Create a Shared Certifications Report
To generate a new shared certifications report in the People Module, open the Reports Page in the People Module on the Main Menu. Open the Create Shared Reports Tab.
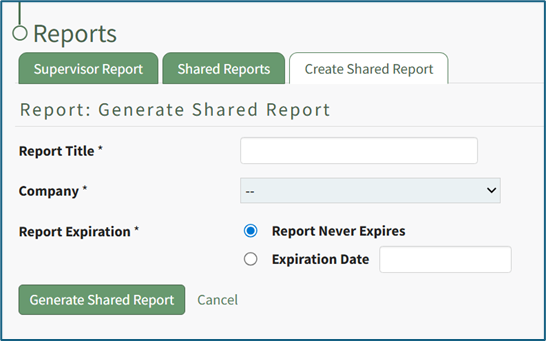
Input a title for the new shared report.
The Company dropdown menu will allow you to select the “Company name” or “Other Required Certifications”. Making a selection in the Company dropdown menu opens the People Module’s Certification Legend and the User/Role Report Selection table.
“Report Never Expires” is a default selection, but the report creator can select “Expiration Date” include a date for the report to expire.

In the User/Role Report Selection table, columns represent the company’s certification roles. The rows contain all available users. The colored dot next to the check boxes in each cell indicates the status of each user relative to the Certification Role. A dash with no checkbox indicates that the user is not assigned to that Certification Role.
Select the checkboxes for all certification information to be included in the report.
Selecting the checkbox in the first row will select all the checkboxes in that column. Selecting the checkbox in the first column will select all the checkboxes in that row.
To create the report, select the “Generate Shared Report” button or select “Cancel” to return to the Shared Reports tab on the Reports Page.

The message states, “Some of the selected employees have certifications that are not current or will become due soon. Are you sure you want to share this report?” Selecting “OK” will generate the report and open the Shared Report Page.

To simultaneously share the report with multiple email addresses, make sure each email address is separated with a comma. A personal message can be included in the textbox along with any desired attachments. To submit, select the “Send Shared Report” button. To delete the new report, select the “Delete Report” text on the right side of the screen.
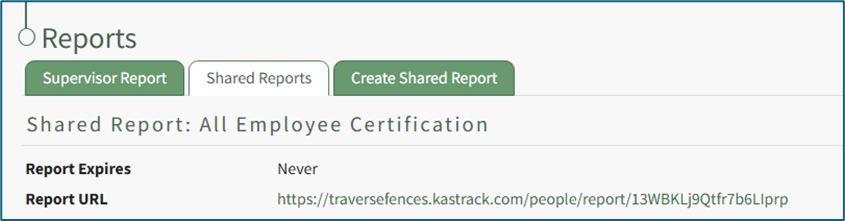
Once the report has been shared, the page will show “You successfully shared this report with (the input email addresses).”
If the URL is clicked, it will create a color-coded, clickable table with the users, their certifications, and their statuses.
No comments to display
No comments to display