Bulk Import Asset Information
To bulk import asset information using a CSV file, open the Manage Assets Page from the Main Menu in the Assets Module and click the three dot (…) icon to the right of the page header to open the Manage Assets Page Context Menu.
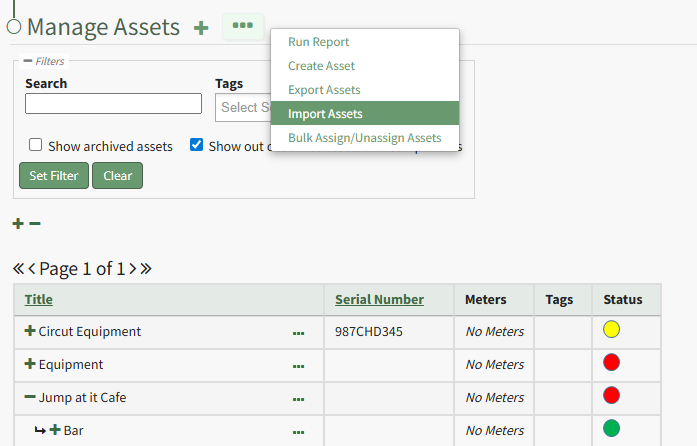
Click “Import Assets” from the context menu to open the Import Assets Modal
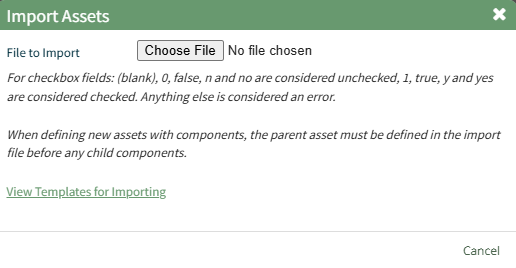
A template for importing assets in bulk has been provided and can be downloaded to your personal device by clicking “View Templates for Importing.” Each of the columns in the downloaded CSV are specific to the asset type and are listed in the order as they are defined.
Helpful Hints for Bulk Importing Asset Information | |
Field | Comments / Notes |
Temp ID for Create New | |
Modify Existing on Import | |
Exist ID | This is a unique ID generated by the system. If assets have already been created, download an export to identify the ExistID. |
Parent ID | Input the ExistID generated by KAStrack for the parent asset/component. Export all assets to determine what the ExistID is for the parent assets. |
Title | Input the asset title. |
Descriotion | Input a description for the asset. |
Manufacturer | Input the manufacturer of the asset. Leave blank if it does not apply. |
Model Number | Input the asset’s model number. Leave blank if it does not apply. |
Serial Number | Input the asset’s serial number. Leave blank if it does not apply. |
Critical Component | If the asset has a critical component designation, input Y. If the asset does not have a critical component designation, input N. |
Critical Spares | |
Tagging | |
Expired Cert Roles Allowed | To Leave the checkbox unchecked: [blank], 0, false, n, no To Select the checkbox: 1, true, y, yes |
Alert Past Due to OK Status | To Leave the checkbox unchecked: [blank], 0, false, n, no To Select the checkbox: 1, true, y, yes |
Alert on Change to Warn Status | To Leave the checkbox unchecked: [blank], 0, false, n, no To Select the checkbox: 1, true, y, yes |
Alert on Change to Past Due Status | To Leave the checkbox unchecked: [blank], 0, false, n, no To Select the checkbox: 1, true, y, yes |
Asset Type | When uploading mixed asset types, the last field of the CSV must be the asset type (or blank for no asset type). |
When your CSV file with new account information is complete, ensure it is saved with the CSV format UTF-8.
Click “Choose File” and select the correct CSV file from your computer. Click the “Next >” button opening the Import Assets Page.
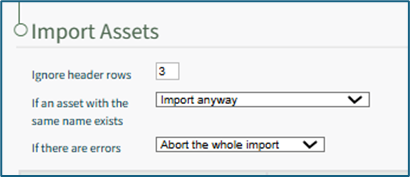
Input the number of header rows in your file that are to be ignored by KAStrack in the import.
Specify your preference on how the system should respond if an asset with the same name already exists from a dropdown menu. Options include Import anyway, Import if the duplicate is elsewhere, Do not import the asset, and Abort the whole import.
Specify your preference on how the system should respond if if there are errors with the import from a dropdown menu. Options include Abort the whole import or Import rows without headers.
If you downloaded a CSV template, the columns labels should already match the system requirements. If you created your own CSV headers, select the correct column header to be associated with each asset field.

To abandon the import, select the “Cancel” button at the bottom of the screen.
To complete the import, select the “Import” button at the bottom of the screen.
The system will confirm the import was successful.
No comments to display
No comments to display