Edit an Employee's Supervisor
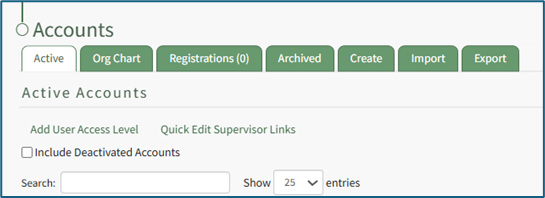
To edit an individual user’s supervisor in KAStrack, go to the Active Tab on the Accounts Page of the Accounts Module. This tab is also accessible from the Main Menu. There are three ways to edit a supervisor from the Active Tab.
You can also update multiple users’ access levels via the Import Tab on the Accounts Page. When doing so, make sure to separate each access level with a semicolon.
How To: Bulk Import Account Information
Before bulk importing several new accounts, be sure that your organization has customized the account information fields to meet your needs. WIKI LINK TO ACCOUNT FIELDS TAB: SITE SETTINGS Once your account information preferences have been established in the Site Settings Module, you can begin organizing the CSV file for bulk imports.
Open the Import Tab on the Accounts Page in the Accounts Module.
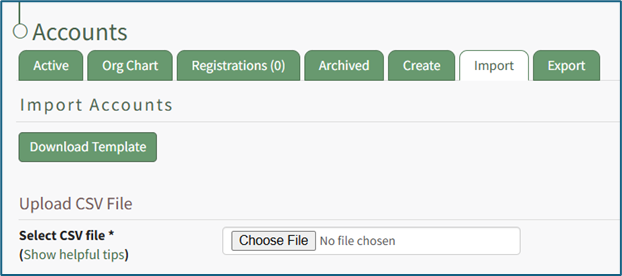
Select the “Download Template” button to have KAStrack generate a template with the appropriate fields in separate columns that match the designated preferences in the Site Settings Module.
When your CSV file with new account information is complete, ensure it is saved with the CSV format UTF-8.
Click “Choose File,” and select the correct CSV file from your computer. Click “Open”.
Each of the Account Information fields will now show below the selected CSV file.
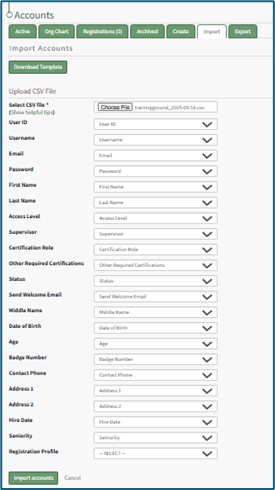
KAStrack scans the first row of your CSV file for matching column headers and attempts to map your column headers to the appropriate Account Fields. The dropdown menu next to each field will automatically be set to any matching column headings from the CSV.
If a matching column couldn't be found, you can manually choose which column should map to those Account Fields by choosing an option from the dropdown.
Select the “Import Accounts” button to import the information. Click “Cancel” to return to the Active Tab on the Accounts Page without saving information.
The Import Tab can also be used to update existing account information. The KAStrack- generated unique user ID is a required column in the CSV file if editing an existing account. This can be found in the URL at the top of your browser when viewing a user’s Account Info page, or by doing an account export.
How To: Export User Account Information
Open the Export Tab on the Accounts Page in the Accounts Module.

There are two checkboxes that allow for customization of your export. Both or neither can be included.
Select “Include archived accounts in export” to include archived accounts in your export. Select “Include inactive accounts in export” to include inactive accounts in your export.
Click “Export local accounts” and a CSV file will automatically be downloaded to your personal device.
Helpful Tips for Bulk Imports
The CSV document created to import account information will vary based on your customized Site Settings. Required account fields are username, password, first and last name. Required status for fields is designated by an asterisk (*). Each included field should be represented by its own column in the CSV document.
Required system user account information fields do not show as required on the Account Fields Tab on the Site Settings Page.
Helpful Tips for Account Information Bulk Imports | |
Field | Comments / Suggestions |
User ID | The User ID is a unique system ID for the user. Leave blank to create a new user. |
Username* | Required Field. Character usage is limited to lowercase letters, numbers, hyphens, underscores, periods, or at signs. A username cannot contain spaces and cannot start with an underscore. When editing an existing account via imports, the username and email cannot be changed simultaneously. |
This field may be left blank when creating a new user. If so, an email address will be generated for the user with the format: username@sitename.kastrack.com. When editing an existing account via imports, the username and email cannot be changed simultaneously. | |
Password* | Required Field. Default settings require a minimum of 8 characters. All passwords created in an import will be temporary. Users will be required to update their password upon their initial login. |
First Name* | Required Field. |
Last Name* | Required Field. |
Access Levels | KAStrack defaults: Employee, Supervisor, Admin, Observer. Customized Access Levels can be created. Separate multiple values with a semi-colon. If a user is not assigned an Access Level, they will not have access to ANY modules. This column can be left blank if the Access Level is identified in the Registration Profile applied to the user. |
Supervisor | The supervisor’s username must be entered verbatim. Separate multiple values with a semi-colon. This column can be left blank if the Supervisor is identified in the Registration Profile applied to the user. |
Certification Role | Allows assignment of roles in the People Module. Multiple values should be separated with a semi-colon. Role names must be preceded by Company name as listed in the People Module, e.g. CompanyName RoleName. This column can be left blank if Certification Roles are identified in the Registration Profile applied to the user. |
Status | User status cannot be changed through import. All new imported accounts will automatically be Active. |
Employee ID | This is an optional field (included by default settings) that can be edited or removed by going to the Account Fields Tab in Site Settings. |
Phone | This is an optional field (included by default settings) that can be edited or removed by going to the Account Fields Tab in Site Settings. |
Address 1 | This is an optional field (included by default settings) that can be edited or removed by going to the Account Fields Tab in Site Settings. |
Address 2 | This is an optional field (included by default settings) that can be edited or removed by going to the Account Fields Tab in Site Settings. |
Registration Profile | This column is used to apply Registration Profiles to accounts. The full name of the Registration Profile must be entered. The following fields listed above can be modified through the Registration Profile: Access Levels, Supervisors, and Certification Roles. |
Custom Fields | If other custom fields have been created on the Account Fields Tab in Site Settings, they can be included as column headers in an Import. These fields may or may not be required based on their settings in the Account Fields Tab. |
Using the Quick Edit Supervisor Link
To add a supervisor for an employee using the Quick Edit Supervisor Link, go to the Active Tab on the Accounts Page.
Click “Quick Edit Supervisor Links” opening the Set Supervised Users Modal.
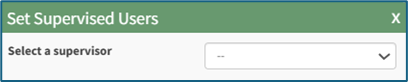
Select the supervisor from the dropdown menu provided. KAStrack will then open a list of users to be listed under the selected supervisor in the organization’s hierarchal structure.
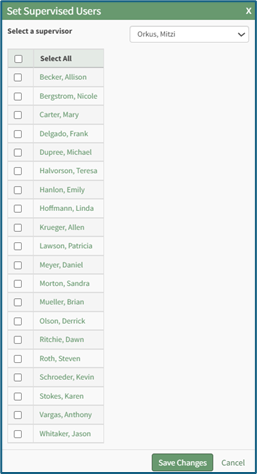
The checkbox on the first row allows for the selection of all employees listed. You can also click the appropriate checkboxes individually.
Select the “Save Changes” button to save the changes within the system or click “Cancel” to return to the Active Tab on the Accounts Page.
By Editing a User's Account Information
To edit a user’s supervisors by editing a user’s account information, go to the Active Tab of the Accounts Page. Select the three dots (…) icon in the Name column opening the context menu for the specific user and select “Edit Account Info”.
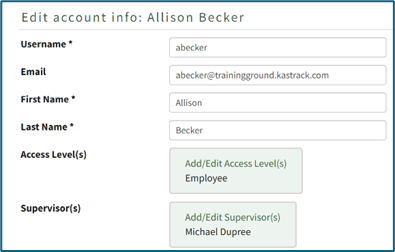
Click “Add/Edit Supervisor(s)” in the Supervisor(s) Field opening the Choose Supervisor Modal.
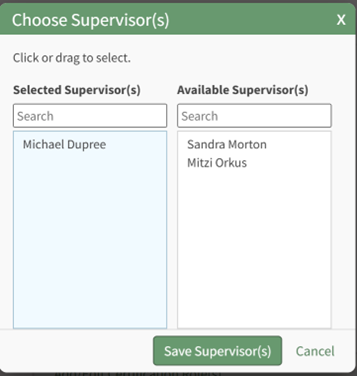
The Choose Supervisor(s) Modal will display the two-column drag-and-drop tool.
There are two columns: Selected Supervisor(s) (what has been assigned to the user) and Available Supervisor(s) (what can still be assigned). Drag and drop the designations as desired or click an item to move it from its current column to the other.
Select the “Save Supervisor(s)” button at the bottom of the modal to save the changes or click “Cancel” to return to the Edit Account Info Page.
From the Active Accounts Table
Editing a supervisor from the active accounts table is only possible if the Supervisor column shows on the Active Accounts Table, which included by default. If the column is not visible, it can be added through the Site Settings Module.
How To: Edit the Accounts Module Active Accounts Table
To edit the Active Accounts Table in the Accounts Module, go to the Table Defaults Tab in the Site Settings Module.
Select “Accounts: Active” from the dropdown menu.

Select the “Edit Columns” button, opening the Choose Columns Modal. The default column choices include: name, username, email, access levels, supervisors, become, status, last active, login, archive, first name, last night, employee ID, phone, Address 1 and Address 2 and any customized account fields.
How To: Add a Custom/Additional User Account Information Field
To add a user account information field, open the Account Fields Tab in the Site Settings Module from the Main Menu.
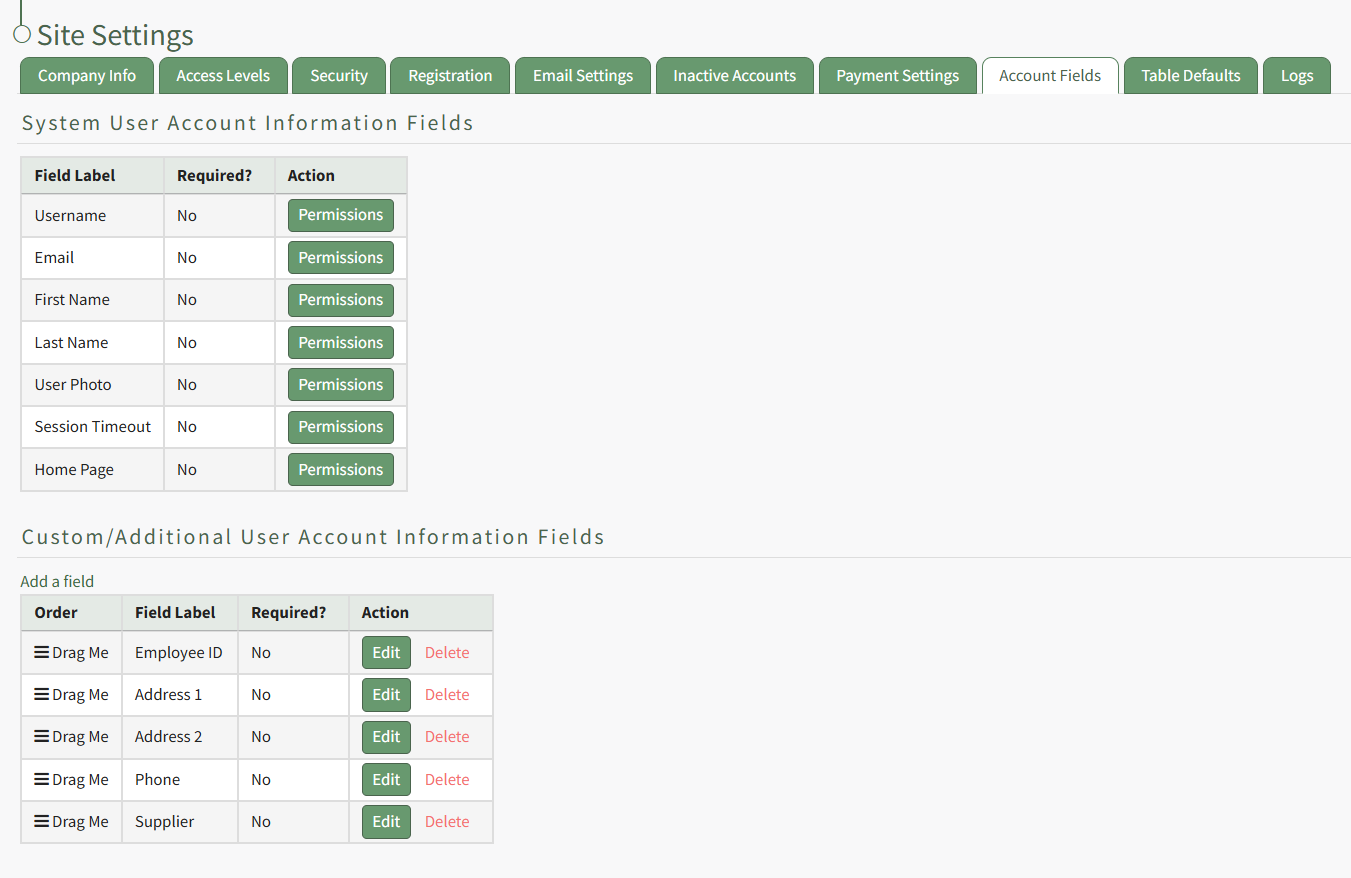
Click the "Add a Field" clickable link above the Custom / Additional User Account Information Fields opening the Add Field Modal.
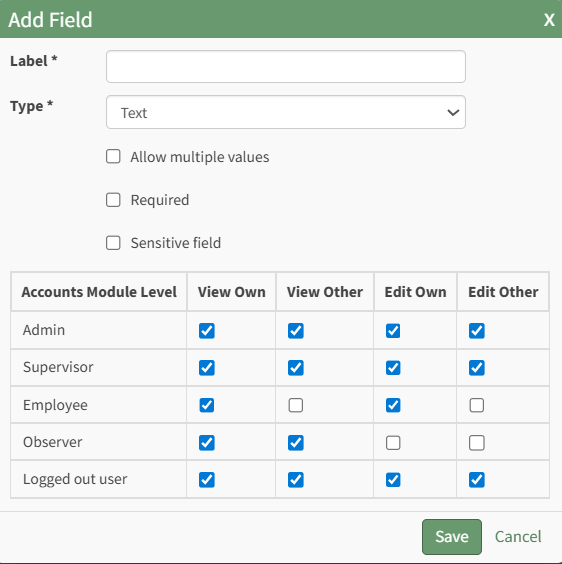
Input the label for the field.
Select the field type (text or email) from the dropdown menu.
Selecting the checkbox enables customization to "Allow multiple values," make the field "Required," or make it a "Sensitive Field."
Designating the field as a "Sensitive Field" allows an extra step in form security when integrating these fields within the Form module. The Form Designer must explicitly choose when they wish to use a sensitive field.
The Permissions Table determines who can view / edit their own and other user's fields. Selecting the checkbox gives the individual the specified permission. Deselecting the checkbox removed the permission.
Select the "Save" button and the custom field now shows in the table.
Use the Drag Me icon to drag and drop the field into your desired position of choice.
The bars icon allows the columns to be positioned in the order of your choosing.
Click “Cancel” to return to the Table Defaults Tab without making any changes.
Select the “Save” button to make the desired changes and return to the Table Defaults Tab. A preview of the first five rows of the table is shown. Select the “View Live Table” button to be directed to the live table in the Accounts Module.
To add a supervisor for an employee from the Active Accounts Table, go to the Active Tab on the Accounts Page.

Select the pencil icon to the right of the supervisor in the Supervisors Column. This opens the Select Supervisors Modal.
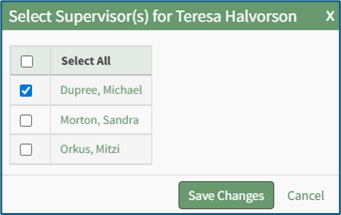
Select the checkboxes to the left of the desired supervisor(s). Then select the “Save Changes” button to save the changes within the system or click “Cancel” to return to the Active Tab on the Accounts Page.
No comments to display
No comments to display