Create a New Asset
To create a new asset, open the Manage Assets Page in the Asset Module and click the plus sign (+) icon to open the New Asset modal.
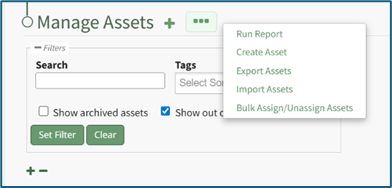
You can also access the New Asset Modal by clicking the three dot (…) icon and selecting “Create Asset” from the context menu.
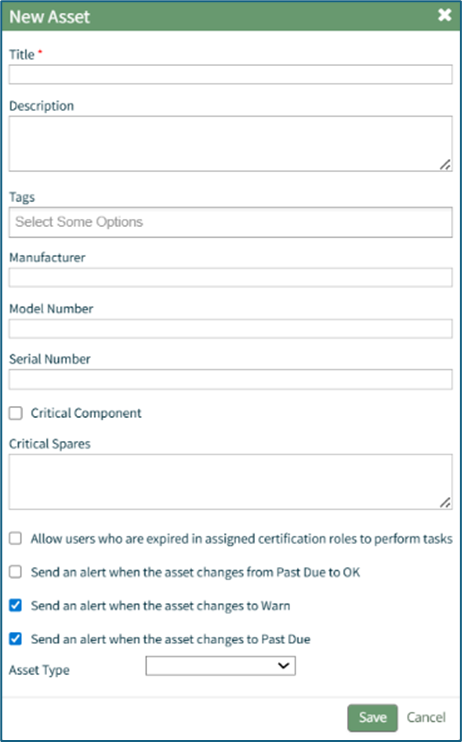
The New Asset Modal requires the entry of an Asset Title. Optional fields include an asset description, tags, manufacturer, model number, serial number, and critical spares.
Select the "Critical Component" checkbox to designate this asset as a critical component. This term is subjective for your organization to define. Designating an asset as a critical component will result in a hazard symbol being used as a visual indicator.

Critical items are prioritized and show separately on the Assets Module Summary.
An entire asset is designated as a critical. All components and associated tasks will also have a critical component designation.
KAStrack’s default setting prevents users with an expired certification role from performing tasks (such as completing tasks, recording faults, and updating meter readings. Select the “Allow users who are expired in assigned certification roles to perform tasks” checkbox to allow a user to perform tasks regardless of their assigned certification role status.
The remaining three checkbox options all relate to asset status alert preferences.
The “Send an alert when the asset changes from Past Due to OK” checkbox will send an alert via email to the assigned users when the task status changes from past due (red) to current/up to date (green).
The “Send an alert when the asset changes to Warn” checkbox will send an alert via email to all users assigned to the asset when the task status changes from current/up to date (green) to warn (yellow).
The “Send an alert when the asset changes to Past Due” checkbox will send an alert via email to all users assigned to the asset when the task status changes to past due (red).
Asset Types are customizable to your company and are created on the Settings Page of the Asset Module. Once an asset type has been created, you can select one from the dropdown menu in the New Asset Modal to enable additional filtering capabilities.
Asset Types allows your organization to add customizable fields unique to individual assets.
How To: Create a New Asset Type
To create a new asset type, open the Asset Types Tab on the Settings Page of the Assets Module.
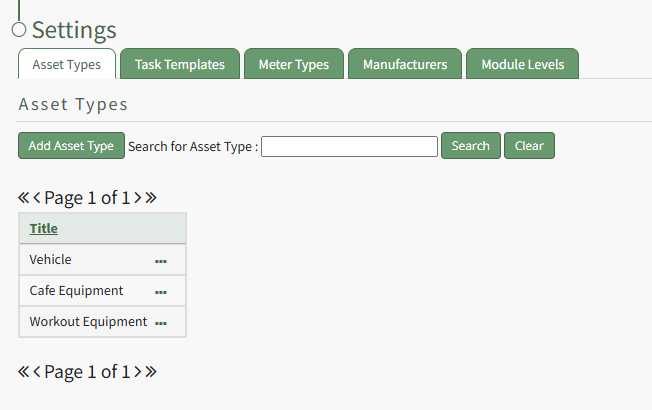
Selecting the “Add Asset Type” button opens the New Asset Type modal.
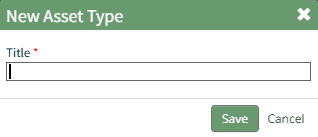
Input the title of the New Asset Type and click “Save”.
The newly created Asset Type will now show in the table on the Asset Type tab on the Settings page and is ready for you to add fields to.
How To: Add Fields to an Asset Type
In order to include unique, customized additional information regarding an Asset, you must first create an asset type and then add fields to it. This allows your organization to specify whatever information they choose to regarding their assets.
How To: Create a New Asset Type
To create a new asset type, open the Asset Types Tab on the Settings Page of the Assets Module.
Selecting the “Add Asset Type” button opens the New Asset Type modal.
Input the title of the New Asset Type and click “Save”.
The newly created Asset Type will now show in the table on the Asset Type tab on the Settings page and is ready for you to add fields to.
How To: Add Fields to an Asset Type
{{@496}}
To add additional fields to an asset type, go to the Asset Types Tab on the Settings Page of the Assets Module. Click the three-dot icon to the right of the Asset Type title to open the Asset Type Context Menu.
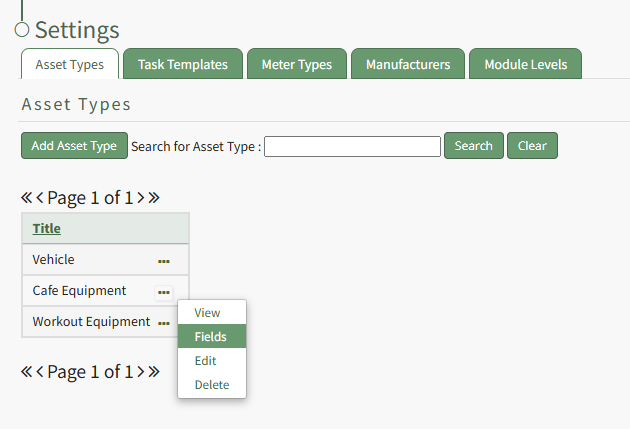
Select "Fields" from the context menu opening the Asset Type Fields Page.
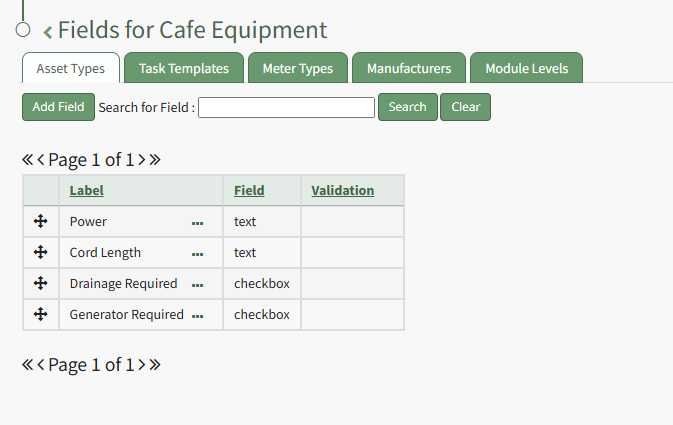
Click the "Add Field" button opening the New Field Modal.
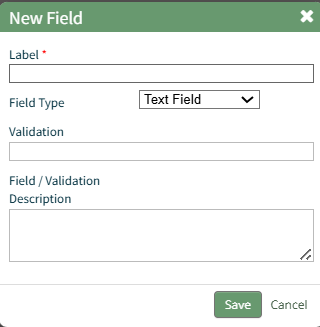
Input a label for the field and select the field type from a dropdown menu. Options include: text field, number, password field, text box, date field, and checkbox.
Validation uses standard JavaScript RegExp constructor for validating Field input values entered by end-users. Entering a RegExp validation string will check against the input value.
Include a description of the field of validation (optional).
Select “Save” and a popup confirms that the asset has been saved. The new field now shows on the Asset Type Field Page.
Select the “Save” button at the bottom of the New Asset Modal to create the new asset or click “Cancel” to close the modal without saving and return to the Manage Assets Page.
After an asset is created, it will appear in the Manage Asset Table where it can be managed.
No comments to display
No comments to display