Communications Module How Tos
How To: Apply a Notification Template to Existing Accounts
To apply notification templates to existing accounts, go to the Account Settings Tab on the Settings Page of the Communications Module.
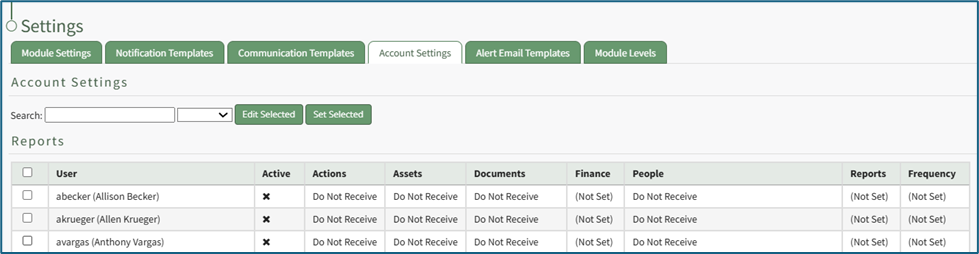
Select the existing user accounts you wish to apply the notification template to.
How To: Create New Notification Templates
Note: A default new user Notification Template already exists in the system. This template can be edited for your preferences.
How To: Edit New User Notification Templates
To edit new user notification templates, go to the Notification Templates Tab on the Settings Page of the Communications Module.
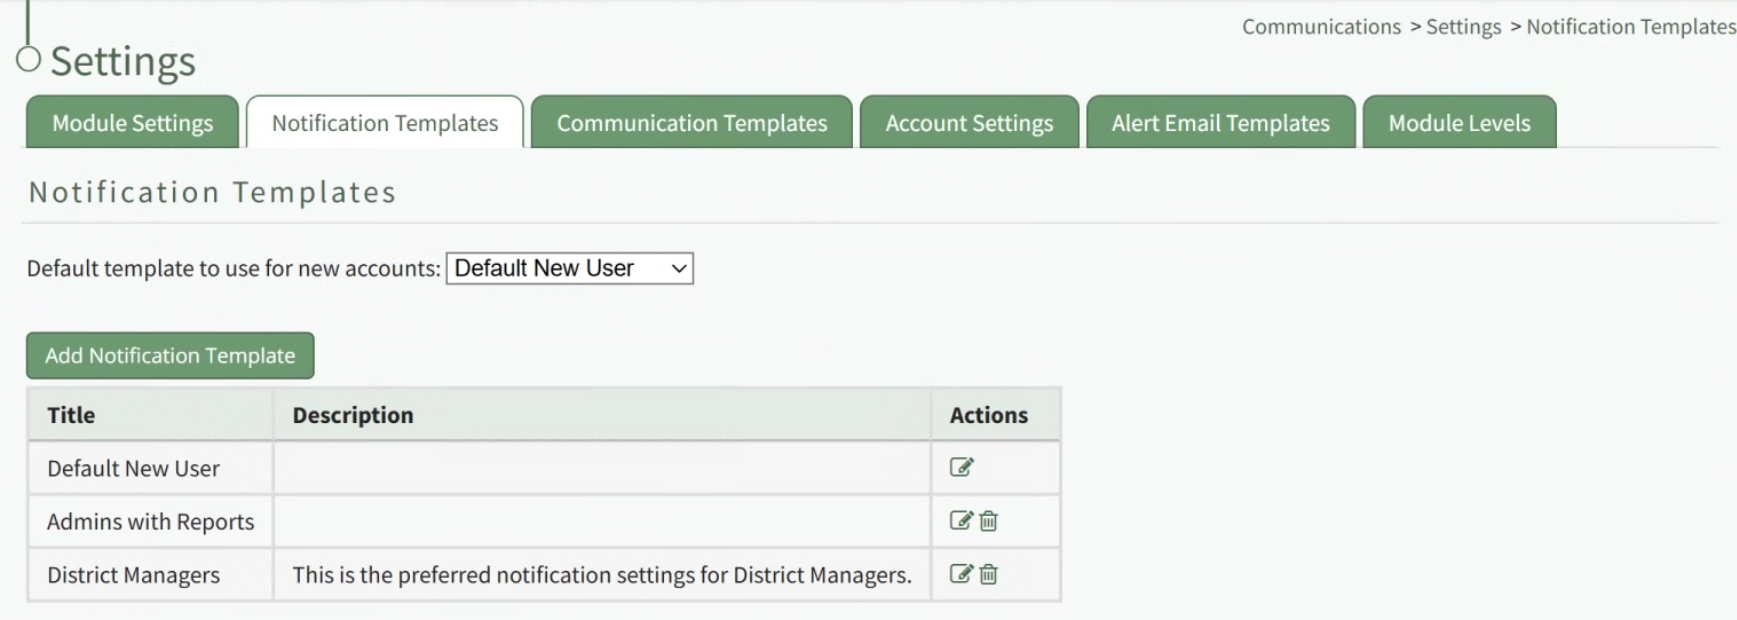
Existing templates will be shown in the Notification Template Table.
Select the edit icon in the action column of the template you wish to edit opening the Edit Notification Template Page.
A notification template is comprised of two parts: Reports and Alerts.
Indicate the desired status for email report notifications: Not Active or Active.
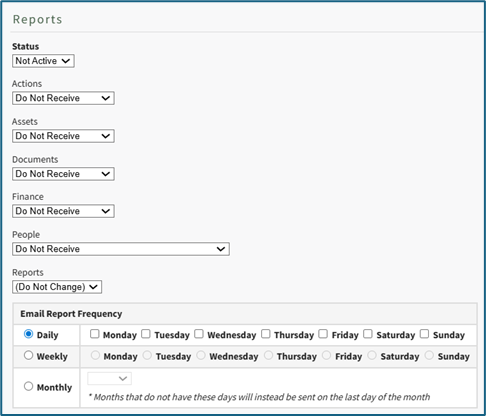
Alter the desired reports selected for each module or leave as “Do Not Receive”.
Email Report Frequency has three options: daily (or on specified days of the week), weekly (on the day of your choosing), or monthly (which requires the user to specify which numerical day of the month from a dropdown menu you wish to receive the report summary).
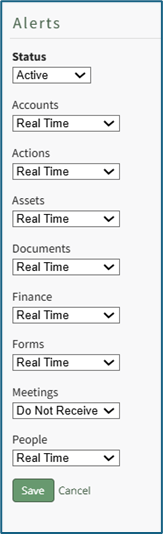
After setting template preferences for reports, scroll down to set template preferences for email alerts.
Alter email preferences as set by module through a dropdown menu with three options that designate when an email alert should be sent: “Real Time”, “Digest”, and “Do Not Receive”.
After making edits to your preferences for both Email Report and Email Alert Settings, select “Save”, returning you to the Notification Templates Tab on the Settings Page of the Communications Module.
The newly created notification template will now be shown on the Notification Template Table.
To create a new notification template, go to the Notification Templates Tab on the Settings Page of the Communications Module.
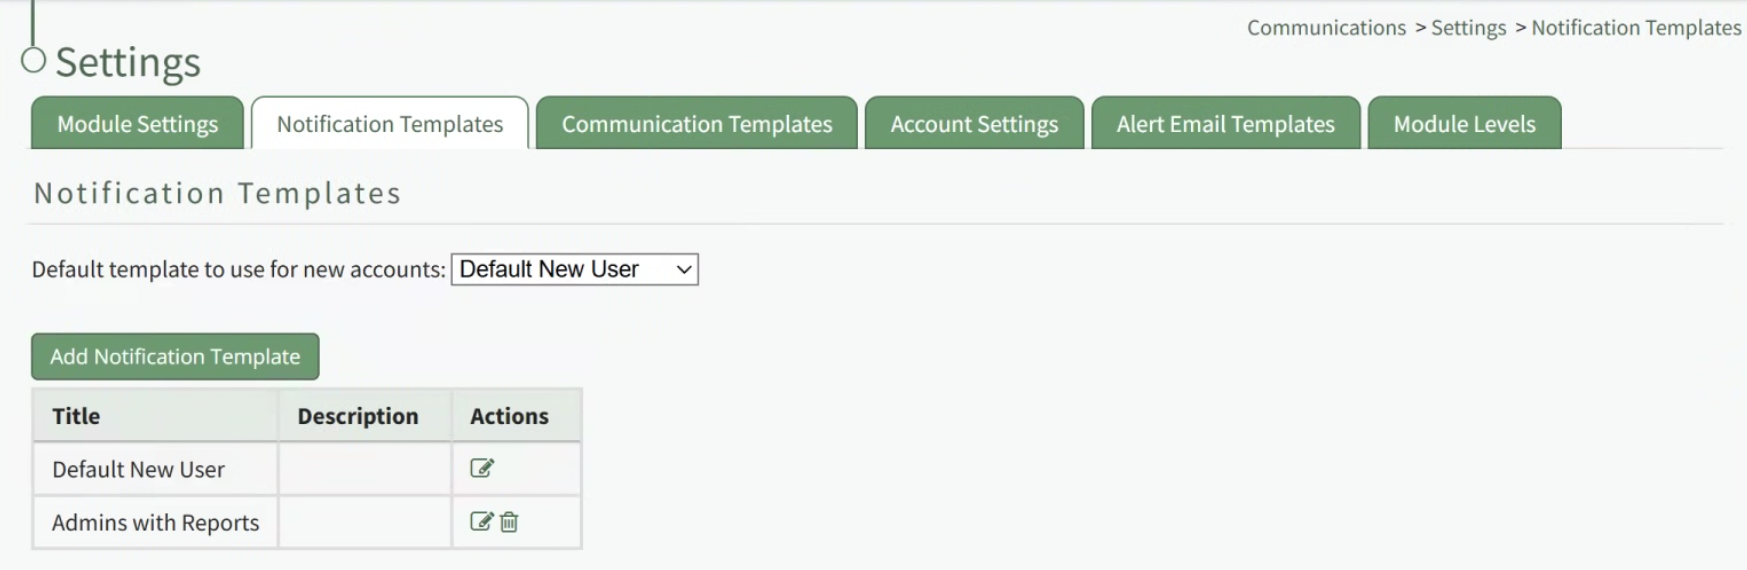
Select the “New Notification Template” button, opening the Edit Notification Template Page.
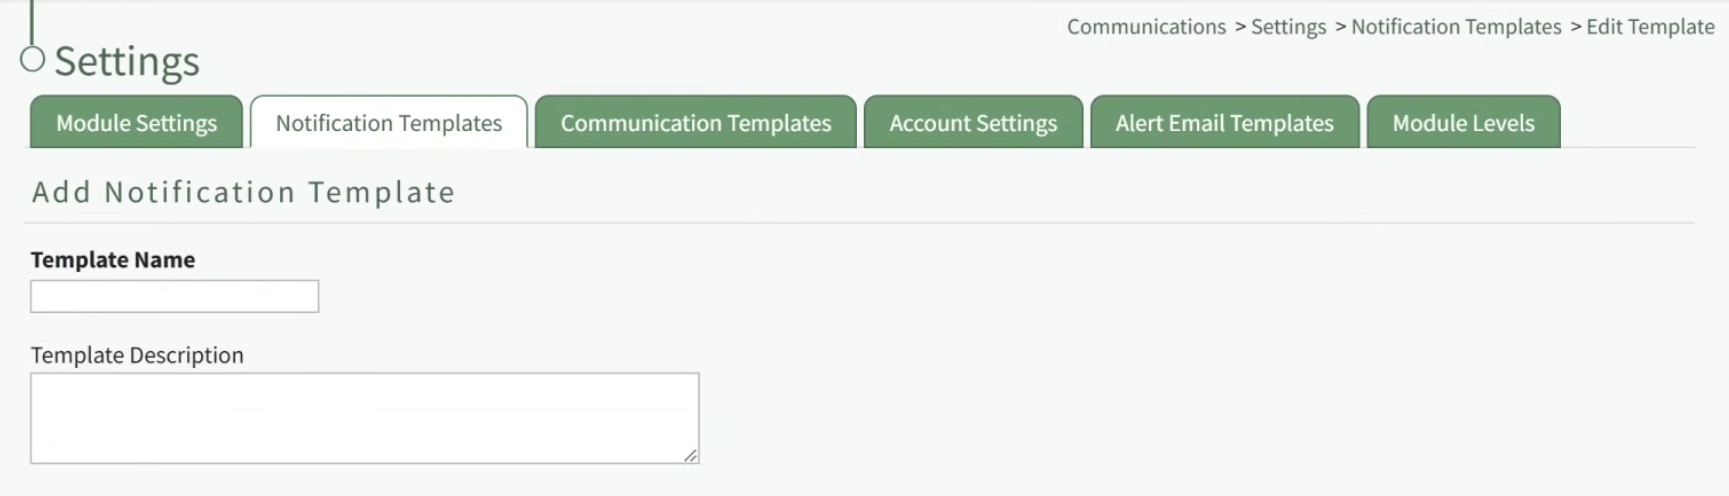
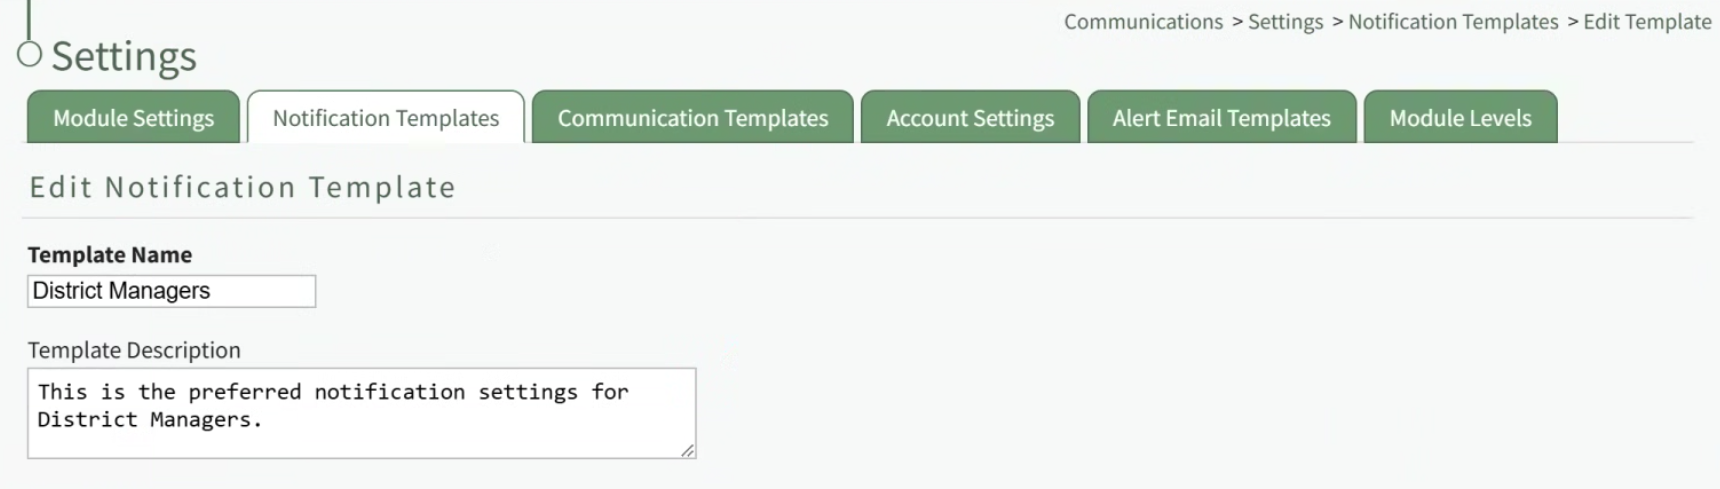
Input a name for the new Notification Template as well as a description.
A notification template is comprised of two parts: Reports and Alerts.
Indicate the desired status for email report notifications: Not Active or Active.
KAStrack generates and sends reports for the following modules: Actions, Assets, Documents, Finances, and People, and Reports.
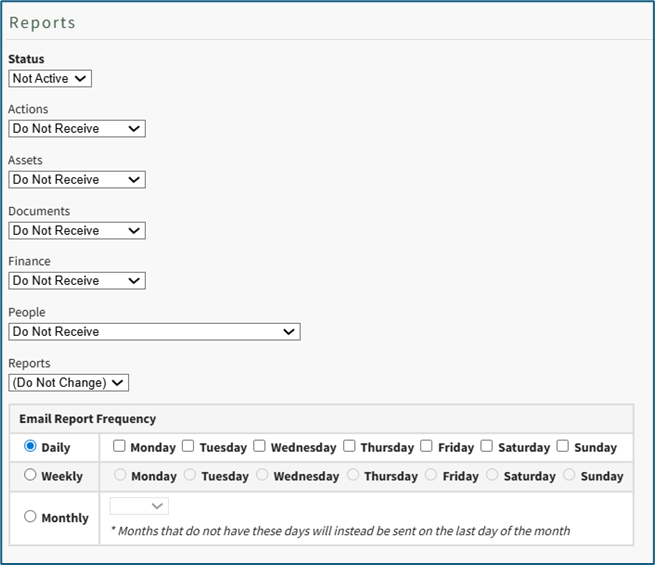
Alter the desired reports selected for each module or leave as “Do Not Receive”.
Daily email report notifications can be sent everyday of the week, or on specific days. Select the appropriate checkboxes to indicate your preference.
Selecting a weekly email report notification requires you to indicate which day of the week you prefer the report summary email to be sent.
Selecting a monthly frequency requires the user to specify which numerical day of the month from a dropdown menu you wish to receive the report summary. The days that are not included in every month (29, 30, 31) have an asterisk next to them. If the current month does not have that particular date, the system will send the report on the final day of the month.
After setting template preferences for reports, scroll down to set template preferences for email alerts.
KAStrack sends email alerts for the following modules: Accounts, Actions, Assets, Dispatch, Documents, Finance, Forms, Meetings, and People. Each module has a dropdown menu with three options that designate when an email alert is sent: “Real Time”, “Digest”, and “Do Not Receive”.

Real Time is the default setting that sends email alerts in real time.
Digest is KAStrack’s delayed timing feature. Selecting “Digest” will summarize all alerts with this designation to be sent daily between midnight and 4 a.m. Central Time (United States). As noted in KAStrack, alert digests are not applicable to all alerts.
Whether or not an alert is digestible can be customized on the Alert Email Templates Tab of the Communications Module.
Do Not Receive designates that the user does not wish to receive email alerts about that specific module.
Communications sent from users are always sent in real time
After selecting your preferences for both Email Report and Email Alert Settings, select “Save”, returning you to the Notification Templates Tab on the Settings Page of the Communications Module.
The newly created notification template will now be shown on the Notification Template Table.

The Search textbox simplifies the search for specific users. The dropdown menu allows you to select between active / inactive users. If you wish to edit all user accounts with the same new settings, select the checkbox in the title row of the table to select all users in the table. Selecting a user in one table automatically selects them in the other.
Select the “Set Selected” button opening the Update Account Settings Modal.

The existing notification templates will show in the dropdown menu. Select the template you wish to apply to the selected user accounts.
Select “Save” for the notification template to be applied. Click “Cancel” to return to the Account Settings Tab on the Settings Page with any user accounts being impacted.
How To: Attach a Documents Module File To an Email
To attach a documents module file to a system message, open the Send Communications Page in the Communications Module from the Main Menu.
Click the "Attach Documents" button on the bottom left-hand side of the page opening the Attach Documents Modal.
Choose the file you wish to attach to the system message from the dropdown menu. It will automatically attach it to the bottom of the Send Communication page. Click the"Close" button on the modal to return to the Send Communications Page.

Checkboxes to the right of the attachment allow you to require acknowledgement of the attached file from the Documents Module, or to require acknowledgement of the attached file immediately when the message recipients login to the system next.

After make the appropriate selections, click "Send" on the bottom right-hand side of the page to send the system message.
How To: Attach a File to an Email
To attach a file to a system message in KAStrack, open the Send Communications Page in the Communications Module on the Main Menu. After inputting all information, click the "Upload Files" button on the bottom left-hand side of the page.

This will open your personal device so that you can access the file you wish to attach to the system message.
After selecting the appropriate file, it will be visible at the bottom of the Send Communications Page.
Checkboxes allow you to upload the file from your personal device to the Documents Module, to requirement acknowledgement of the document from the users who receive it, or to require acknowledgment of the document immediately when the user logs in to the system. After making the appropriate selections, press "Send" on the bottom right-hand corner of the page.
How To: Copy a QR Code
To copy an individual QR Code, open the QR Code Page of the Communications Module from the Main Menu.
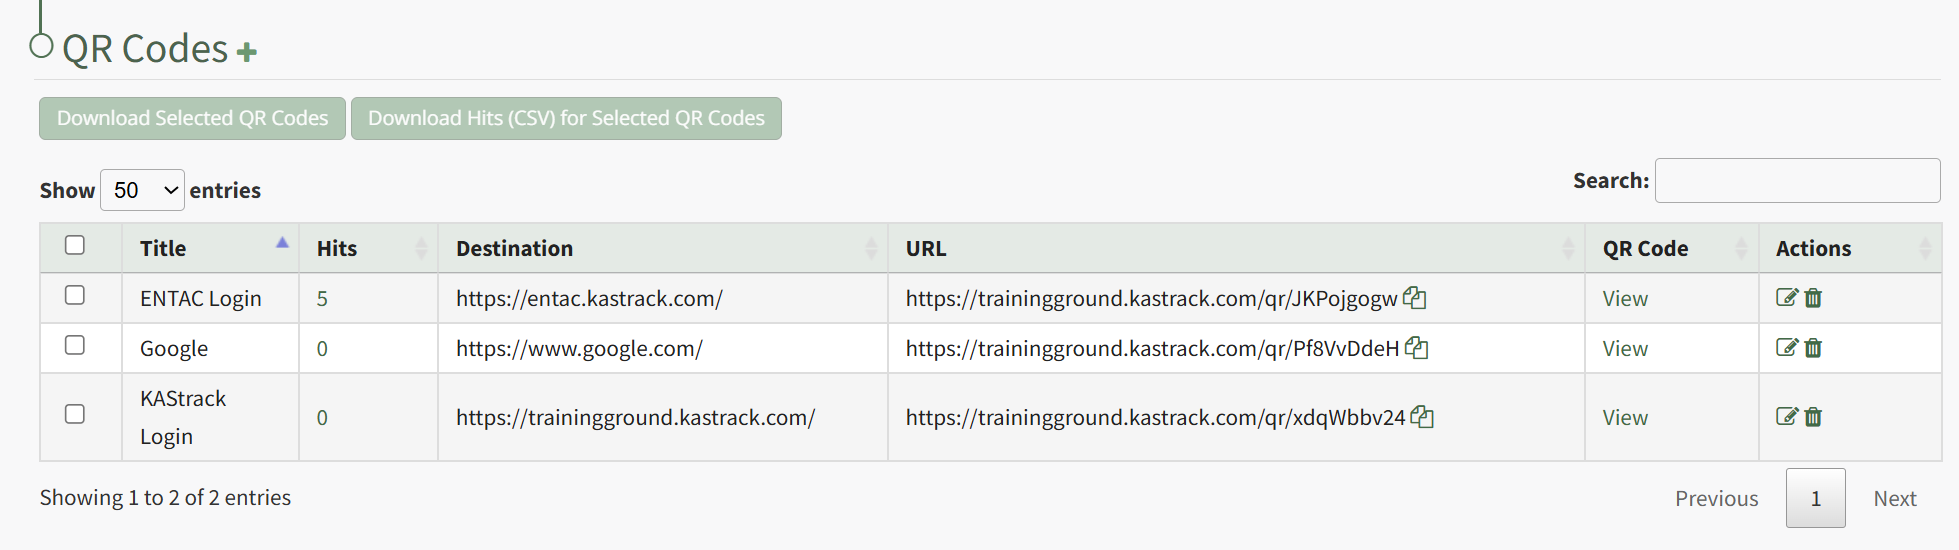
Click "View" in the QR Code Column to the right of the specific QR Code you wish to view. This opens the QR Code Modal and displays the specified QR Code.
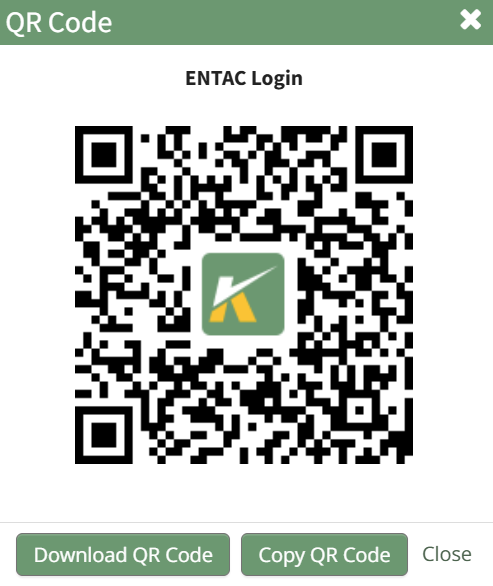
Click the "Copy QR Code" button, and you can now paste the specified QR Code as needed.
How To: Copy a QR Code's Destination URL Link
To copy the Destination URL Link associated with a specific QR Code, open the QR Code Page in the Communications Module from the Main Menu.
Click the double page icon to the right of the URL Link in the URL Column.

The URL Link is briefly highlighted, confirming that the link has been copied and is ready to be pasted as needed.
How To: Create a Custom QR Code
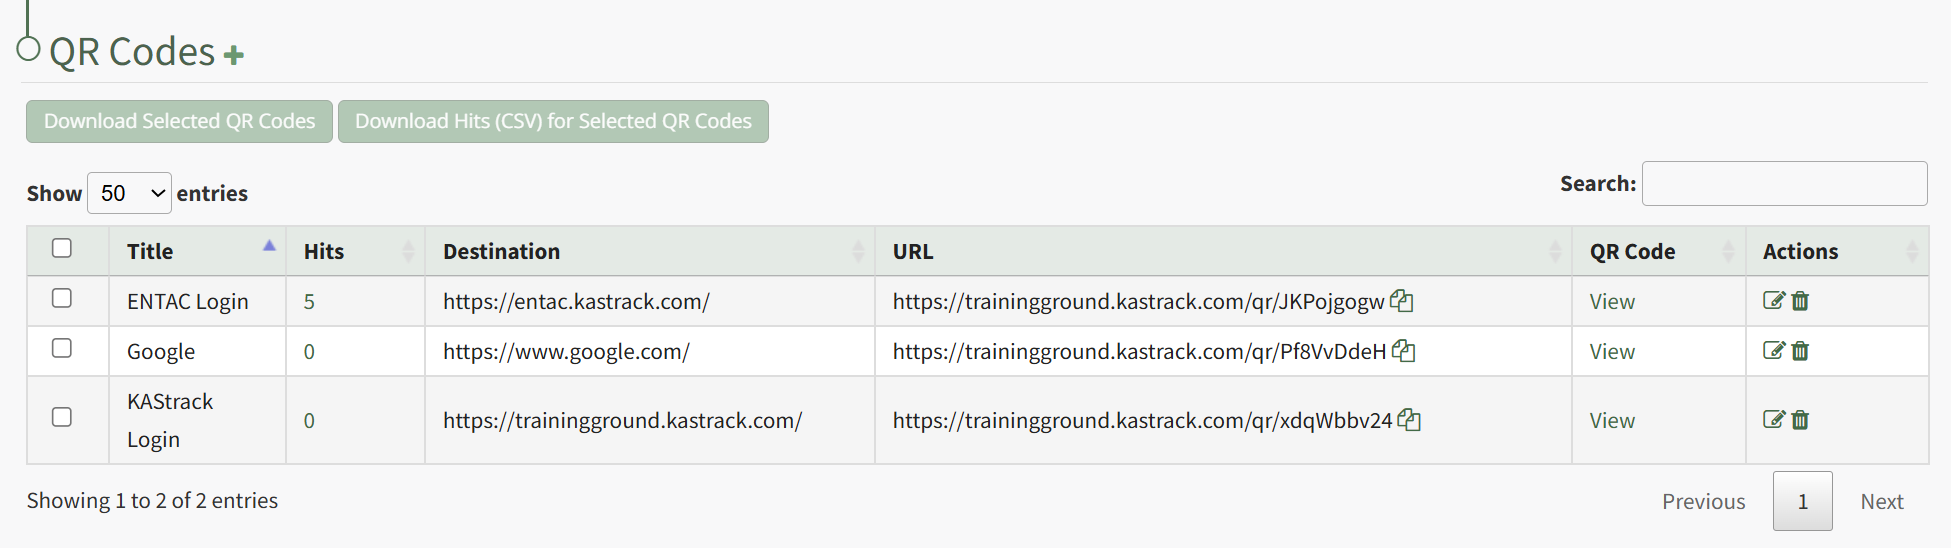
To create a custom QR Code, open the QR Code Page in the Communications Module from the Main Menu.

Click the plus sign icon immediately to the right of the page header. This opens the New QR Code Modal.
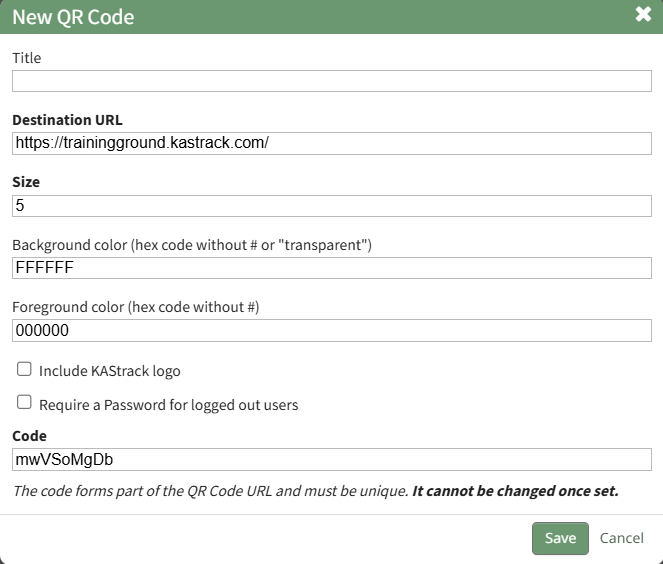
Input the Title for the new QR code.
The system will automatically input the login page for your KAStrack domain. Input your desired destination URL.
The system automatically inputs 5 as the size. A larger integer will increase the size. A smaller integer will decrease the size.
Both the background and foreground color of the QR Code can be customized. Input the desired hex code for each without the #.
Select the "Include a KAStrack logo" checkbox if you would like the KAStrack logo to be inserted into the middle of the QR code.
Select the "Require a password for logged out users" checkbox if you would like to require a password to access the destination URL.
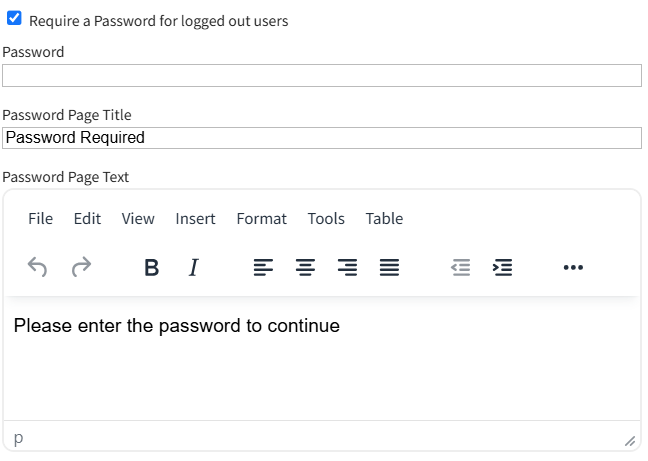
This expands the Modal so that you can input a password and design the Password Page.
If the Destination URL is a KAStrack page, only individuals with permission to access the page in the system will be able to access it through the QR code.
The System generates a default code for every new QR Code. It must be unique. You can edit this code if desired, but once the code is set it cannot be altered.
After making the desired customizations for your QR Code, click the "Save" button at the bottom of the modal.

The new QR Code is now visible in the QR Code Table.
How To: Create a New Module Level (Communications Module)
To create a new module level, go to the Module Levels Tab on the Settings Page of the Communications Module.
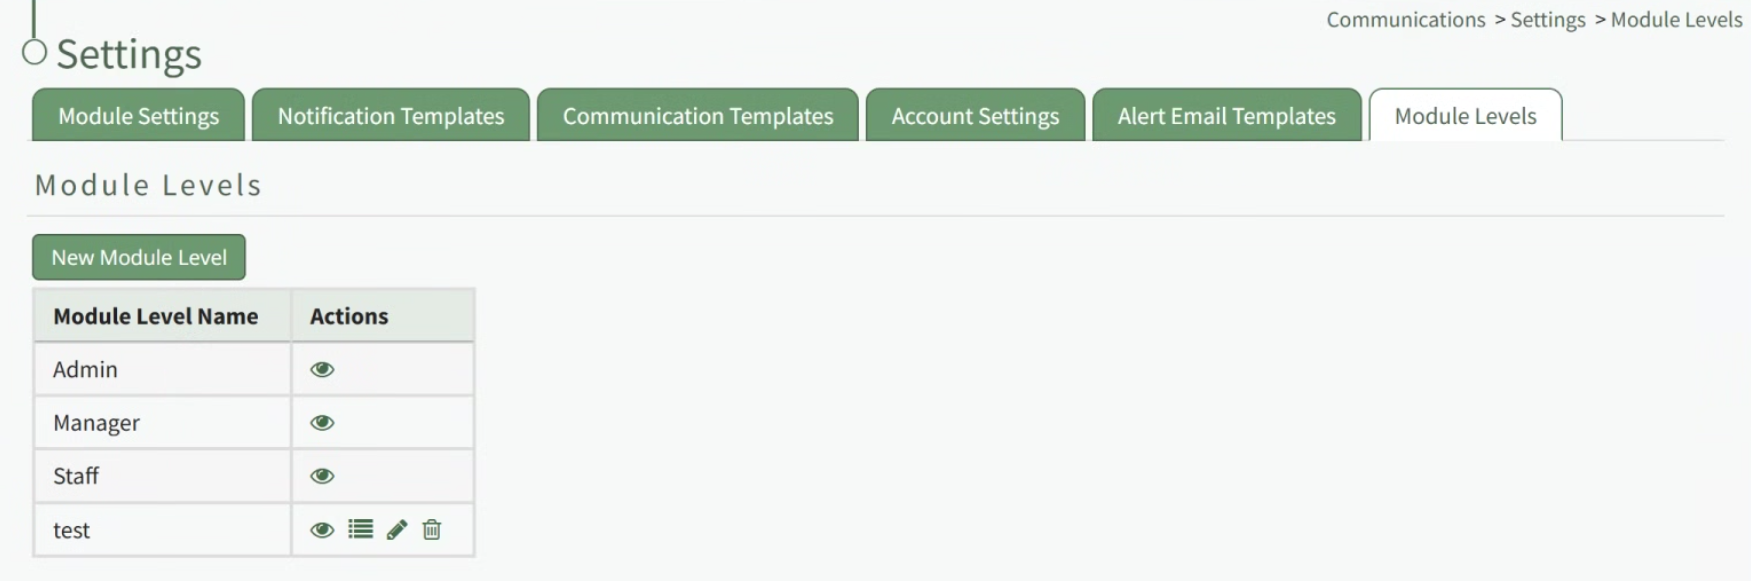
Select the “New Module Level” button opening the New Module Level Modal.
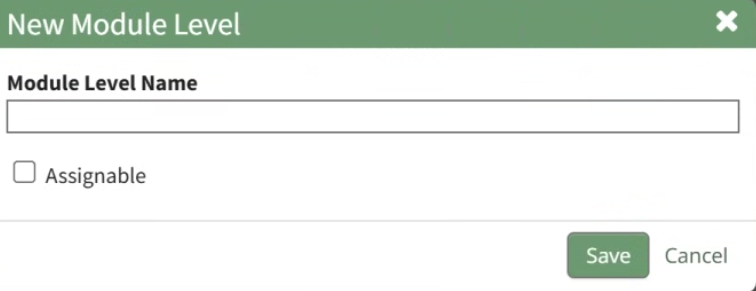
Input the new Module Level Name.
Select the “Assignable” checkbox, so that the module level can be assigned to users.
Click “Cancel” to return to the Module Levels Tab on the Communications Page without creating a new module level. Select “Save” and the new module level will show on the Module Level Table.
Users can select which permissions are allowed for a customized module level. Select the Permissions icon (the bullet point list to the right of the eye) to assign the permissions the new Module Level would have within the Communications Module.

Select “Save” and the permissions are now assigned to the Module Level.
Access levels for all modules can be managed in the Site Settings Module on the Access Levels Tab.
How To: Create New Communication Templates
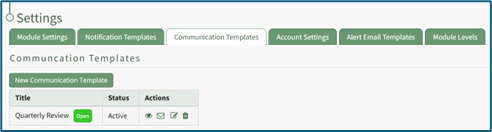
To create a new communication template, go to the Communication Templates Tab on the Settings Page of the Communications Module.

Select the “New Communication Template” button opening the New Template Modal.

Input the Title for the Template.
Select Active / Inactive from the dropdown menu to indicate if the template is available for use.
Both individual people and certification roles can be selected as desired recipients via dropdown menu in the “Send To” line.
Include the subject line for communications, as well as a message.
An attachment can be uploaded from your personal device to be included in the template, or you have the option to select one or more files from KAStrack’s Document Module.
KAStrack documents that are tagged may limit visibility of this template. Specifically, if a template contains a tagged document you cannot see, you will be unable to see the template when sending a communication. Individuals with access to a Document that has visibility restrictions for others via Tags cannot use Send Communication to send that tagged Document to users that lack the authorization to see it.
Select “Save” and the New Communications Template will show in the Communications Template Table on the Settings Page.
The template can now be applied as desired when sending communications in the system on the Send Communications Page. You can also click the closed envelope symbol in the Communication Templates table to go to the Send Communications page and pre-fill the chosen template.
How To: Create New Notification Templates
Note: A default new user Notification Template already exists in the system. This template can be edited for your preferences.
How To: Edit New User Notification Templates
To edit new user notification templates, go to the Notification Templates Tab on the Settings Page of the Communications Module.
Existing templates will be shown in the Notification Template Table.
Select the edit icon in the action column of the template you wish to edit opening the Edit Notification Template Page.
A notification template is comprised of two parts: Reports and Alerts.
Indicate the desired status for email report notifications: Not Active or Active.
Alter the desired reports selected for each module or leave as “Do Not Receive”.
Email Report Frequency has three options: daily (or on specified days of the week), weekly (on the day of your choosing), or monthly (which requires the user to specify which numerical day of the month from a dropdown menu you wish to receive the report summary).
After setting template preferences for reports, scroll down to set template preferences for email alerts.
Alter email preferences as set by module through a dropdown menu with three options that designate when an email alert should be sent: “Real Time”, “Digest”, and “Do Not Receive”.
After making edits to your preferences for both Email Report and Email Alert Settings, select “Save”, returning you to the Notification Templates Tab on the Settings Page of the Communications Module.
The newly created notification template will now be shown on the Notification Template Table.
To create a new notification template, go to the Notification Templates Tab on the Settings Page of the Communications Module.
Select the “New Notification Template” button, opening the Edit Notification Template Page.
Input a name for the new Notification Template as well as a description.
A notification template is comprised of two parts: Reports and Alerts.
Indicate the desired status for email report notifications: Not Active or Active.
KAStrack generates and sends reports for the following modules: Actions, Assets, Documents, Finances, and People, and Reports.
Alter the desired reports selected for each module or leave as “Do Not Receive”.
Daily email report notifications can be sent everyday of the week, or on specific days. Select the appropriate checkboxes to indicate your preference.
Selecting a weekly email report notification requires you to indicate which day of the week you prefer the report summary email to be sent.
Selecting a monthly frequency requires the user to specify which numerical day of the month from a dropdown menu you wish to receive the report summary. The days that are not included in every month (29, 30, 31) have an asterisk next to them. If the current month does not have that particular date, the system will send the report on the final day of the month.
After setting template preferences for reports, scroll down to set template preferences for email alerts.
KAStrack sends email alerts for the following modules: Accounts, Actions, Assets, Dispatch, Documents, Finance, Forms, Meetings, and People. Each module has a dropdown menu with three options that designate when an email alert is sent: “Real Time”, “Digest”, and “Do Not Receive”.
Real Time is the default setting that sends email alerts in real time.
Digest is KAStrack’s delayed timing feature. Selecting “Digest” will summarize all alerts with this designation to be sent daily between midnight and 4 a.m. Central Time (United States). As noted in KAStrack, alert digests are not applicable to all alerts.
Whether or not an alert is digestible can be customized on the Alert Email Templates Tab of the Communications Module.
Do Not Receive designates that the user does not wish to receive email alerts about that specific module.
Communications sent from users are always sent in real time
After selecting your preferences for both Email Report and Email Alert Settings, select “Save”, returning you to the Notification Templates Tab on the Settings Page of the Communications Module.
The newly created notification template will now be shown on the Notification Template Table.
How To: Delete a QR Code
To delete a QR Code, open the QR Page in the Communications Module from the Main Menu.
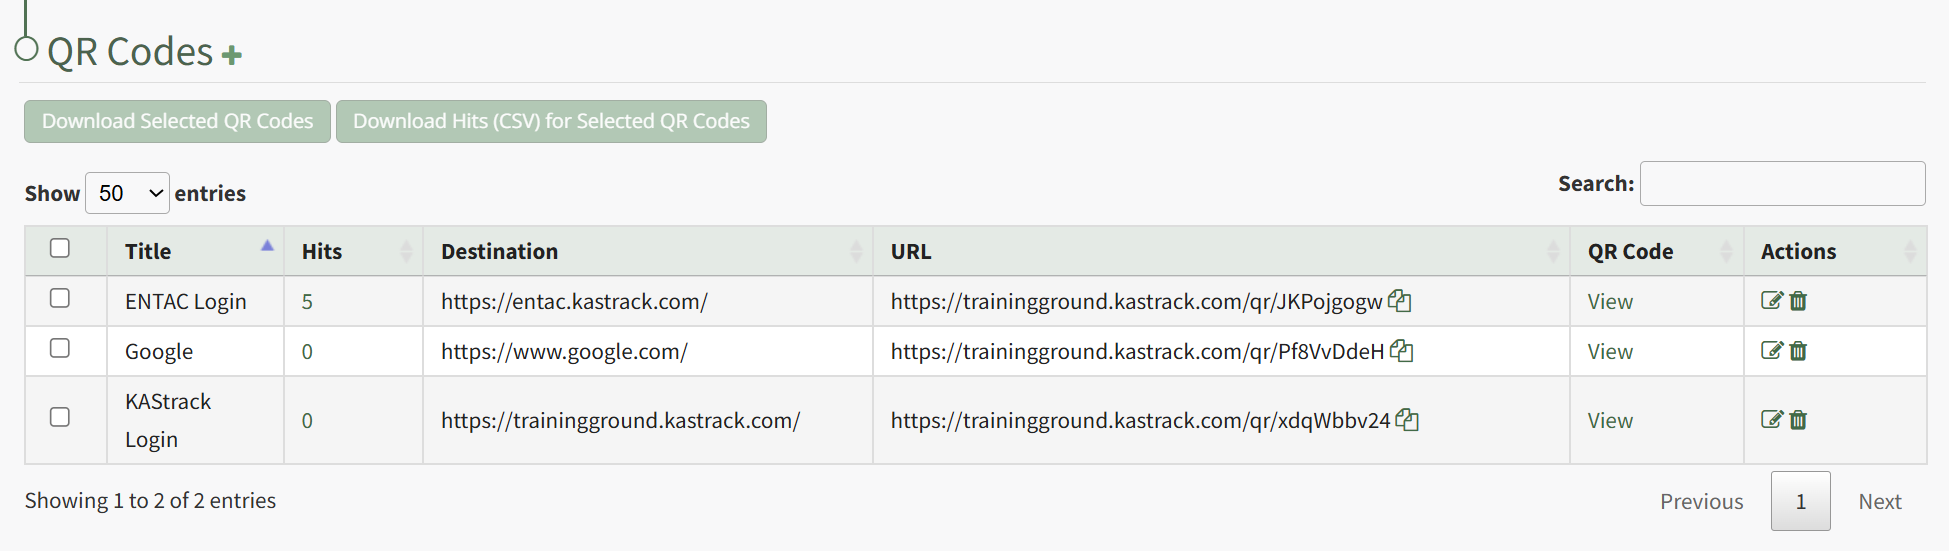
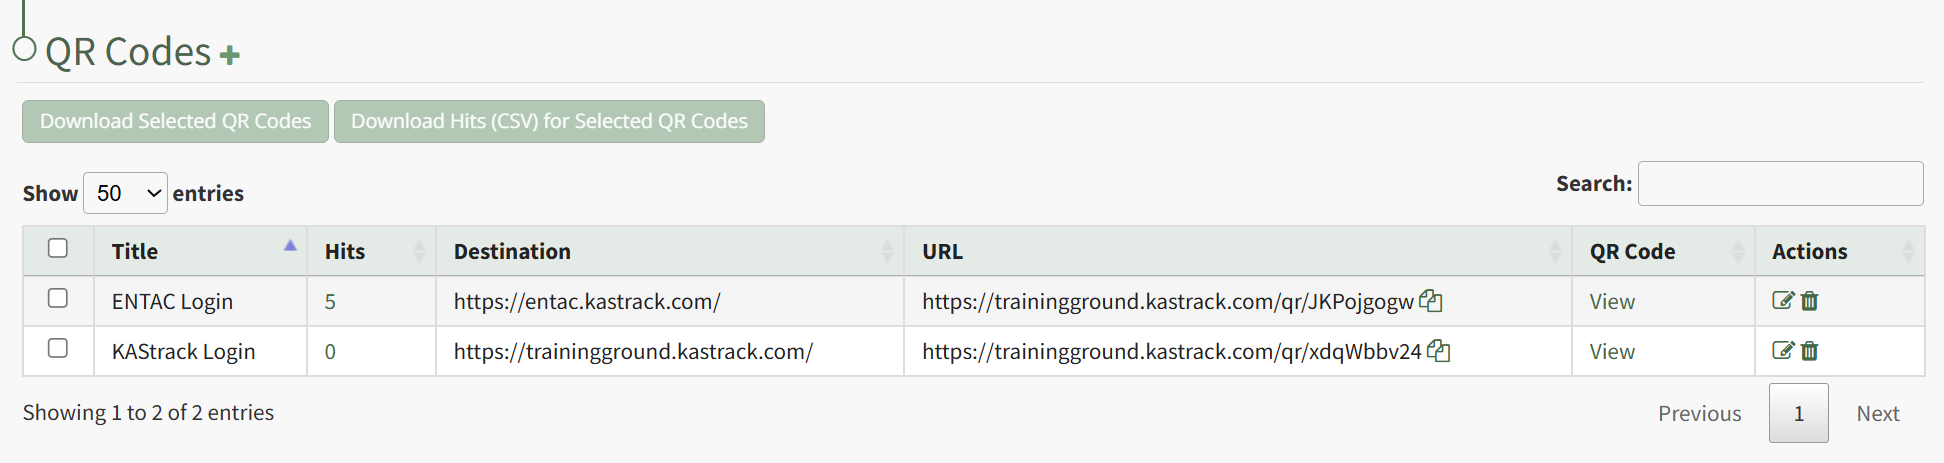
Click the trashcan icon in the Actions Column to the right of the QR Code you wish to delete.
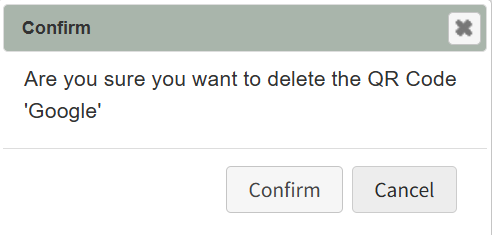
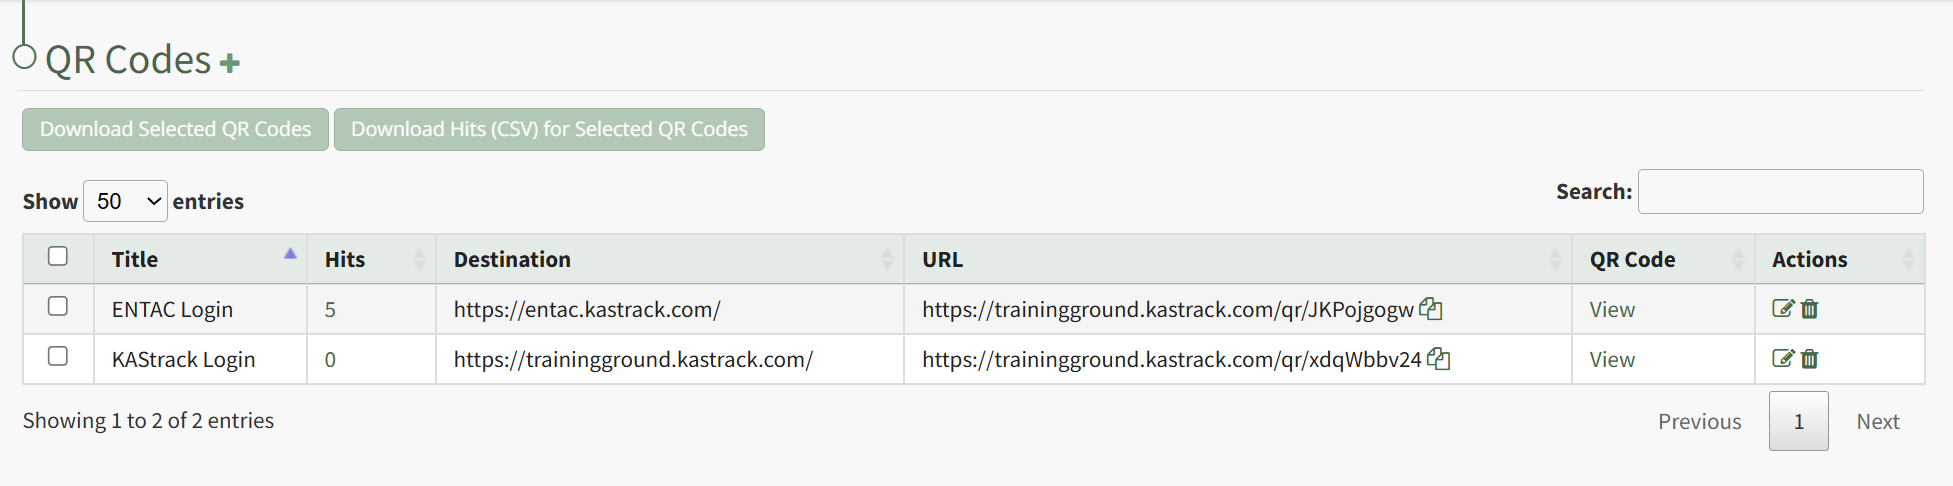
This opens the QR Code Deletion Confirmation Modal, which states "Are you sure you want to delete the QR Code?" Click Confirm.

The QR Code is permanently deleted from the QR Code Table.
How To: Download an Individual QR Code
To download an individual QR Code, open the QR Code Page of the Communications Module from the Main Menu.
Click "View" in the QR Code Column to the right of the specific QR Code you wish to view. This opens the QR Code Modal and displays the specified QR Code.
Click the "Download QR Code" button,
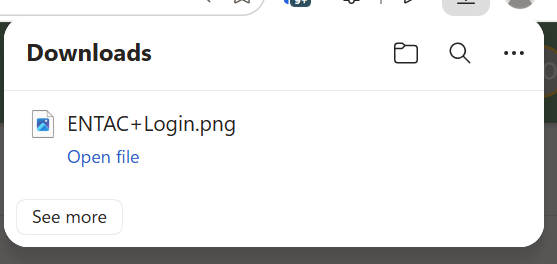
This automatically downloads the specified QR Code to your personal device.
How To: Download Multiple QR Codes at Once
To download multiple QR Codes at once, open the QR Page in the Communications Module from the Main Menu.
Click the checkboxes to the right of the QR Codes you wish to download, or click the checkbox in the top header row to select all QR Codes.
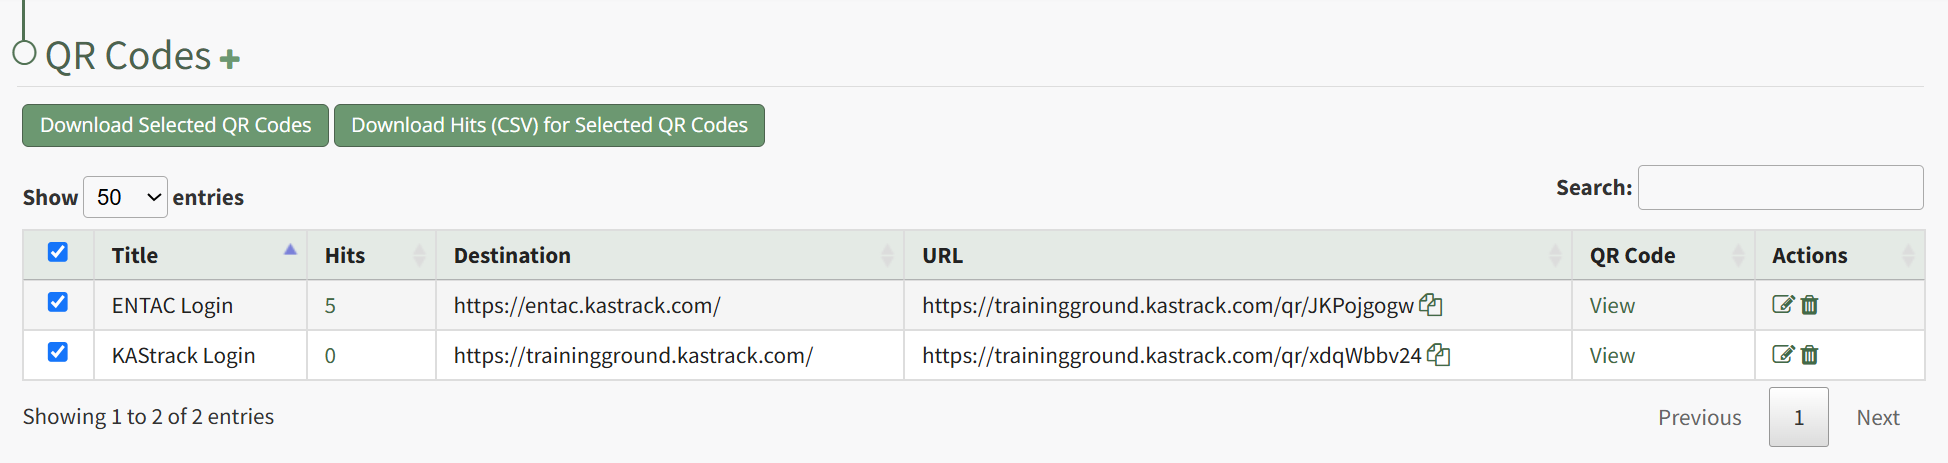
After selecting a checkbox, the buttons beneath the header can now be used. Click the "Download Selected QR Codes" button.
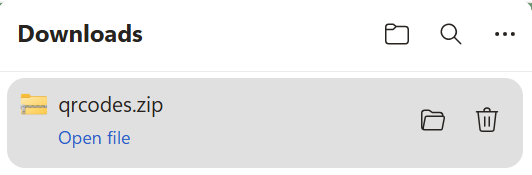
The selected QR Codes will automatically download as a .zip file to your personal device.
How To: Download QR Code Hits Data in a CSV File
To download the number of hits associated with a QR Code in a CSV file, open the QR Page in the Communications Module from the Main Menu.
Click the checkboxes to the right of the QR Codes you wish to download hit data for or click the checkbox in the top header row to download data for all QR Codes.
After selecting the desired checkboxes, click the "Download Hits (CSV) for Selected QR Codes" button.
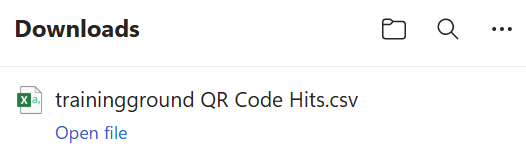
The .csv file will automatically download to your personal device.
How To: Edit a QR Code
To edit a custom QR Code, open the QR Code Page in the Communications Module from the Main Menu.
Click the page and pencil icon in the Actions Column to the right of the QR Code you want to edit, opening the Edit QR Code Modal.
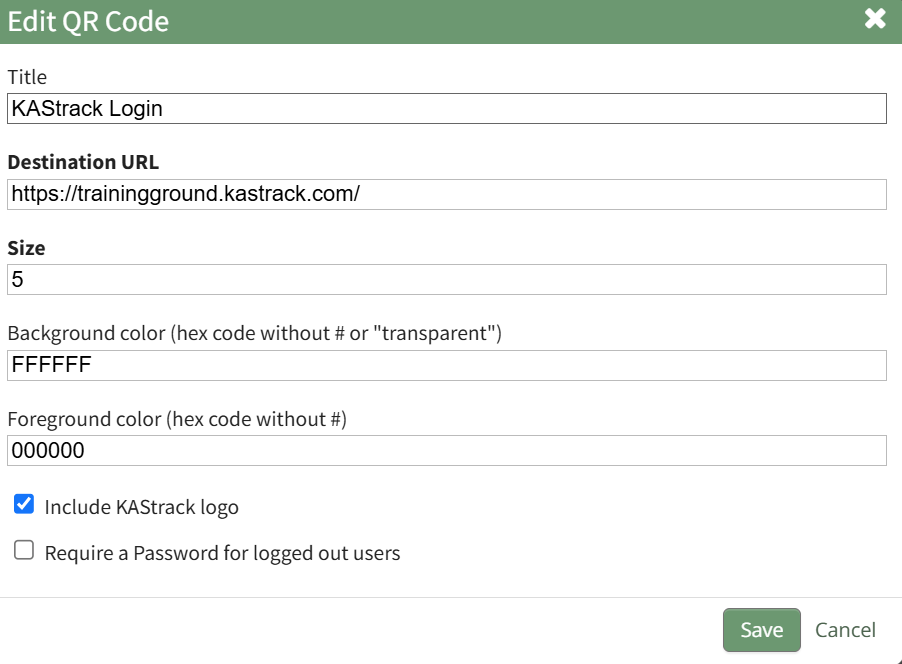
Make the desired changes to the QR Code and click the Save button. The system returns you to the QR Codes Page.
How To: Edit Email Report/Alert Notification Settings for Existing Accounts
To edit email report / alert settings for existing accounts, go to the Account Settings Tab on the Settings Page of the Communications Module.

Select the users whose email report/ alerts notification settings you wish to edit.

The Search textbox simplifies the search for specific users. The dropdown menu allows you to select between users’ current statuses for Reports/Alerts receipt. If you wish to edit all user accounts with the same new settings, select the checkbox in the title row of the table to select all users in the table. Selecting a user in one table automatically selects them in the other.
Select the “Edit Selected” button, opening the Update Account Settings Modal.


Make the desired changes for both email reports/alerts that you would like to apply to the pre-selected users.
Select “Save” for the notification preferences to be altered. Click “Cancel” to return to the Account Settings Tab on the Settings Page with any user accounts being impacted.
How To: Edit New User Notification Templates
To edit new user notification templates, go to the Notification Templates Tab on the Settings Page of the Communications Module.
Existing templates will be shown in the Notification Template Table.
Select the edit icon in the action column of the template you wish to edit opening the Edit Notification Template Page.
A notification template is comprised of two parts: Reports and Alerts.
Indicate the desired status for email report notifications: Not Active or Active.
Alter the desired reports selected for each module or leave as “Do Not Receive”.
Email Report Frequency has three options: daily (or on specified days of the week), weekly (on the day of your choosing), or monthly (which requires the user to specify which numerical day of the month from a dropdown menu you wish to receive the report summary).
After setting template preferences for reports, scroll down to set template preferences for email alerts.
Alter email preferences as set by module through a dropdown menu with three options that designate when an email alert should be sent: “Real Time”, “Digest”, and “Do Not Receive”.
After making edits to your preferences for both Email Report and Email Alert Settings, select “Save”, returning you to the Notification Templates Tab on the Settings Page of the Communications Module.
The newly created notification template will now be shown on the Notification Template Table.
How To: Reset the Hit Count on a QR Code
To reset the hit count for a specific QR Code, open the QR Code page of the Communications Module from the Main Menu.
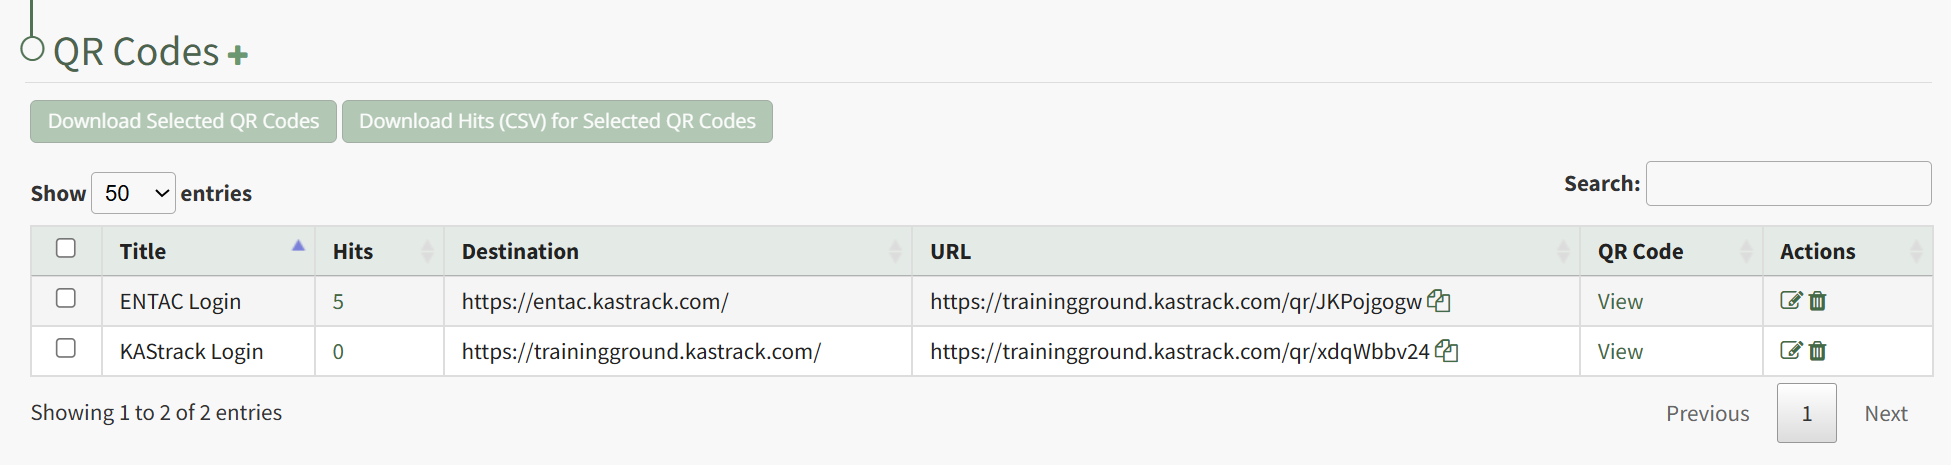
Click on the integer in the Hits Column of the QR Code whose count you wish to reset.
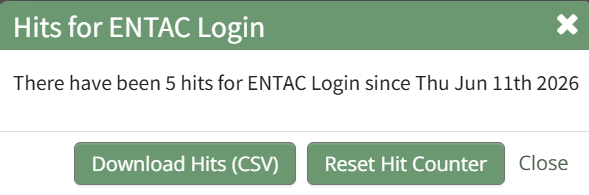
This opens the HIts For QR Code Modal, which states the number of hits and the data that the QR Code was last used. Click the "Reset Hit Counter" button on the modal, opening a Reset Confirmation Modal.
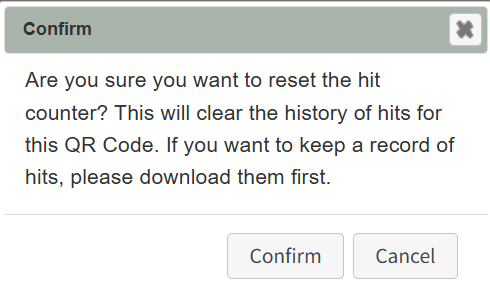
The modal states, "Are you sure you want to reset the hit counter? This will clear the history of hits for this QR Code. If you want to keep a record of hits, please download them first." Click the "Confirm" button.

A pop-up modal confirms that the counter has been reset.

The Hits for QR Code Modal shows that the count is 0 and states the reset date.
How To: Send an Email in KAStrack
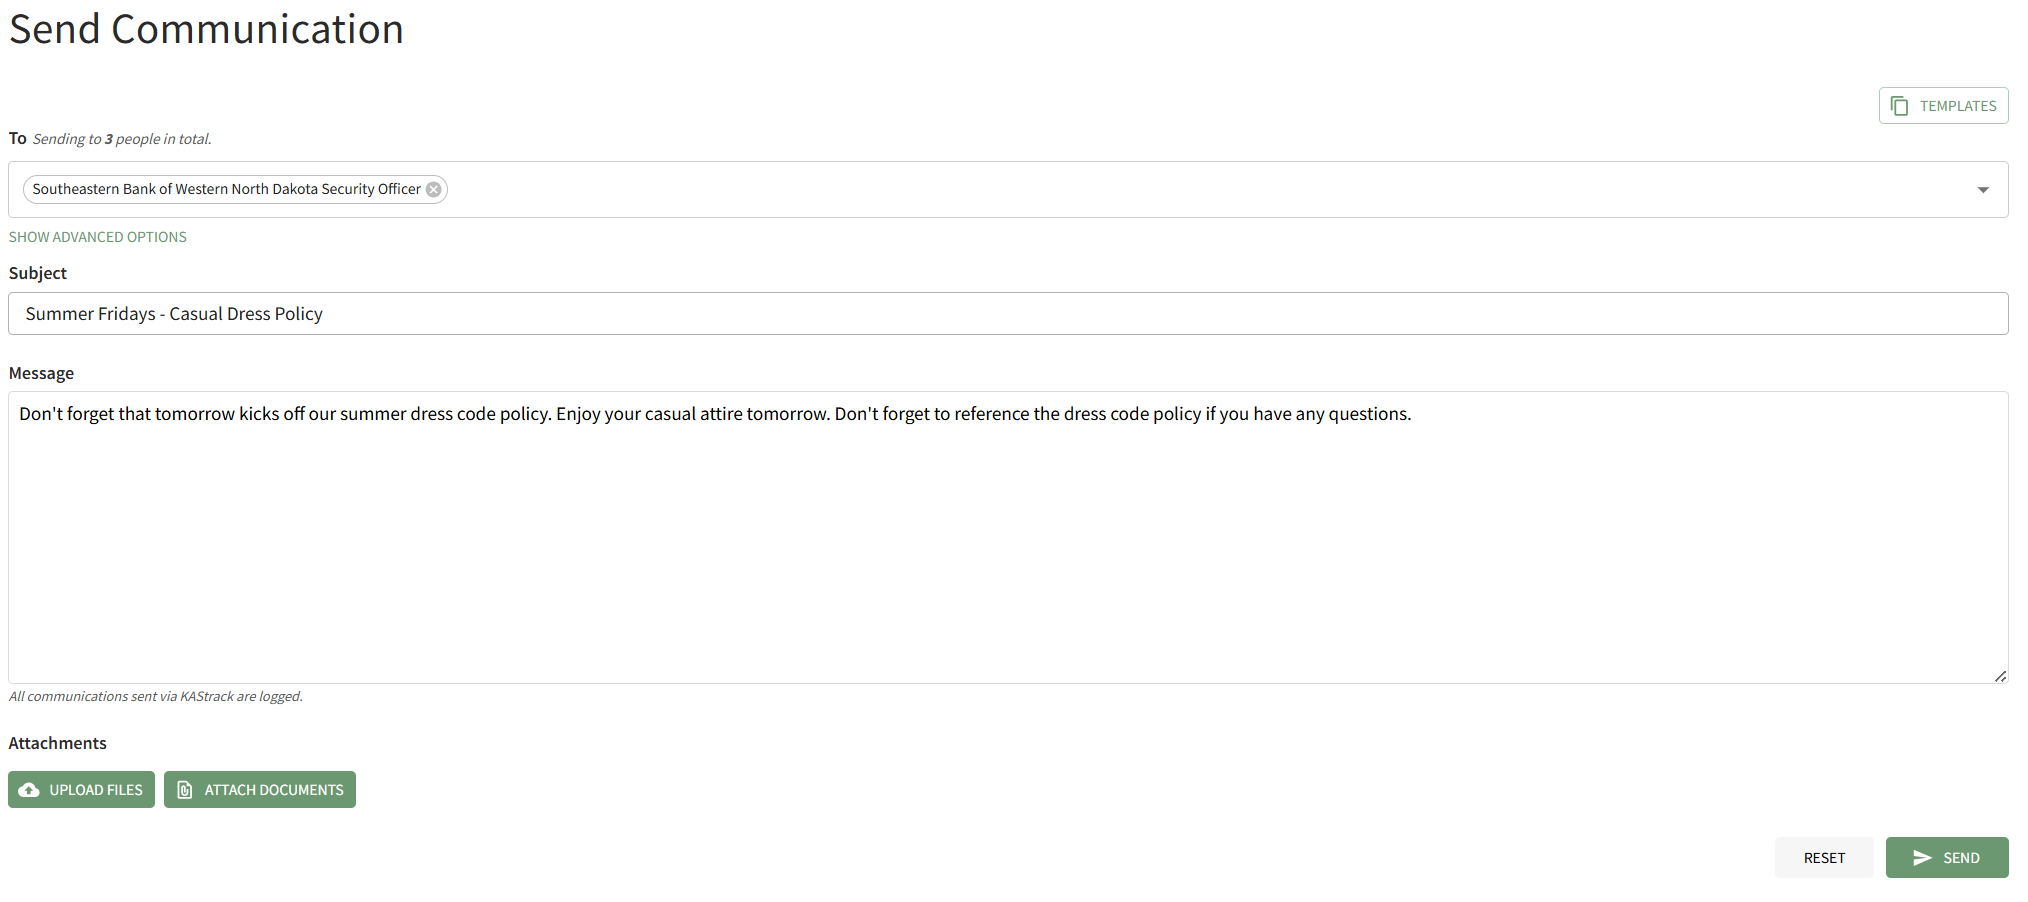
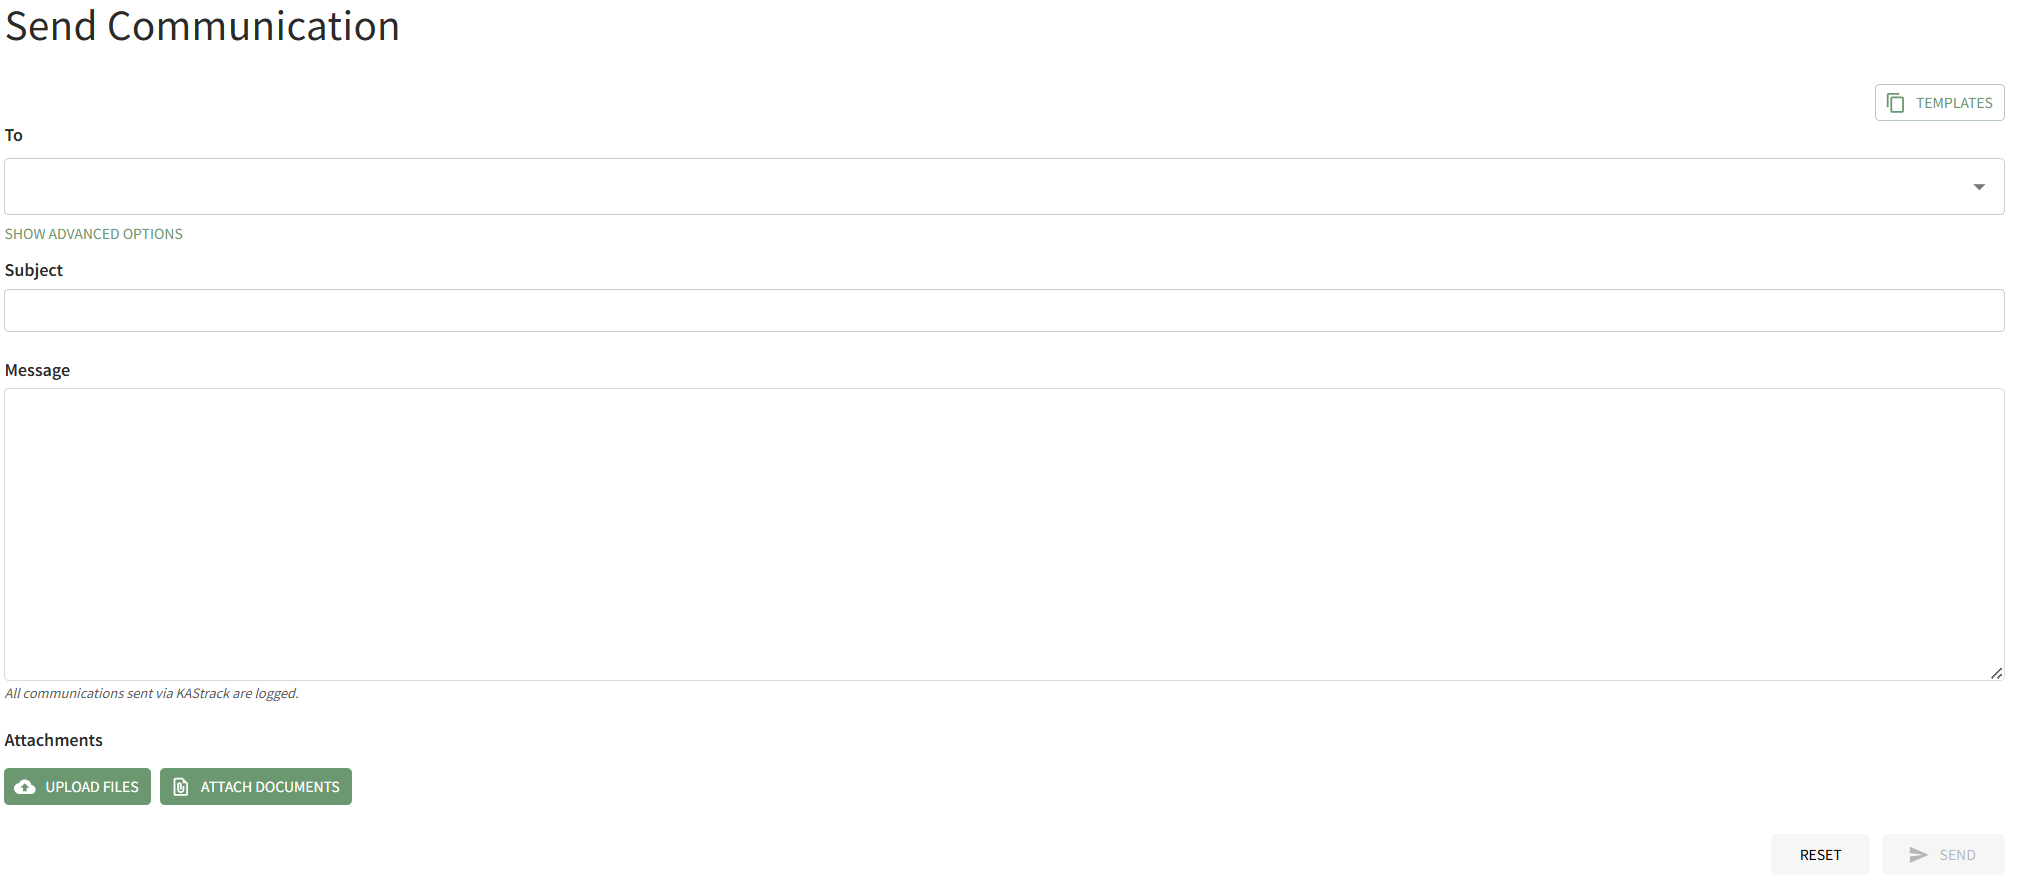
To send a system email in KAStrack, open the Send Communications Page in the Communications Module from the Main Menu.
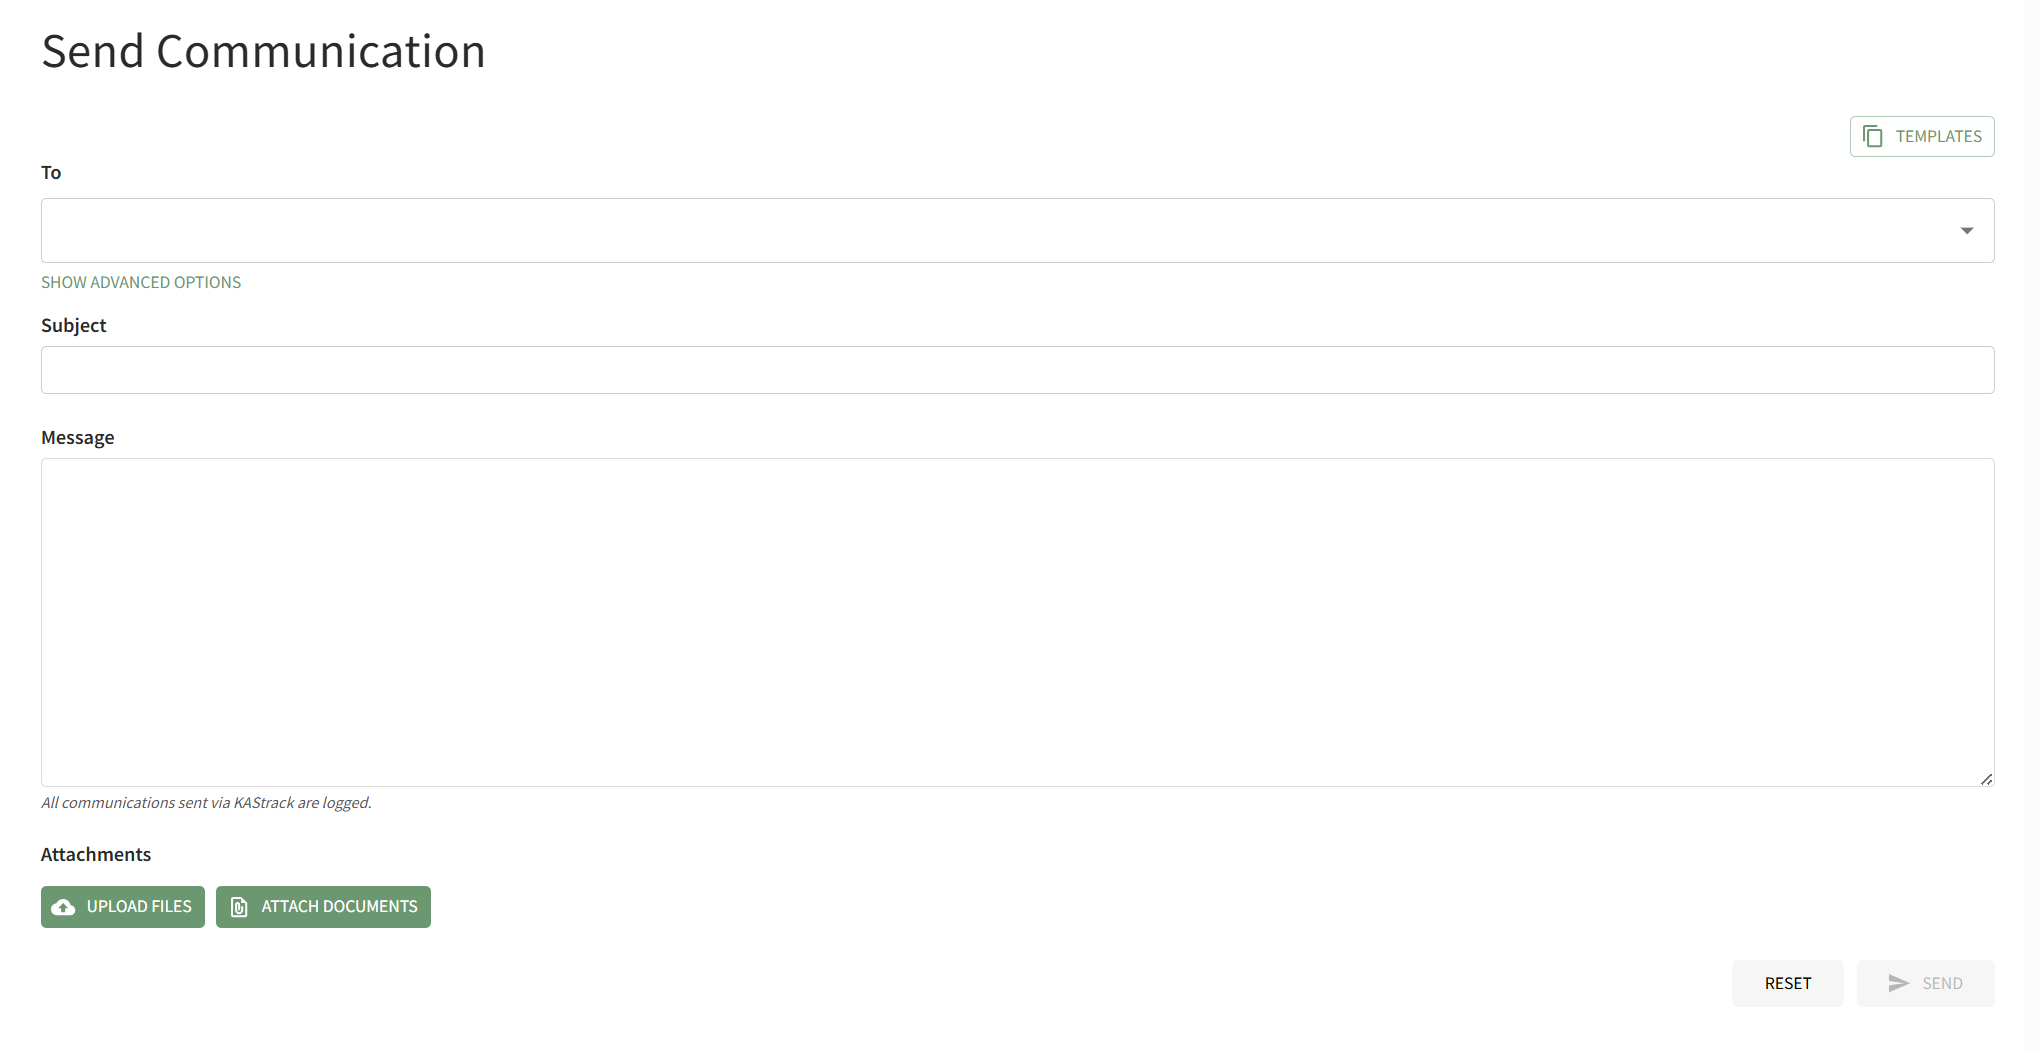
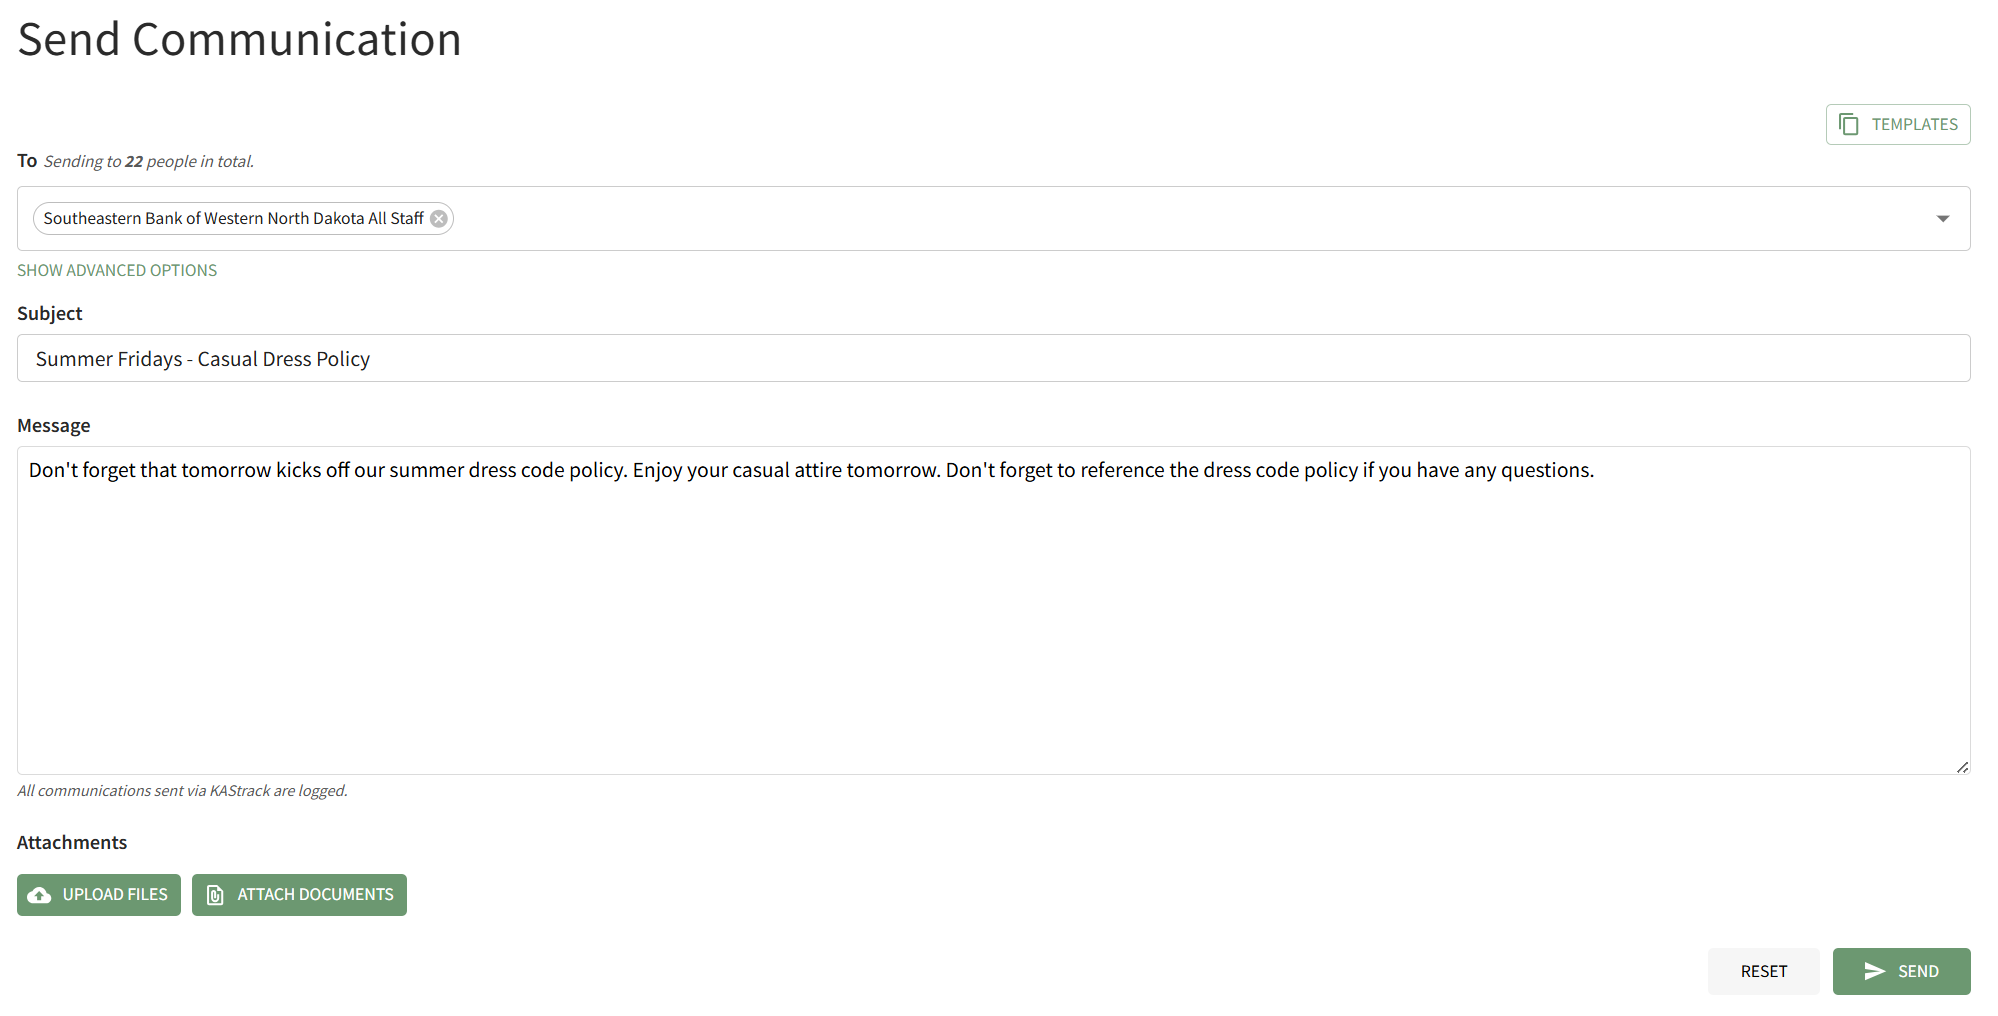
Select the individual users, certification roles or access levels you wish to send the message to from the dropdown menu in the "To" field. Input the Subject and Message.
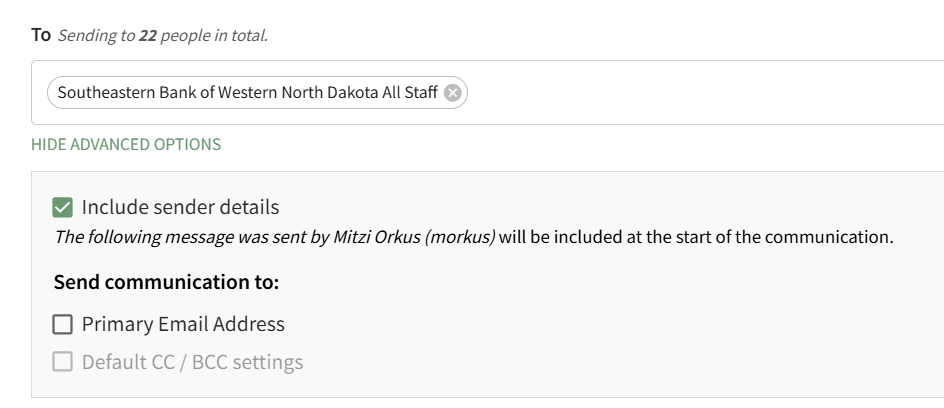
Individuals with an Admin Access Level have access to advanced options.
How To: Attach a File to an Email
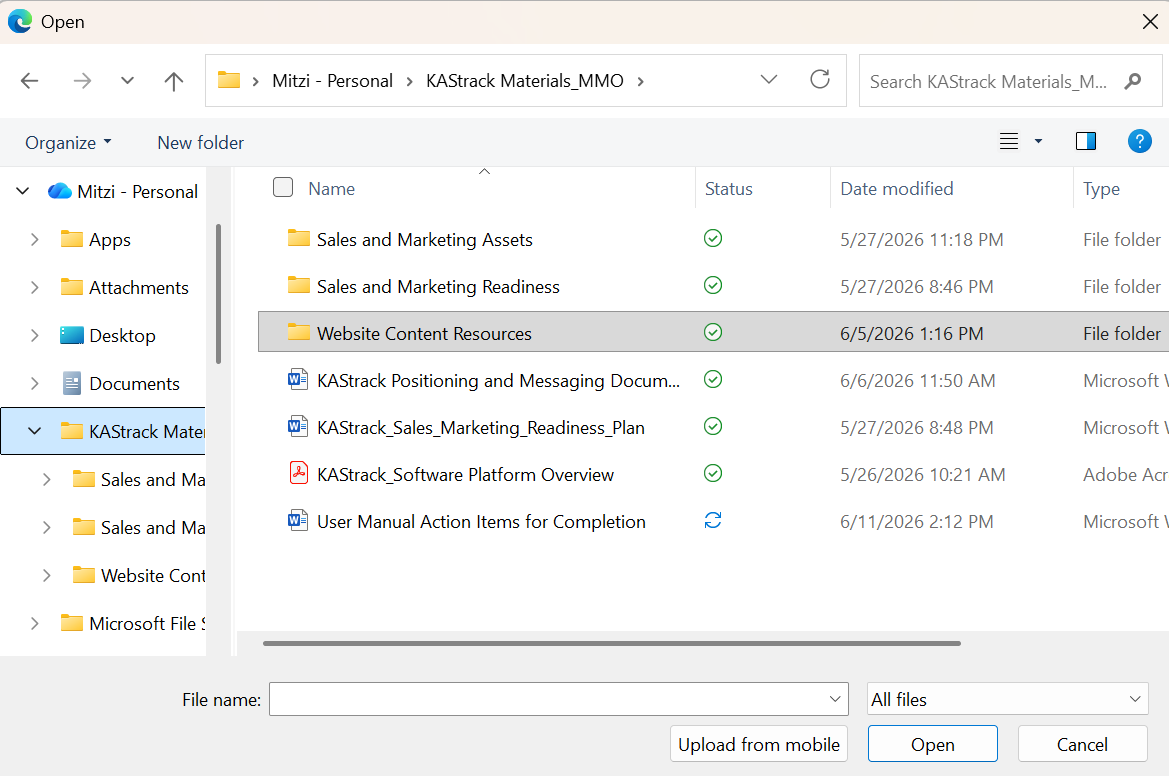
To attach a file to a system message in KAStrack, open the Send Communications Page in the Communications Module on the Main Menu. After inputting all information, click the "Upload Files" button on the bottom left-hand side of the page.
This will open your personal device so that you can access the file you wish to attach to the system message.
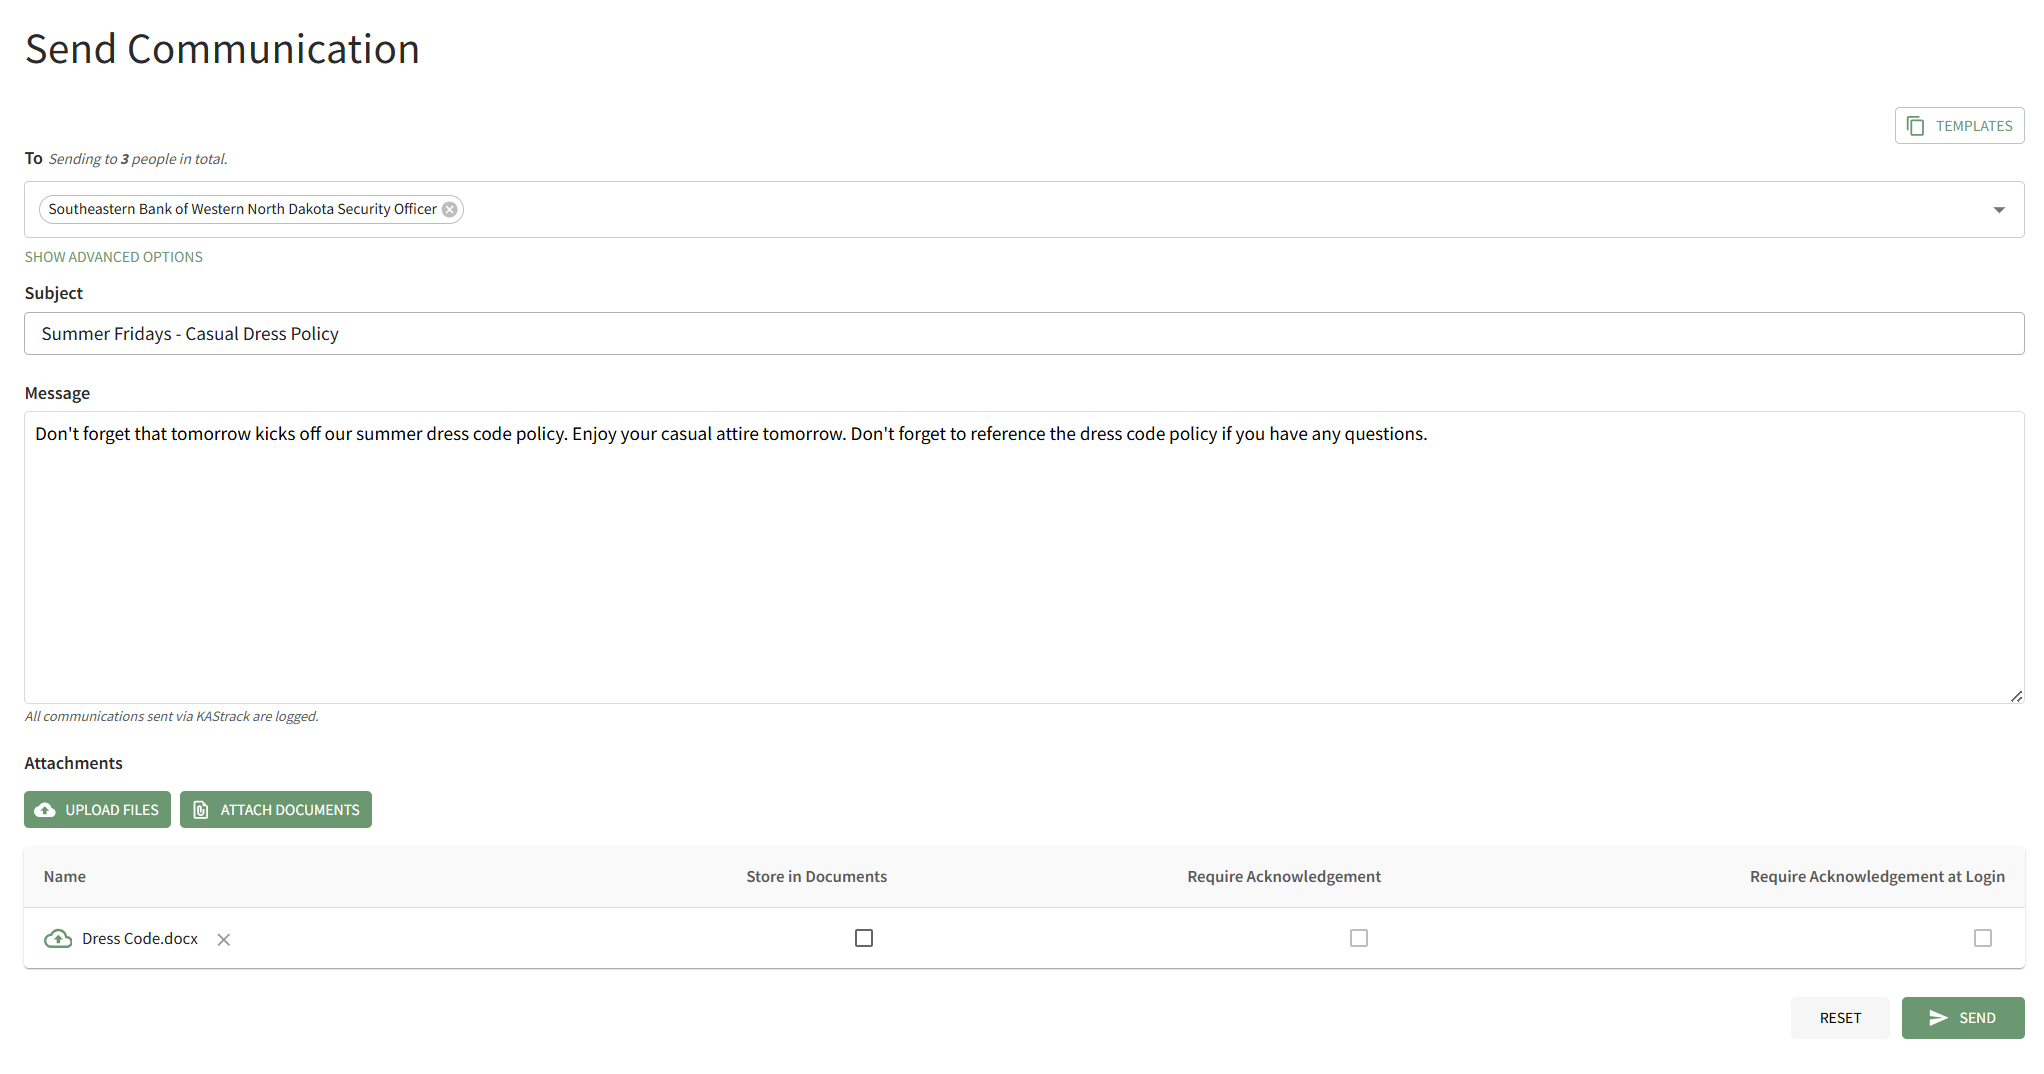
After selecting the appropriate file, it will be visible at the bottom of the Send Communications Page.
Checkboxes allow you to upload the file from your personal device to the Documents Module, to requirement acknowledgement of the document from the users who receive it, or to require acknowledgment of the document immediately when the user logs in to the system. After making the appropriate selections, press "Send" on the bottom right-hand corner of the page.
How To: Attach A Documents Module File to an Email
To attach a documents module file to a system message, open the Send Communications Page in the Communications Module from the Main Menu.
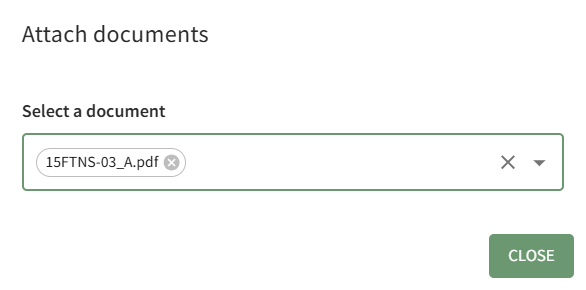
Click the "Attach Documents" button on the bottom left-hand side of the page opening the Attach Documents Modal.
Choose the file you wish to attach to the system message from the dropdown menu. It will automatically attach it to the bottom of the Send Communication page. Click the"Close" button on the modal to return to the Send Communications Page.
Checkboxes to the right of the attachment allow you to require acknowledgement of the attached file from the Documents Module, or to require acknowledgement of the attached file immediately when the message recipients login to the system next.
After make the appropriate selections, click "Send" on the bottom right-hand side of the page to send the system message.
When you are ready to send the system message, click the "Send" button in the bottom right-hand corner of the page.
If there is an error sending the message, the system will communicate that through a modal at the bottom of the page.

You will automatically return to the Send Communications Page so that the issue can be addressed.
How To: Set Up Additional Account Fields for Email Settings
To utilize the CC and BCC Email Settings on the Module Settings Tab of the Settings Page in the Communications Module, you must first set up additional user account information fields.
To set up additional user account information fields with email settings, go to the Account Fields Tab of the Site Settings Module.

Select “Add a Field” beneath the Custom / Additional User Account Information Fields opening the Add Field Modal.

Enter a Label for the new field, and select “email” as the type of field.
The checkboxes below allow for customization. Select “Allow multiple values” if there could be multiple emails associated with this field for an account. Select “Required” if you would like to require that this field be filled out for each account. Selecting the “Sensitive field” checkbox will tell KAStrack not to show this information when the field is being included in a report or form entry.
Select the permissions to be granted for each Accounts Module Level for this field, communicating if each Module Level can view their own/others and edit their own/others.
Under Accounts Module Level in the permissions grid, “Logged out user” refers to how fields will be displayed to users creating their account via a Registration Profile Link. To allow users to fill in information for the chosen field, ensure that the Edit Own permission is enabled for that field for “Logged out user”.
Select “Save” to create the new account information field.

The newly created email account fields will now show on the Account Info: (UserName) Page.
How To: Use a Communications Template when Sending An Email
To use a communications template, the template must first be created.
How To: Create New Communication Templates
To create a new communication template, go to the Communication Templates Tab on the Settings Page of the Communications Module.
Select the “New Communication Template” button opening the New Template Modal.
Input the Title for the Template.
Select Active / Inactive from the dropdown menu to indicate if the template is available for use.
Both individual people and certification roles can be selected as desired recipients via dropdown menu in the “Send To” line.
Include the subject line for communications, as well as a message.
An attachment can be uploaded from your personal device to be included in the template, or you have the option to select one or more files from KAStrack’s Document Module.
KAStrack documents that are tagged may limit visibility of this template. Specifically, if a template contains a tagged document you cannot see, you will be unable to see the template when sending a communication. Individuals with access to a Document that has visibility restrictions for others via Tags cannot use Send Communication to send that tagged Document to users that lack the authorization to see it.
Select “Save” and the New Communications Template will show in the Communications Template Table on the Settings Page.
The template can now be applied as desired when sending communications in the system on the Send Communications Page. You can also click the closed envelope symbol in the Communication Templates table to go to the Send Communications page and pre-fill the chosen template.
To use a pre-existing communications template, go to the Send Communications Page in the Communications Module from the Main Menu.
Select the Templates button on the right-hand side of the page above the To field. This opens the Templates Modal.
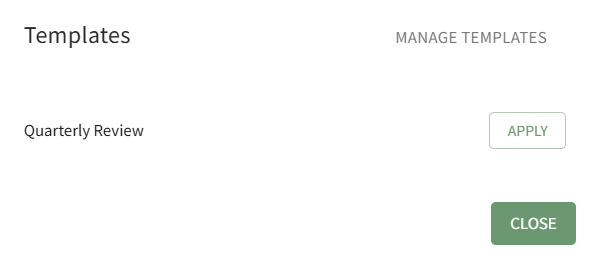
Click the Apply button to the right of the template you wish to use for the System Message.
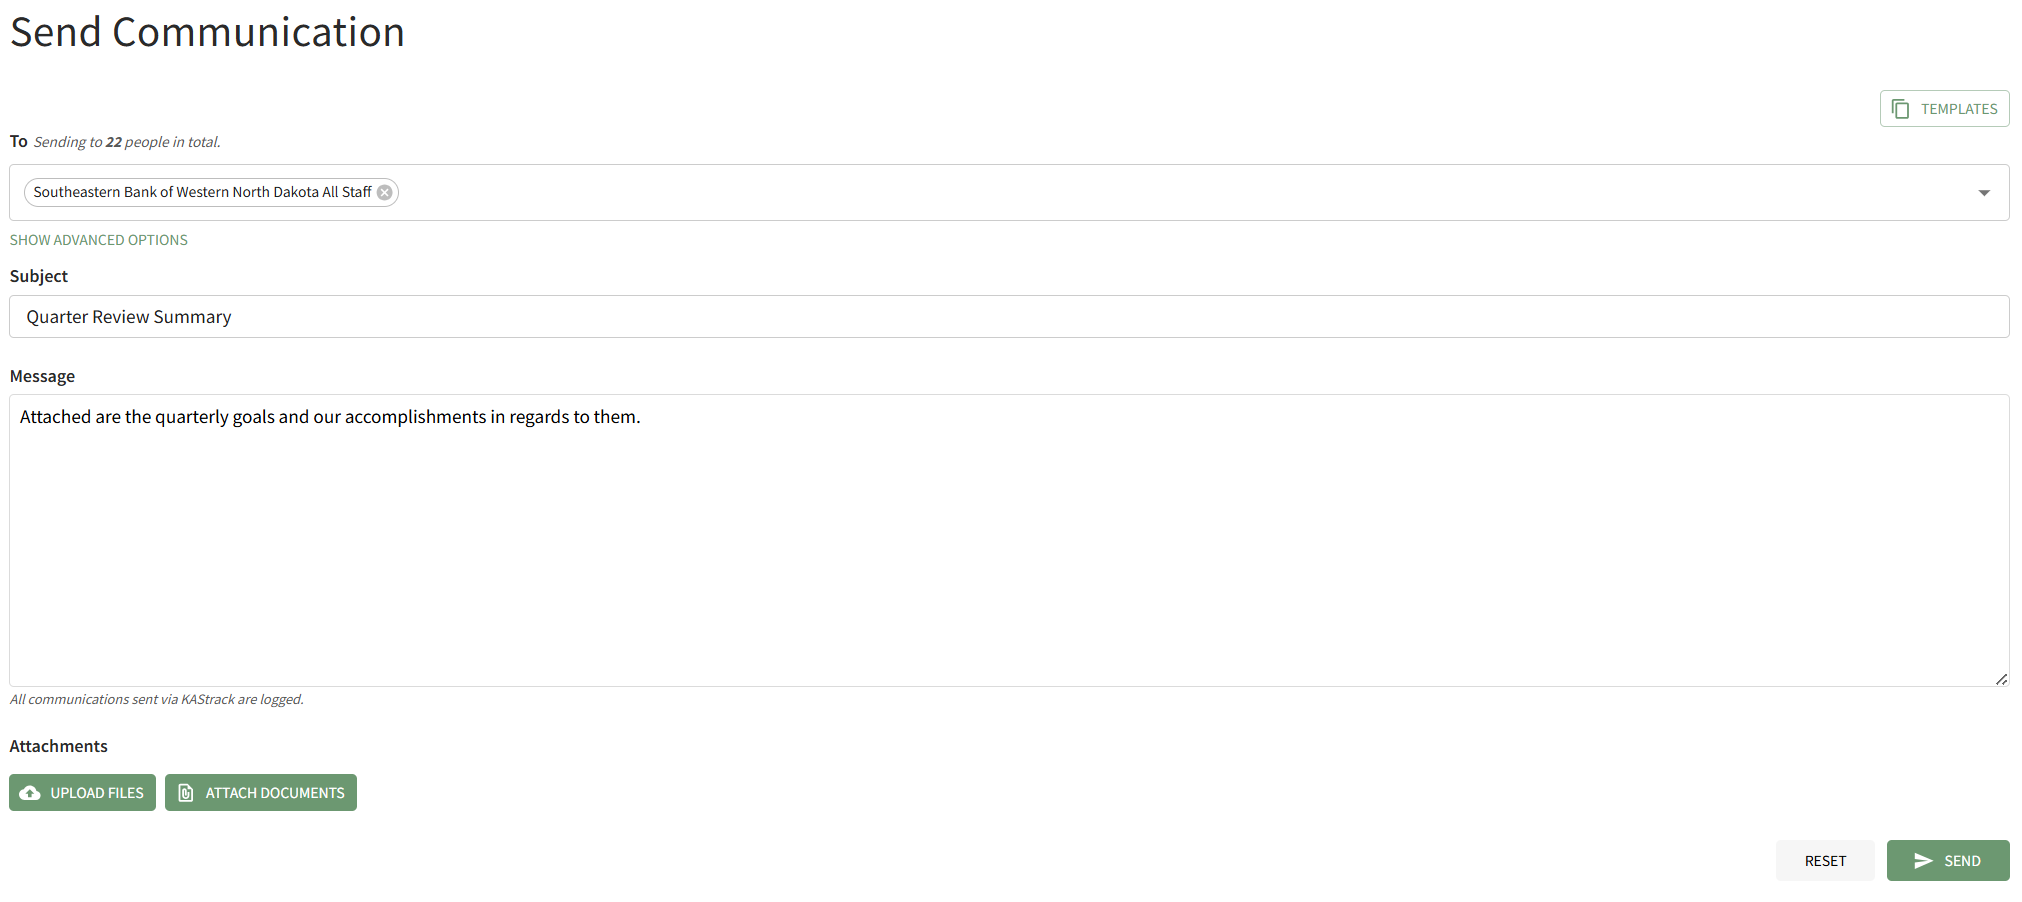
The Templates Modal automatically closes, and the selected template is applied to the Send Communications Page.
How To: View a Custom QR Code
To view a specific, custom QR Code, open the QR Code Page of the Communications Module from the Main Menu.
Click "View" in the QR Code Column to the right of the specific QR Code you wish to view.
This opens the QR Code Modal and displays the specified QR Code.
No comments to display
No comments to display