
Import User Certifications
User certification completion and expiration data can be imported in bulk into KAStrack from a CSV file.
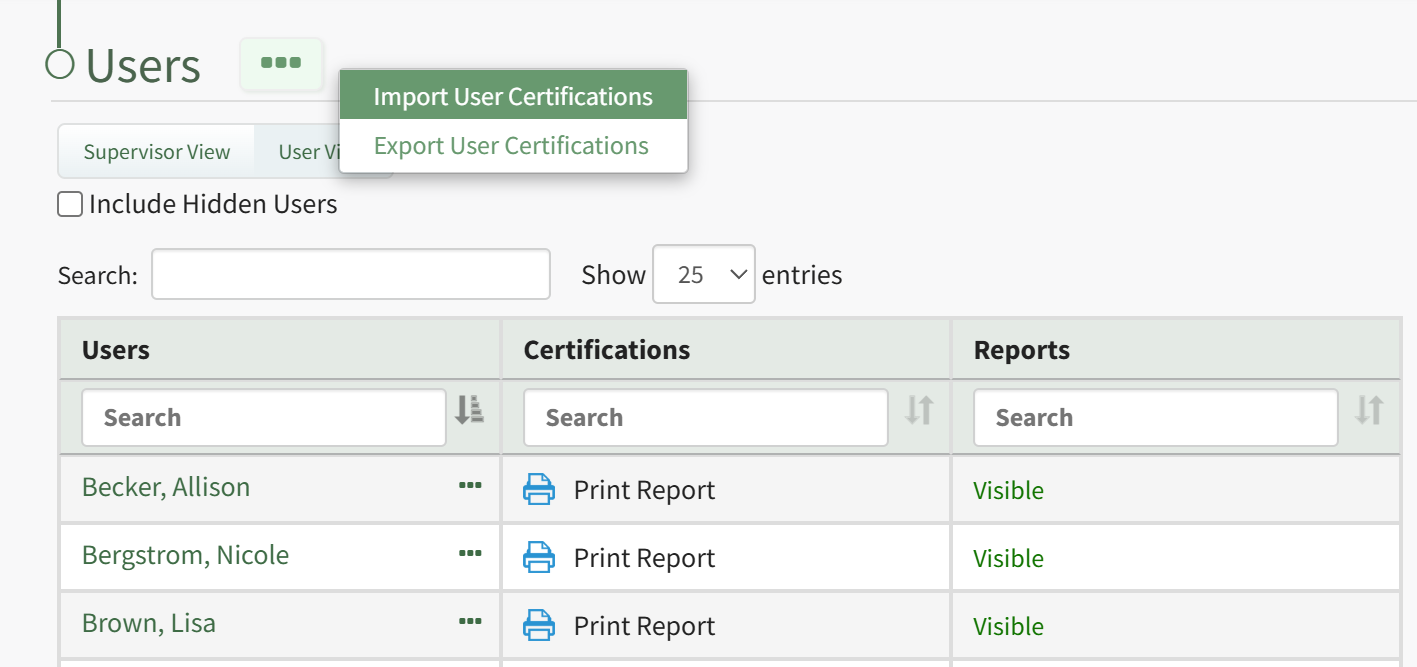
To import this data, open the Users Page in the People Module from the Main Menu to display the Users Table. Click the three dot (…) icon to the right of the header to open a context menu and select “Import User Certifications”.
This opens the Import User Certifications Page. A template is provided to simplify importing.
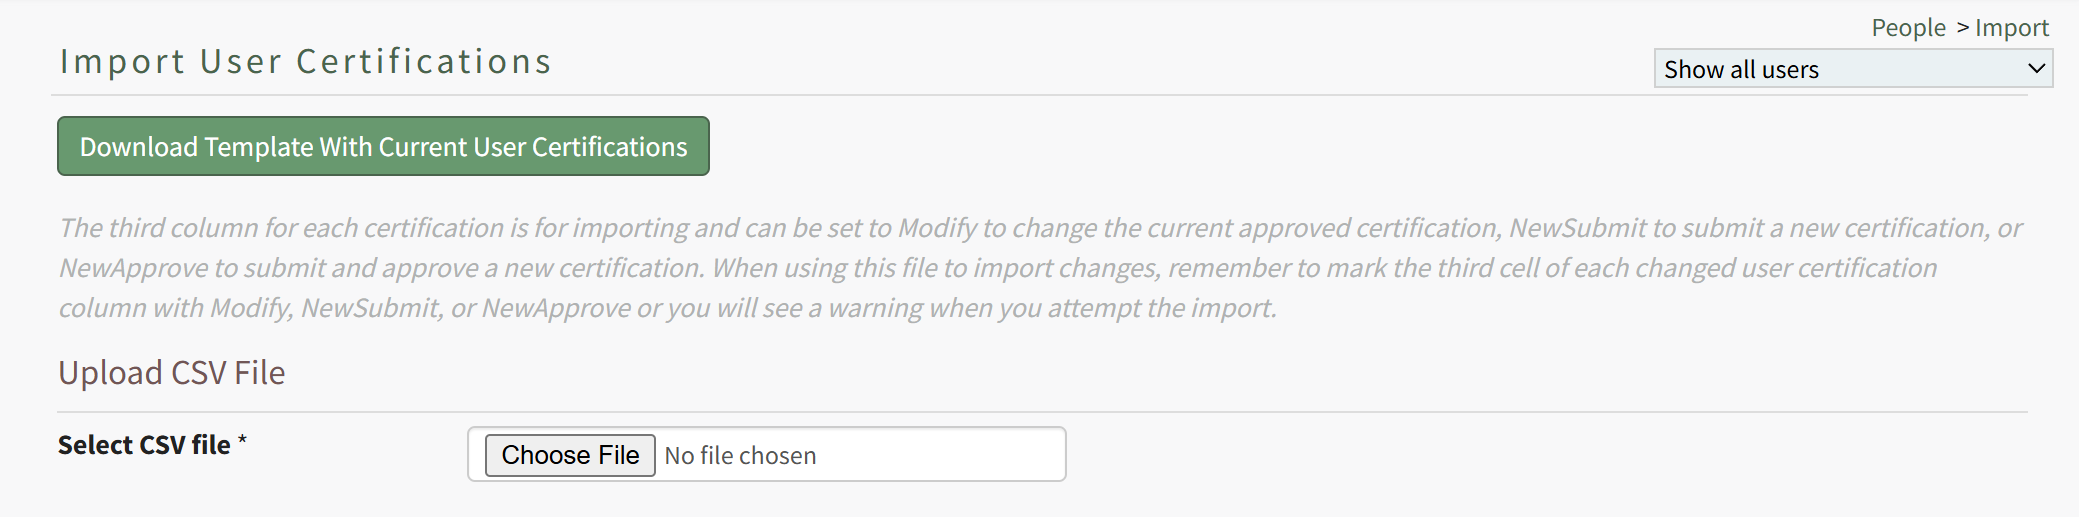
Click the “Download Template” button to download the Certifications Template CSV to your device.
If you'd like to modify existing User Certification data in bulk using User Certification Import, in contrast or in addition to using User Certification Import to create new User Certification completions, you can first export all User Certification data from KAStrack to a CSV file and work off of that file. Read more here.
When ready, open the downloaded file (or create a new CSV file, if desired) in your favorite text editor / spreadsheet software (e.g. Excel, Sheets, etc.).
When preparing a CSV file for import, certain conditions must be met for the file to import properly, including how the rows, columns, and cells are structured. An example file is pictured below for reference:
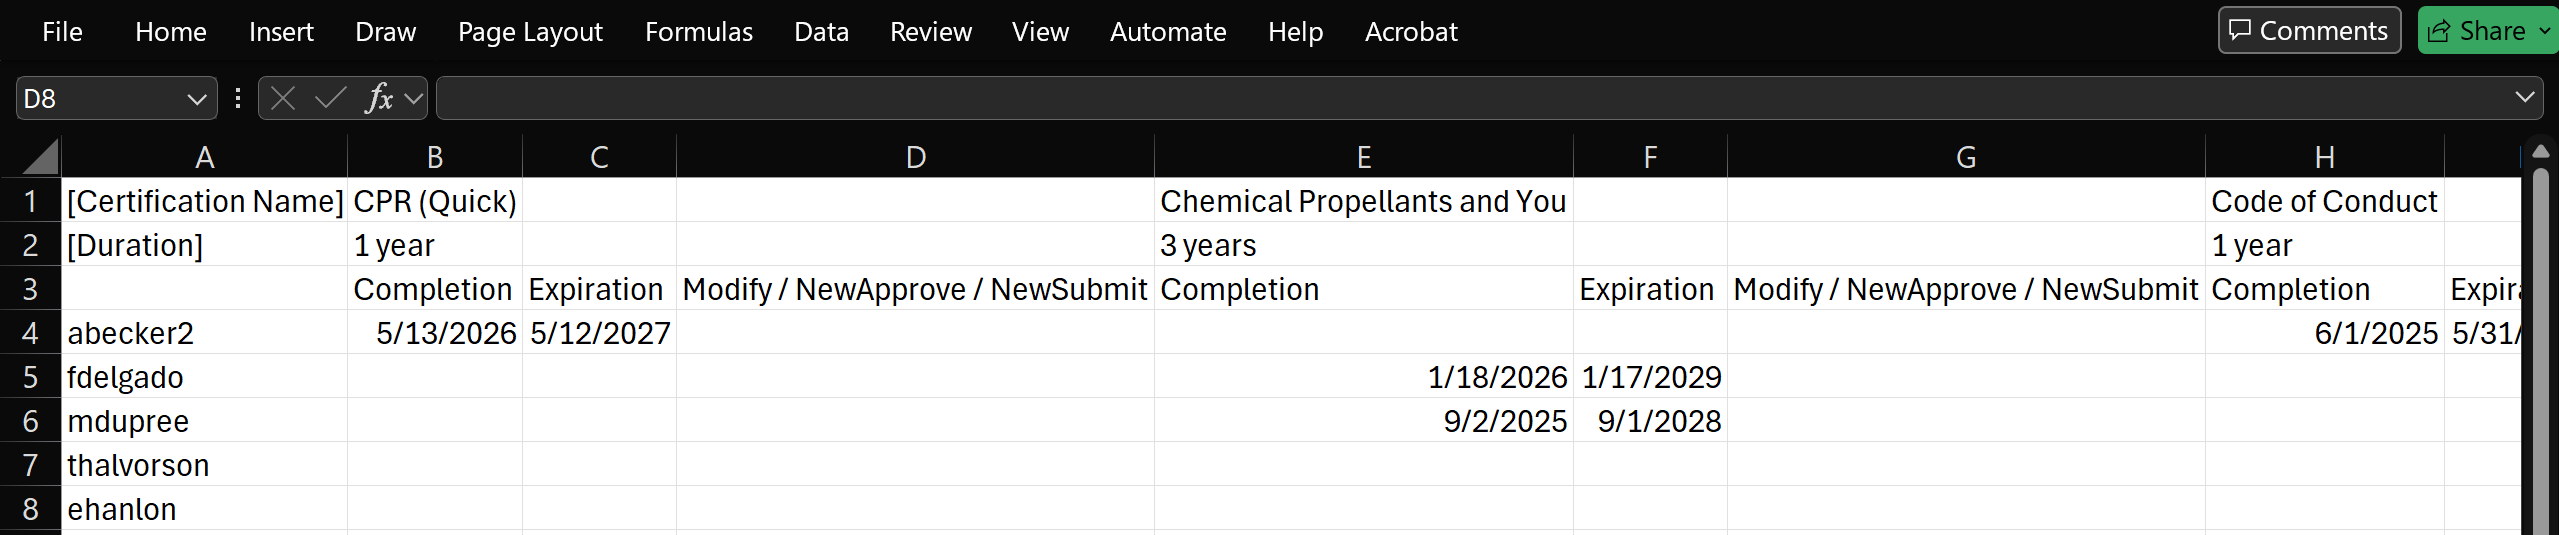
The first cell, A1, will always be the descriptor '[Certification Name]', written inside square brackets. This denotes that cells on the top row are the names of all Certifications in the KAStrack System. A Certification Name will always be followed by two blank cells; thus, while the first Certification listed is in cell A2, the next Certification Name will be in cell A5, then A8, then A11, and so on.
Note: Certification Names must match exactly as they appear in KAStrack, and Certifications listed in this Import must already exist in KAStrack. This Import tool does not allow for creating new Certifications; it is solely for importing completion data for users tied to existing Certifications. To edit or create new Certifications via a CSV Import, learn more about importing from the Certifications page here.
The first cell below Certification Name, B1, will always be the descriptor '[Duration]', written inside square brackets. This denotes that cells on the second row are the duration of validity for the Certifications named above them. A Duration period will always be followed by two blank cells; thus, if the first Duration listed is in cell B2, the next Duration Period will be in cell B5, then B8, then B11, and so on.
The first cell below Duration, C1, will always be blank. This third row lists headers that apply to each Certification named above them. Starting in C2, cells will alternate with a pattern of "Completion", "Expiration", and "Modify / NewApprove / NewSubmit". These columns are further explained int he table below. The Completion column is used to denote the most recent Completion Date of that Certification for a user. The Expiration column is used to denote the current Expiration Date of that Certification for a user. The Modify / NewApprove / NewSubmit column is used to denote the any changes to the completion and expiration information of that Certification for a user.
Third Row Column Header | Information | |
Completion | The Completion column is used to denote the most recent Completion Date of that Certification for a user. If a Completion already exists for that Certification by a user, the most recent completion date will be shown. If the field is blank, this user has not completed the Certification. If not blank, this column should have a full date in MM/DD/YYYY or YYYY-MM-DD format. | |
Expiration | The Expiration column is used to denote the current Expiration Date of that Certification for a user. If a Completion already exists for that Certification by a user, the most recent completion's expiration date will be shown. If the field is blank, this user has not completed the Certification. If not blank, this column should have a full date in MM/DD/YYYY or YYYY-MM-DD format, or "Never expires", if the Duration Period indicates completion of this Certification never expires. | |
Modify / NewApprove / NewSubmit | This column is used to denote whether the completion data shown in the preceding columns have been altered in some way from how they're currently stored in KAStrack. | |
Modify | Blank if the preceding columns are blank, or if there is no change to the existing completion data for that Certification by that user. If "Modify" is written in this column, on import, KAStrack will modify the user's existing completion data to match the import's listed completion and expiration dates. | |
NewApprove | Blank if the preceding columns are blank, or if there is no change to the existing completion data for that Certification by that user. If "NewApprove" is written in this column, on import, KAStrack will submit a new Certification Completion for this user, using the import's listed completion and expiration dates. This submission will be automatically approved. | |
NewSubmit | Blank if the preceding columns are blank, or if there is no change to the existing completion data for that Certification by that user. If "NewSubmit" is written in this column, on import, KAStrack will submit a new Certification Completion for this user, using the import's listed completion and expiration dates. This submission may be approved if automatic approvals are set up for that Certification. | |
Once your file is ready for import, return to KAStrack's Import User Certifications page. Click the “Choose File” button to select the CSV file from your device. The page will then update to show the "Import user certifications" button.
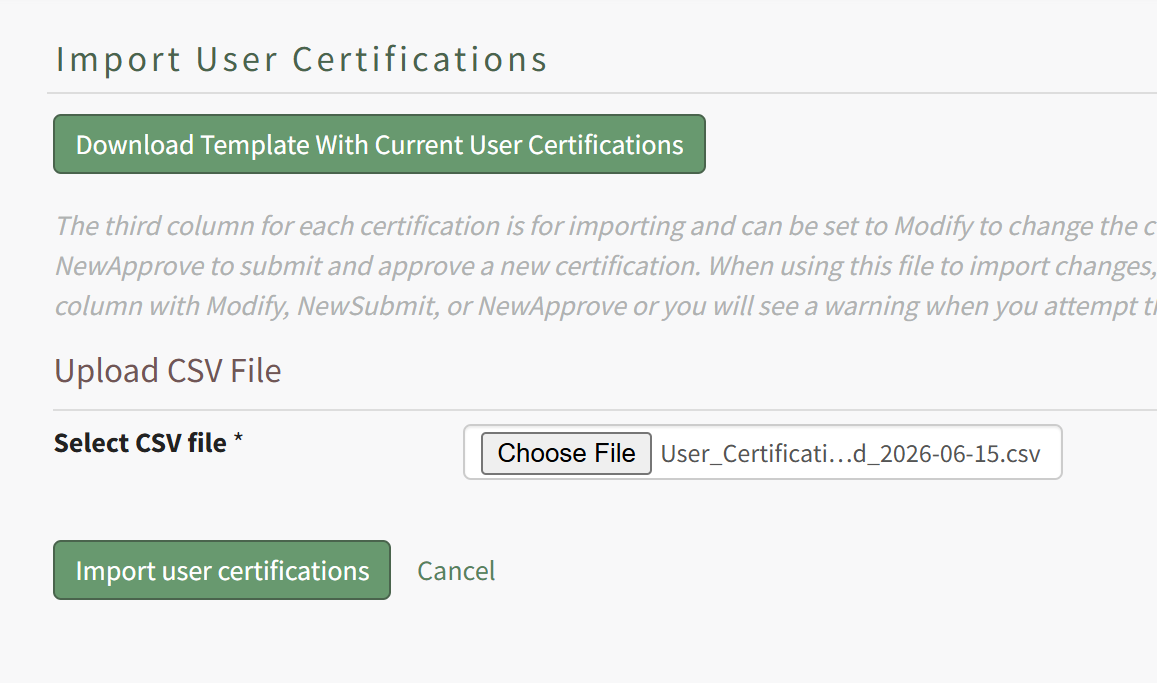
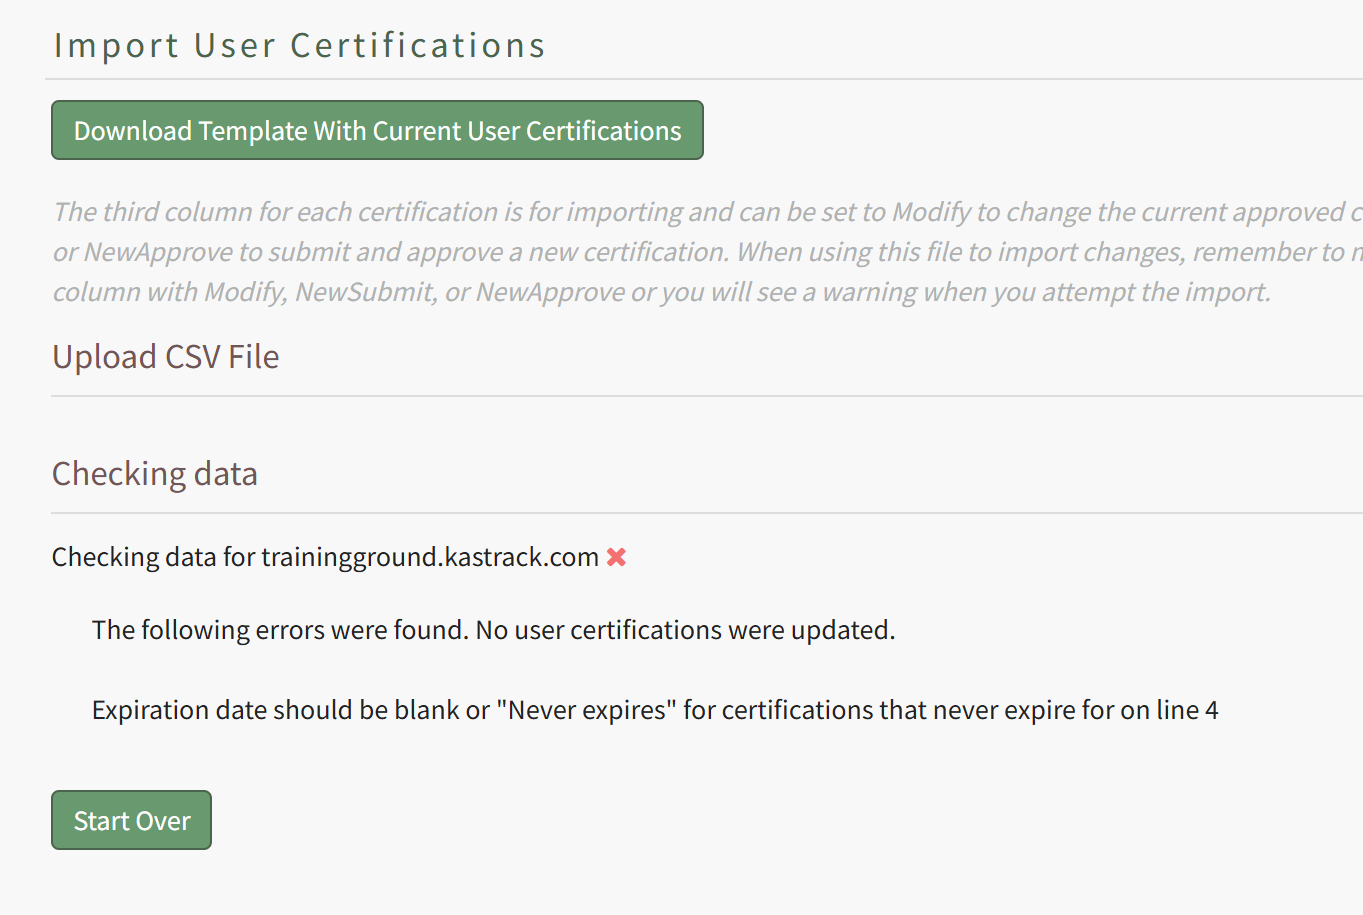
Click the “Import user certifications” button to upload the file and import the changes into KAStrack. The screen will then display a success or fail message, and, if failed, alert to any changes that should be made to the imported file. If the import fails, no certification completion data changes will be imported.
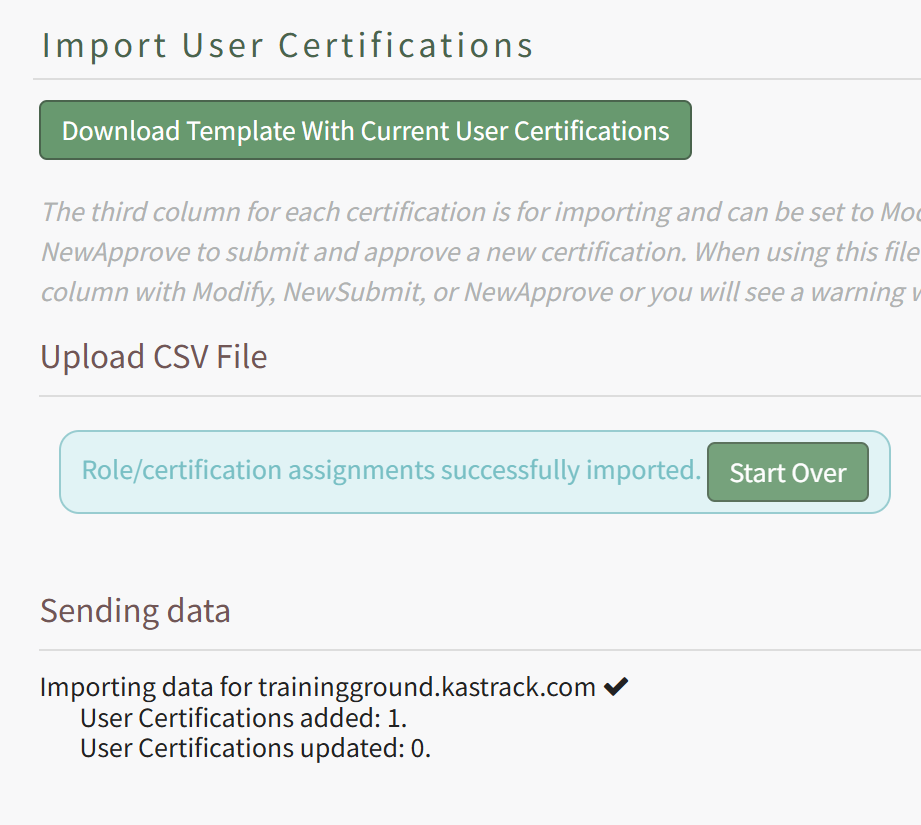
If successful, KAStrack will inform how many User Certifications Completions were created, and how many existing ones have been updated.
No comments to display
No comments to display