Create an Individual New User Account
The Create Tab opens to the Create Account Page. To bulk import the information for several new user accounts, go to the Import Tab on the Accounts Page.
How To: Bulk Import Account Information
Before bulk importing several new accounts, be sure that your organization has customized the account information fields to meet your needs. WIKI LINK TO ACCOUNT FIELDS TAB: SITE SETTINGS Once your account information preferences have been established in the Site Settings Module, you can begin organizing the CSV file for bulk imports.
Open the Import Tab on the Accounts Page in the Accounts Module.
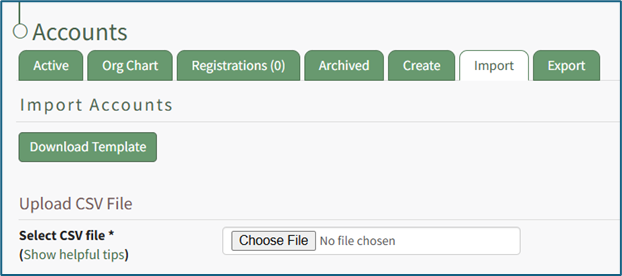
Select the “Download Template” button to have KAStrack generate a template with the appropriate fields in separate columns that match the designated preferences in the Site Settings Module.
When your CSV file with new account information is complete, ensure it is saved with the CSV format UTF-8.
Click “Choose File,” and select the correct CSV file from your computer. Click “Open”.
Each of the Account Information fields will now show below the selected CSV file.
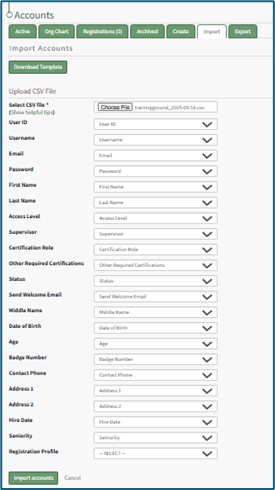
KAStrack scans the first row of your CSV file for matching column headers and attempts to map your column headers to the appropriate Account Fields. The dropdown menu next to each field will automatically be set to any matching column headings from the CSV.
If a matching column couldn't be found, you can manually choose which column should map to those Account Fields by choosing an option from the dropdown.
Select the “Import Accounts” button to import the information. Click “Cancel” to return to the Active Tab on the Accounts Page without saving information.
The Import Tab can also be used to update existing account information. The KAStrack- generated unique user ID is a required column in the CSV file if editing an existing account. This can be found in the URL at the top of your browser when viewing a user’s Account Info page, or by doing an account export.
How To: Export User Account Information
Open the Export Tab on the Accounts Page in the Accounts Module.

There are two checkboxes that allow for customization of your export. Both or neither can be included.
Select “Include archived accounts in export” to include archived accounts in your export. Select “Include inactive accounts in export” to include inactive accounts in your export.
Click “Export local accounts” and a CSV file will automatically be downloaded to your personal device.
Helpful Tips for Bulk Imports
The CSV document created to import account information will vary based on your customized Site Settings. Required account fields are username, password, first and last name. Required status for fields is designated by an asterisk (*). Each included field should be represented by its own column in the CSV document.
Required system user account information fields do not show as required on the Account Fields Tab on the Site Settings Page.
Helpful Tips for Account Information Bulk Imports | |
Field | Comments / Suggestions |
User ID | The User ID is a unique system ID for the user. Leave blank to create a new user. |
Username* | Required Field. Character usage is limited to lowercase letters, numbers, hyphens, underscores, periods, or at signs. A username cannot contain spaces and cannot start with an underscore. When editing an existing account via imports, the username and email cannot be changed simultaneously. |
This field may be left blank when creating a new user. If so, an email address will be generated for the user with the format: username@sitename.kastrack.com. When editing an existing account via imports, the username and email cannot be changed simultaneously. | |
Password* | Required Field. Default settings require a minimum of 8 characters. All passwords created in an import will be temporary. Users will be required to update their password upon their initial login. |
First Name* | Required Field. |
Last Name* | Required Field. |
Access Levels | KAStrack defaults: Employee, Supervisor, Admin, Observer. Customized Access Levels can be created. Separate multiple values with a semi-colon. If a user is not assigned an Access Level, they will not have access to ANY modules. This column can be left blank if the Access Level is identified in the Registration Profile applied to the user. |
Supervisor | The supervisor’s username must be entered verbatim. Separate multiple values with a semi-colon. This column can be left blank if the Supervisor is identified in the Registration Profile applied to the user. |
Certification Role | Allows assignment of roles in the People Module. Multiple values should be separated with a semi-colon. Role names must be preceded by Company name as listed in the People Module, e.g. CompanyName RoleName. This column can be left blank if Certification Roles are identified in the Registration Profile applied to the user. |
Status | User status cannot be changed through import. All new imported accounts will automatically be Active. |
Employee ID | This is an optional field (included by default settings) that can be edited or removed by going to the Account Fields Tab in Site Settings. |
Phone | This is an optional field (included by default settings) that can be edited or removed by going to the Account Fields Tab in Site Settings. |
Address 1 | This is an optional field (included by default settings) that can be edited or removed by going to the Account Fields Tab in Site Settings. |
Address 2 | This is an optional field (included by default settings) that can be edited or removed by going to the Account Fields Tab in Site Settings. |
Registration Profile | This column is used to apply Registration Profiles to accounts. The full name of the Registration Profile must be entered. The following fields listed above can be modified through the Registration Profile: Access Levels, Supervisors, and Certification Roles. |
Custom Fields | If other custom fields have been created on the Account Fields Tab in Site Settings, they can be included as column headers in an Import. These fields may or may not be required based on their settings in the Account Fields Tab. |
To manually create a single new account, open the Create Tab on the Accounts Page in the Accounts Module. The fields that show are customizable and your organization has the ability to create any desired fields.
An asterisk indicates that the input field is a required entry. You can create new Account Fields and modify existing ones, including which Account Fields are required, on the Account Fields Tab in the Site Settings Module.
How To: Edit a Custom/Additional User Account Information Field
To edit a custom user account information field, open the Account Fields Tab in the Site Settings Module from the Main Menu.
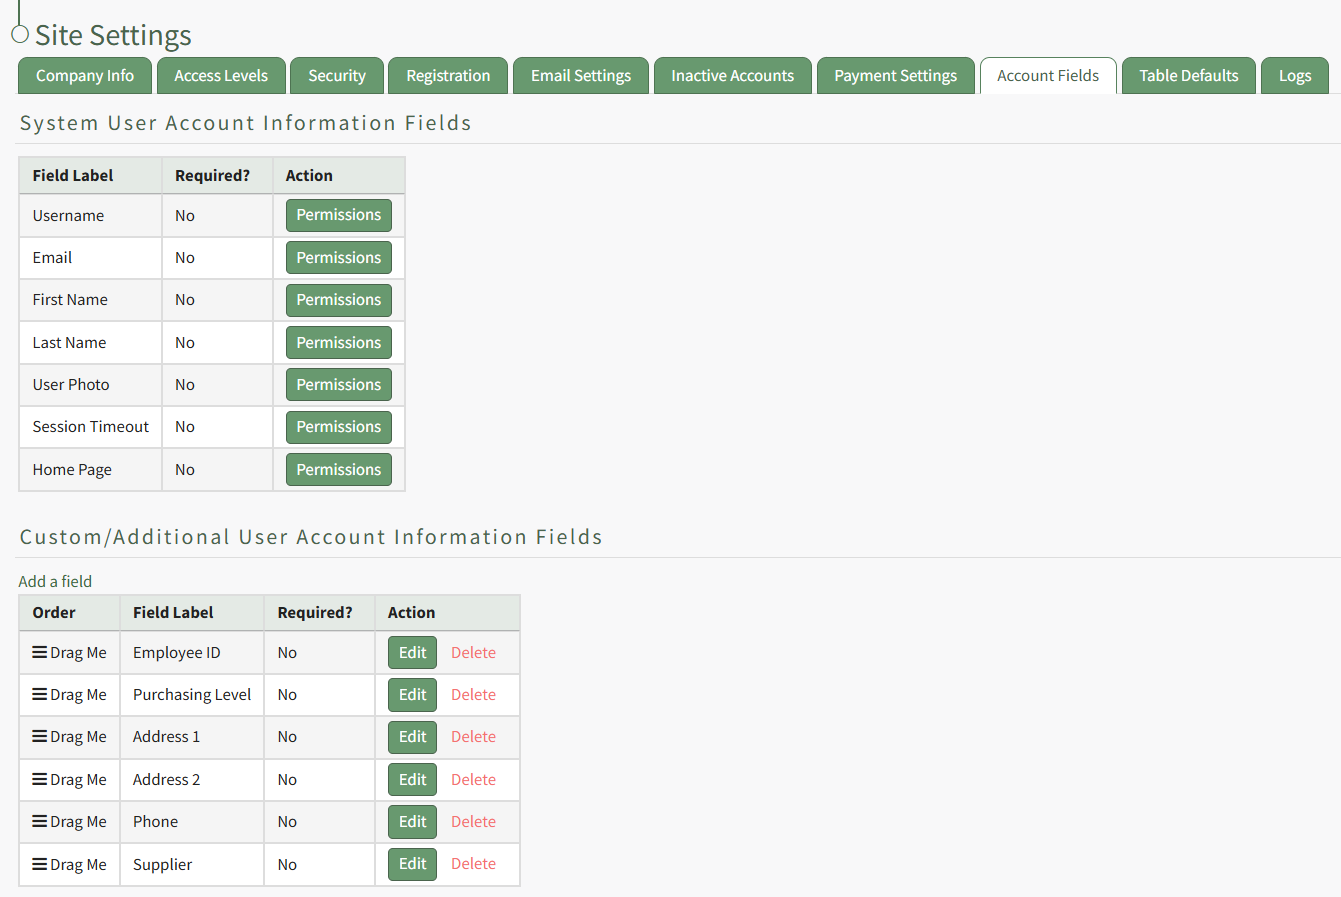
Custom Fields show in the Additional User Account Information Fields Table. Click the Edit button in the Action column of the table opening the Edit Field Modal.
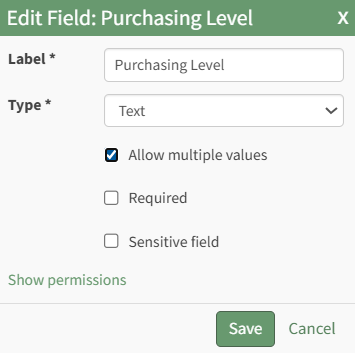
Make the desired changes and select the Save button, returning to the Account Fields Tab.
The email field can be left blank when creating a new user account. If so, KAStrack will generate a unique email address for the user, formatted like: username@sitename.kastrack.com.
If no email address is entered, a user will not be able to receive email reports/alerts, however, reports and alerts are still delivered to the user’s account. Users can access system messaging through the Notifications History Tab on the My Accounts Page in the Accounts Module. If you want to designate an email address to receive all notices sent to an account that does not have their own email address, this can be done by “Enabling Catch Missing CC” on the Settings Page of the Communications Module.
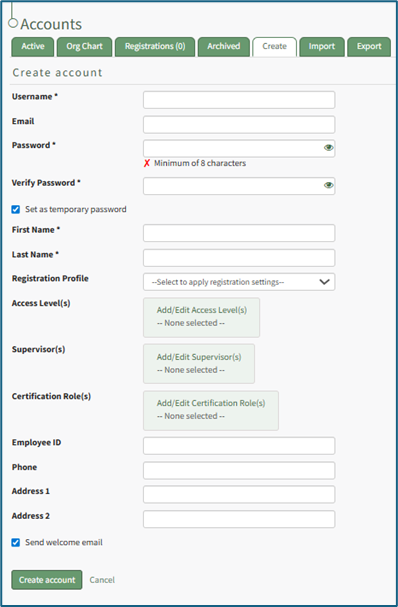
Enter the requested information for the new user.
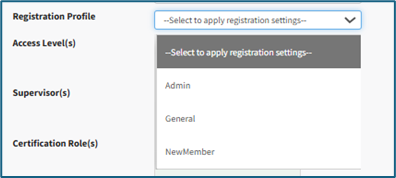
Registration profiles act as templates when creating new user accounts. Select which registration profile (listed in the registration tab of Site Settings) you would like to apply to the new user account from the dropdown menu to assign predetermined access level(s), supervisor(s), and Certification Role(s).
These fields will not populate on screen until the account is saved.
How To: Create Registration Profiles
To create a new registration profile, go to the Registration Tab in the Site Settings Module.

Click the plus icon next to the Registration Profiles header or select “Create” from the three dot (…) icon context menu. This will open the Create Registration Profile Page.
The fields used in a Registration Profile are optional. You are not required to make selections for all when generating a new profile.
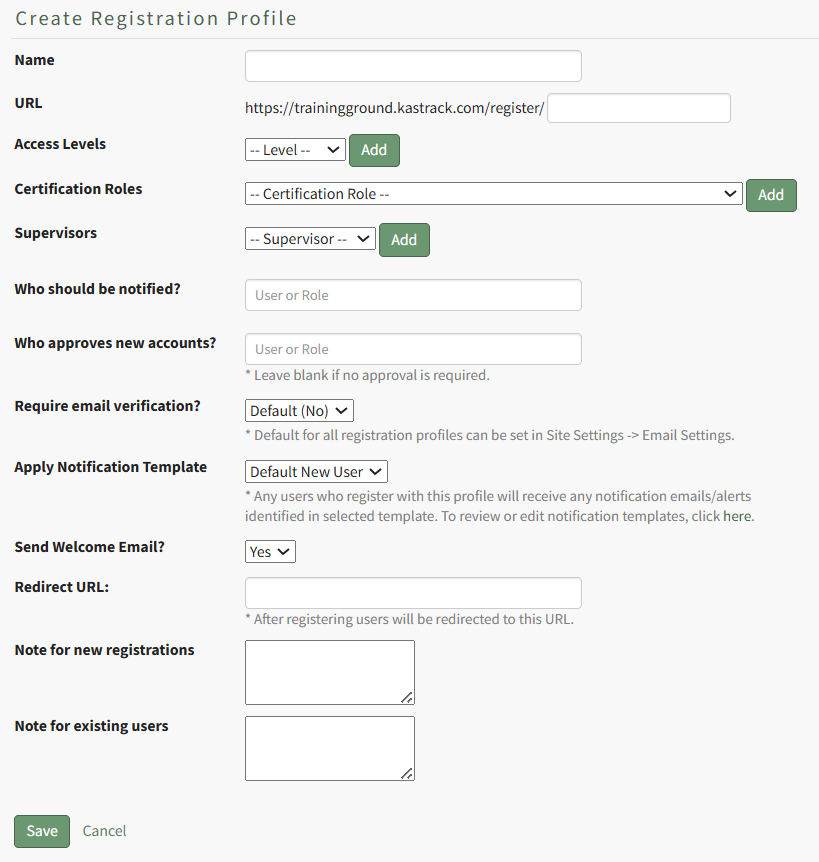
Input a name for the new registration profile, which will automatically fill in the URL link textbox.

Select any desired access level(s) for this registration profile from the dropdown menu list and click “Add”. Multiple Access Levels can be selected. The X icon to the left of the access level will remove the selection if it was made in error.
It is recommended to include at least one access level if this Registration Profile will be used to register new user accounts, as they must have an access level to see anything in KAStrack.

Select any desired Certification Role(s) for this registration profile from the dropdown menu list and click “Add”. Multiple Certification Roles can be selected. The X icon to the left of the Certification Roles will remove the selection if it was made in error.

Select any desired supervisor(s) that are to be assigned to the new accounts that register with this profile from the dropdown menu list and click “Add”. Multiple supervisors can be selected. The X icon to the left of the supervisor will remove the selection if it was made in error.

If desired, you can specify individual users and/or certification roles that are to receive notification of the new user account’s registration. When you type into the textbox, users and certification roles will show on a dropdown menu for selection. Multiple users and/or certification roles can be selected. The X icon to the left of the user / role will remove the selection if it was made in error.
If new registrations require approval, you can specify individual users and/or certification roles that are responsible for approving the new registrations. When you type into the textbox, users and certification roles will show on a dropdown menu for selection. Multiple users and/or certification roles can be selected. The X icon to the left of the user / role will remove the selection if it was made in error. Leave this field blank if no approval is required.
The default is set to not require email verification for new account generation, but you can select Yes or No from a dropdown menu. Users will then receive an email after registration asking them to verify their email address.
The default for all registration profiles can be set on the Email Settings Tab in the Site Settings Module, but the Registration Profile being created will override the default settings.
A default new user notification template is applied for all registration profiles.

Any users who register with this profile will receive notification emails/alerts that have been specified through the new user template. The Default New User Notification Template details are shown on the Notification Templates Tab on the Settings Page of the Communications Module. Clicking the word “here” will redirect the user to the Notification Template Tab where the Default New User Template can be edited or a new notification template can be created for your organization’s preferences.
How To: Edit New User Notification Templates
To edit new user notification templates, go to the Notification Templates Tab on the Settings Page of the Communications Module.
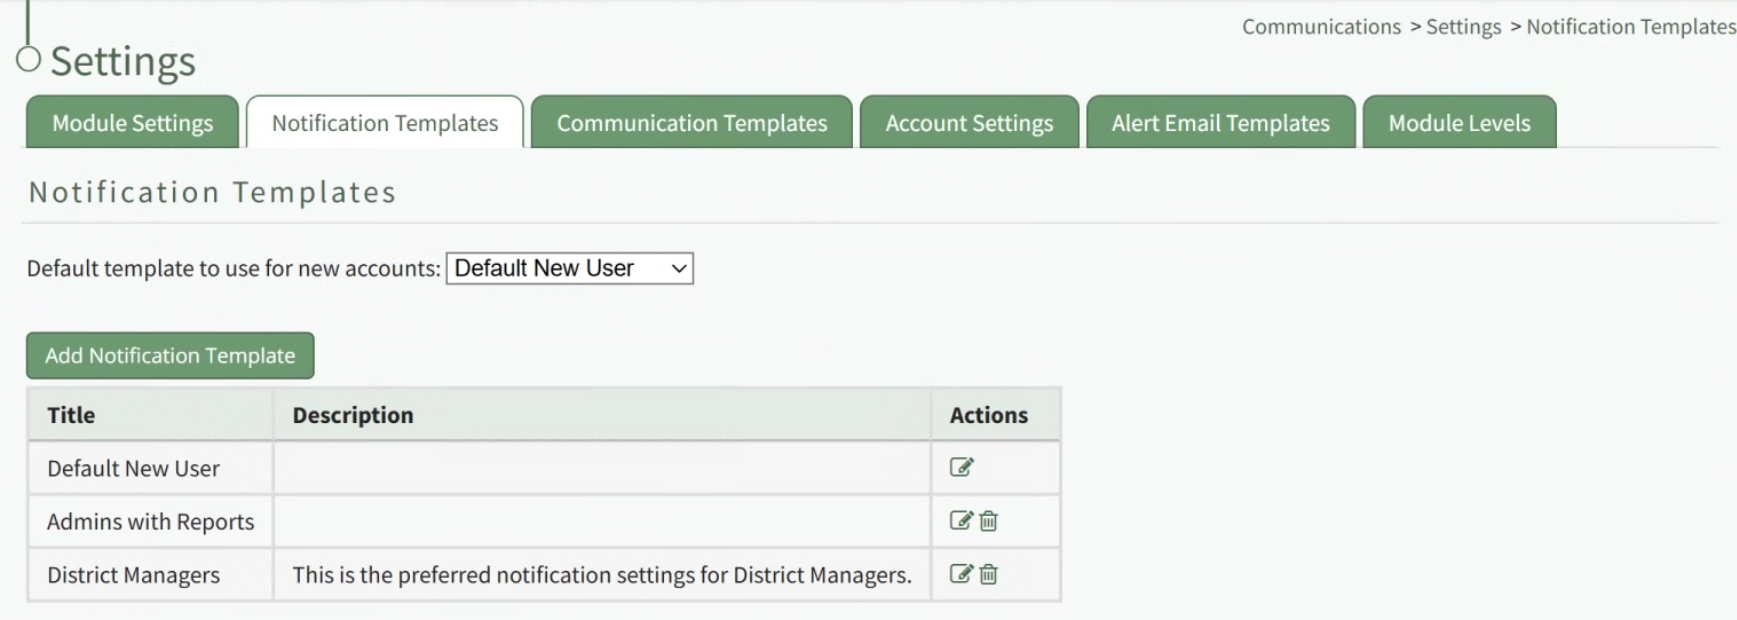
Existing templates will be shown in the Notification Template Table.
Select the edit icon in the action column of the template you wish to edit opening the Edit Notification Template Page.
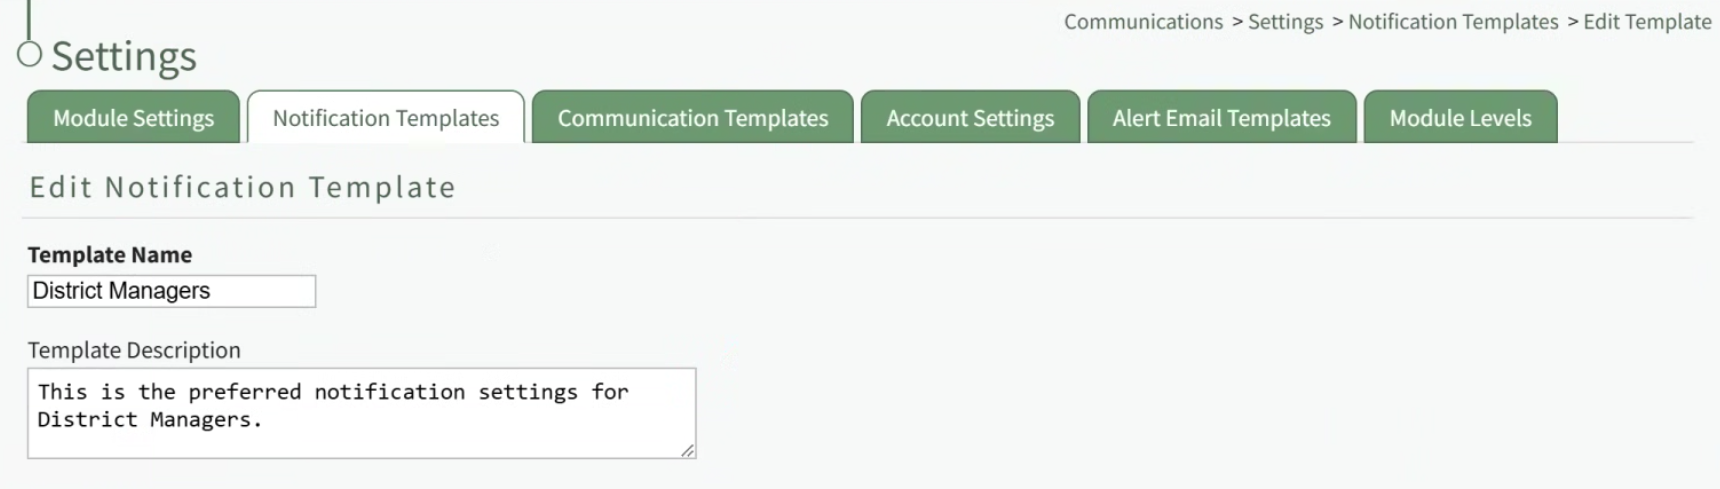
A notification template is comprised of two parts: Reports and Alerts.
Indicate the desired status for email report notifications: Not Active or Active.
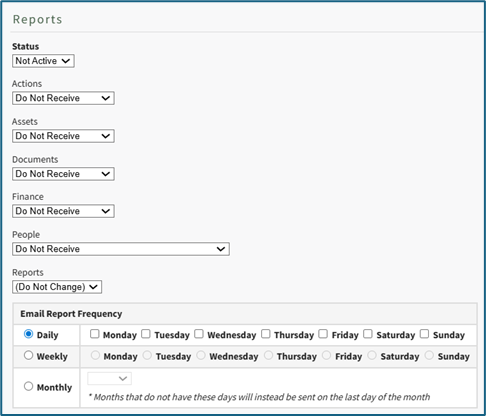
Alter the desired reports selected for each module or leave as “Do Not Receive”.
Email Report Frequency has three options: daily (or on specified days of the week), weekly (on the day of your choosing), or monthly (which requires the user to specify which numerical day of the month from a dropdown menu you wish to receive the report summary).
After setting template preferences for reports, scroll down to set template preferences for email alerts.
Alter email preferences as set by module through a dropdown menu with three options that designate when an email alert should be sent: “Real Time”, “Digest”, and “Do Not Receive”.
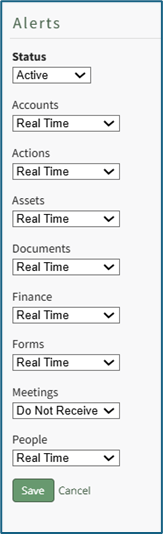
After making edits to your preferences for both Email Report and Email Alert Settings, select “Save”, returning you to the Notification Templates Tab on the Settings Page of the Communications Module.
The newly created notification template will now be shown on the Notification Template Table.
If you would like new user accounts that use this registration profile to receive a Welcome Email, select yes from the dropdown menu.
The default for all registration profiles can be set on the Email Settings Tab in the Site Settings Module, but the Registration Profile being created will override the default settings.
A redirect URL can be designated, so that any user registering with this profile will be redirected to the specified URL after registering.

Input a custom message for new registrations and a custom message for existing users if desired.
If an existing user logs in from a Registration Profile link, the access level(s), certification role(s), and supervisor(s) listed on the Registration Profile will be added to the user’s account. Any existing access levels, certification roles, and supervisors on their account are not removed.
Select “Cancel” at any time to return to the Registration Profile Tab in the Site Settings Module without saving the profile. Select the “Save” button and the new registration profile now shows on the Registration Tab in the Registration Profile Table.
Registration profiles can be enabled/disabled via a checkbox in the Registration Profile Table so that your organization has control of when this link is activated.
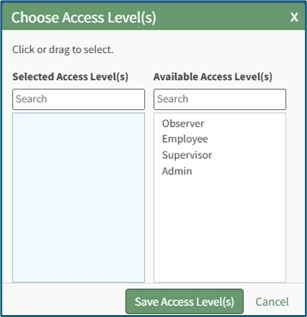
Click “Add/Edit Access Level(s)” opening the Choose Access Levels Modal.

The Modal will display two columns: Selected Access Level(s) (what has been assigned to the user) and Available Access Level(s) (what can still be assigned). Drag and drop the designations as desired or click an item to move it from its current column to the other.
Select the “Save Access Level(s)” button at the bottom of the modal to save the changes or click “Cancel” to return to Create Tab on the Accounts Page.
Click “Add/Edit Supervisor(s)” opening the Choose Supervisors Modal.

The Modal will display two columns: Selected Supervisor(s) and Available Supervisor(s). Drag and drop the designations as desired or click an item to move it from its current column to the other.
Select the “Save Supervisor(s)” button at the bottom of the modal to save the changes or click “Cancel” to return to the Create Tab on the Account Page.
Click “Add/Edit Certification Role(s) opening the Choose Certification Role(s) Modal.

The Modal will display two columns: Selected Certification Role(s) and Available Certification Role(s). Drag and drop the designations as desired or click an item to move it from its current column to the other.
Select the “Save Certification Role(s)” button at the bottom of the modal to save the changes or click “Cancel” to return to the Create Tab on the Account Page.
Select the optional “Send welcome email” checkbox to send a welcome e-mail.
Select the “Create Account” button to create the new user account or click “Cancel” to return to the Active Tab on the Accounts Page without saving changes.
No comments to display
No comments to display