Robert Test Page
This is a code block:
Reports Module Home Page Icon Explanations | ||
Icon | Explanation | |
| The star icon stars a report (marking the report as important). This acts as an additional filter, as you can filter by “Starred Only” on the Reports Home Page. | |
| The excel icon will download the report in an excel (.xlsx) file to your personal device. | |
| The download icon opens the Download Modal which allows an individual to select from seven different formats to download the report from a drop-down menu. Possible download formats are listed to the right. WIKI LINK HOW TO: DOWNLOAD A REPORT | Comma Separated Values (.csv) |
Tab Separated Values (.tsv) | ||
Other Separated Values (.txt) | ||
Open Document Format (.ods) | ||
Excel 97 (.xls) | ||
Excel 2007 and later (.xlsx) | ||
| The chart icon opens the Chart Wizard Modal, allowing an individual to create a chart from the data generated by the report. WIKI LINK HOW TO: CREATE A CHART | |
Reports Module Home Page Icon Explanations | ||
Icon | Explanation | |
| The star icon stars a report (marking the report as important). This acts as an additional filter, as you can filter by “Starred Only” on the Reports Home Page. | |
| The excel icon will download the report in an excel (.xlsx) file to your personal device. | |
| The download icon opens the Download Modal which allows an individual to select from seven different formats to download the report from a dropdown menu. Possible download formats are listed to the right. WIKI LINK HOW TO: DOWNLOAD A REPORT | Comma Separated Values (.csv) |
Tab Separated Values (.tsv) | ||
Other Separated Values (.txt) | ||
Open Document Format (.ods) | ||
Excel 97 (.xls) | ||
Excel 2007 and later (.xlsx) | ||
| The chart icon opens the Chart Wizard Modal, allowing an individual to create a chart from the data generated by the report. WIKI LINK HOW TO: CREATE A CHART | |
Title | Title | ||
#!/bin/sh

errors=""

sudo rsync -avh --delete --no-o --no-g /home/xralf/audio /media/extdevice/rsync_backups/
if [ "$?" -eq "0" ]
then
  echo "no errors in audio"
else
  errors="${errors}error in audio\n"
fi

sudo rsync -avh --delete --no-o --no-g /home/xralf/books /media/extdevice/rsync_backups/
if [ "$?" -eq "0" ]
then
  echo "no errors in books"
else
  errors="${errors}error in books\n"
fi

sudo rsync -avh --delete --no-o --no-g /home/xralf/source_code /media/extdevice/rsync_backups/
if [ "$?" -eq "0" ]
then
  echo "no errors in source_code"
else
  errors="${errors}error in source_code\n"
fi

# more such directories with this code pattern

echo ${errors}
Calendar Module
The Calendar Module is a Gregorian calendar in KAStrack where meetings and events can be created and shared. The Document and Assets Modules integrate with the Calendar Module, showing task schedules and documents that need review for continued suitability.
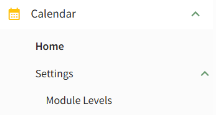
The Calendar Module is comprised of two pages, the Home Page and the Settings Page. Both pages can be accessed through the Main Menu on the left-hand side of the screen.
Calendar Module – Email Alerts
There are no email alerts associated with the Calendar Module.
Home Page
The Home Page displays the Gregorian calendar showing an All Events Filter. A default all events filter displays all meetings / events, assets and documents deadlines. Filters can be created and customized to present different views. WIKI LINK HOW TO: CREATE A NEW CALENDAR FILTER

The calendar can be shown in a monthly, weekly, daily, or schedule view. The schedule view presents calendar data in a continuous, vertically scrolling list organized by date and time. Each event or deadline is displayed in sequential order. Unlike the monthly, weekly, or daily grid layouts, the schedule view emphasizes a linear timeline of upcoming activities, allowing users to quickly reference or edit events without navigating between calendar pages.
Understanding the Calendar Module Home Page
There are several features on the Calendar Home Page that allow for customization explained in the table below.
Understanding the Calendar Home Page | ||
Button / Icon | Associated Action | |
| Selecting the “Today” button will return the calendar view to the current day / month. For the month view, the current date will be indicated by a blue rectangle with the date inside. For the week view, the current day is shown in blue. |
|
| Clicking the left arrow will change the calendar view to the previous month / week / day. Clicking the right arrow will change the calendar view to the next month / week / day. | |
| The default All events filter restores the Calendar to showing all available events to the user, removing any user-applied filters. | |
| Selecting the “Settings” icon will open the Settings Modal. This allows a user to customize the first day of the week on the calendar between Saturday, Sunday, and Monday. |
|
| The View dropdown menu allows a user to select between a daily, weekly, monthly, or schedule calendar view. | |
| Selecting the “New Event” button on the calendar Home Page opens the New Event Modal. WIKI LINK HOW TO: CREATE A NEW CALENDAR EVENT |
|
| Selecting either of the two buttons on the Home Page opens the Save Filters Selection Modal. WIKI LINK HOW TO: CREATE A NEW CALENDAR FILTER |
|
| Selecting the Manage icon allows a user to edit, delete and organize the different calendar filters created. |
|


Settings Page
The Settings Page of the Calendar Module can be accessed from the Main Menu. It automatically opens to the Module Level Tab showing the different module levels created for the Calendar Module and the permissions that have been granted to each.
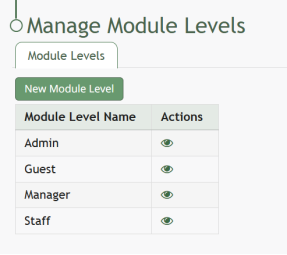
There are four base Module Levels with default permissions in the Calendar Module that cannot be altered by the user.
Calendar Module Module Levels and Permissions | |
Module Level | Permissions |
Admin | Manage Roles (add / view / edit / delete roles, assign hidden roles, role permissions), Manage Permissions (view / delete permission, list manage permissions) |
Guest | None |
Manager | None |
Staff | None |
Customized Module Levels can be created. WIKI LINK HOW TO: CREATE A NEW MODULE LEVEL
Module Level Customization Icons | |
Icon | Explanation |
| The eyeball icon allows you to view users assigned to the module level as well as the permissions assigned to them. |
| The bulleted list icon allows you to assign permissions to customized module levels. |
| The pencil icon opens the Edit Module Level Modal. |
| The trashcan icon opens the Delete Module Level Confirmation Modal. |
How To: Create a New Calendar Event
To create a new calendar event, open the Home Page of the Calendar Module.

Select the “New Event” button on the left-hand side above the mini-monthly calendar view.

This opens the New Event Modal.

Input the title of the new event.
Select whether the new event is an event or meeting. Note: The selected value will be indicated by green text and a lightly filled background.
Select the calendar icon in the date field, opening a calendar modal. Select the date of the meeting/event.

Input a start and end time. Note: The time zone is indicated above the end time.
Select the checkbox if the meeting / event takes place all day.

Use the dropdown menu to indicate if the meeting/event does not repeat, repeats daily / weekly / monthly / yearly, or every weekday.
Input a meeting / event description, location, and include a URL Link if relevant.
The meeting / event can be shared by selecting an individual, an access level, or a certification role. Users selected here will then be able to see the meeting / event on their Calendar,
Select the “Create Event” button, and the event will now show on the calendar.
How To: Create a New Calendar Filter
The Calendar Home Page has one default filter, All Events, that includes all meetings, events, assets, and documents available to the user on the calendar. The default filter shows below the Calander header.

Making any changes from the current view of the filter you are currently using will allow you to save a new filter. Examples of changes that can be made include de-selecting a filter checkbox below the mini-month calendar view or by clicking the filter icon to the right of the Events Calendar and de-selecting options, such as Meetings Shared With Me.

Select the “+ Save Filters” button to create a new calendar filter, opening the Save Filters Selection Modal. Note: You can also select the “+” icon to the right of the existing calendar filters to open the Save Filters Selection Modal.

Select the “Confirm” button, and the new filter view now shows on the Home Page.

How To: Edit a Calendar Filters
To edit a calendar filter, go to the Home Page of the Calendar Module. All existing filters show in a horizontal row under the calendar header.

Select the edit icon above the calendar. The edit icon is located on the far right of the horizontal row of existing filters.
Filter Icon Explanations | |
Icons | Explanations |
| Selecting the edit icon will open the Edit Saved Filters Modal, where filters can be accessed for editing or deletion. |
| The pencil icon shows on the Edit Saved Filters Modal. Selecting it will allow an individual to edit the filter name. |
| The trashcan icon shows on the Edit Saved Filters Modal. Selecting it will allow an individual to delete the filter. |
| The drag and drop icon shows on the Edit Saved Filters Modal. Selecting it will allow an individual to drag and drop the filters into their preferred order that will impact the order shown on the calendar. |
The edit icon opens the Edit Saved Filter Modal.

Selecting the pencil icon allows for changes to be made to the filter name.

Make the desired changes to the filter name, and then select the check mark to save the edits.
Click “Close” to return to the calendar Home Page.
How to: Delete a Calendar Filter
To delete a calendar filter, go to the Home Page of the Calendar Module. All existing filters show in a horizontal row under the calendar header.

Select the edit icon above the calendar. The edit filter icon is located on the far right of the horizontal row of existing filters.
Filter Icon Explanations | |
Icons | Explanations |
| Selecting the edit filter icon will open the Edit Saved Filters Modal, where filters can be accessed for editing or deletion. |
| The pencil icon shows on the Edit Saved Filters Modal. Selecting it will allow an individual to edit the filter name. |
| The trashcan icon shows on the Edit Saved Filters Modal. Selecting it will allow an individual to delete the filter. |
| The drag and drop icon shows on the Edit Saved Filters Modal. Selecting it will allow an individual to drag and drop the filters into their preferred order that will impact the order shown on the calendar. |
The edit filter icon opens the Edit Saved Filter Modal.

Selecting the trashcan icon opens the Delete Saved Filter Confirmation Modal.

The modal states, “Are you sure you want to delete (Filter Name)?”
Click the “Confirm” button to delete the filter and return to the calendar Home Page.
How To: Create a New Module Level in the Calendar Module
To create a customizable module level in the Calendar Module, go to the Module Level Tab on the Settings Page.

Select the “New Module Level” button opening the New Module Level Modal.
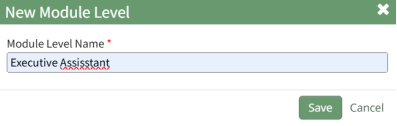
Input the new Module Level Name.
Select “Save and the new Module level will show on the Module Level Table.

Users can select which permissions are allowed for a customized module levels.
Module Level Customization Icons | |
Icon | Explanation |
| The eyeball icon allows you to view users assigned to the module level as well as the permissions assigned to them. |
| The bulleted list icon allows you to assign permissions to customized module levels. |
| The pencil icon opens the Edit Module Level Modal. |
| The trashcan icon opens the Delete Module Level Confirmation Modal. |
Select the Permissions icon to assign permissions to the new Module Level within the Calendar Module by selecting the appropriate checkboxes.

Select “Save” and the permissions are now assigned to the Module Level.
Note: Access levels for all modules can also be managed in the Site Settings Module on the Access Levels Tab.
Converted to HTML with WordToHTML.net | Document Converter for Windows
No comments to display
No comments to display