My Accounts Page: Account Info Tab
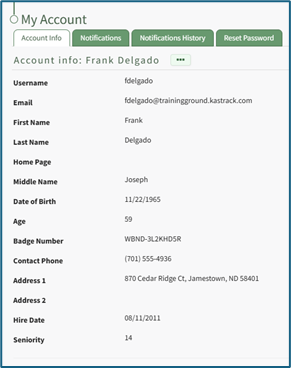
The Account Info Tab on the My Accounts Page displays a user’s personal information. Default fields include: Username, Email, First Name, Last Name, Home Page, Employee ID, Phone Number, Address 1, and Address 2. Other Custom Fields may show depending on settings designated in the Account Fields Tab of the Site Settings Module.
The link https://[INSERT YOUR COMPANY'S DOMAIN NAME].kastrack.com/user?id=me can be provided to any user and will take them directly to their My Account Page.
How To: Add a Custom/Additional User Account Information Field
To add a user account information field, open the Account Fields Tab in the Site Settings Module from the Main Menu.
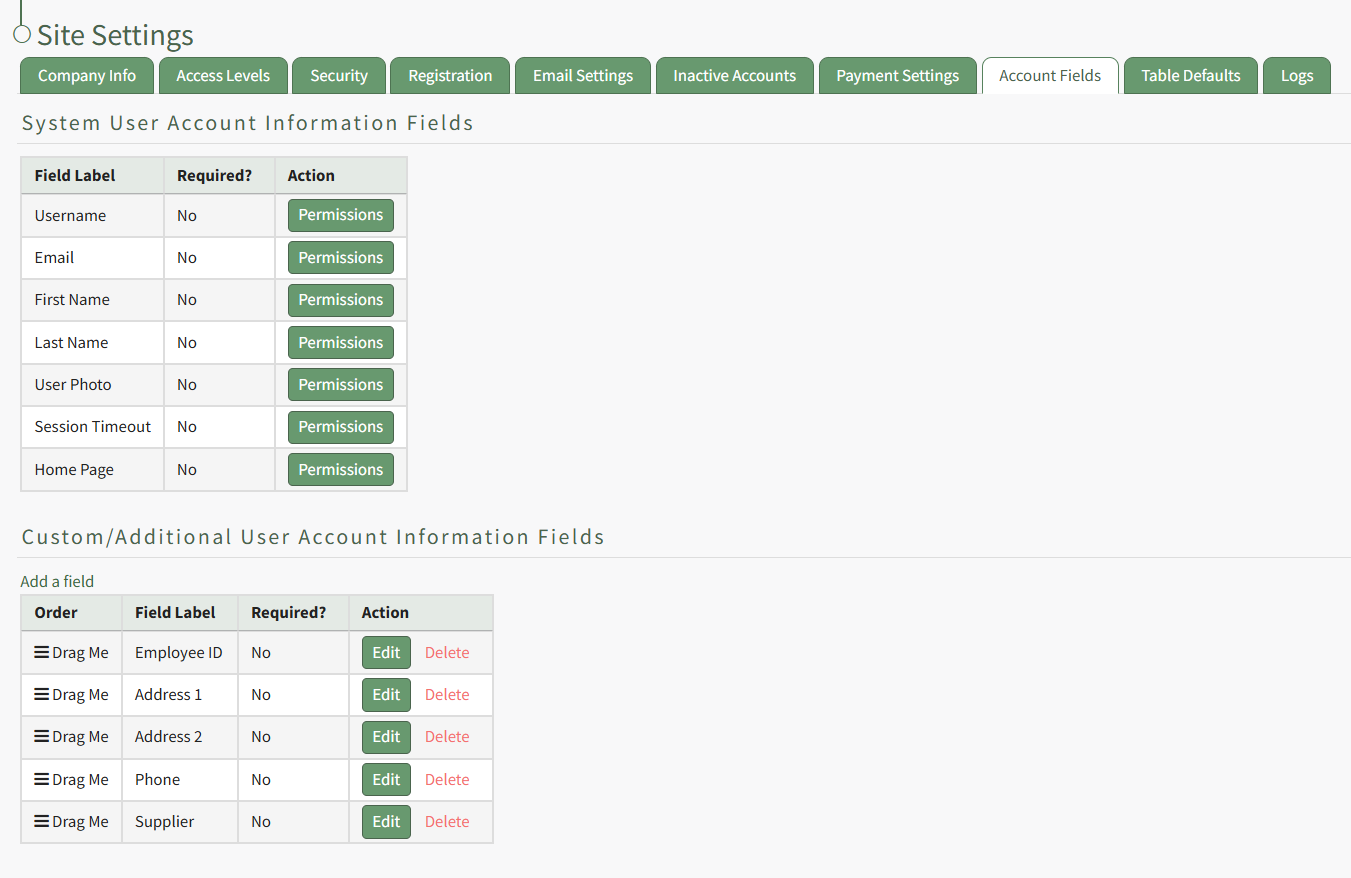
Click the "Add a Field" clickable link above the Custom / Additional User Account Information Fields opening the Add Field Modal.
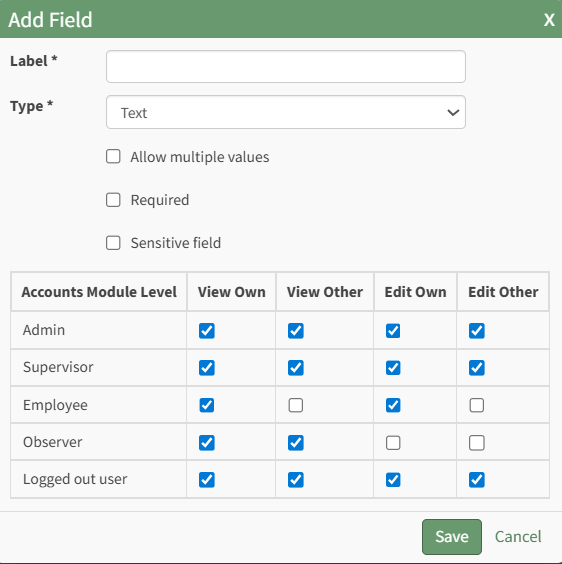
Input the label for the field.
Select the field type (text or email) from the dropdown menu.
Selecting the checkbox enables customization to "Allow multiple values," make the field "Required," or make it a "Sensitive Field."
Designating the field as a "Sensitive Field" allows an extra step in form security when integrating these fields within the Form module. The Form Designer must explicitly choose when they wish to use a sensitive field.
The Permissions Table determines who can view / edit their own and other user's fields. Selecting the checkbox gives the individual the specified permission. Deselecting the checkbox removed the permission.
Select the "Save" button and the custom field now shows in the table.
Use the Drag Me icon to drag and drop the field into your desired position of choice.
At the bottom of the Account Info Page, comment channels allow an individual to view or generate comments from/to their supervisors or other users added to the channels.
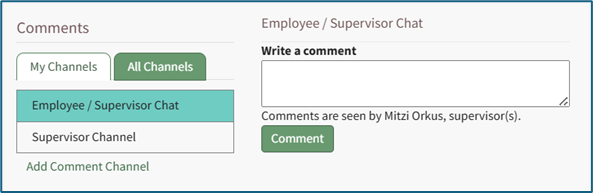
My Channels Explanation
The Accounts Module has its own communication feature referred to as Channels that allows for comments to be sent between individuals, their supervisors, and/or other accounts and certification roles. A date and time stamp is assigned to each comment as it is sent. Channels can be accessed at the bottom of the Account Info: (User Name) Page on the Account Info Tab of the Accounts. Module.
Channels are divided into two tabs: My Channels and All Channels. The My Channels Tab will list all comment channels that an individual has access to.
The All Channels Tab will list all comment channels. The Supervisor Chanel is a default channel that allows comments to be made that are only accessible by an individual’s supervisors. If an individual does not have access to the channel the statement, “You do not have permission to view this channel because you are not a participant,” will show in place of the comment textbox.

Account Info Tab Context Menu Explanations
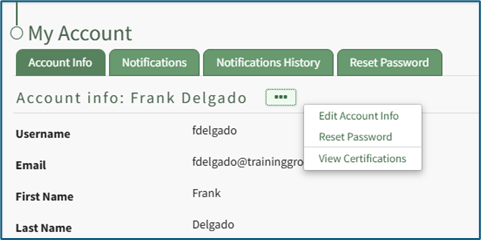
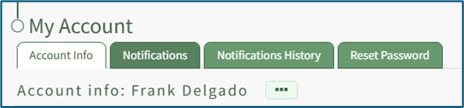
To manage your personal account information, click on the three dot (…) icon to the right of the Account Info: (User Name) header to open a context menu with the options: Edit Account Info, Reset Password, and View Certifications (will only show if the individual has access to the People Module).
Account Info Tab Context Menu Explanations | |
Option | Explanation |
Edit Account Info | Selecting “Edit Account Info” from the context menu will open the Edit Account Info: (User Name) Page under the Account Info Tab. How To: Edit Your Personal Account InfoTo edit your own account information, select the Account Info Tab on the My Accounts Page of the Accounts Module.
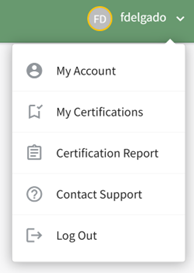
The Account Info Tab can also be accessed from the Main Menu or by clicking your username in the top right corner of the site and then choosing My Account.
When editing an existing account, only the username or the email fields can be changed at the same time. Click the three dot (…) icon to the right of the Account info: (User Name) header to open the context menu. Select “Edit Account Info”.
This opens the Edit Account Info Page on the Account Info Tab. An account profile picture can be uploaded through the User Photo field. The image can be cropped as part of the upload process. It is recommended to upload an image less than 5MB. By default, a user logging in to KAStrack will be taken to the Dashboard Module. The Home Page field allows a user to designate the URL within KAStrack of their preference. Enter the page URL in this field if you wish to start on a different page than the Dashboard. For example, if you’d like to start in the Documents Module after login, set Home Page to: https://sitename.kastrack.com/r/documents. As a shortcut, you can also simply use the part after the .com, entering /r/documents in the field. After making changes to the account information, select “Save” and the changes made will be reflected on the Account Info: (User Name) Page. Click “Cancel” and return to the Account Info: (User Name) Page without any information being altered. |
Reset Password | Selecting “Reset Password” from the context menu will open the Reset Password Tab on the My Account Page in the Account Module. How To: Reset Your Own PasswordTo reset your own password, select the Reset Password Tab on the My Accounts Page of the Accounts Module. The Account Info Tab can also be accessed from the Main Menu.
Enter the required following information: your current password, your new password, and the new password a second time to confirm. Ensure your new password meets all displayed security requirements, which are listed under the Enter new password textbox.
When the password security requirement is met, the “X” will change to a “Check”. Click the “Save” button to change your password. Click “Cancel” and you will return to the Account Info Tab on the My Account Page. |
View Certifications | Selecting “View Certifications” from the context menu will open the My Certifications Tab on the User: (User Name) Page in the People Module If “View Certificates” does not show on the context menu, it’s likely that user does not have access to the People Module. |


No comments to display
No comments to display