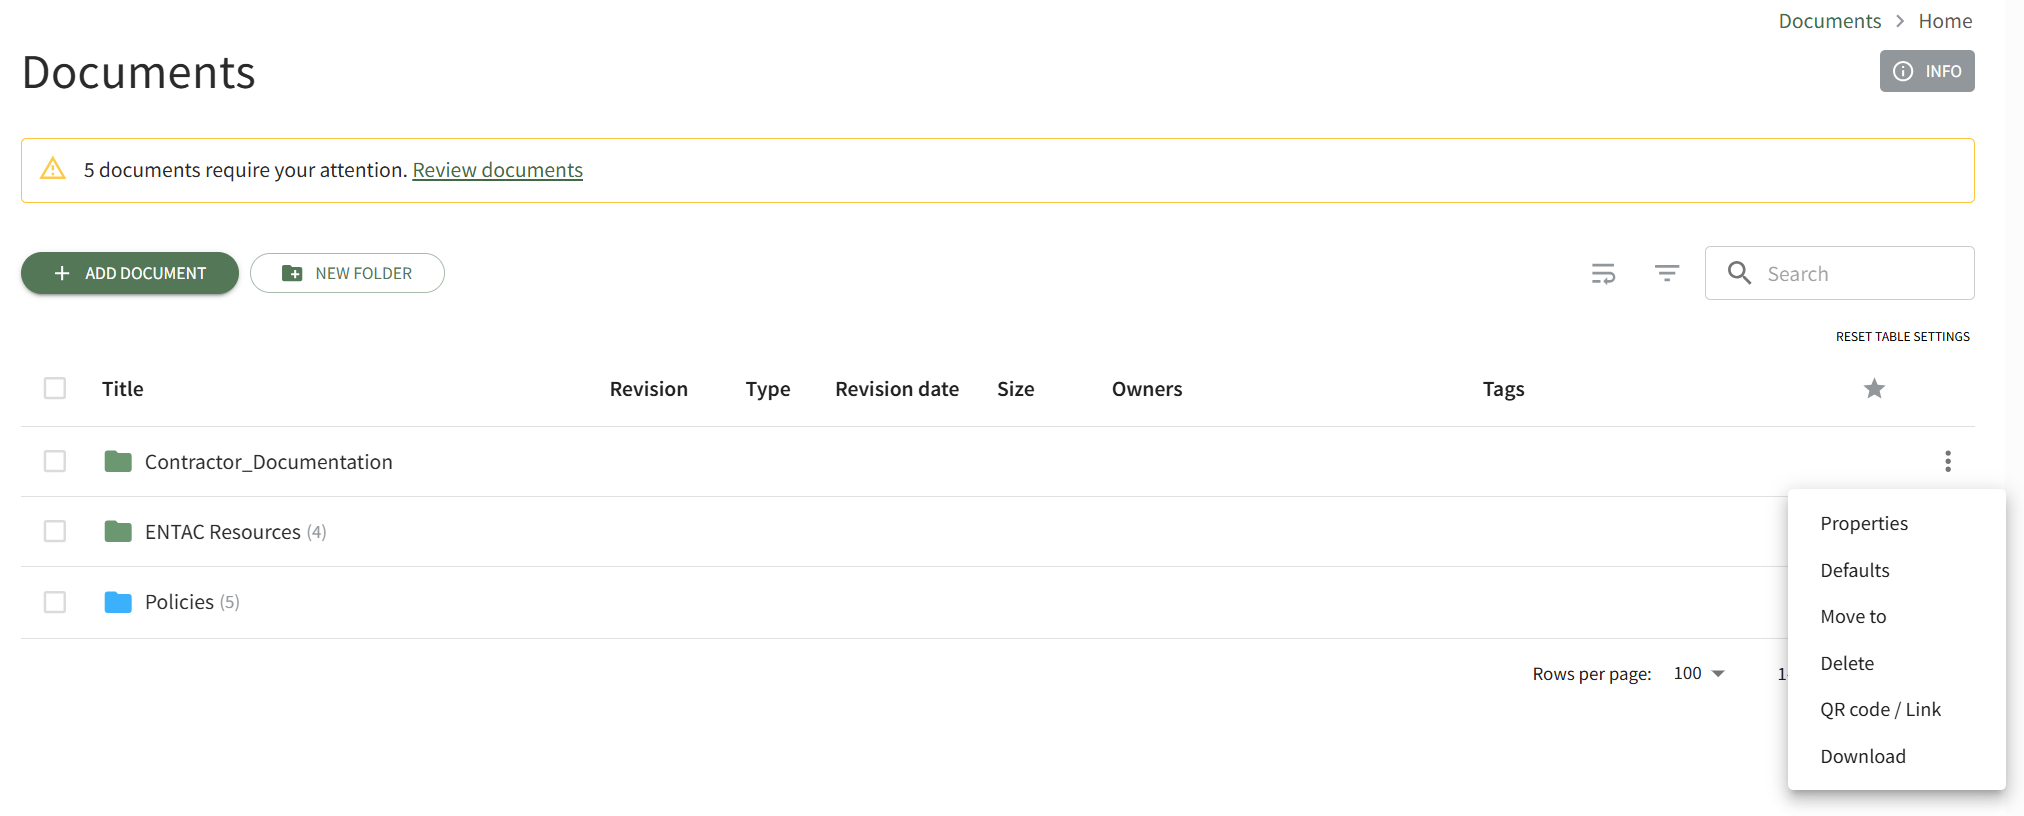
Folder and File Context Menu Explanations
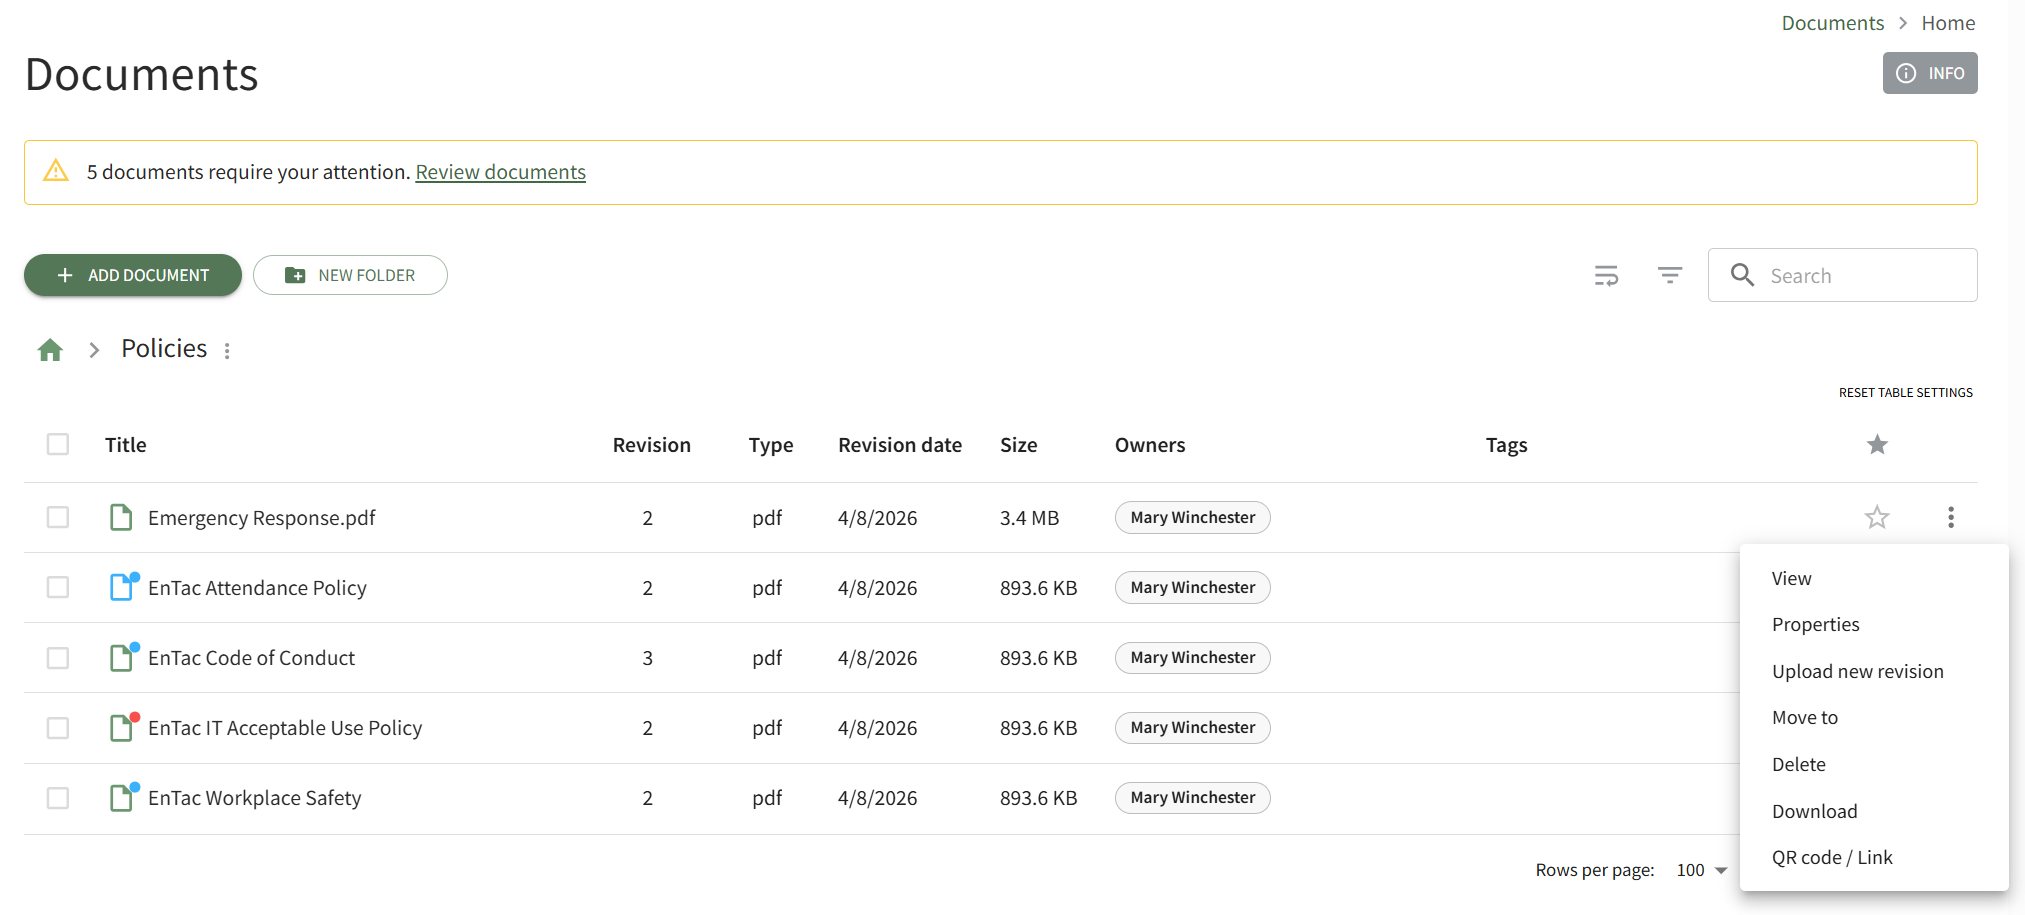
Each folder and file within the Documents Module will have a context menu associated with it (accessed via the verticle three dot icon) that links to actions. The options available on a specified folder's context menu are explained in the table below.
Folder Context Menu Option Explanations | |
Option | Explanation |
Properties | Selecting Properties from the context menu opens the Folder Properties Modal, allowing the user to update the folder title, tags, and establish if the folder should be set as pubic. |
Defaults | “Defaults” is a dropdown menu option for Folders only. Clicking “Defaults” will open the Defaults for New Documents Modal, which allows the user to make customized settings for bulk uploads. The user enters a title pre-fix instead of a title for bulk uploads. |
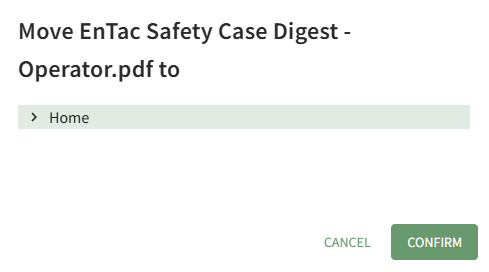
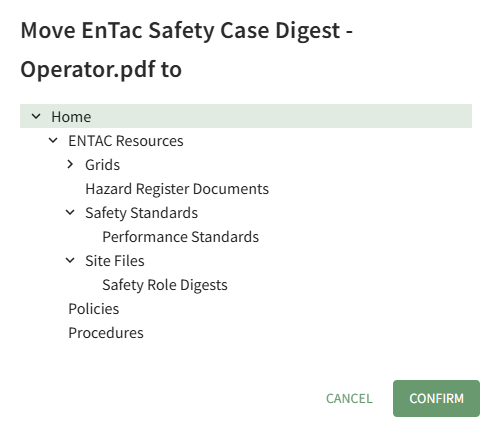
Move To | Selecting Move To from the context menu opens a modal that allows the user to move a folder from its current location to another. How To: Move a File/FolderTo move a file/folder in the Documents Module, open the Documents Home Page from the Main Menu and navigate the repository to the file/folder you want to move.
Click the vertical three-dot icon to the right of the file you wish to move, opening the file's context menu. Select Move To, opening the Move To Modal.
The right arrow indicates a collapsed folder. Click it to expand and see all the subfolders contained within it. The down arrow indicates an expanded folder. Click it to collapse the parent folder and remove all subfolders from view.
Select the folder you wish to move the file/folder to, then press the Confirm button. A pop-up confirms that the file was relocated. |
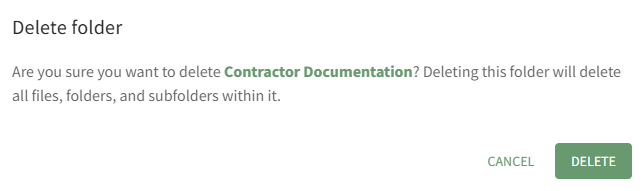
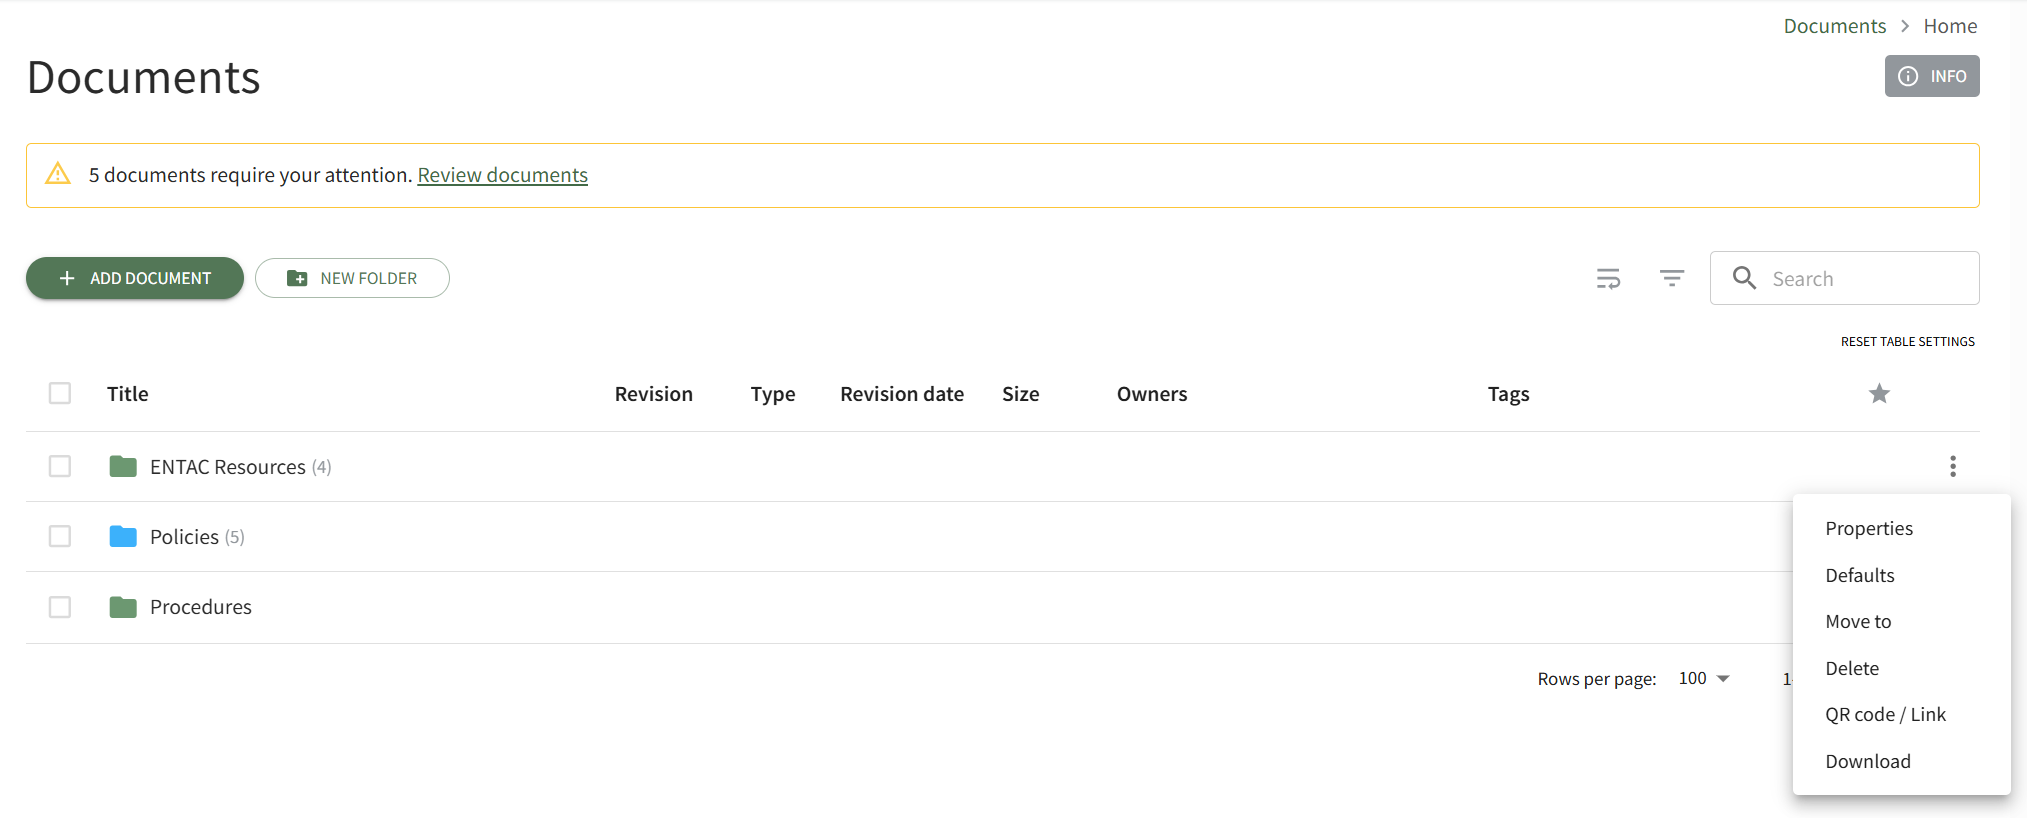
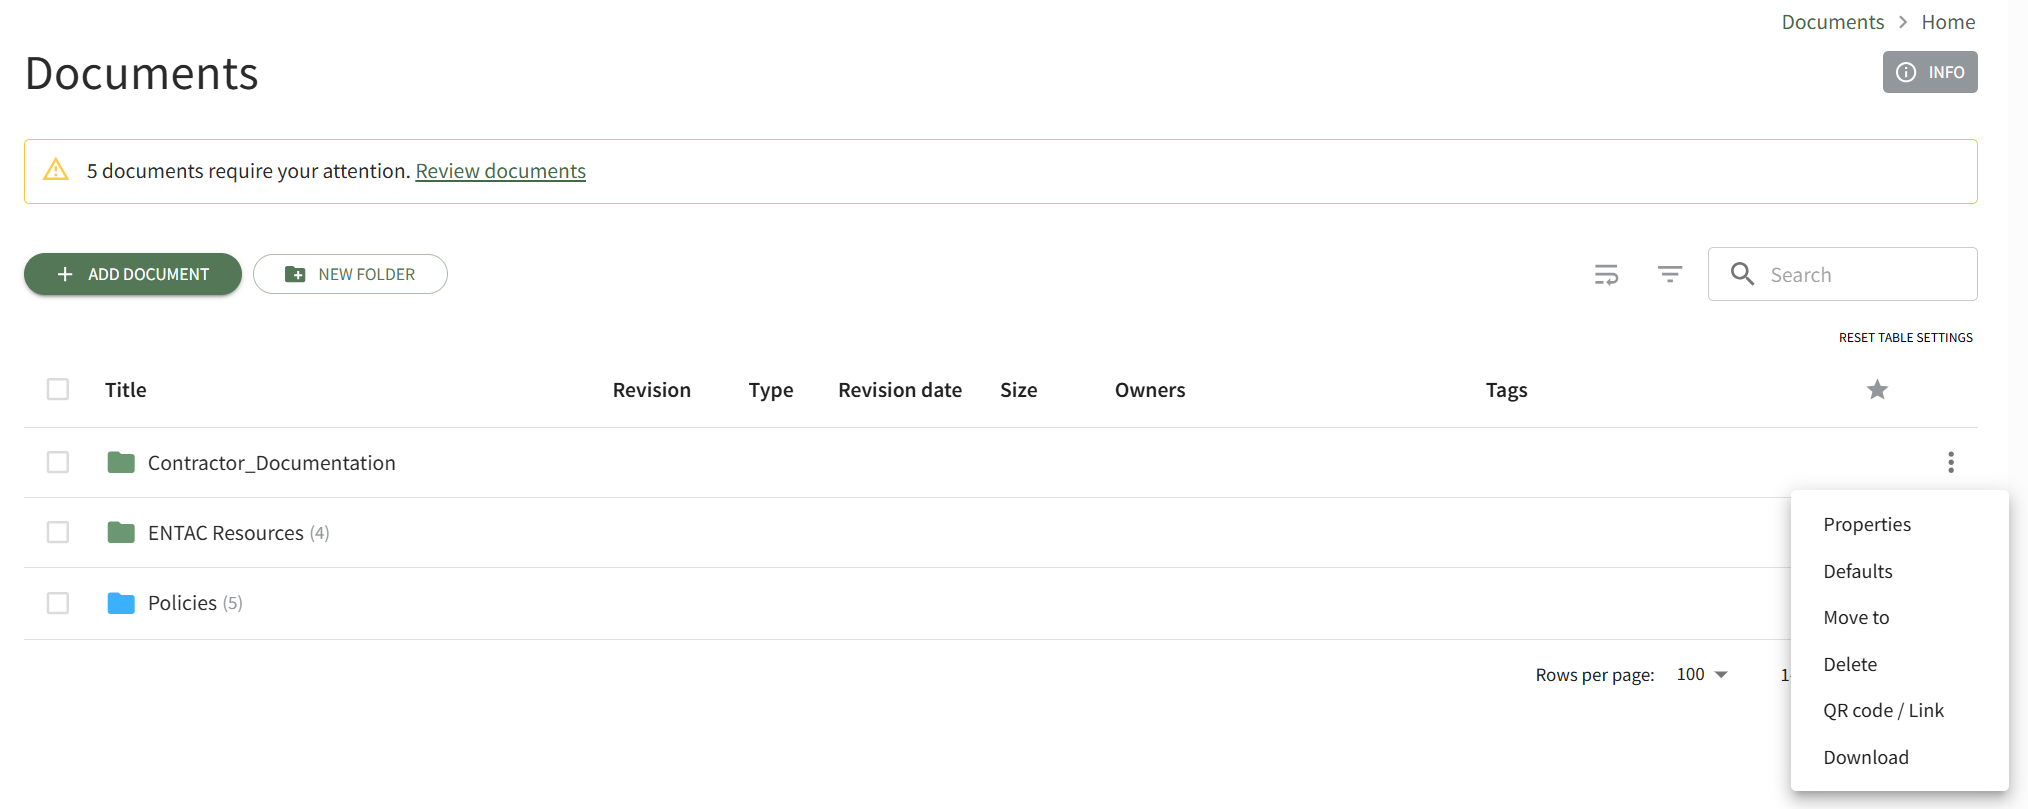
Delete | Selecting Delete from the context menu opens a Delete Folder modal that will ask the user to confirm that they want to delete the folder, including all the files, folders, and subfolders stored in the parent folder. How To: Delete a FolderTo delete a folder in the Documents Module, open the Documents Home Page from the Main Menu and navigate the repository to the folder you wish to delete. Click the vertical three-dot icon to the right of the folder opening the folder's context menu. Select the Delete option.
This opens the Deletion Confirmation Modal.
The modal states, "Are you sure you want to delete FOLDER NAME? Deleting this folder will delete all files, folders, and subfolders within it." Click the Delete button. The folder and its contents have now been deleted from the Documents Module. |
QR Code / Link | Selecting “QR Code / Link” from the context menu opens the Direct Access Modal for individual folders.
The user can use either the URL or QR Code to share access to the folders selected. Access will be given to internal users who have permission to view the folder. Access will be given to external users if the folder is public. How To: Access A Folder's QR Code / LinkTo access a QR Code/Link for a folder in the Documents Module, open the Document Module Home Page from the Main Menu and navigate your repository to access the desired folder. Access will only be given to users who have permission to view the folder unless the folder has been indicated as public. Click the vertical three-dot icon to the far right of the folder, opening the folder's context menu. Select the QR Code/Link option.
This opens the folder's Direct Access Modal.
From this modal, you can copy the URL Link and/or copy the QR code. Clicking the Create Shortlink button will generate a shortened URL link for file and display it on the modal. |
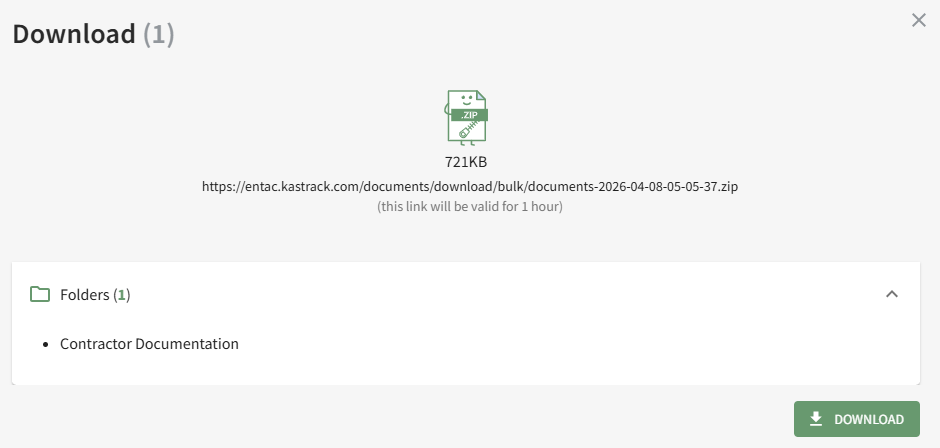
Download | Selecting Download on the context menu opens the Download Modal, allowing the user to download all of the files located in the folder selected and the subfolders held within.
Selecting The download is not accessible to those without permission to access it. Restrictive tags can also be used to limit access and cannot be bypassed by a user. How To: Download a FolderTo download the files contained in a folder in the Documents Module, open the Documents Home Page from the Main Menu and navigate your respository to the desired folder. Select the vertical three-dot icon to the far right of the folder opening the context menu and select the Download option.
This opens the Download Modal.
Click the Download button and zip file will be downloaded to your personal device. |
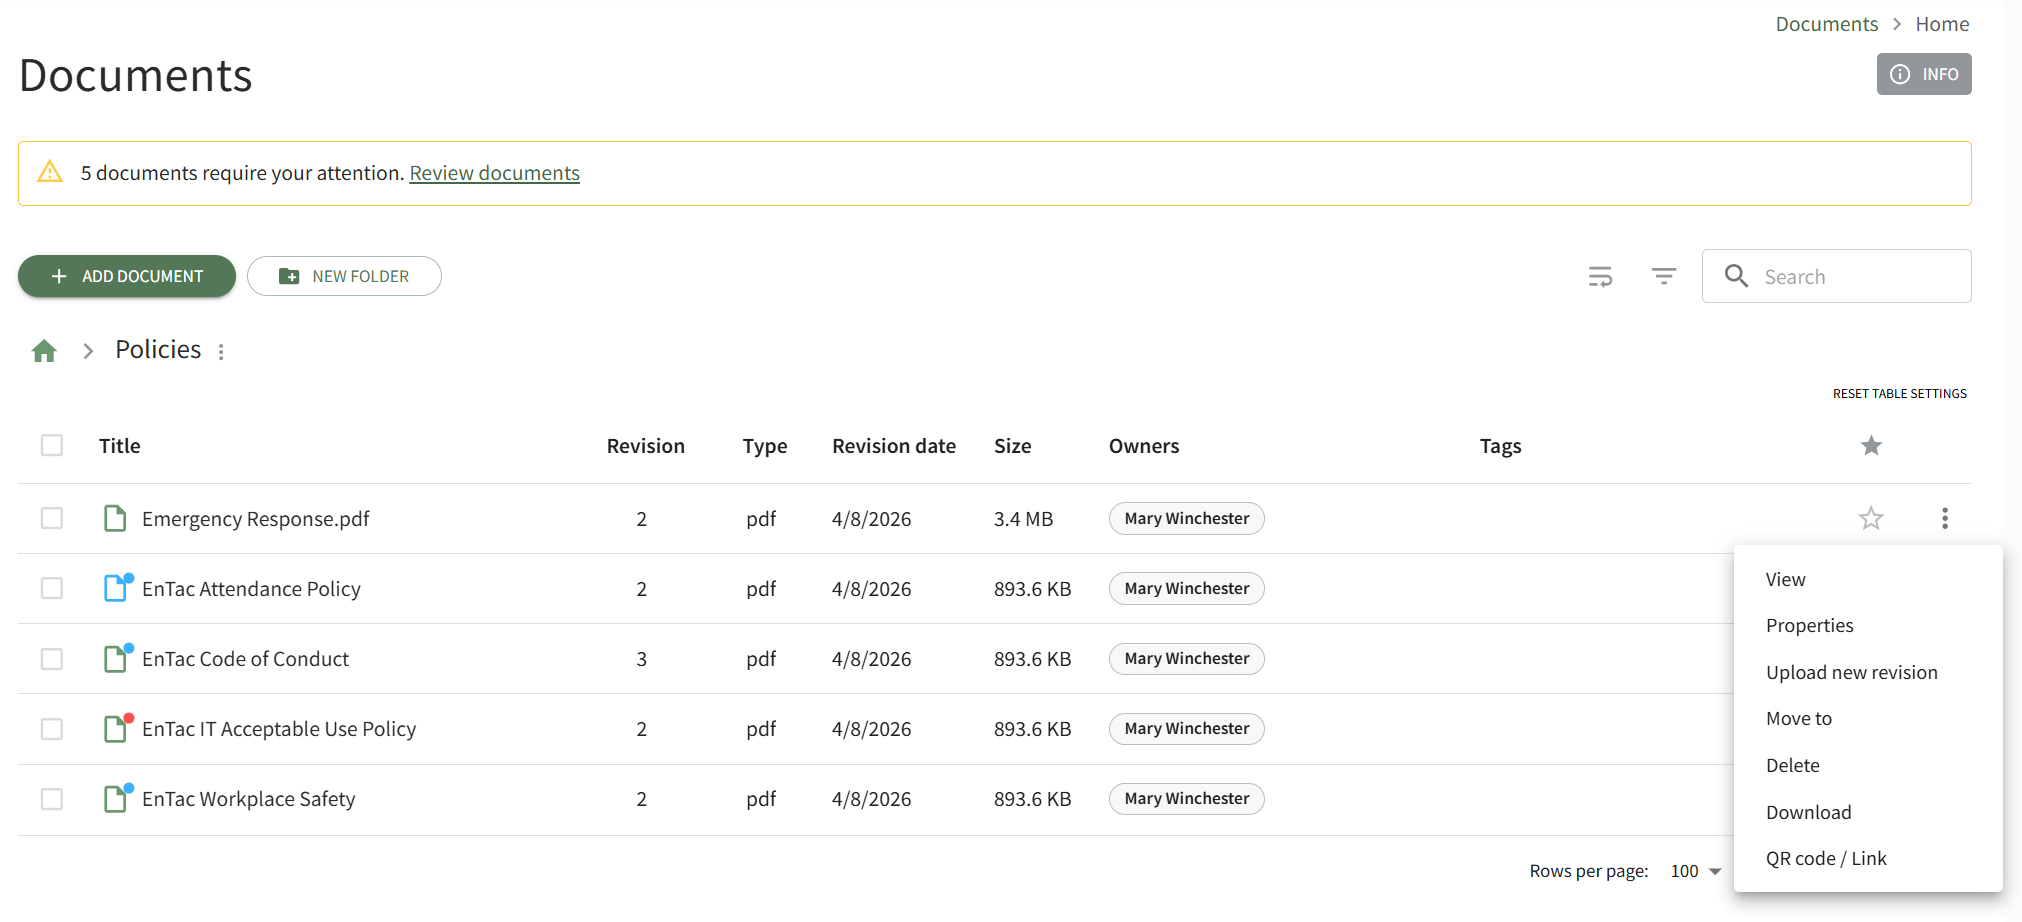


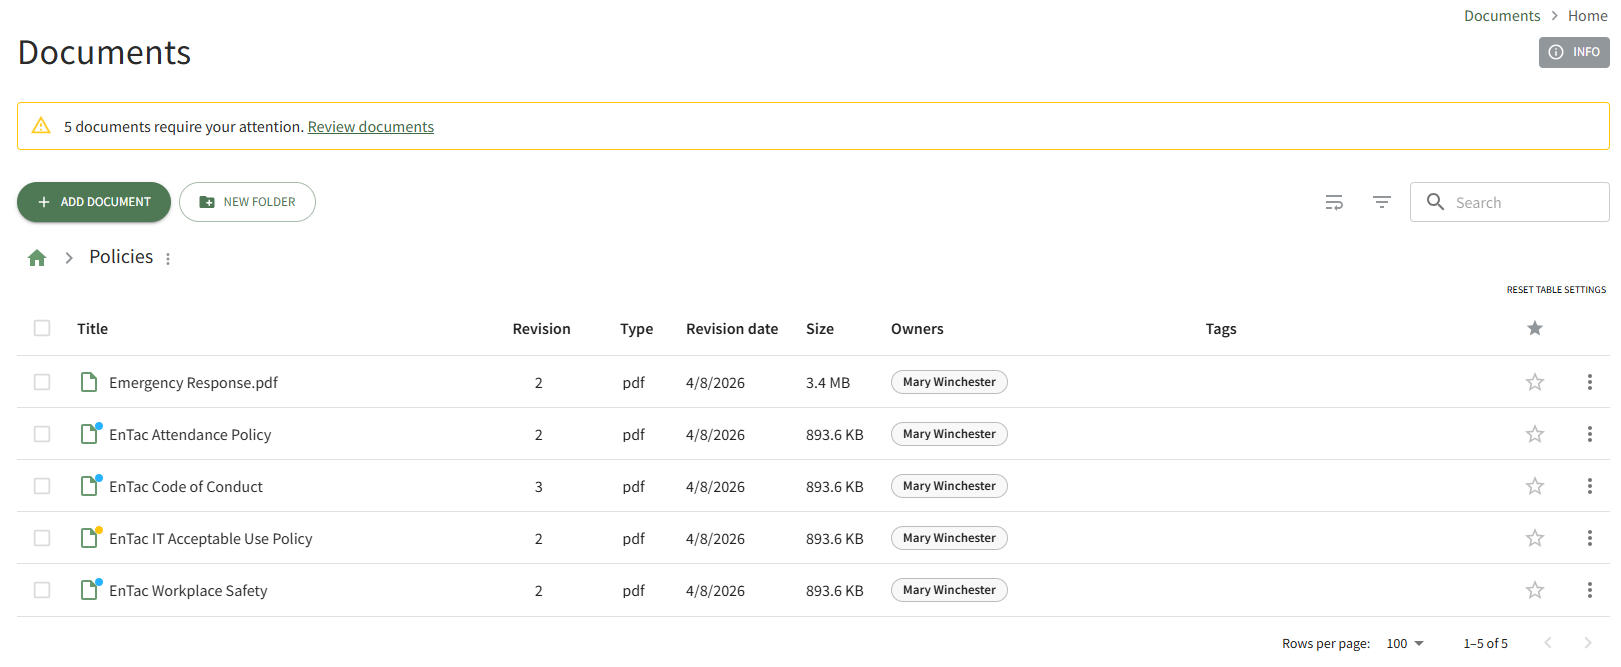
The options available on a specified file's context menu are explained in the table below.
File Context Menu Option Explanations | |||||||||||||||||
Option | Explanation | ||||||||||||||||
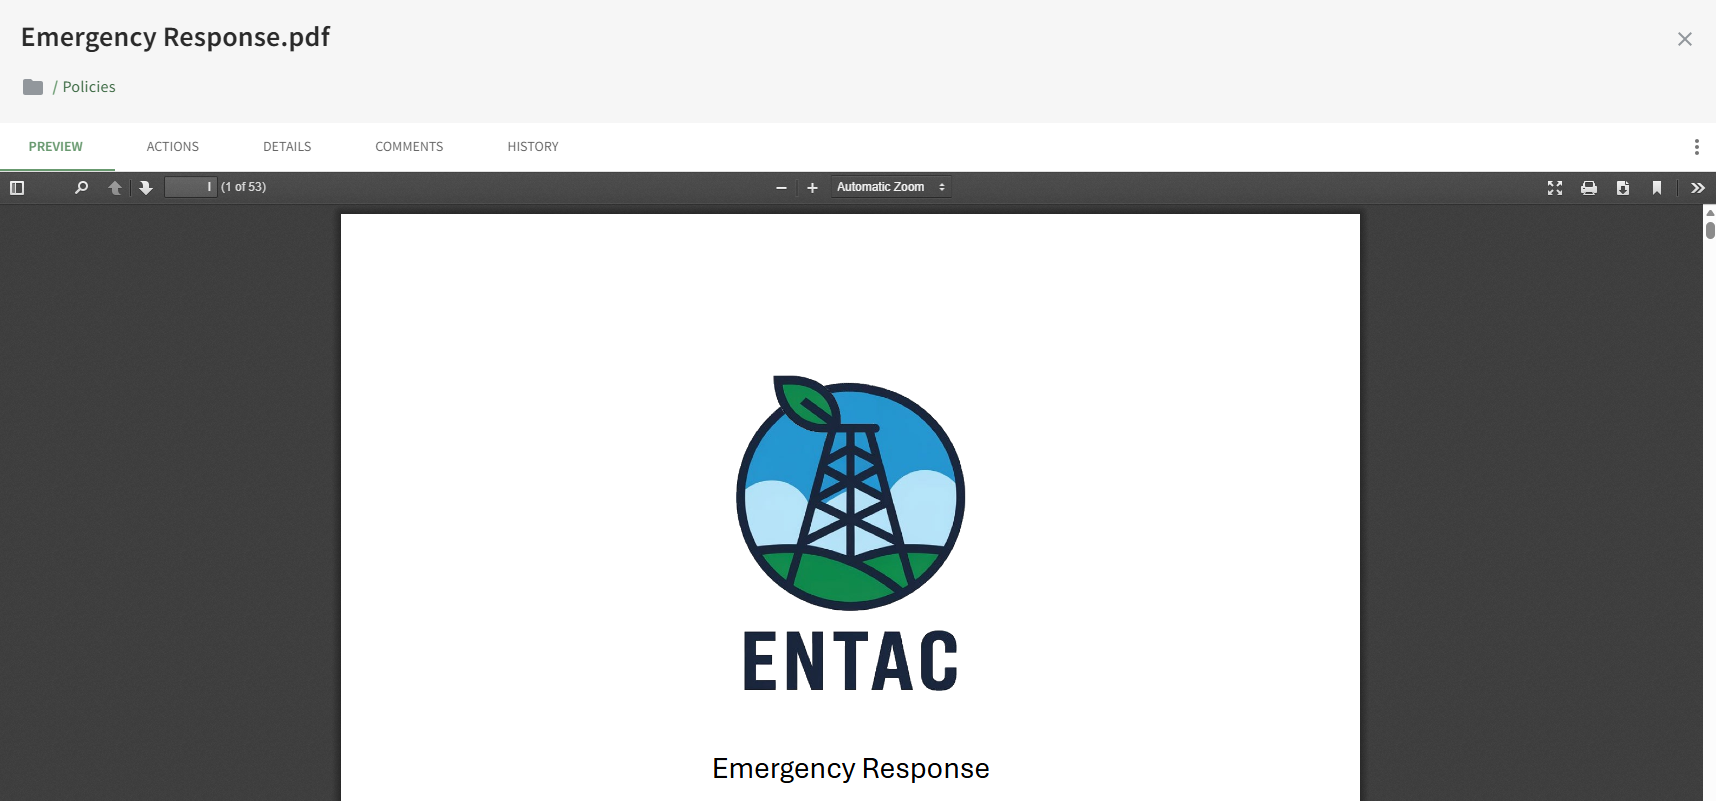
View | Selecting View from a file's context menu opens the document's Details Page. Understanding a file's Details PageEach file added to the Documents Module will have its own Details Page. The header of the file's Details Page displays the file title and the file's location in the documents module.
A file's Details Page is comprised of five tabs: Preview, Actions, Details, Comments, and History. Each tab is explained in detail in the section below. The vertical three-dot icon opens the Details Page Context menu with options for quick actions. Preview TabA file's Details Page opens to the Preview Tab by default.
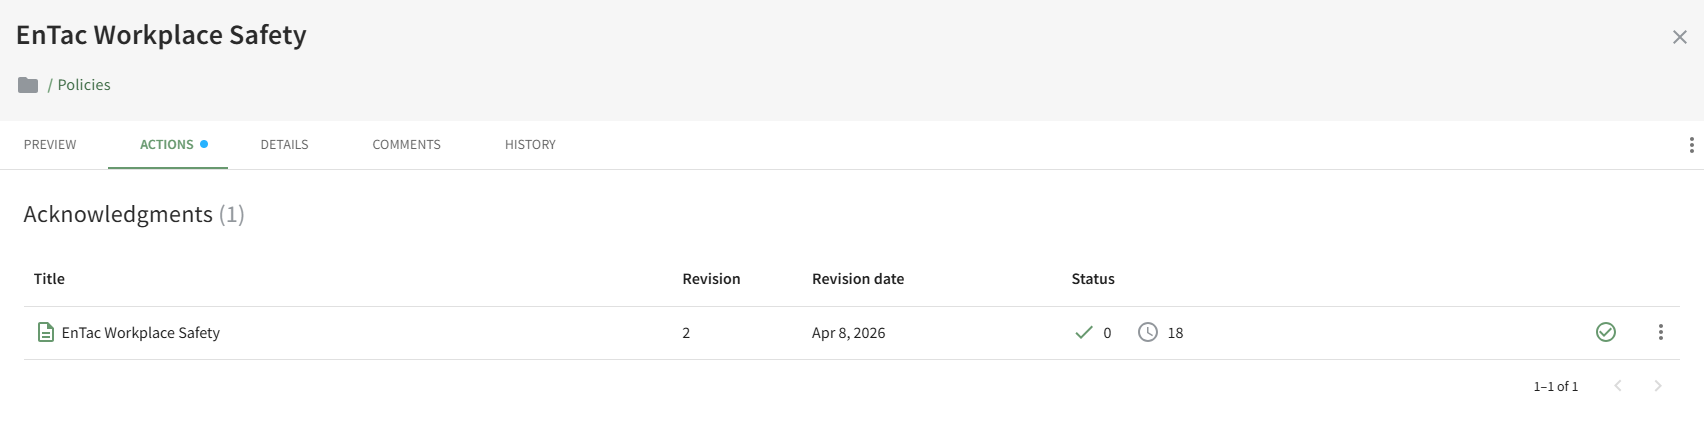
If the file type is supported by the document viewer, users will able to view, download or print the file directly from the preview tab. Actions TabThere are four types of actions involving a document that can be displayed on the Actions Tab: Approvals, Publish, Acknowledgement, and Continued Suitability. A detailed explanation of each action can be found in the User Manual on the Documents Module Review Page: Actions Tab.
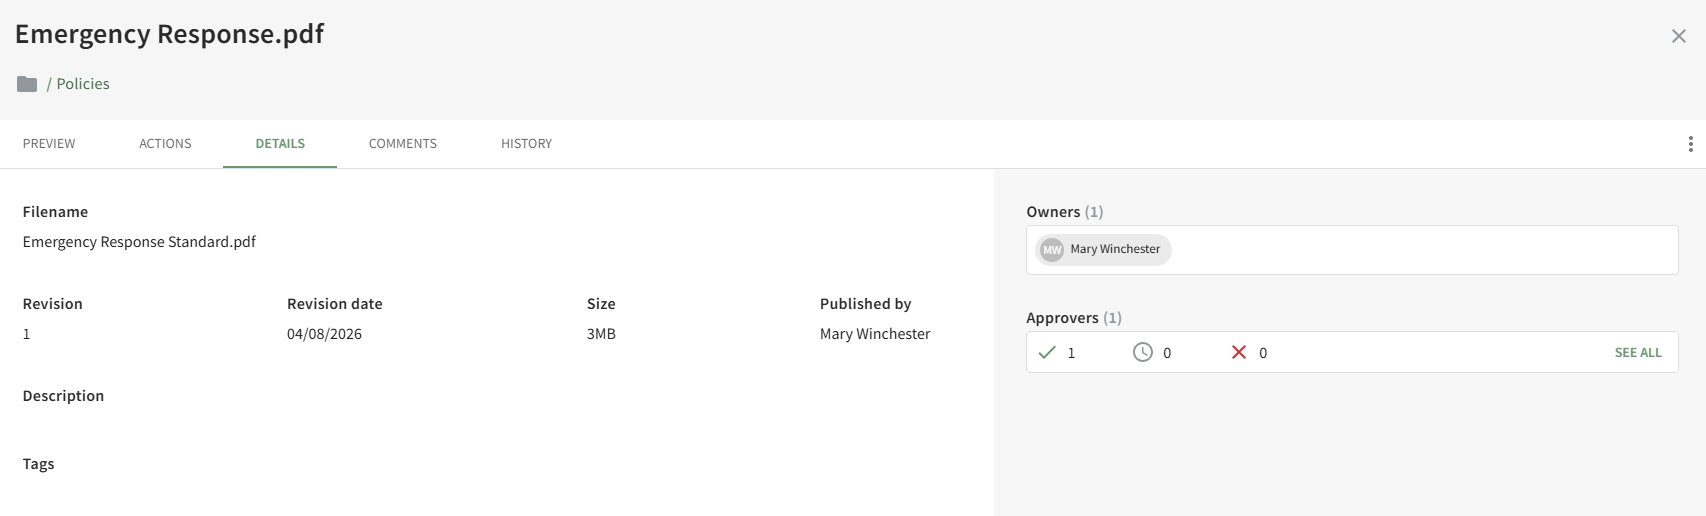
All outstanding actions associated with a document will show on the Actions Tab (to users with appropriate permissions). Details TabThe Details Tab displays the file's information (size, description, tags, revision and publishing details) and displays the Document Owners, Approvers, or Acknowledgers.
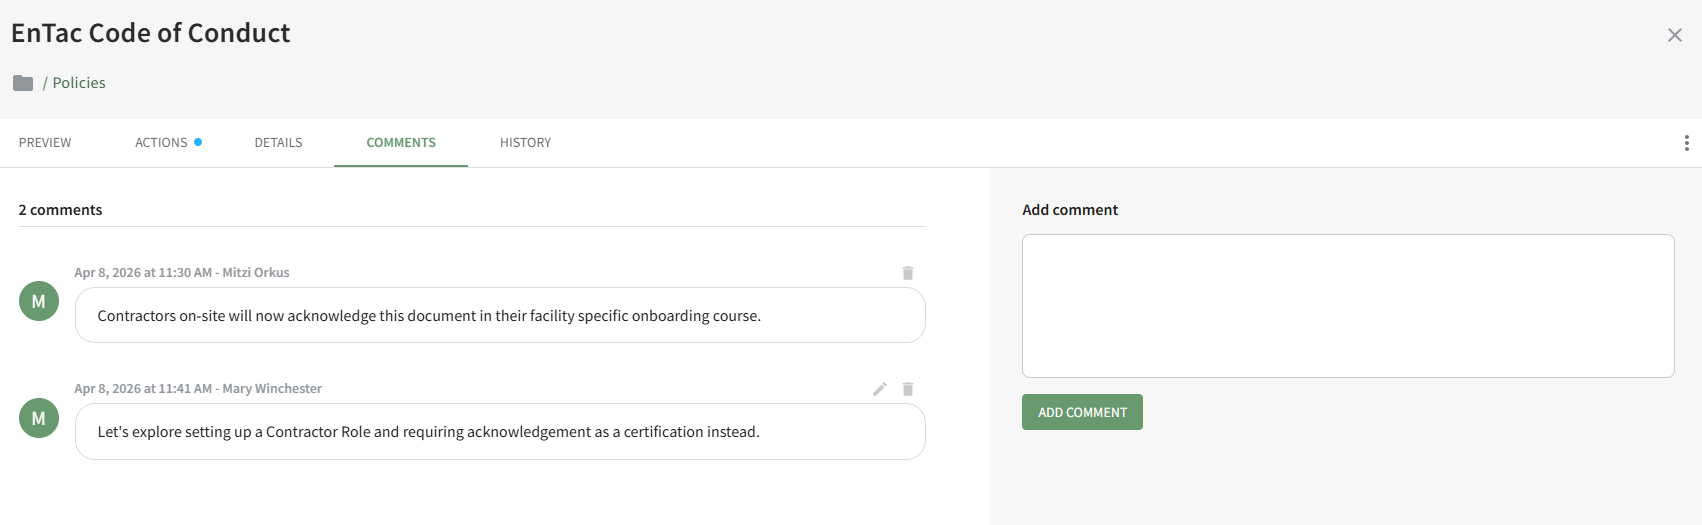
Users with permissions can send email alert reminders for acknowledgement from the Details Tab. Comments TabThe Comments Tab on the Details Page allows users with access to the document to add, edit and delete comments relevant to the document revision.
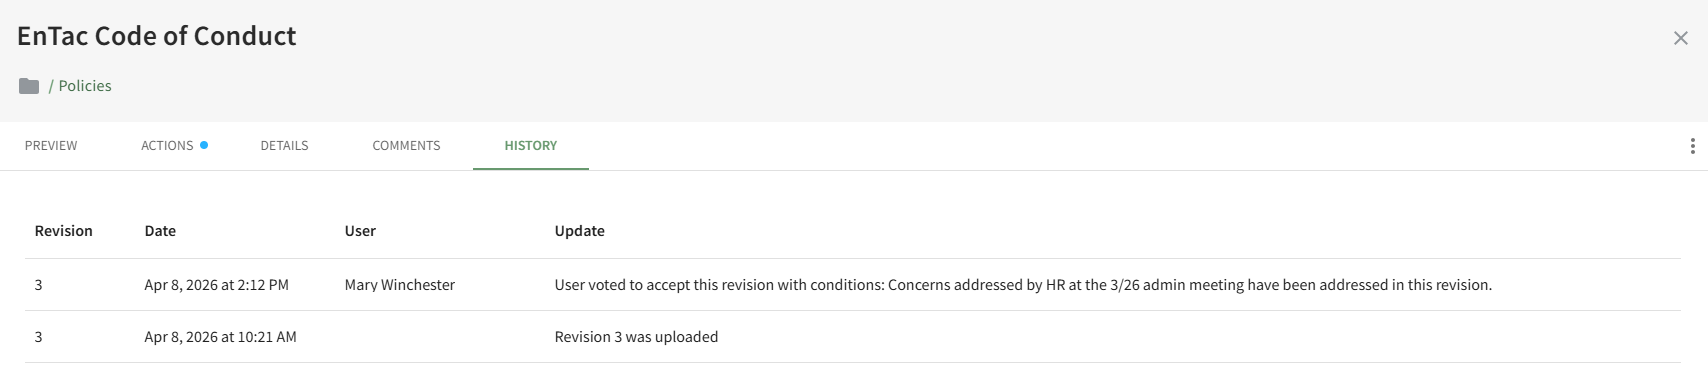
History TabThe History Tab on the Details Page displays any historical actions pertaining to the current and previous versions of a document.
The file revision number, date and time of action, user, and summary update of the action are included. | ||||||||||||||||
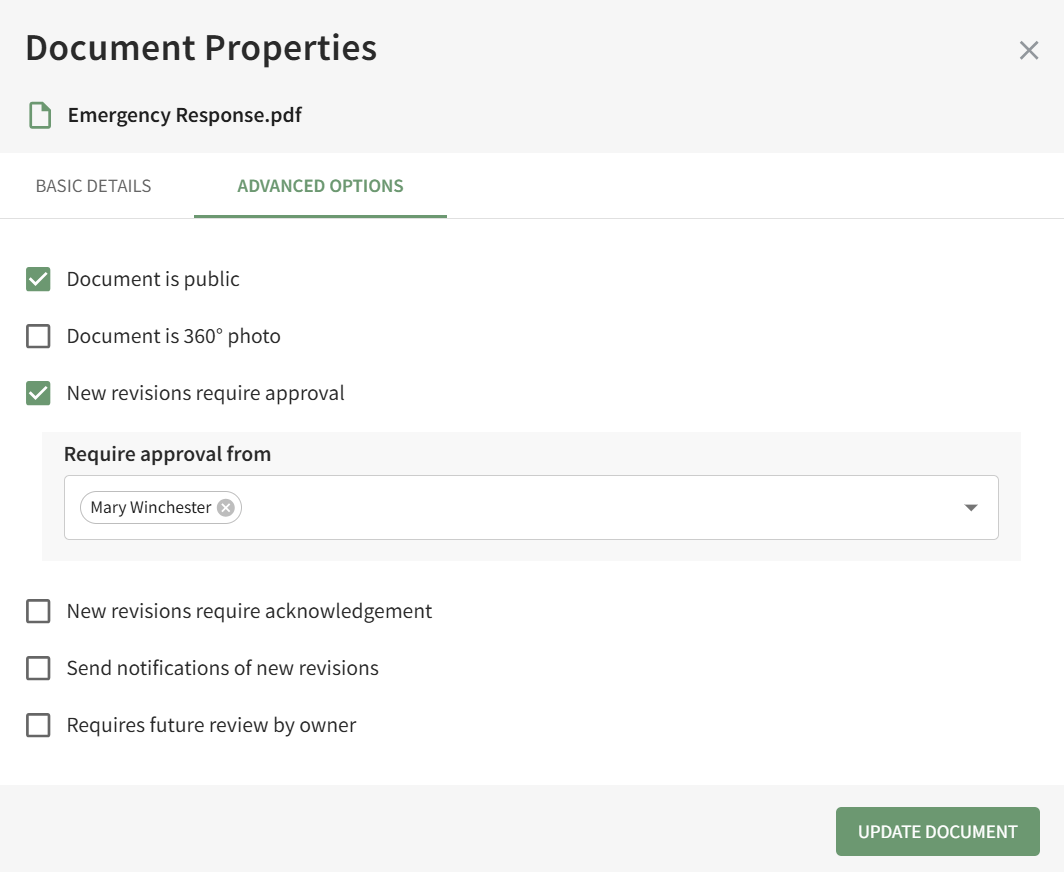
Properties | Selecting Properties from a file's context menu opens the File Properties Modal, allowing the user to update the document parameters that were established when the new document was added. Understanding Customizable Document PropertiesEach file uploaded in the Documents Module has customizable properties that are designated when a new file is uploaded. An explanation of those properties are explained in the Basic Details and Advanced Options Tabs below. Basic DetailsUnder the Basic Details Tab, the user can input a title, description of the file, revision number and revision date. They can also designate any document owners (the uploader is initially included as an Owner by default) and tags.
If the incorrect file was selected, the user can click “Select a different file” from the top right corner of the modal to exchange it with the correct file. Document owner(s) can be selected from a dropdown list of users. Document owners have the ability to approve documents, which is relevant for companies who are required to attest an annual/periodic review for regulatory agencies or other governing bodies. Document owners are also notified any time a new comment is made on a file and are responsible for affirming continued suitability of the file if enabled under Advanced Options. Advanced OptionsSelecting the Advanced Options Tab allows the user to apply enhanced settings to the file. An explanation of each Advanced Options checkbox is included in the table below.
| ||||||||||||||||
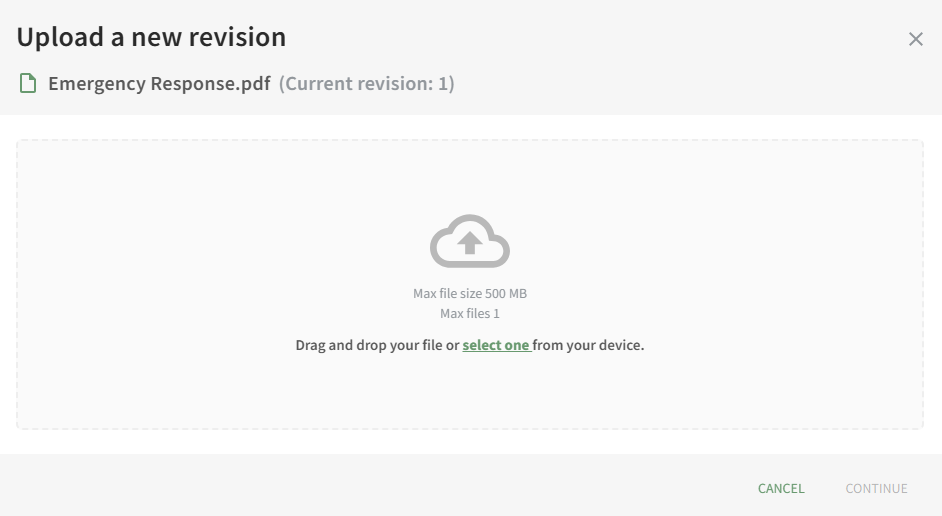
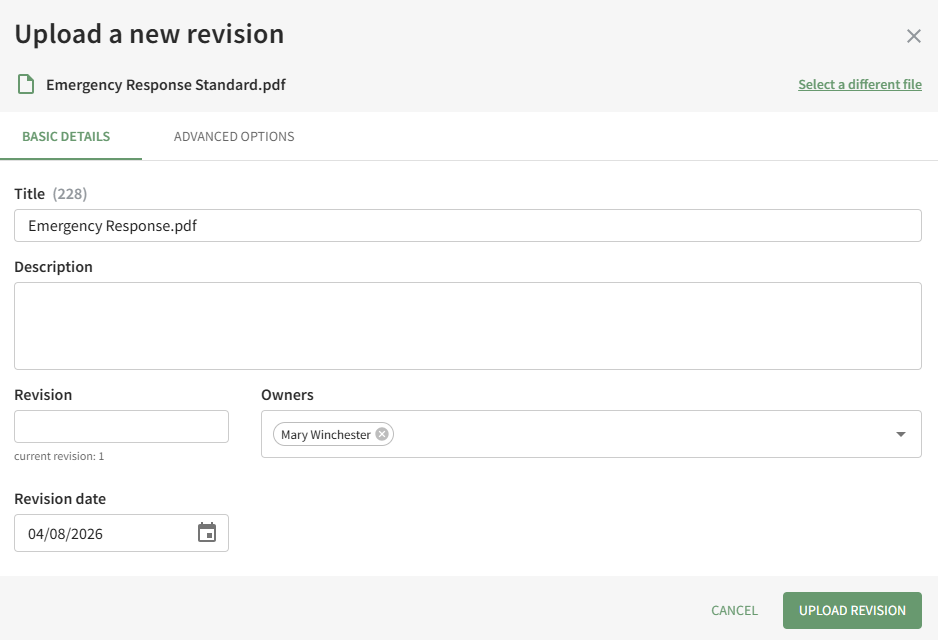
Upload New Revision | Selecting Upload New Revision from a file's context menu is used to upload a new revision of an existing file. You can also drag and drop a file from your computer onto the name of an existing file to upload a new revision. How To: Upload a Revised Version of an Existing FileTo upload a revised version of an existing file in the Documents Module, open the Documents Home Page from the Main Menu and navigate the repository until you find the file you want to have an updated revision. Click the vertical three-dot icon to right of the file opening the file's context menu and select Upload New Revision.
This opens the New Revision Upload Modal.
Either drag and drop your file into the modal or select a file from your device and select Continue.
The modal now displays the Basic Details Tab and the Advanced Options Tab. Change the revision number and edit relevant information as needed. Select the Upload Revision button and a pop-up confirms that the file version was updated. | ||||||||||||||||
Move To | Selecting Move To from a file's context menu opens a modal that allows the user to move a file from its current folder to another. How To: Move a File/FolderTo move a file/folder in the Documents Module, open the Documents Home Page from the Main Menu and navigate the repository to the file/folder you want to move.
Click the vertical three-dot icon to the right of the file you wish to move, opening the file's context menu. Select Move To, opening the Move To Modal.
The right arrow indicates a collapsed folder. Click it to expand and see all the subfolders contained within it. The down arrow indicates an expanded folder. Click it to collapse the parent folder and remove all subfolders from view.
Select the folder you wish to move the file/folder to, then press the Confirm button. A pop-up confirms that the file was relocated. | ||||||||||||||||
Delete | Selecting Delete from a file's context menu will open a Delete Document Modal that will ask the user to confirm that they want to delete the file before it is permanently deleted. Once a user selects “Delete” from the Delete Document Modal, the files have been removed. When a file that originates in the Documents Module is later linked to another module, it needs to be disassociated before the file can be deleted. If this is the case, the deletion warning will identify where the file needs to be unlinked before deletion can occur. | ||||||||||||||||
Download | Selecting “Download” from a file's context menu automatically downloads an individual file to your device. For the file to be shared with an external individual, the file must be designated as public. The download is not accessible to those without permission to access it. Restrictive tags can also be used to limit access and cannot be bypassed by a user. | ||||||||||||||||
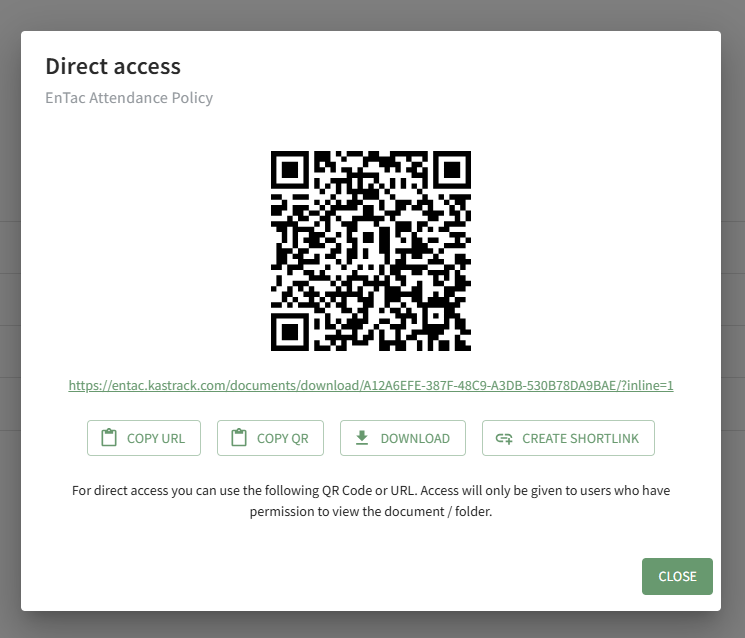
QR Code / Link | Selecting “QR Code / Link” from a file's context menu opens the Direct Access Modal for individual files.
The user can use either the URL or QR Code to share access to the files selected. Access will be given to internal users who have permission to view the folder. Access will be given to external users if the folder is public. How To: Access A File's QR Code / URL LinkTo access a QR Code/Link for a file in the Documents Module, open the Document Module Home Page from the Main Menu and navigate your folders to access the desired file. Access will only be given to users who have permission to view the file unless the document has been indicated as public. Click the vertical three-dot icon to the far right of the file, opening the file's context menu. Select the QR Code/Link option.
This opens the Direct Access Modal.
From this modal, you can copy the URL Link and/or copy the QR code. Clicking the Download button will automatically download the file to the user's personal device. Clicking the Create Shortlink button will generate a shortened URL link for file and display it on the modal. | ||||||||||||||||


No comments to display
No comments to display