Attendance Log: Muster Page
The Muster Page can be activated in Drill or Emergency Mode. The buttons available on both modes of the Muster Page are explained in the table below.
Muster Page Button Explanations | |
Button | Associated Actions |
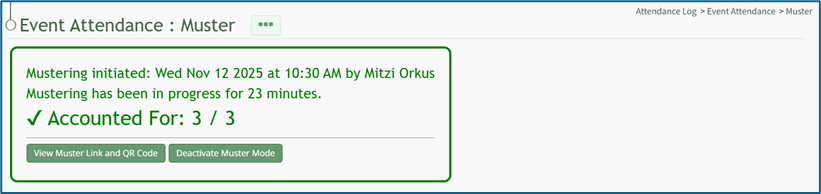
View Muster Link and QR Code | Selecting the “View Muster Link and QR Code” button opens a QR Code and Link for Muster Modal that displays the URL Link and QR Code to be used by individuals to mark themselves as accounted for. The modal allows for the QR Code to be downloaded, and for the QR Code/URL Link to be copied. |
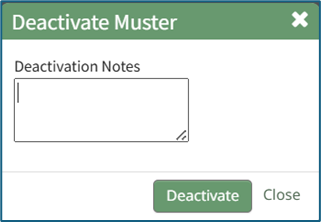
Deactivate Muster Mode | Selecting the “Deactivate Muster Mode” button opens the Deactivate Muster Modal which offers an ability to record deactivation notes before confirming you are ready to deactivate muster mode. How To: Deactivate Muster ModeMuster mode can only be deactivated from the Muster Page when muster mode has been activated.
Select the “Deactivate Muster Mode” button, opening the Deactivate Muster Modal. Input any desired Deactivation Notes in the textbox provided.
Select “Deactivate” and you will be redirected to the attendance log’s Information Page. |
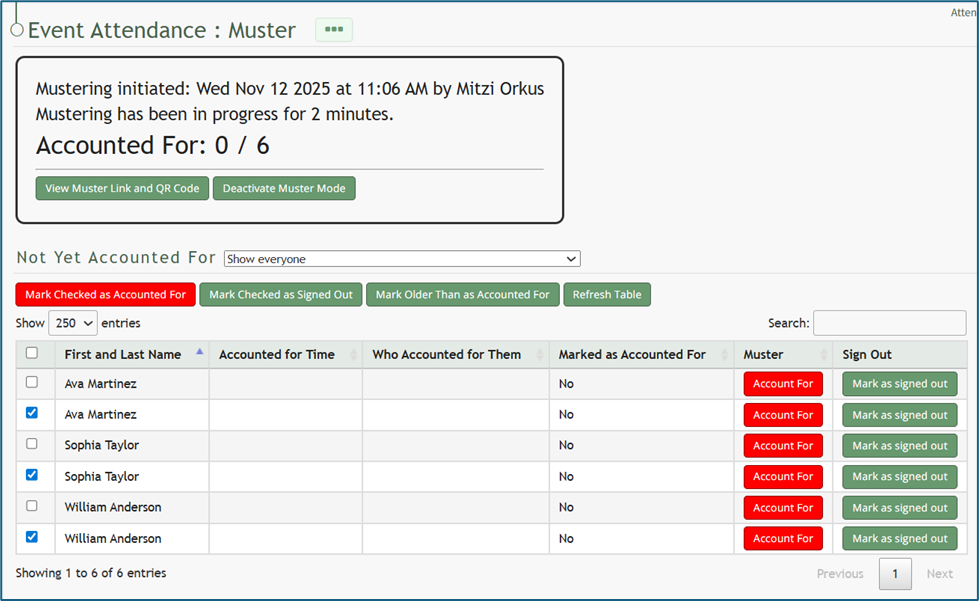
Mark Checked As Accounted For | Selecting the red “Mark Checked as Accounted For” button allows for multiple individuals to be accounted for simultaneously during muster mode. |
Mark Checked as Signed Out | Selecting the “Mark Checked as Signed Out” button allows for individuals who are no longer on the premises but failed to sign out to be signed out rather than indicated as accounted for during the muster. How To: Sign Out Individuals when In Muster ModeOnce muster mode has been activated, individuals can be signed out rather than accounted for if needed. To do so, select the checkboxes to the left of the individuals you wish to sign out. Selecting the checkbox in the top row will select all entries.
Click the “Marked Checked Out as Signed Out” button above the table.
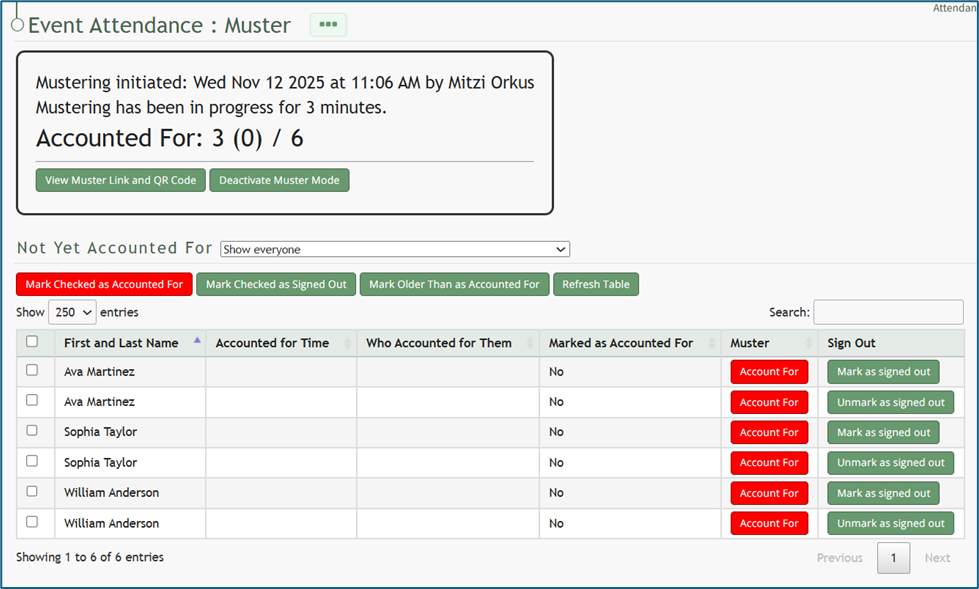
The summary box at the top of the muster page now shows those individuals that were signed out as (indirectly) accounted for. If an individual was signed out in error, you can select the “Unmark as Signed Out” button to correct the issue. |
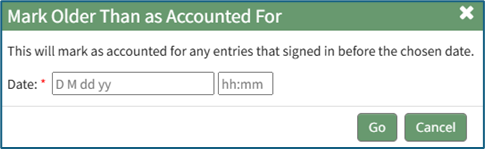
Mark Older Than as Accounted For | Selecting the “Mark Older Than as Accounted For” button opens a modal that allows you to input a date and time so that anyone signed in before the specified date/time will be marked as accounted for. How To: Mark Individuals Signed In Prior to A Date/Time as Accounted For While in Muster ModeOnce muster mode has been activated, individuals who signed in prior to a specific date and time can be marked as accounted for.
To do so, click the “Mark Older Than as Accounted For” button opening the Mark Older Than as Accounted For Modal.
Input the desired date and time. Anyone who signed in before this date/time will be marked as accounted for in the muster table. A calendar is provided for ease in accurately setting the desired date. Click “Go” at the bottom of the modal and a confirmation modal will appear, communicating how many entries were accounted for by the action.
|
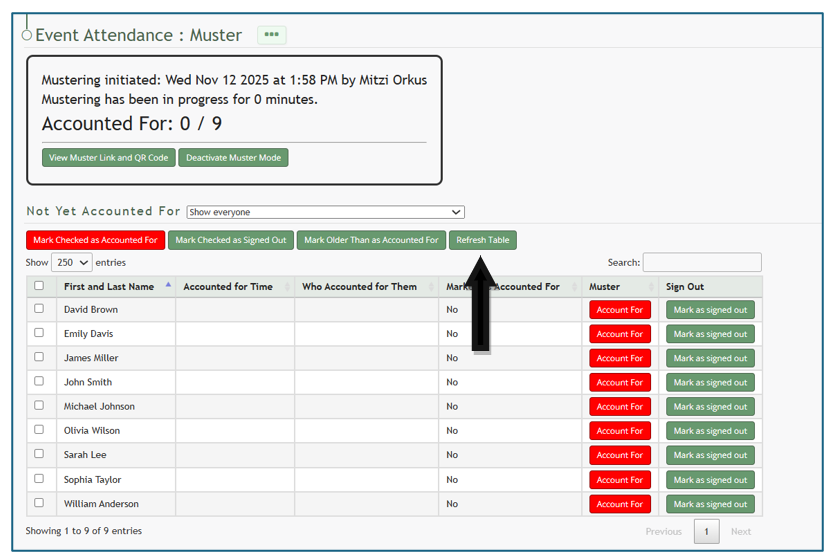
Refresh Table | Selecting the Refresh Table button is used to reload the data currently shown in the table. When clicked, the system will query the latest records and replace any outdated or cached information. How To: Refresh the Muster Table while in Muster ModeRefreshing the Muster table while in muster mode is a beneficial feature, particularly if individuals are using the QR Code or URL Link to account for themselves. To refresh the table, select the “Refresh Table” button.
The muster table will automatically refresh, and the updated summary will show the accounted for individuals.
|
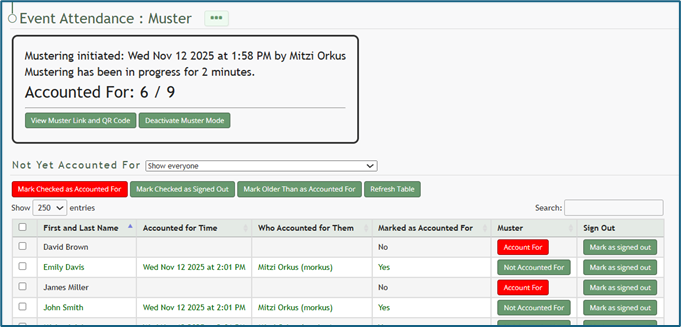
Account For | Selecting the “Account For” button in the Muster Table will mark the specific individual as accounted for during the muster. |
Mark as Signed Out | Selecting the “Mark as Signed Out” button in the Muster Table will mark the specific individual as signed out during the muster. How To: Sign Out Individuals when In Muster ModeOnce muster mode has been activated, individuals can be signed out rather than accounted for if needed. To do so, select the checkboxes to the left of the individuals you wish to sign out. Selecting the checkbox in the top row will select all entries.
Click the “Marked Checked Out as Signed Out” button above the table.
The summary box at the top of the muster page now shows those individuals that were signed out as (indirectly) accounted for. If an individual was signed out in error, you can select the “Unmark as Signed Out” button to correct the issue. |


Muster (Drill)
The Muster (Drill) Page can only be opened by going to an attendance log’s Information Page and selecting the yellow Muster (Drill) button.
This does not automatically activate Muster Mode.
Before muster mode is activated, the Muster (Drill) Page displays a textbox for any desired information regarding the drill to be entered. The “Start Drill” button activates muster mode. Clicking “Do Not Start Drill” will take you back to the attendance log’s Information Page.

Once the drill has started and the Attendance Log is in muster mode, the page changes.

At the top of the Muster Page, a section states when muster mode was initiated, how long it has been in progress, and how many individuals have been accounted for. The table visible in muster mode is customizable and can be editing to show any fields desired.
How To: Edit the Columns that Show when Mustering
To edit the columns that show when mustering (drill or emergency), open the attendance log you want to make changes in. You can access an attendance log on the Main Menu (if selected to be shown there) or from the Home Page of the Attendance Module.
How To: Show an Attendance Log on the Main Menu
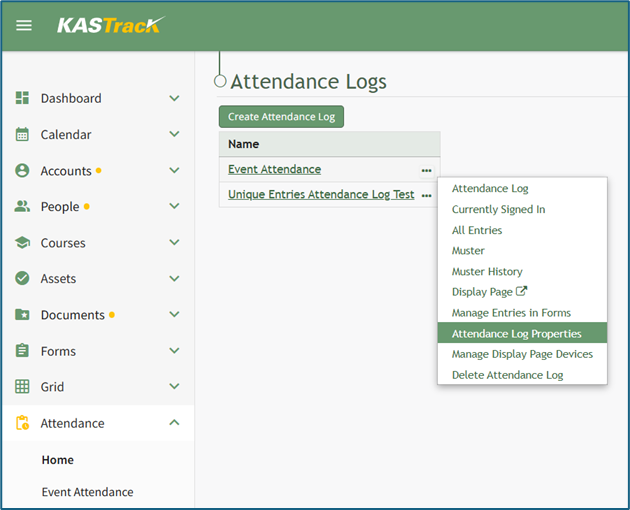
To show an attendance log on the main menu, open the attendance log and go to the Attendance Module Home Page. All available attendance logs will be visible in the table with a three-dot icon to the right of the attendance log’s name. Click the three-dot icon to open the context menu. Select “Attendance Log Properties.”

This opens the Attendance Log Properties Modal. Select the “Show In Main Menu” checkbox.
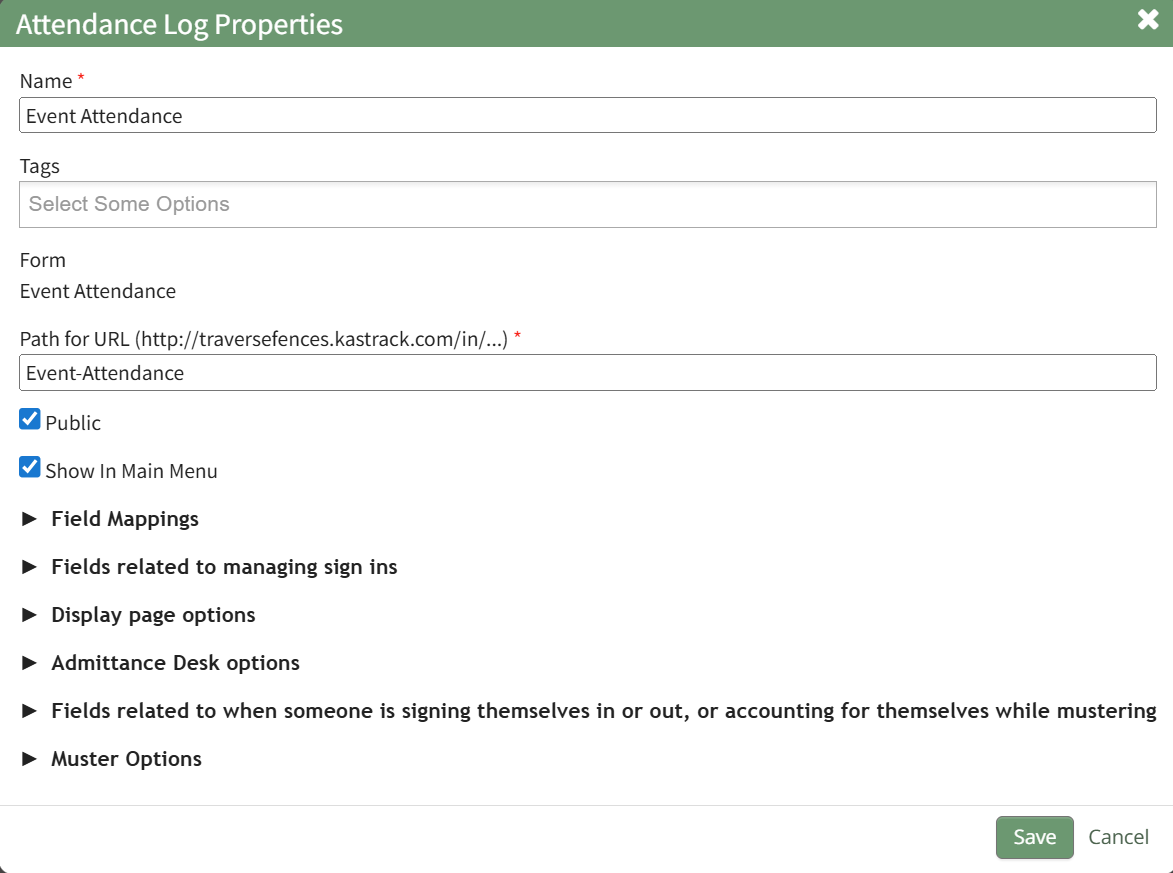
Click “Save” at the bottom of the Attendance Log Properties Modal.
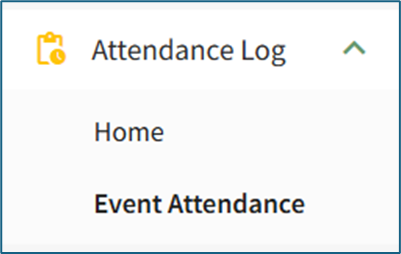
To see the attendance log as its own page in the Main Menu, refresh the page or log out and sign back in to KAStrack. The attendance log will now show as its own page in the Main Menu.
From the Home Page:
By going to the Attendance Module Home Page, all available attendance logs will be visible in the table, with a three-dot icon to the right of the attendance log’s name.
Click on the three-dot icon to the right of the attendance log’s name, which opens the context menu. Then, select “Attendance Log Properties.”
This opens the Edit Attendance Log Modal. The columns visible on the Muster Page can be edited in the section titled Fields Related to Managing Sign Ins.
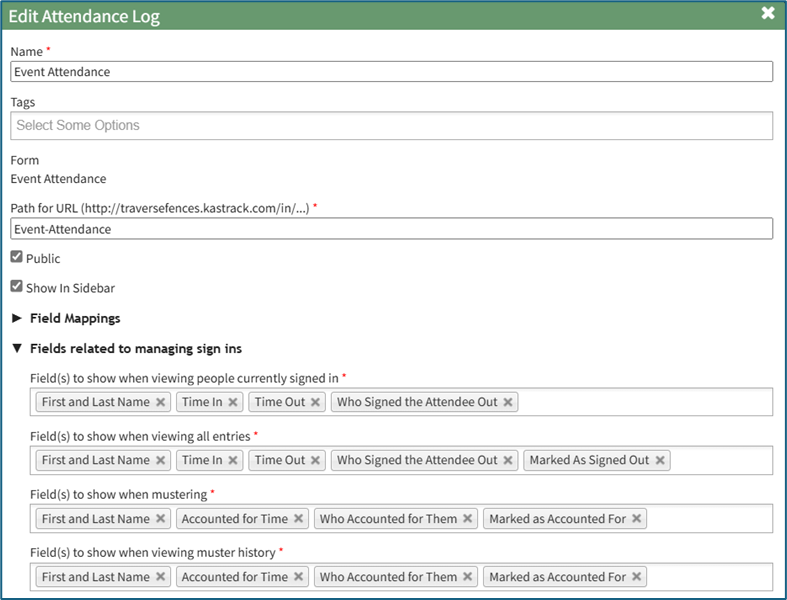
Add and remove fields as desired in the field named “Field(s) to show when mustering”. The order of the fields here corresponds to the order of the columns in the Muster Table.

Select “Save” at the bottom of the Attendance Log Properties Modal and your edits will now show on the Muster Page.
A dropbox on the muster page allows for the names displayed on the muster page to be filtered.

You can choose to show everyone, only show the people who are not accounted for, only show people who are accounted for, only show people who are signed out and not yet accounted for, and only show people who are signed out.
Muster (Emergency)
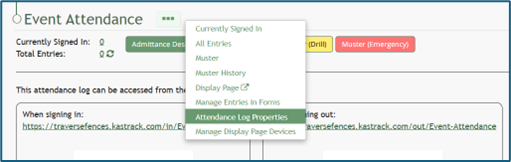
The Muster (Emergency) Page can only be opened by the “Muster” option on the attendance log context menu or by going to an attendance log’s Information Page and selecting the red Muster (Emergency) button.
This does not automatically activate Muster Mode.
Before muster mode is activated, the Muster (Emergency) Page displays a textbox for any desired information regarding the drill to be entered. The “Activate” button activates an emergency muster mode.

Once the emergency muster has started and the Attendance Log is in muster mode, the page changes.

At the top of the Muster Page, a section states when muster mode was initiated, how long it has been in progress, and how many individuals have been accounted for. The table visible in muster mode is customizable and can be editing to show any fields desired.
How To: Edit the Columns that Show when Mustering
To edit the columns that show when mustering (drill or emergency), open the attendance log you want to make changes in. You can access an attendance log on the Main Menu (if selected to be shown there) or from the Home Page of the Attendance Module.
How To: Show an Attendance Log on the Main Menu
To show an attendance log on the main menu, open the attendance log and go to the Attendance Module Home Page. All available attendance logs will be visible in the table with a three-dot icon to the right of the attendance log’s name. Click the three-dot icon to open the context menu. Select “Attendance Log Properties.”
This opens the Attendance Log Properties Modal. Select the “Show In Main Menu” checkbox.
Click “Save” at the bottom of the Attendance Log Properties Modal.
To see the attendance log as its own page in the Main Menu, refresh the page or log out and sign back in to KAStrack. The attendance log will now show as its own page in the Main Menu.
From the Home Page:
By going to the Attendance Module Home Page, all available attendance logs will be visible in the table, with a three-dot icon to the right of the attendance log’s name.
Click on the three-dot icon to the right of the attendance log’s name, which opens the context menu. Then, select “Attendance Log Properties.”
This opens the Edit Attendance Log Modal. The columns visible on the Muster Page can be edited in the section titled Fields Related to Managing Sign Ins.
Add and remove fields as desired in the field named “Field(s) to show when mustering”. The order of the fields here corresponds to the order of the columns in the Muster Table.
Select “Save” at the bottom of the Attendance Log Properties Modal and your edits will now show on the Muster Page.
A dropbox on the muster page allows for the names displayed on the muster page to be filtered.

You can chose to show everyone, only show the people who are not accounted for, only show people who are accounted for, only show people who are signed out and not yet accounted for, and only show people who are signed out.
No comments to display
No comments to display