Submissions Page
Selecting Submissions in the People Module on the Main Menu opens the Submissions Page. The Submissions Page in the People Module allows a supervisor to review an employee or user’s submitted certification, to upload attachments associated with certifications, and submit certifications in bulk.
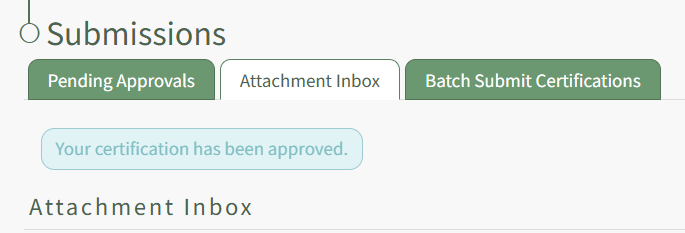
The Submissions Page is comprised of three tabs, Pending Approvals, Attachment Inbox and Batch Submit Certifications. An explanation of each tab is included below.
The Pending Approvals Tab
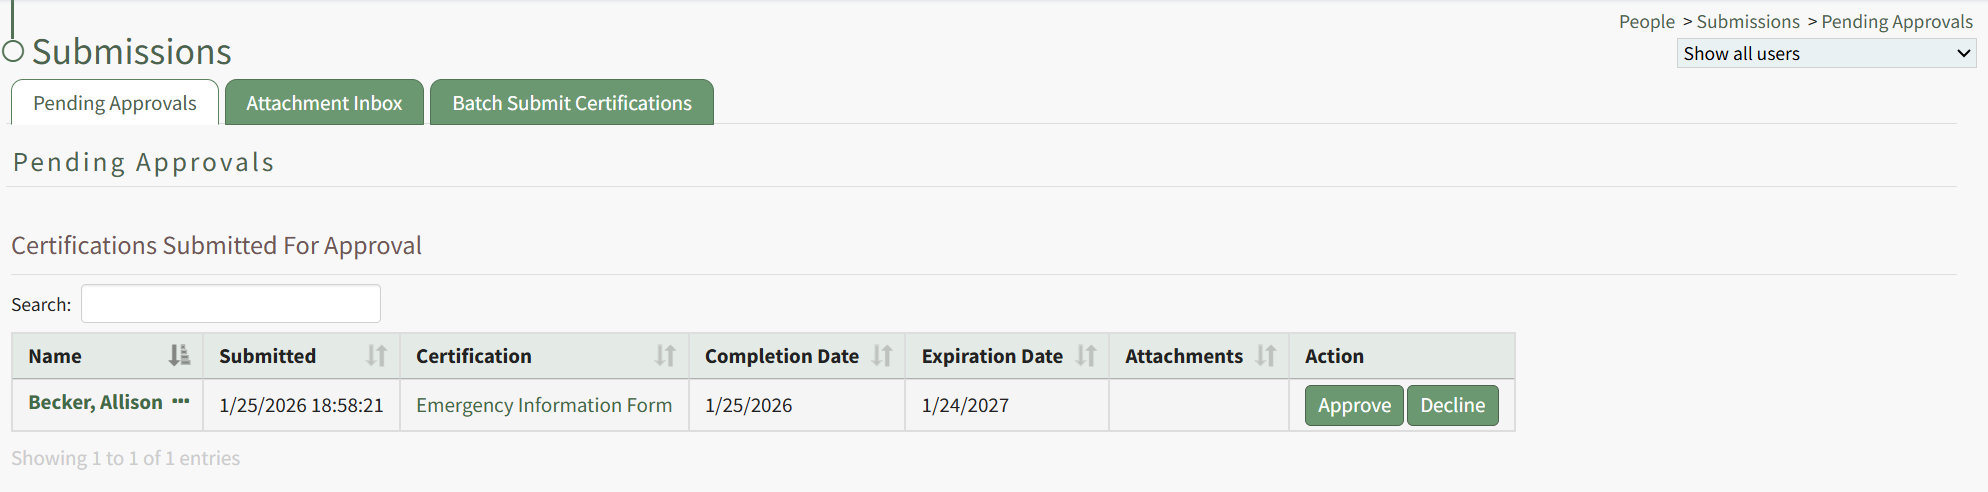
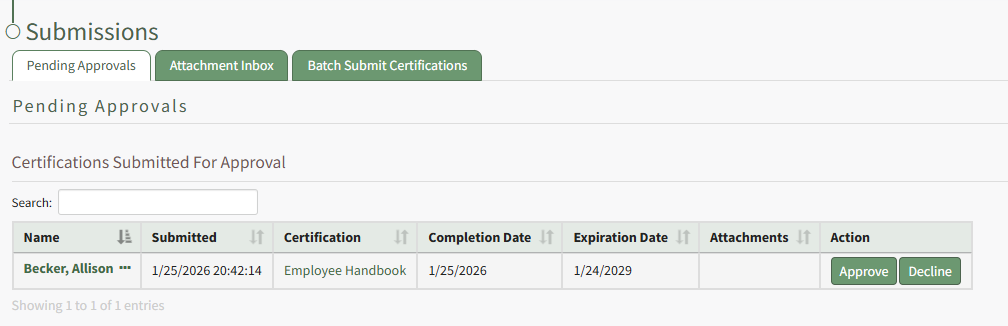
The Pending Approvals Tab displays all user certifications and competency certificates that have been submitted and are awaiting approval. The Date/Time Submitted, Certification, Completion and Expiration Date, and Attachments are included in the Submitted Certifications Table. The Action column has an Approve and Decline button.
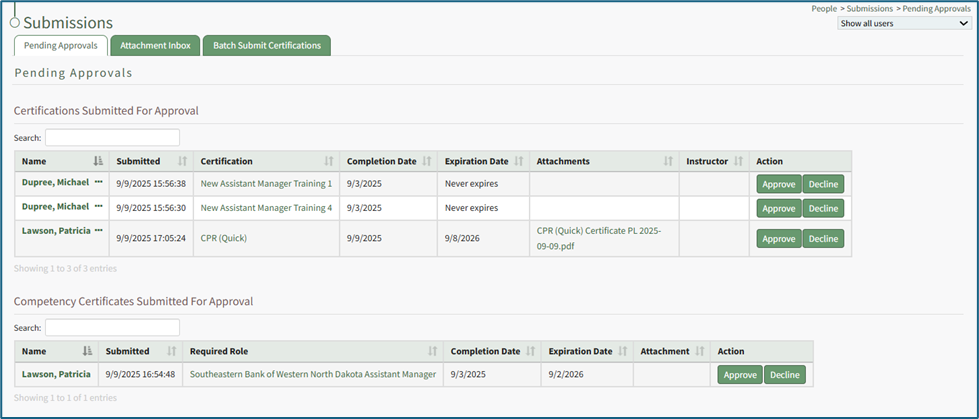
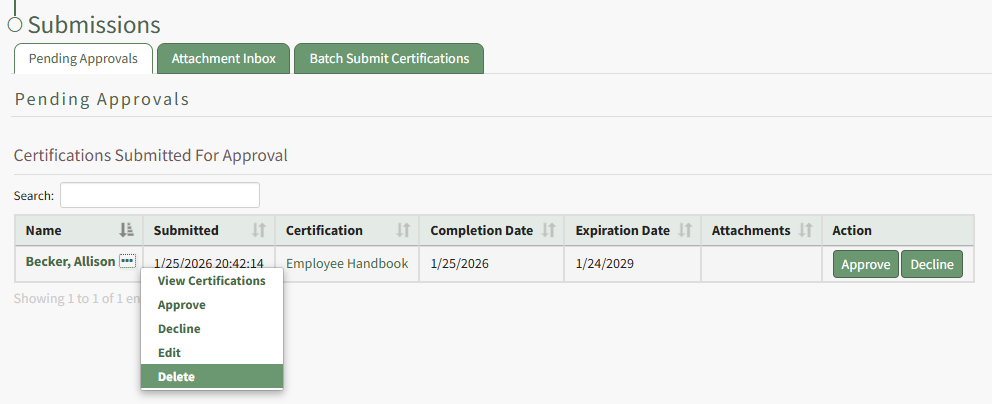
Selecting the three-dot icon to the right of the user’s name in the Certifications Submitted for Approval Table opens the Pending Approvals Context Menu. The options on that context menu are explained in the table below.
Pending Approvals Context Menu Option Explanation | |
Tab | Explanation |
View Certifications | Selecting View Certifications from the Pending Approvals Context Menu opens the User Certifications Tab on that user's Certifications Details Page. |
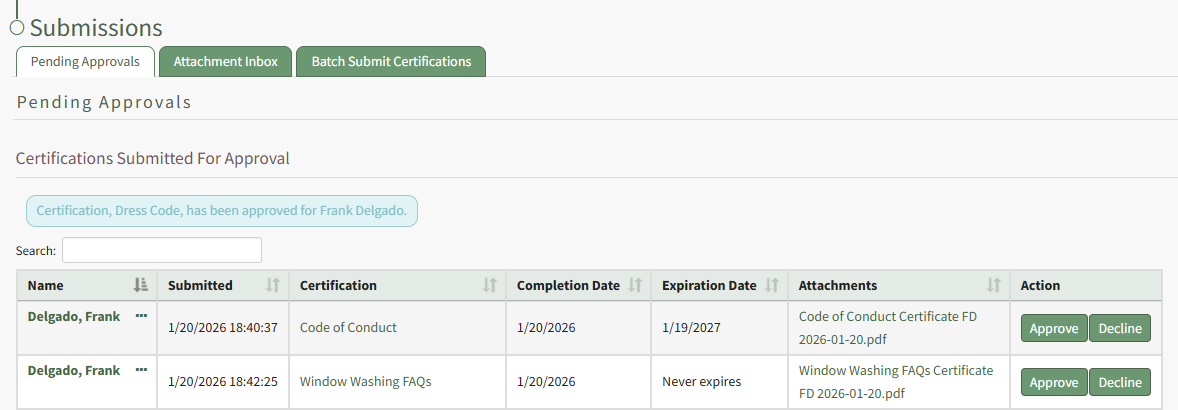
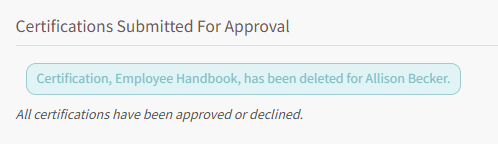
Approve | Selecting Approve from the Pending Approvals Context Menu automatically approves the pending certification. A blue text box confirms which Certification was just approved. The Approve option on the context menu initiates the same action as the Approve button in the Action column of the table. How To: Approve a Submitted Certification Pending ApprovalTo approve a submitted certification that is pending approval, open the Pending Approvals Tab on the Submissions Page in the People Module from the Main Menu.
To approve the certification, click the Approve button in the Action column specific to the certification you want to approve. Selecting Approve from the context menu will initiate the same action. A text box confirms that the certification was approved, and it is no longer visible on the Pending Approvals Tab.
|
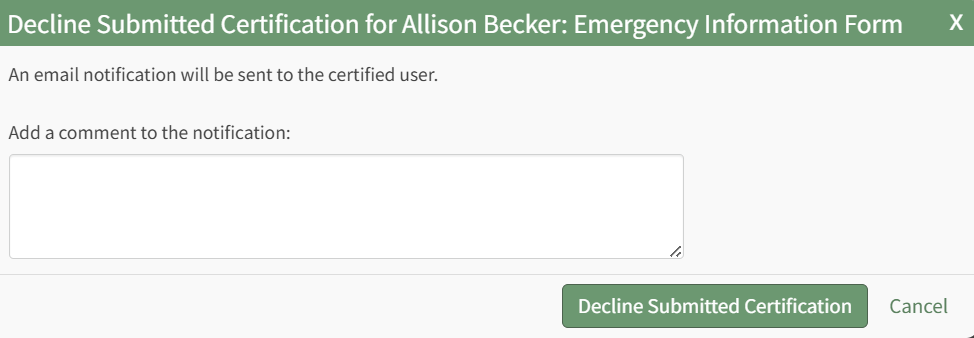
Decline | Selecting Decline from the Pending Approvals Context Menu opens the Decline Submitted Certification Modal, where a unique message can be input and included in the email notification that will be sent to the certified user. The Decline option on the context menu initiates the same action as the Decline button in the Action Column of the table. How To: Decline a Submitted Certification Pending ApprovalTo decline a submitted certification that is pending approval, open the Pending Approvals Tab on the Submission Page of the People Module from the Main Menu.
Any certifications pending approval will be displayed in the Submitted Certifications Table. Click the Decline button in the Action column to the right of the user's name and certification. This opens the Decline Submitted Certification Modal.
The system will send an email notification to the certified user. You can add comments that will be added to the notification email in the modal. Select the Decline Submitted Certification button.
A textbox confirms that the certification was declined and the certification is removed from the Submitted Certifications Table. |
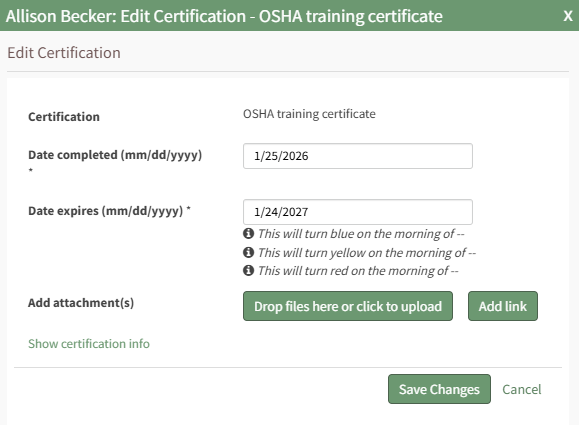
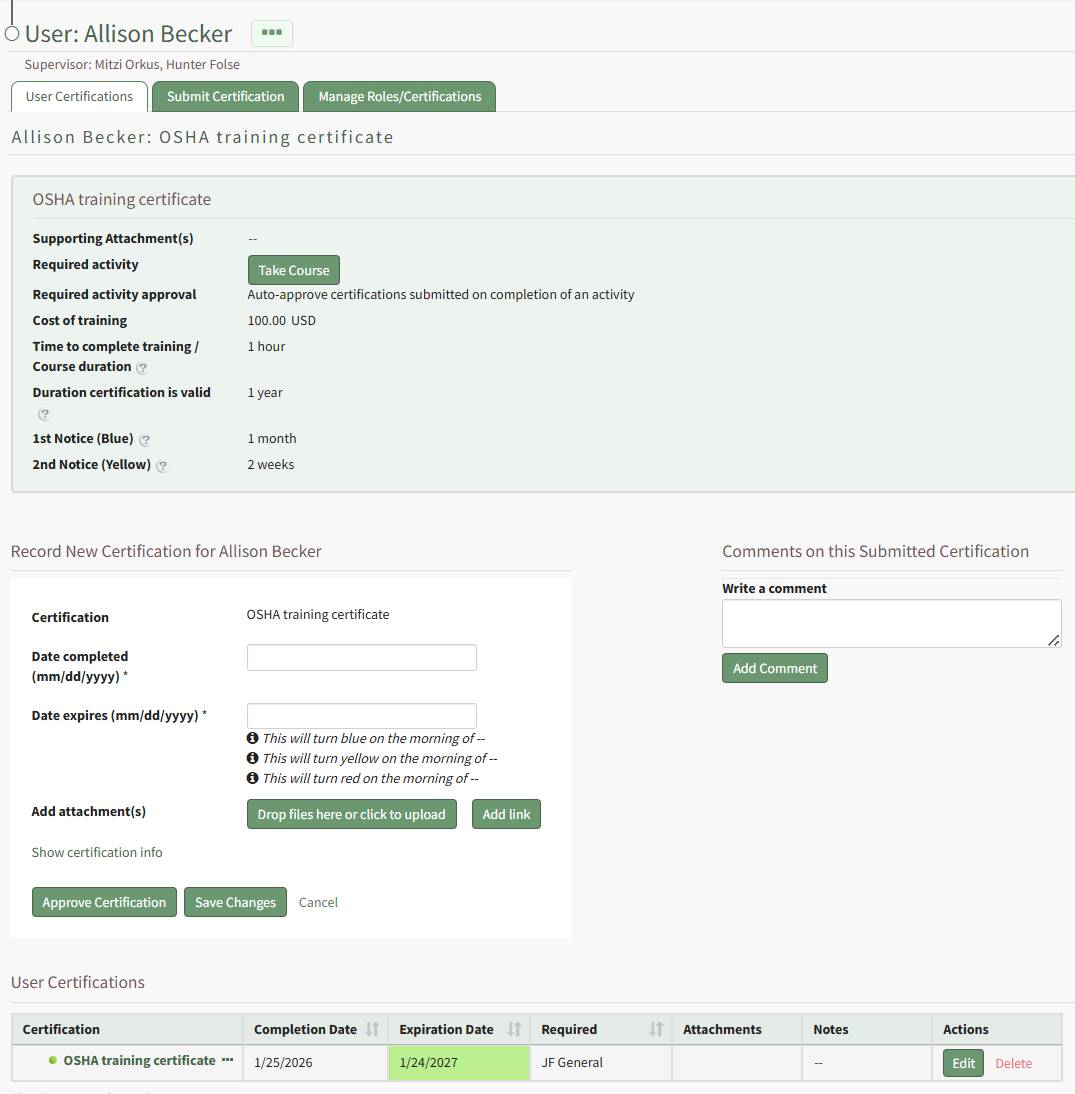
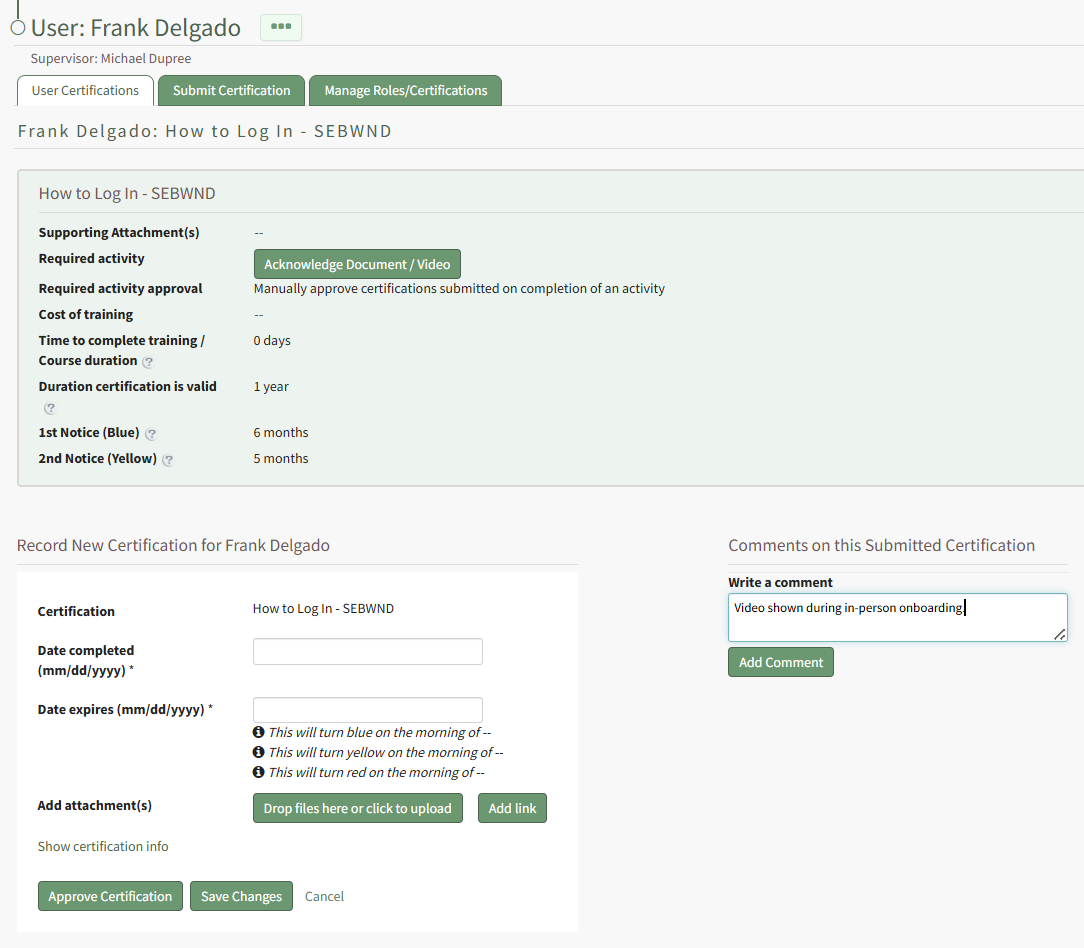
Edit | Selecting Edit from the Pending Approvals Context Menu opens the Edit Certification Page for the specified user. The date the certification was completed, the date the certification expires, and attachments and URL links can be included. The changes to the certifications can be saved and the certification approved directly on this page. Comments can also be included on the submitted certification. How To: Edit a User's Certifications Completion/Expiration DatesTo edit a supervised user's certification completion or expiration dates, open the Users Page in the People Module and click the name of the user whose certification you want to attach a file or link to, opening the user's Certifications Details Page.
Click the Edit button in the Actions column to open the Edit Certification Modal.
Editing the completion date will result in the system editing the certification expiration date. Select the Save Changes button. Your edits will be reflected in the Certifications Table. How To: Attach a File or Link to a User's CertificationTo attach a file or link to a supervised user's certification, open the Users Page in the People Module and click the name of the user whose certification you want to attach a file or link to, opening the user's Certifications Details Page.
Click the certification name in the table opening the user's certification.
Select the "Drag Files Here or Click to Upload" button to attach a file to the user's certifications. Select the Add Link button to include a URL Link with the certification. Click the Save Changes button when complete.
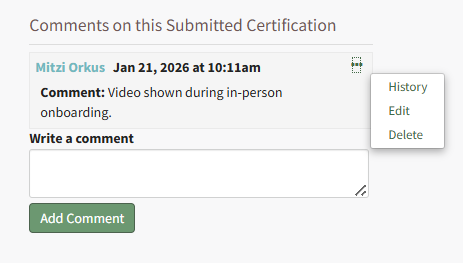
A textbox beneath the User Certification Tab confirms that your changes were submitted. How To: Add / Edit / Delete Comments to a User's Submitted CertificationTo add comments to a user's submitted certification records, open the Users Page in the People Module from the Main Menu. Identify and click the name of the individual whose submitted certification you wish to comment on.
This opens the User's Certification Details Page. Scroll to the bottom of the User Certifications Tab. To the right of the certification record section is a Comments Section.
Input the relevant notes into the textbox beneath "Write a Comment" and click the Add Comment Button.
The commentor, date and time are displayed with the comment. Selecting the three-dot icon to the right of the comment header opens a context menu that allows you to edit and delete the comment.
|
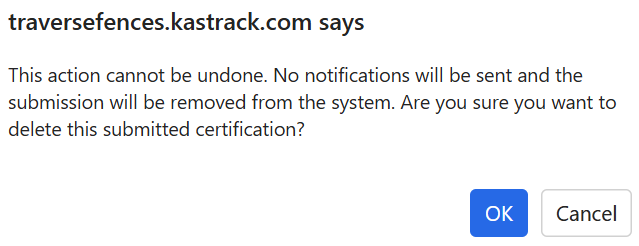
Delete | Selecting Delete from the Pending Approvals Context Menu opens the Certification Deletion Confirmation Modal, requiring confirmation before deleting the submitted certification. When a submitted certification is deleted, the submission is removed from the system and cannot be undone. No notifications will be sent to the associated user. How To: Delete a Certification that is Pending ApprovalTo delete a certification that is pending approval, open the Pending Approvals Tab on the Submissions Page of the Main Menu.
Click the three-dot icon to the right of the user's name in the Submitted Certifications Table opening a context menu.
Select Delete opening a Deletion Confirmation Modal which states, "This action cannot be undone. No notifications will be sent and the submission will be removed from the system. Are you sure you want to delete this submitted certification?"
|
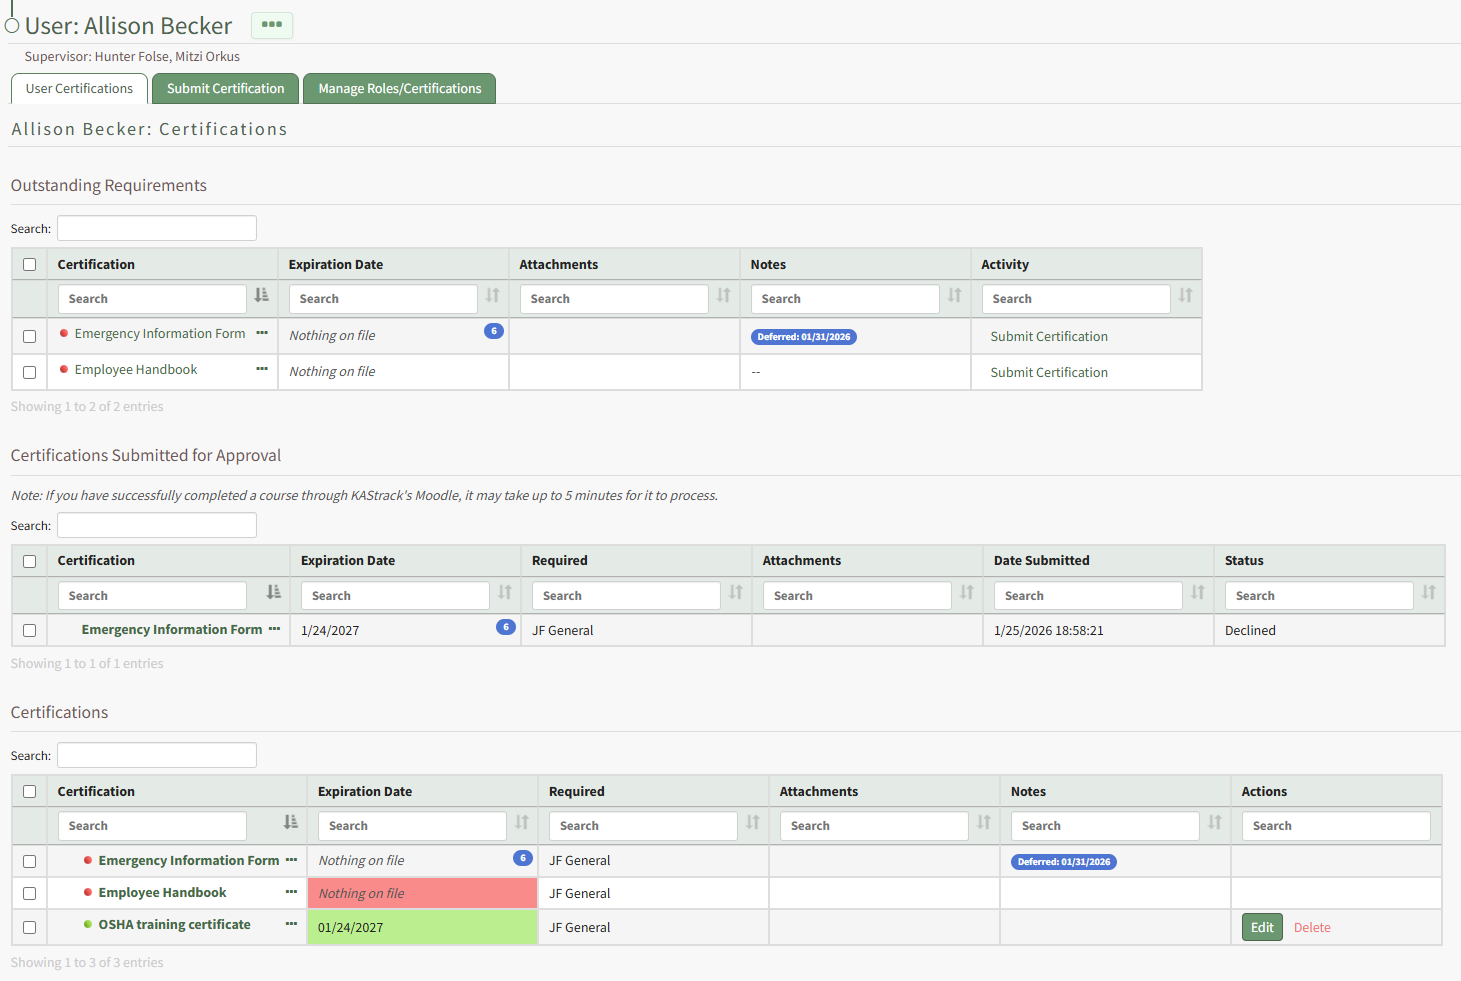
There is a separate table for Competency Certificates that have been submitted for approval. There is no context menu for submitted competency certificates. The date/time the competency certificate was submitted, the required certification role the competency is associated with, completion and expiration dates, as well as attachments are displayed on the table. The Action column has buttons to Approve or Decline the Competency.
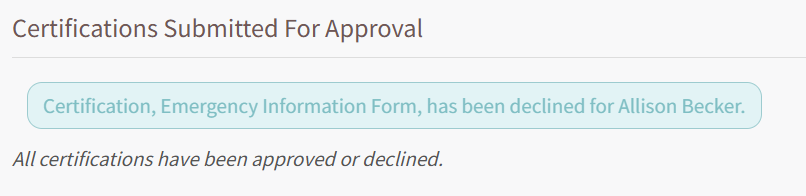
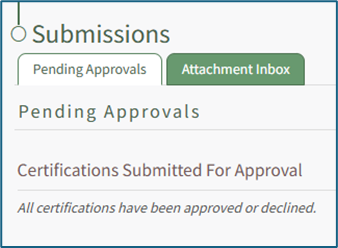
If there are no submitted certifications/competency certificates waiting for approval, you will see “All certifications have been approved or declined” in place of the Certifications/Competency Certificates Submitted for Approval Table.
The Attachment Inbox Tab
The Attachment Inbox Tab allows a supervisor to upload documents in bulk that are to be utilized for user certifications.
The Attachment Inbox includes a Preview Window that allows a user to view supported files on the left side of the page. The “Expand Preview” button opens the View Document Modal. Files uploaded to the Attachment Inbox tool can be seen below the Preview Window in the File Viewer table.
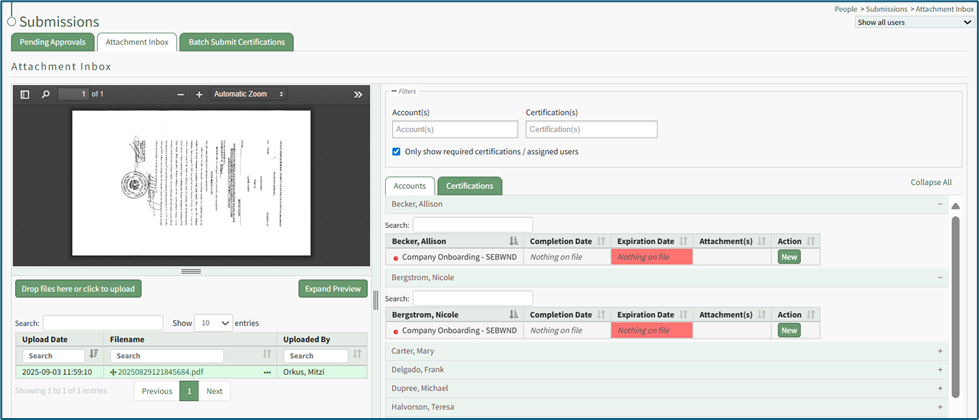
A filter box to the right of the Preview Window allows a user to search by account or certifications. By default, the Accounts/Certifications table is filtered to “Only show required certifications / assigned users”. If instead you’d like to see all available accounts / certifications, regardless of whether a user is assigned the Certification, deselect this checkbox.
Below the filter is a table that contains a listing of all Accounts and Certifications. Clicking on either the Accounts or Certifications Tabs can be used to show available options. Both views allow listings to be expanded to show completion dates, expiration dates, and unique file associated with each user / certification.
Below the Preview Window is a Resize Bar that can be dragged up / down to adjust the vertical size of the Preview Window. In between the two sides of the Attachment Inbox page is a Resize Bar that can be dragged left / right to give more horizontal space to either the Preview Window and File Viewer table, or the Filters and Accounts/Certifications table.
How To: Use Attachment Inbox to Upload a File and Attach it to a Certification
To upload files in the attachment inbox and add them to user certifications, open the Submissions Page in the People Module from the Main Menu. Open the Attachment Inbox Tab.
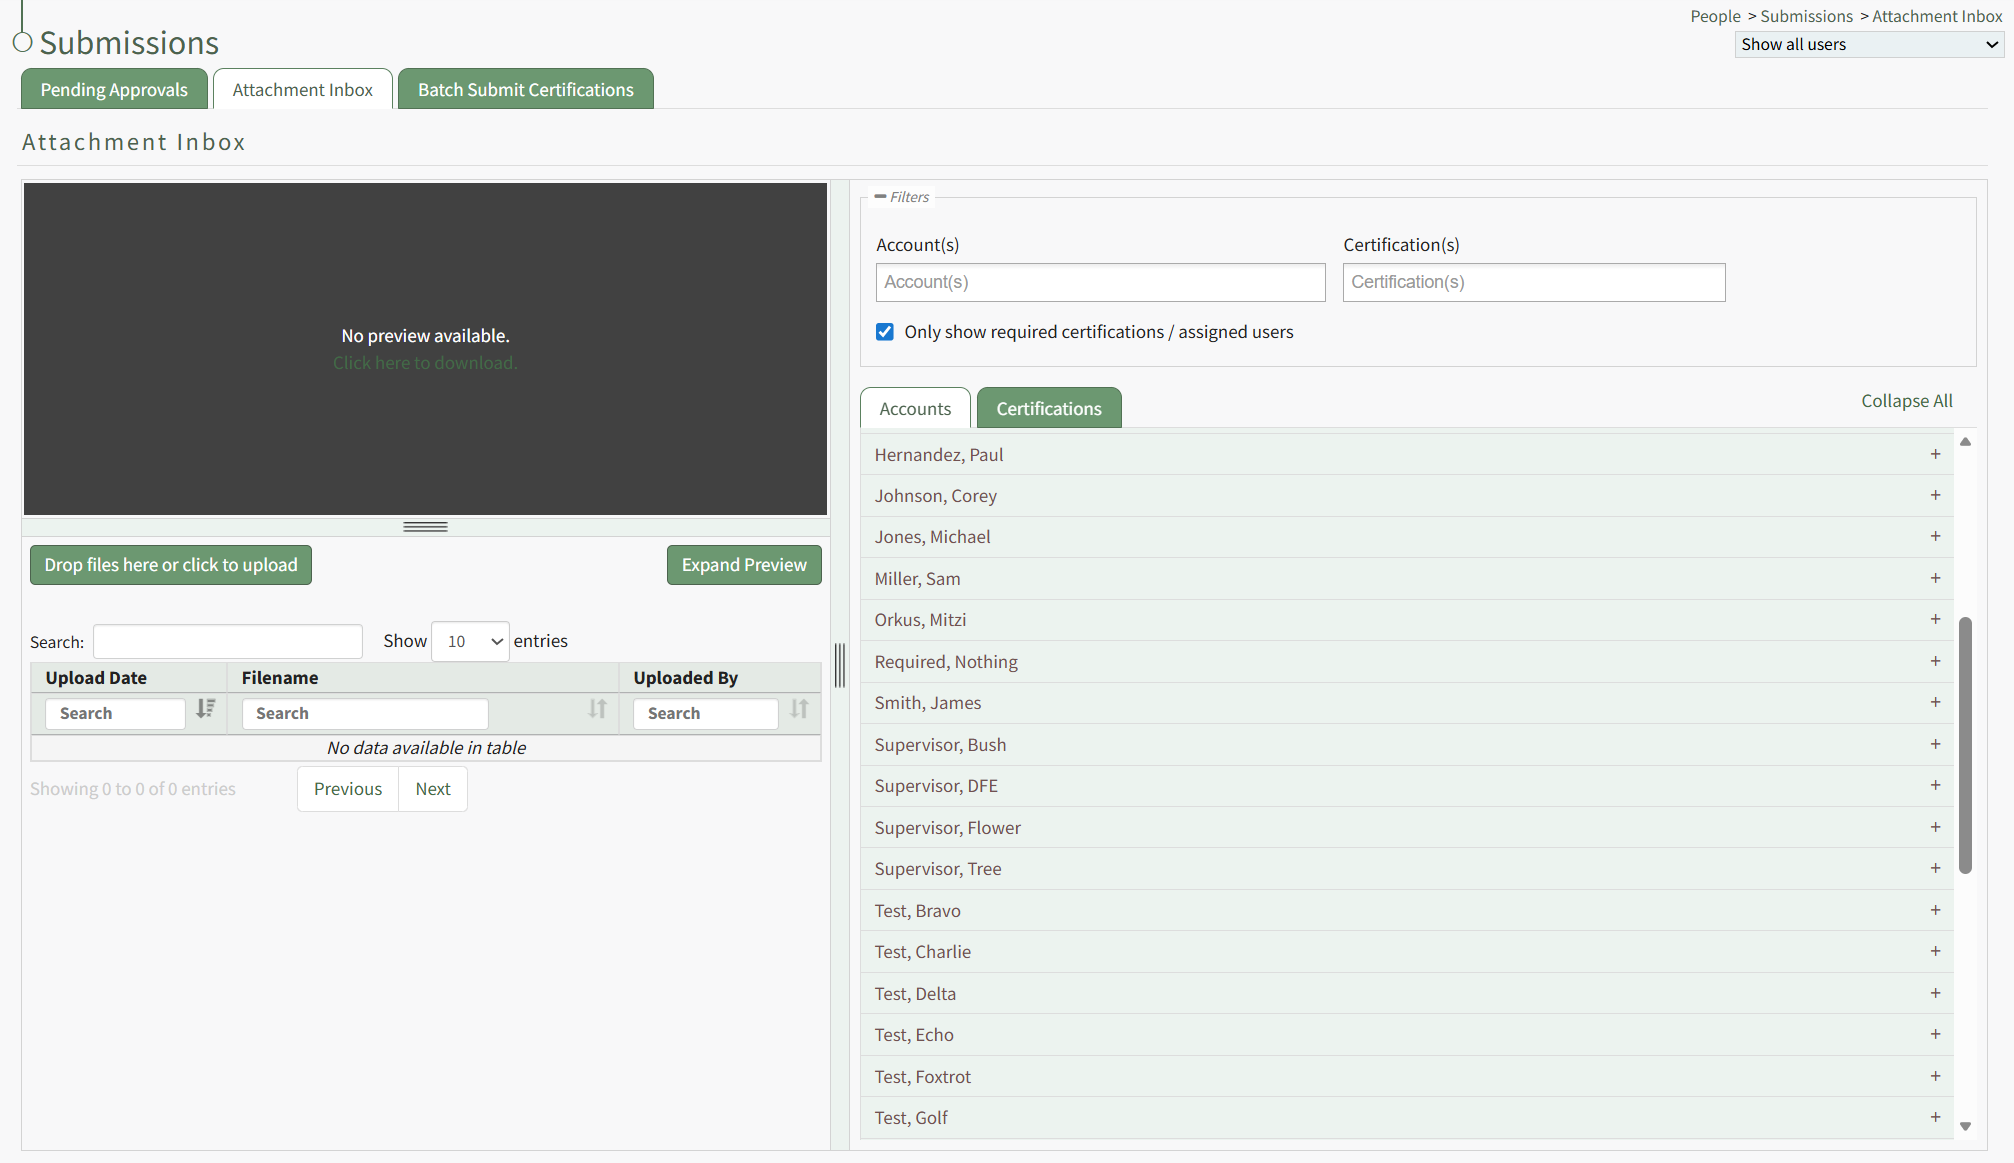
Drag and drop the desired files or click the "Drop Files Here or Click to Upload" button to upload the appropriate files.
PDF files will be visible in the preview window. Other file types can be downloaded if desired.
For flexibility, the file can be assigned to user accounts or a specified certification. Select the view best for your purposes and click the plus sign icon to the right of the account or certification to expand it.
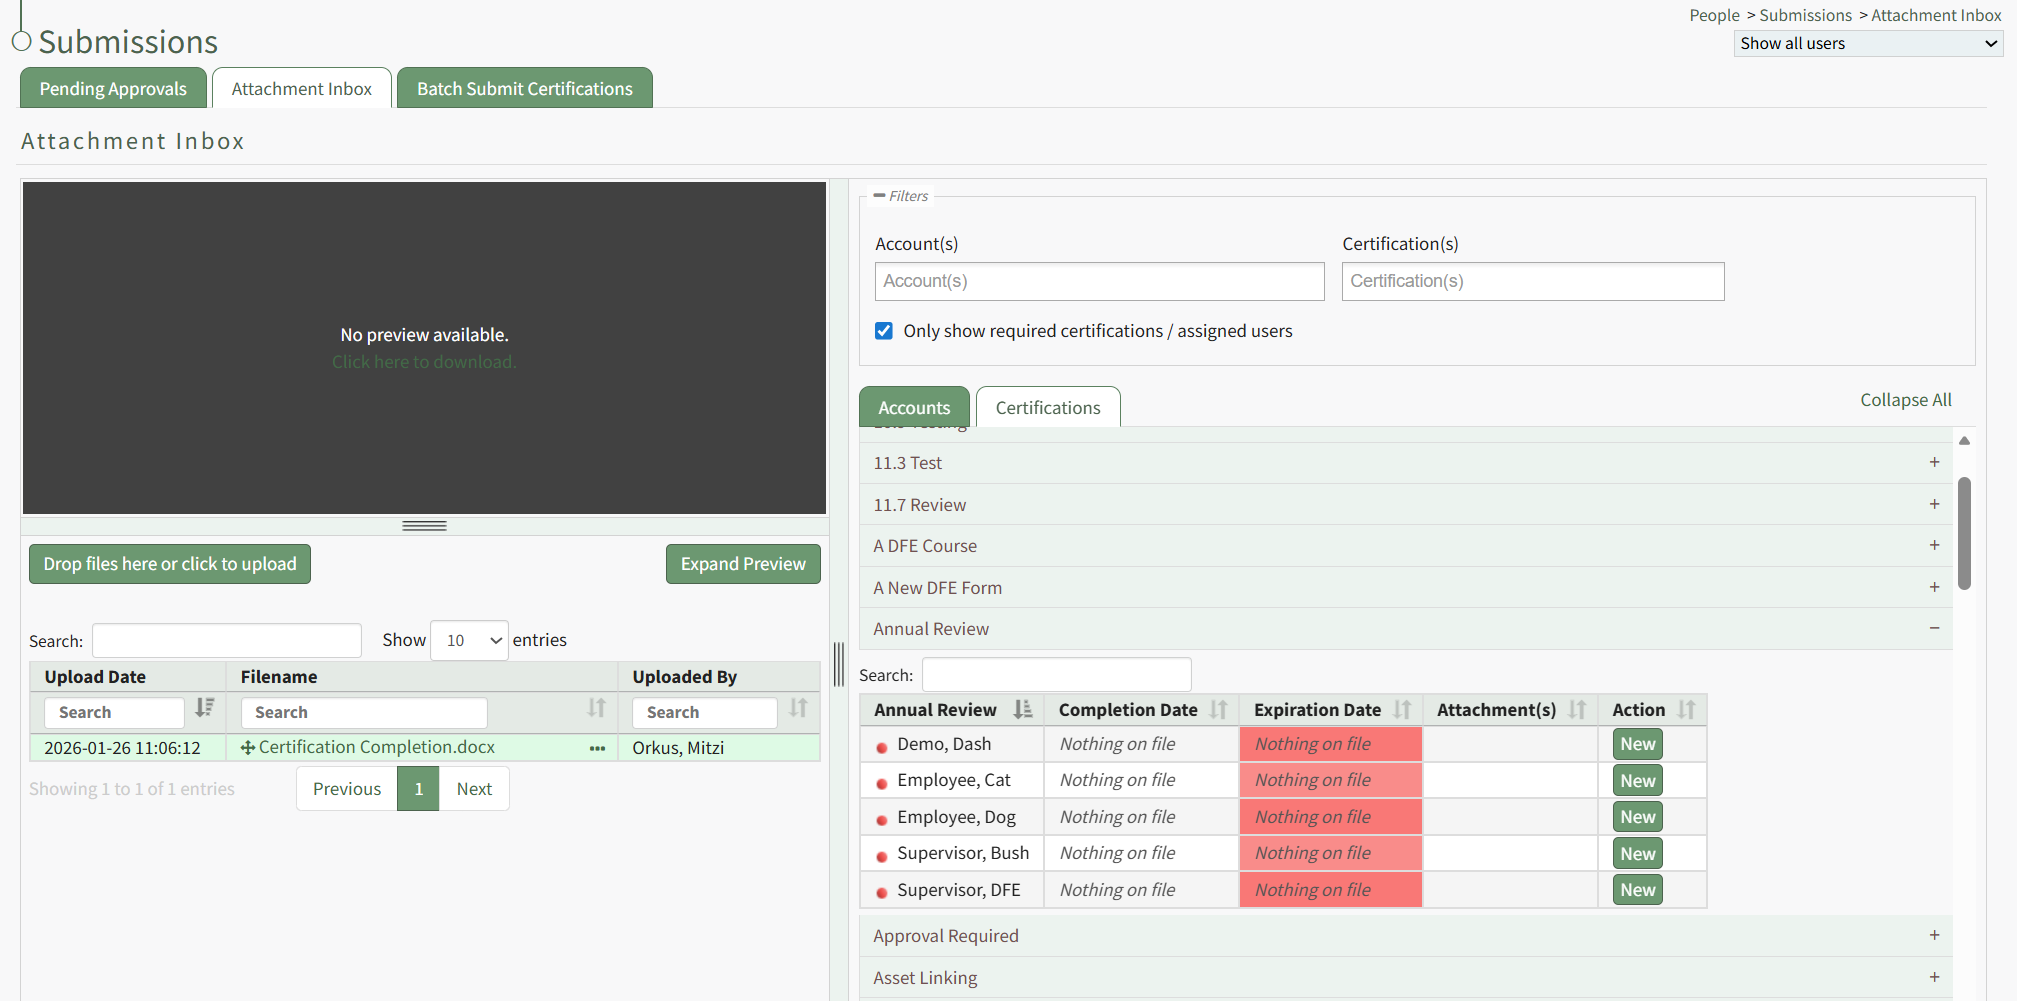
A table shows the users assigned to the certification. Click the New button in the Action column opening the Rename Attachment Modal.
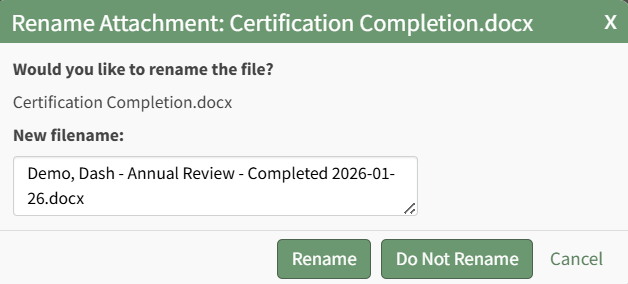
The modal renames the file according to the customizable People Module attachment naming settings, but you have the ability to edit the filename if desired.
When the Attachment Naming Settings are turned on for the Attachment Inbox, KAStrack will require that every uploaded attachment be named according to a designated template within this section for organizational purposes.
To edit the attachment naming settings, open the Module Settings Tab on the Settings Page in the People Module from the Main Menu. ![]()
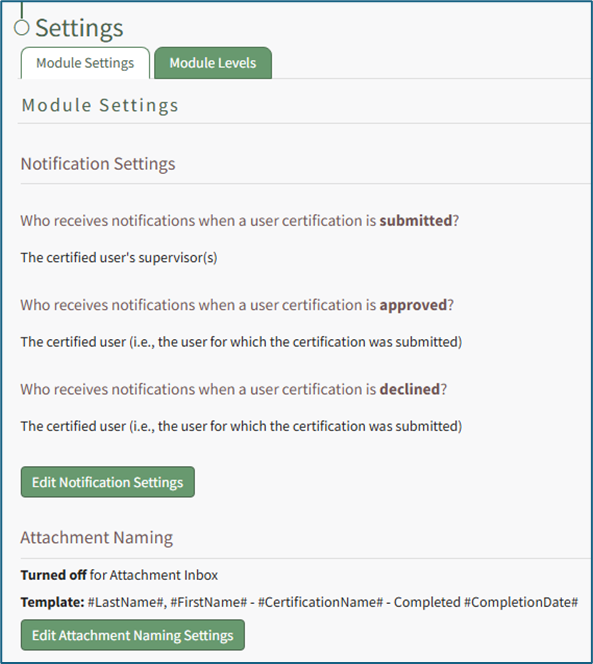
Select “Edit Attachment Naming Settings” to access the Edit Attachment Naming Settings Page.
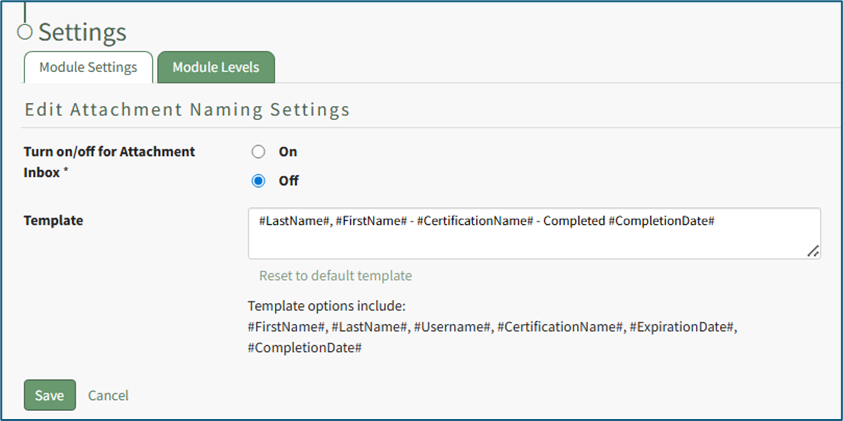
Selecting “On” will require that all attachments be named in a specific way, customized by the Attachment Naming Template.
The default template for Attachment Naming Settings is: Last Name, First Name, Certification Name – Completed, Completion Date
Template options include: #FirstName# , #LastName# , #Username# , #CertificationName# , #ExpirationsDate” , and “Completion Date#. These template options will fill data into the Attachment’s name based on the User Certification the Attachment is being associate with.
Customize the Naming Template to user preferences using the before/after hashtag and comma separated value format to establish recognizable computer language variables.
Select “Save” to update the Attachment Naming Settings or “Cancel” go back to the Module Settings tab on the Settings Page.
Click the Rename button, opening the Submit Certification Modal.
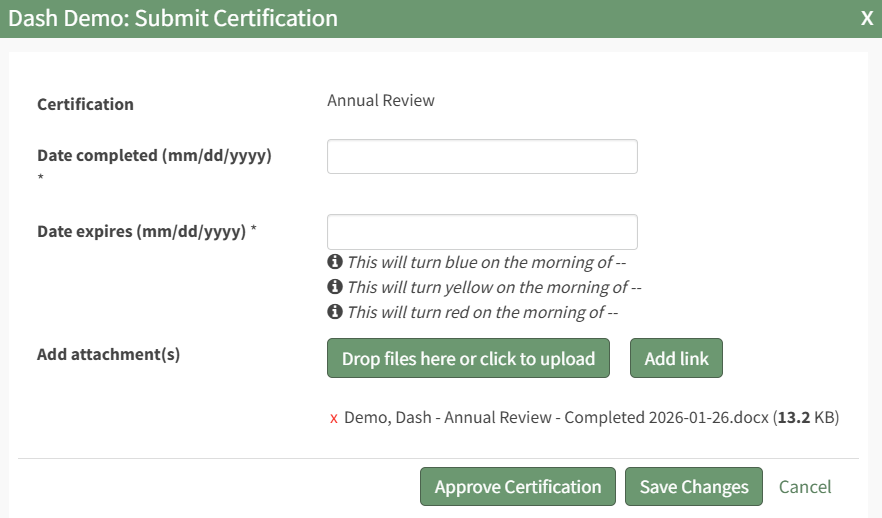
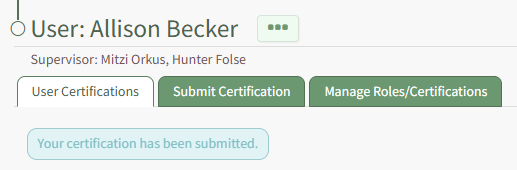
To submit the certification, include the date the certification was completed and select the Save Changes button.
To submit and approve the certification, include the date the certification was completed and select the Approve Certification button.
A textbox below the tabs confirms the completed action.
Any file type can be imported, but previews are only supported for specific filetypes. If a preview cannot be shown for a filetype, a button to download the file will be shown in the Preview Window.
The Batch Submit Certifications Tab
The Batch Submit Certifications tab allows a supervisor to select a certification from a dropdown menu and bulk submit it to certify a group of users simultaneously.
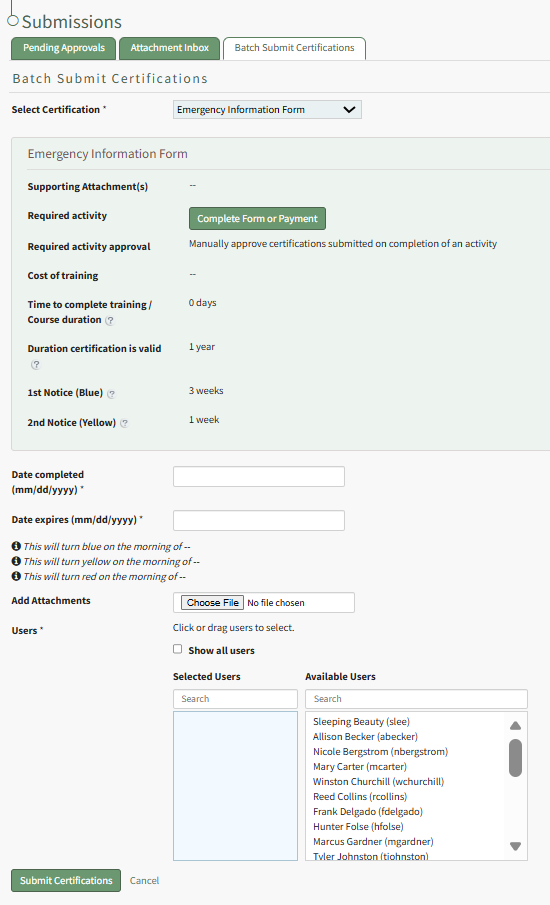
This function is useful when a large number of employees completed a training class and have the same certification validation.
How To: Batch Submit Certifications in Bulk
To simultaneously submit a Certification for multiple users’ accounts, open the Batch Submit Certifications Tab on the Submissions page. Select the certification you would like to submit from the dropdown menu at the top of the page. The information for the selected certification is shown above the required bulk certification validation inputs.
Certifications with a required activity will show a green activity button in their Certification Information box above the required bulk certification validation inputs. Be aware that this button will launch the activity for your account as if you are personally completing the Certification. If you do not need to complete the certification yourself, you can ignore this button.
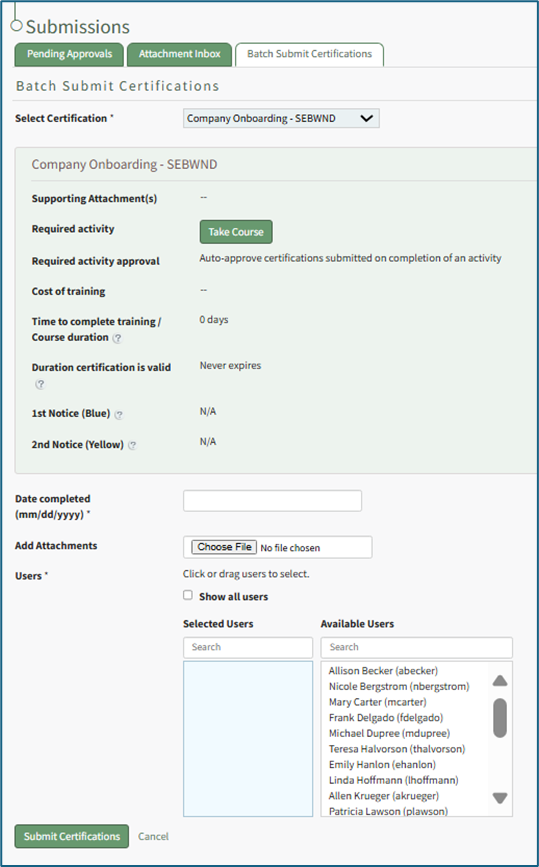
To batch submit, input the Date Completed in MM/DD/YYYY format. Select “Choose File” to upload any attachments.
By default, all available users associated with the selected certifications will show under Available Users. Select the “Show all users” checkbox to see all users in the system, regardless of if they are currently associated with the certification.
Click a user’s name to move it between the Selected Users and Available Users list. You can also drag and drop names.
Select “Submit Certifications” to complete the batch submission process, or select “Cancel” to reset the Batch Submit Certifications Tab.
No comments to display
No comments to display