Settings Page: Module Settings and Module Levels Tabs
Module Settings Tab
The Module Settings Tab on the Settings Page of the People Module allows the user to customize KAStrack settings for certifications and attachments. It is subdivided into two sections: “Notification Settings” and “Attachment Naming.”
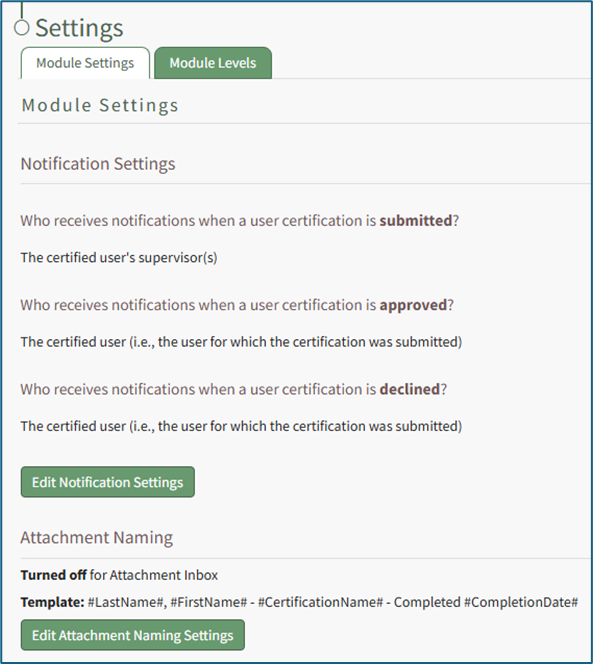
The “Notification Settings” section displays default selections for who will receive notifications under different scenarios/conditions. KAStrack has three default system notifications settings. The system will notify the certified user’s direct supervisor when a user certification is submitted, it will notify the certified user when a user certification is approved and it will notify the certified user when a user certification is declined.
These settings can be edited by selecting the green “Edit Notification Settings” button at the bottom of the section.
How To: Edit Notification Settings
To edit the People Module Notification Settings, open the Module Settings Tab of the Settings Page in the People Module from the Main Menu.
Click the “Edit Notifications Settings” button to access the Notifications Settings Page which offers checkbox selections for three different notification scenarios.
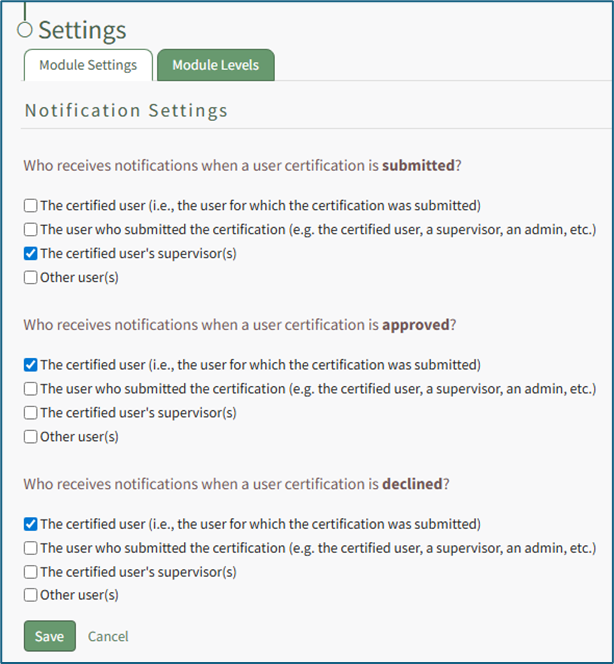
A user has the ability to customize who is notified when a user certification is submitted, when a user certification is approved, and when a user certification is declined.
There are four checkboxes for each of the three previous scenarios:
- The certified user (the user who completed the certification)
- The user who submitted the certification (could refer to the certified user, a supervisor, or and/or an administrator depending on the company’s certification submission procedures)
- The certified user’s supervisor(s) (refers to the individual’s direct supervisor)
- Other user(s) (allows for the selection of any user in the KAStrack system from a dropdown menu)
Multiple, all, or none of the checkboxes can be selected.
Select “Save” to update the default notifications or “Cancel” go back to the Module Settings tab on the Settings Page.
The “Attachment Naming” section allows the user to customize how attachments are named. This can be useful when batch uploading files with file names that don’t adequately indicate what the document is / relates to.
When this feature is turned on, KAStrack will require that every uploaded attachment be named according to the designated template within this module for organizational purposes.
The default template for Attachment Naming Settings is Last Name, First Name, Certification Name – Completed, Completion Date, however this can be customized to your organization's preferences.
How To: Edit Attachment Naming Settings for the People Module
When the Attachment Naming Settings are turned on for the Attachment Inbox, KAStrack will require that every uploaded attachment be named according to a designated template within this section for organizational purposes.
To edit the attachment naming settings, open the Module Settings Tab on the Settings Page in the People Module from the Main Menu. ![]()

Select “Edit Attachment Naming Settings” to access the Edit Attachment Naming Settings Page.
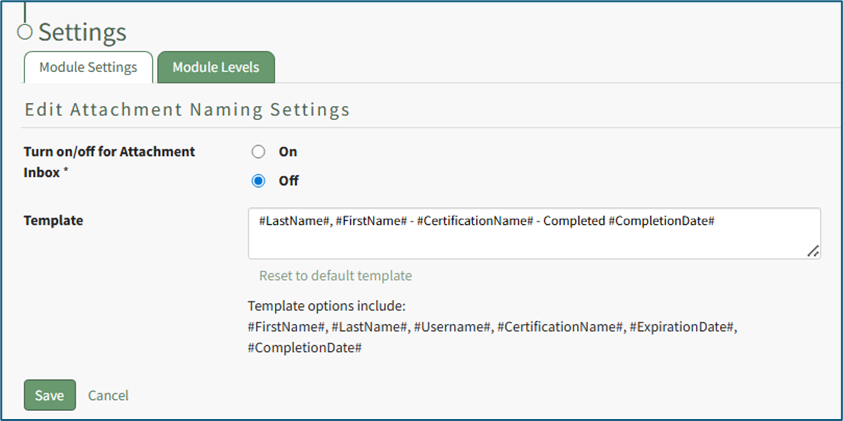
Selecting “On” will require that all attachments be named in a specific way, customized by the Attachment Naming Template.
The default template for Attachment Naming Settings is: Last Name, First Name, Certification Name – Completed, Completion Date
Template options include: #FirstName# , #LastName# , #Username# , #CertificationName# , #ExpirationsDate” , and “Completion Date#. These template options will fill data into the Attachment’s name based on the User Certification the Attachment is being associate with.
Customize the Naming Template to user preferences using the before/after hashtag and comma separated value format to establish recognizable computer language variables.
Select “Save” to update the Attachment Naming Settings or “Cancel” go back to the Module Settings tab on the Settings Page.
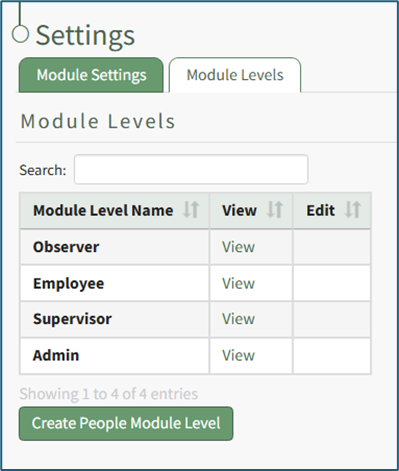
Module Levels Tab
The Module Levels Tab of Settings Page can be accessed from the Main Menu. The system default module levels for the module are visible in the Module Levels Table. New module levels with customizable permissions can be created and managed on this tab.
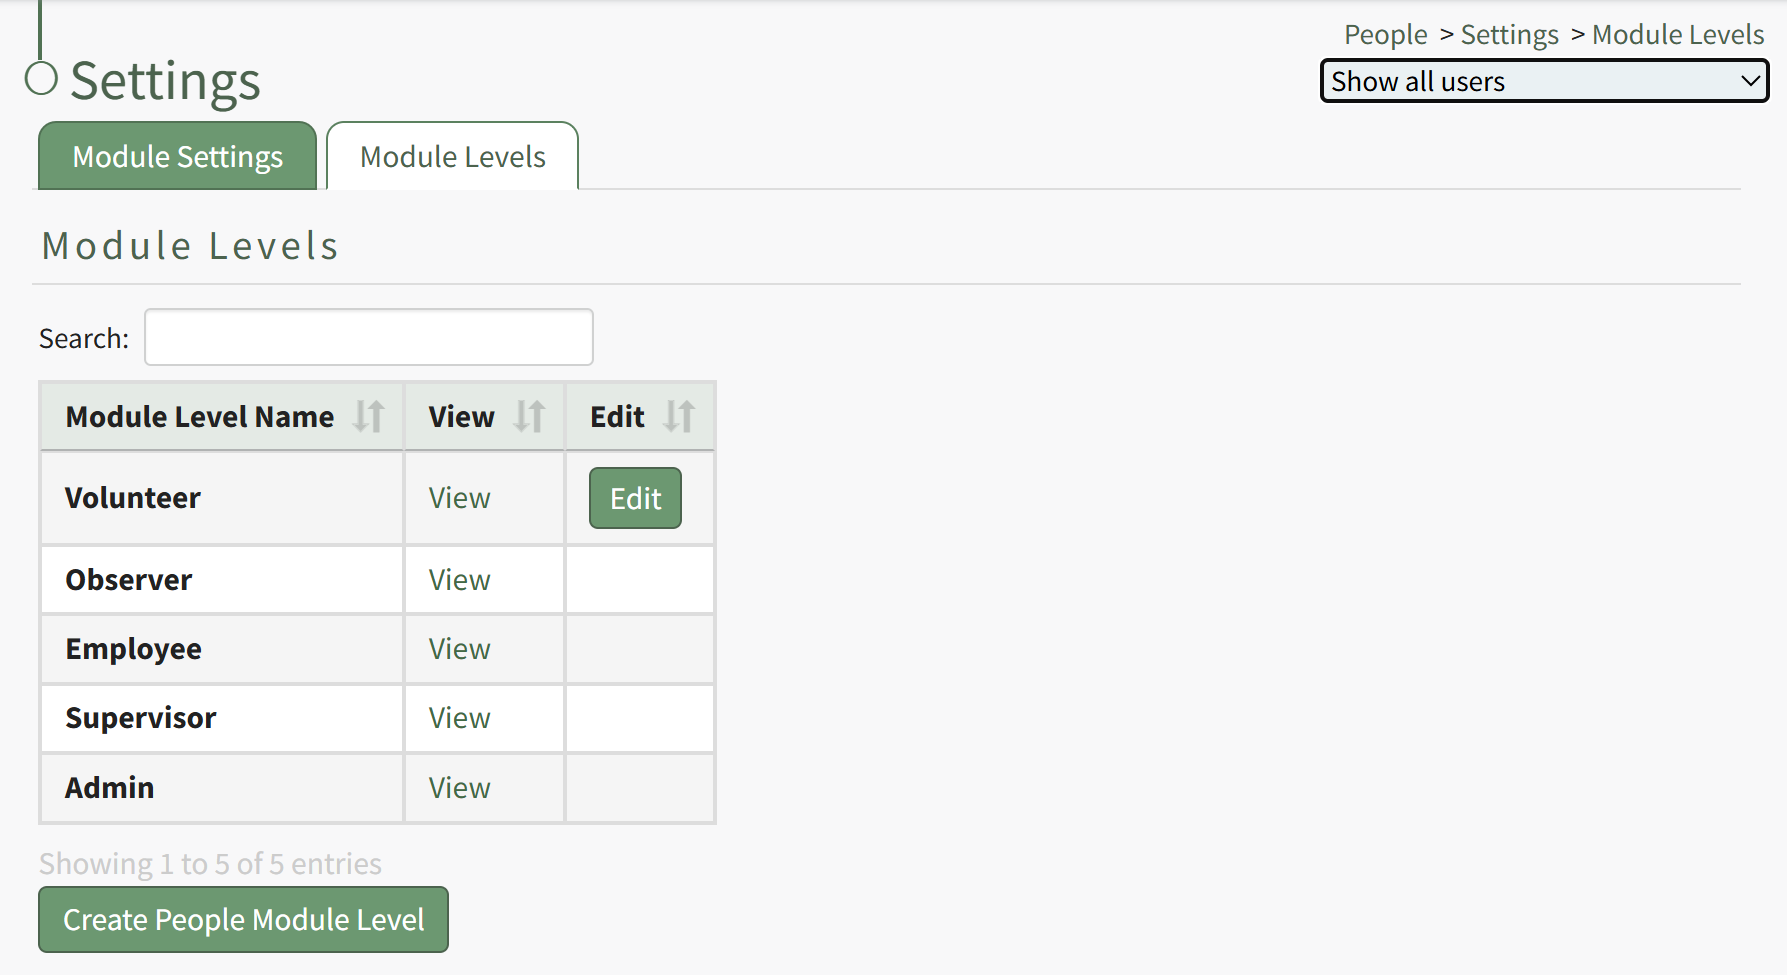
There are four system default module levels associated with the People Module. An explanation of the permissions associated with each default module level are shown in the People Module Level Permissions Table below.
System default module levels cannot be customized.
People Module Level Permissions Table | |
Module Level | Permissions |
Observer | Can create, delete and share reports; can view associated roles and users for certifications, can view all certification roles; can view all assessments |
Employee | Can submit certifications, can submit competency certificates, include users with this level on reports, can view all assessments |
Supervisor | Can submit certifications; Can edit/delete my comments on a user certification that has been approved; Can submit competency certificates; can submit and delete assessments; can approve and delete certifications; can approve and delete competency certificates; include users with this level on reports; can create, delete, and share reports; can submit certifications; can submit competency certificates; can approve and delete competency certificates; can edit user tags; can assign user to certification roles; can manage report visibility; can view associated roles and users for certifications; can edit certification info; can create or delete certifications; can view all certification roles; can edit certification roles; can create and delete certification roles; can view all assessments |
Admin | Can submit certifications; Can edit/delete my comments on a user certification that has been approved; Can submit competency certificates; can submit and delete assessments; can approve and delete certifications; can approve and delete competency certificates; can create, delete, and share reports; can submit certifications; can submit competency certificates; can approve and delete competency certificates; can edit user tags; can assign user to certification roles; can manage report visibility; can edit training courses; can edit notification settings; can view associated roles and users for certifications; can edit certification info; can create or delete certifications; can batch submit for any accessible certification; can view all certification roles; can edit certification roles; can create and delete certification roles; can view all assessments; can edit assessments; can create and delete assessments |
New Module Levels can be created in order to customize module level permissions to suit your organization's needs.
How To: Create a New Module Level (People Module)
To create a new Module Level in the People Module, select the Module Levels Tab on the Settings Page in the People Module on the Main Menu.
Select the “Create People Module Level” button opening the Create People Module Level Page.
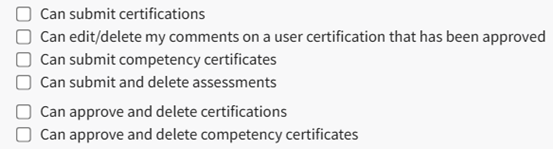
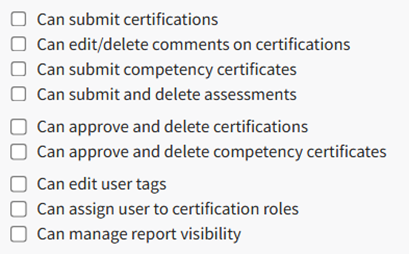
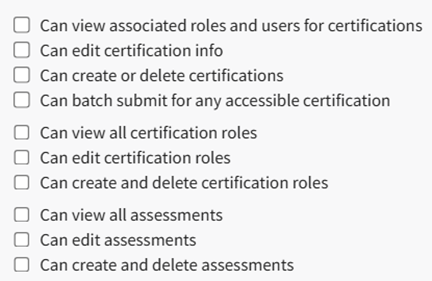
Input the new Module Level Name and select the permissions for the new user group by selecting the desired checkboxes. A comprehensive list of permissions is shown in the table below.
People Module Possible Permissions Organized by Permission Category | |
Permission Category | Possible Permissions |
My Account |
|
Reports |
|
Non-Supervised Users |
|
Supervised User |
|
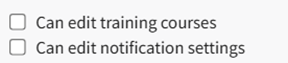
Administration |
|
General Permissions |
|


A list of the module level hierarchy is provided at the bottom of this screen.
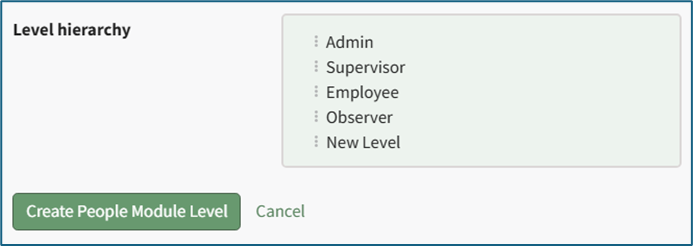
The different module levels can be dragged and dropped as needed in order to quickly and accurately organize as desired.
If a module level permission is included with the associated module level, it displays in black font with a check mark to the left of the permission. If the permission is not included, it displays in gray font with a line strikethrough and no check mark.

If the Reports permission “Include users with this level on reports” is given, then users assigned this permission will appear in the matrix, on e-mail reports, and in shared reports. If the Reports permission “Can create, delete, and share reports” is given, the permission includes supervisor and shared reports.
A complete list of all permissions associated with the People Module have been provided in the table below.
People Module Permissions Table | |
Permission Category | Possible Permissions |
My Account |
|
Reports |
|
Non-Supervised Users |
|
Supervised User |
|
Administration |
|
General Permissions |
|
No comments to display
No comments to display