List of People Module How Tos
How To: Access a User's Roles and Certifications Report QR Code
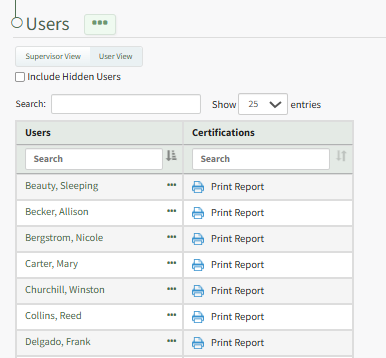
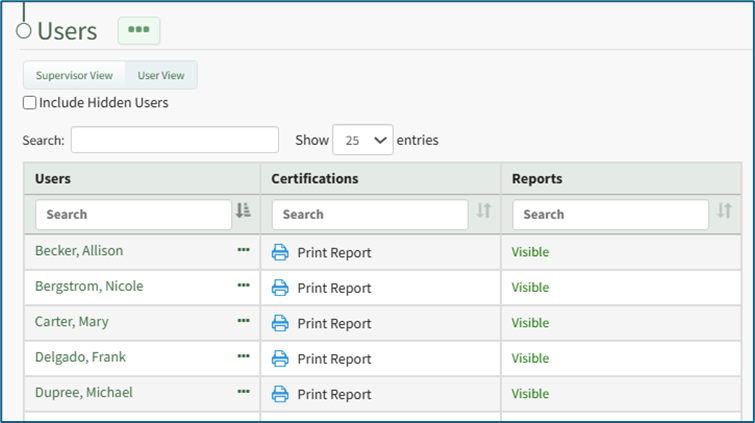
To access a user's roles and certifications report QR Code, open the Users Page in the People Module on the Main Menu. Click the three-dot icon to the right of the specific user's name in the User Table opening the User Table Context Menu.
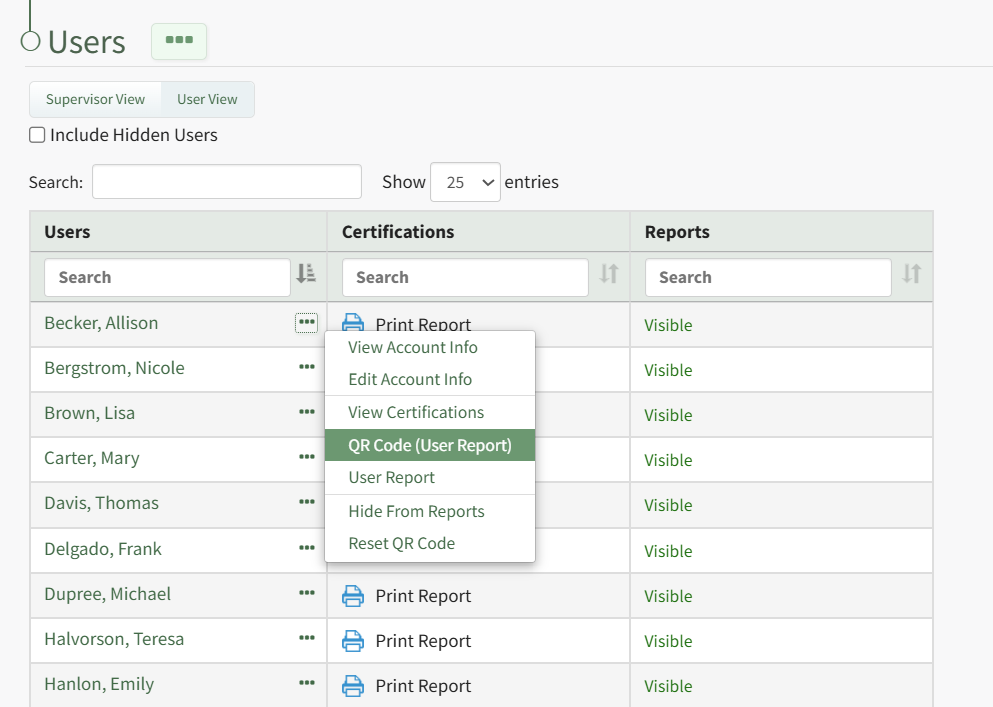
Select "QR Code (User Report)" from the main menu opening the User Report QR Code Modal.

Close the modal to return to the Users Page.
How To: Acknowledge a Document/Video Associated with a Required Certification
One of the possible required activities for a certification is to require acknowledgement of a document or video.
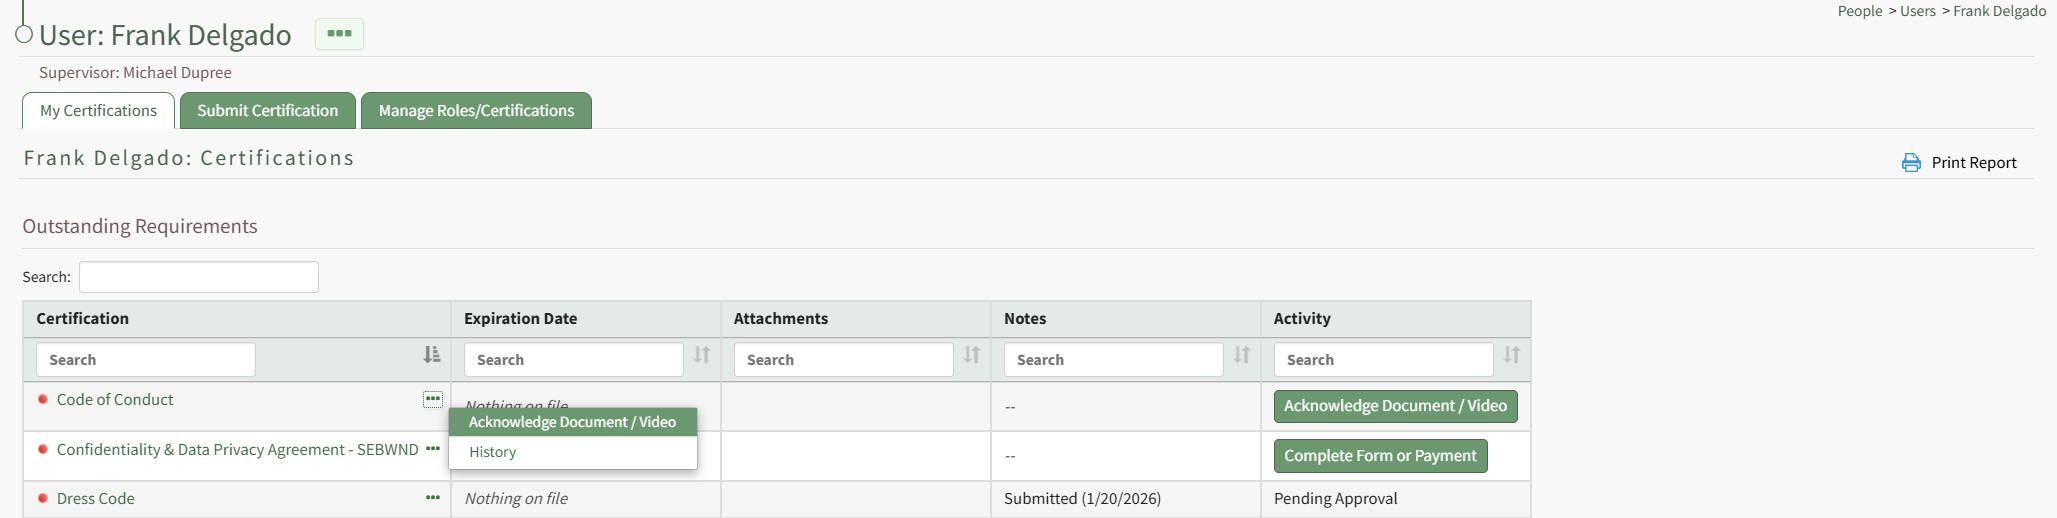
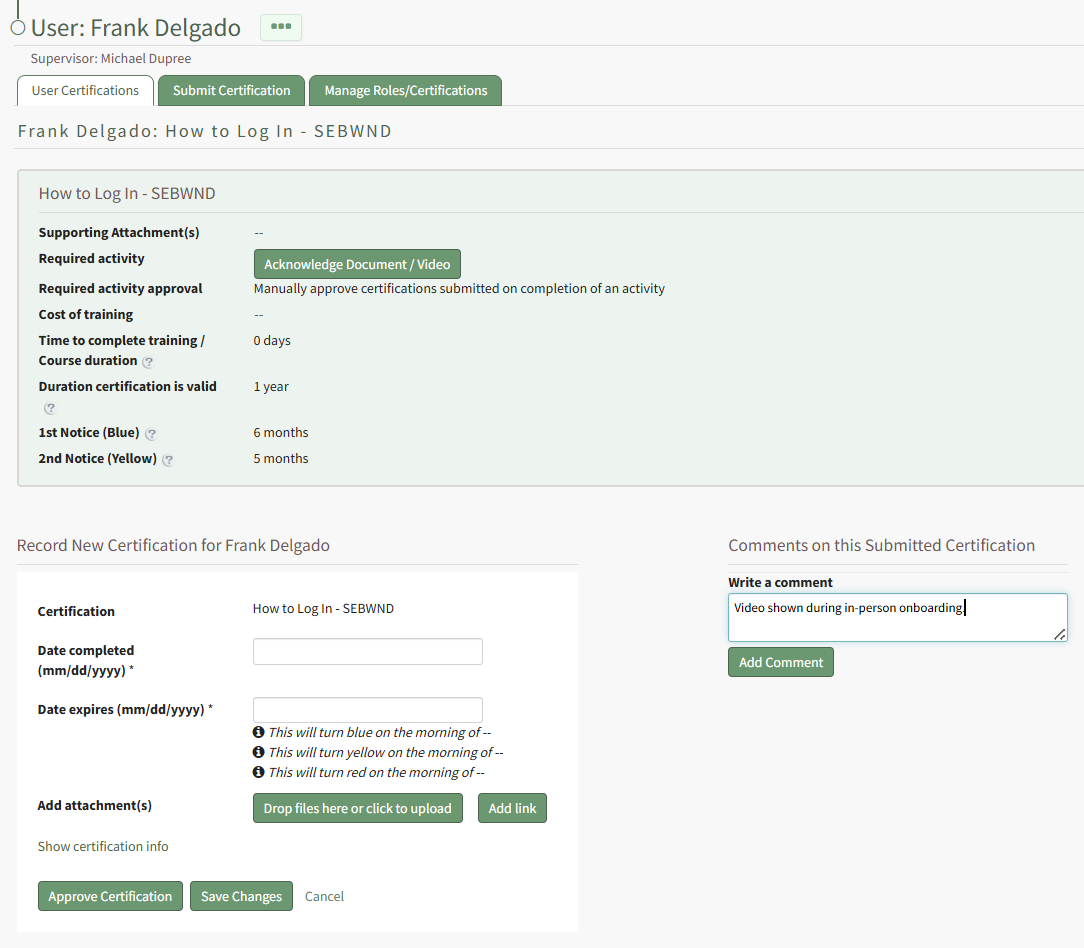
Acknowledge Document / Video is a context menu open as well as a button in the Activity column on a user's My Certifications Tab on the My Account Page of the People Module. It is also a clickable link in the Required Activity column on a User's Certifications Page.

Select Acknowledge Document / Video to open the Acknowledge Document/Video Modal, which displays the required activity directly in the modal.
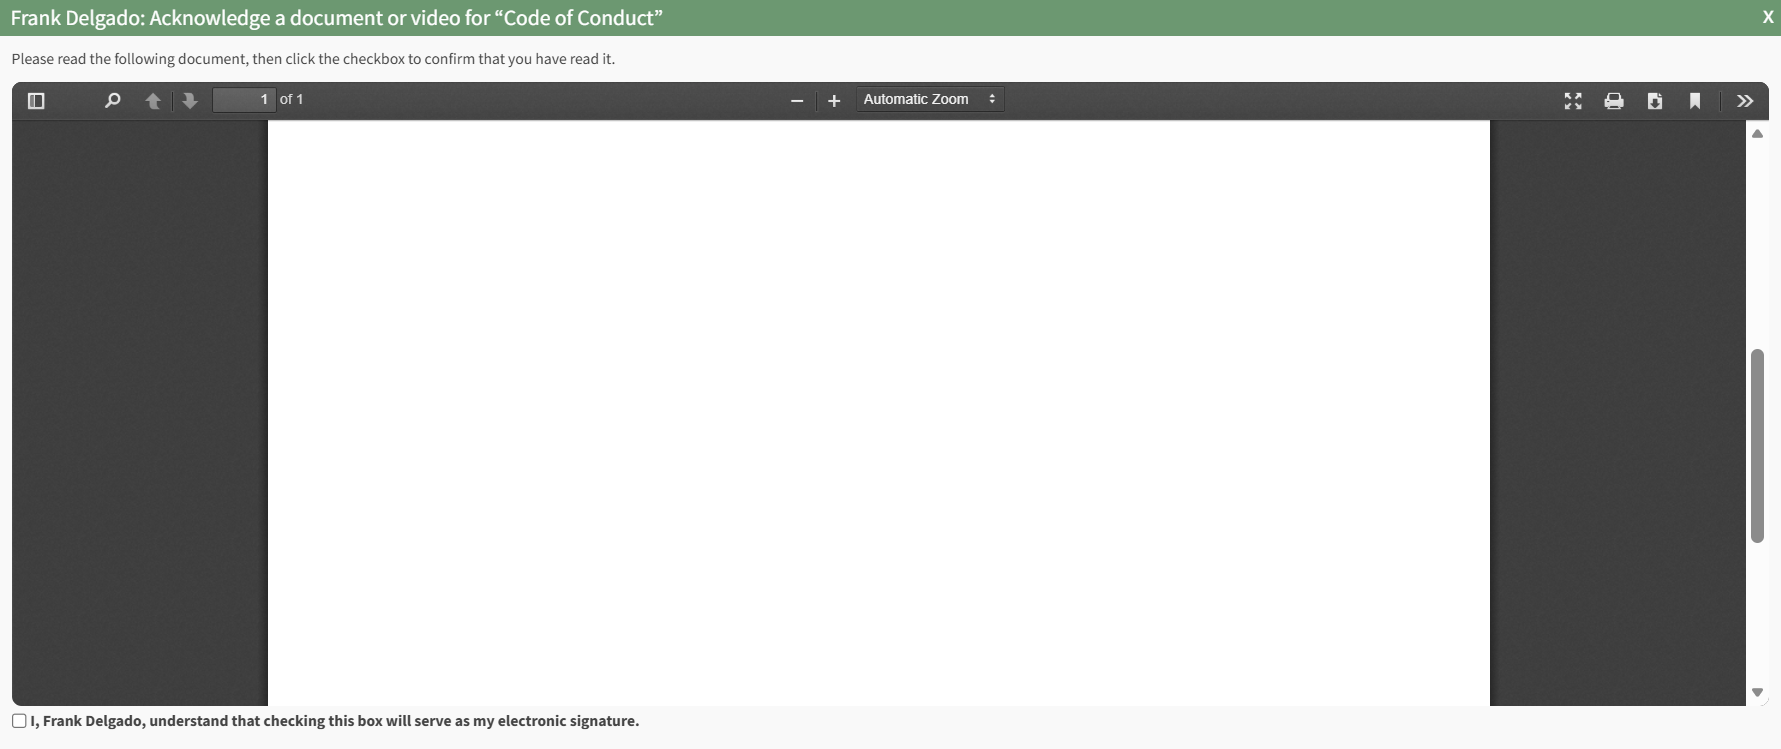
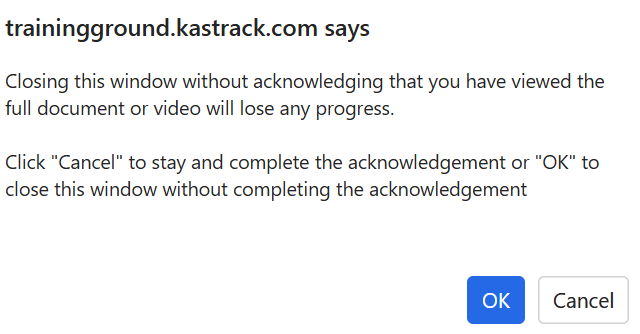
Instructions on the modal state to read the document/watch the video and click the checkbox at the bottom of the modal to confirm you have read/viewed it. If you attempt to close the modal before acknowledging the document/video, a modal appears stating that if you close the window without acknowledgement, you will lose any progress.
Click the checkbox with the statement, "I, FIRST/LAST NAME, understand that checking this box will serve as my electronic signature.

Clicking the checkbox completes the required activity.
The completion of a required activity can also serve as the certification submission. This is a customizable property available to any certification.
How To: Add / Edit / Delete Comments to a User's Submitted Certification
To add comments to a user's submitted certification records, open the Users Page in the People Module from the Main Menu. Identify and click the name of the individual whose submitted certification you wish to comment on.
This opens the User's Certification Details Page. Scroll to the bottom of the User Certifications Tab. To the right of the certification record section is a Comments Section.
Input the relevant notes into the textbox beneath "Write a Comment" and click the Add Comment Button.
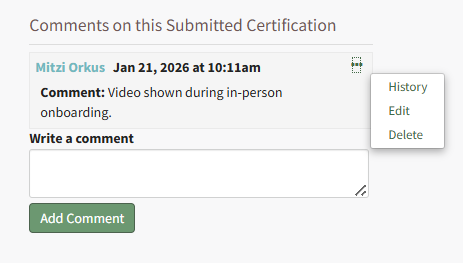
The commentor, date and time are displayed with the comment. Selecting the three-dot icon to the right of the comment header opens a context menu that allows you to edit and delete the comment.
How To: Approve a Submitted Certification Pending Approval
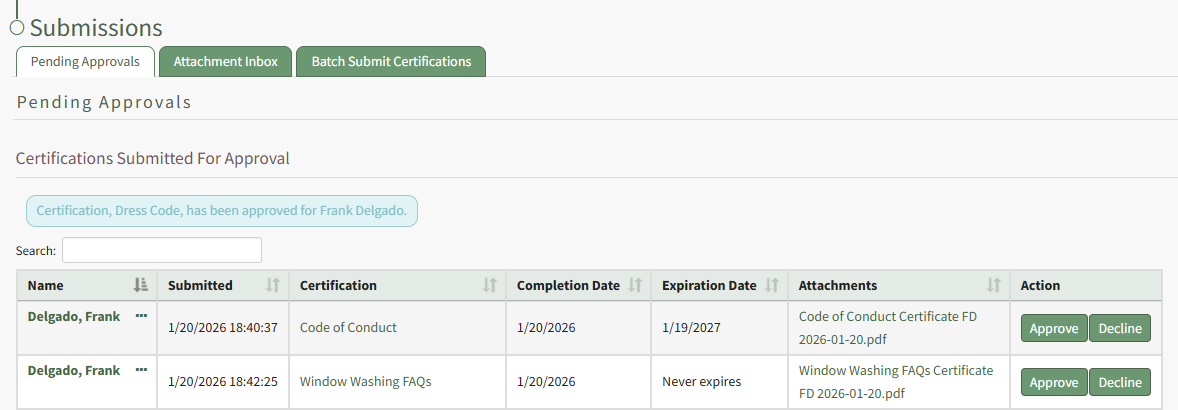
To approve a submitted certification that is pending approval, open the Pending Approvals Tab on the Submissions Page in the People Module from the Main Menu.
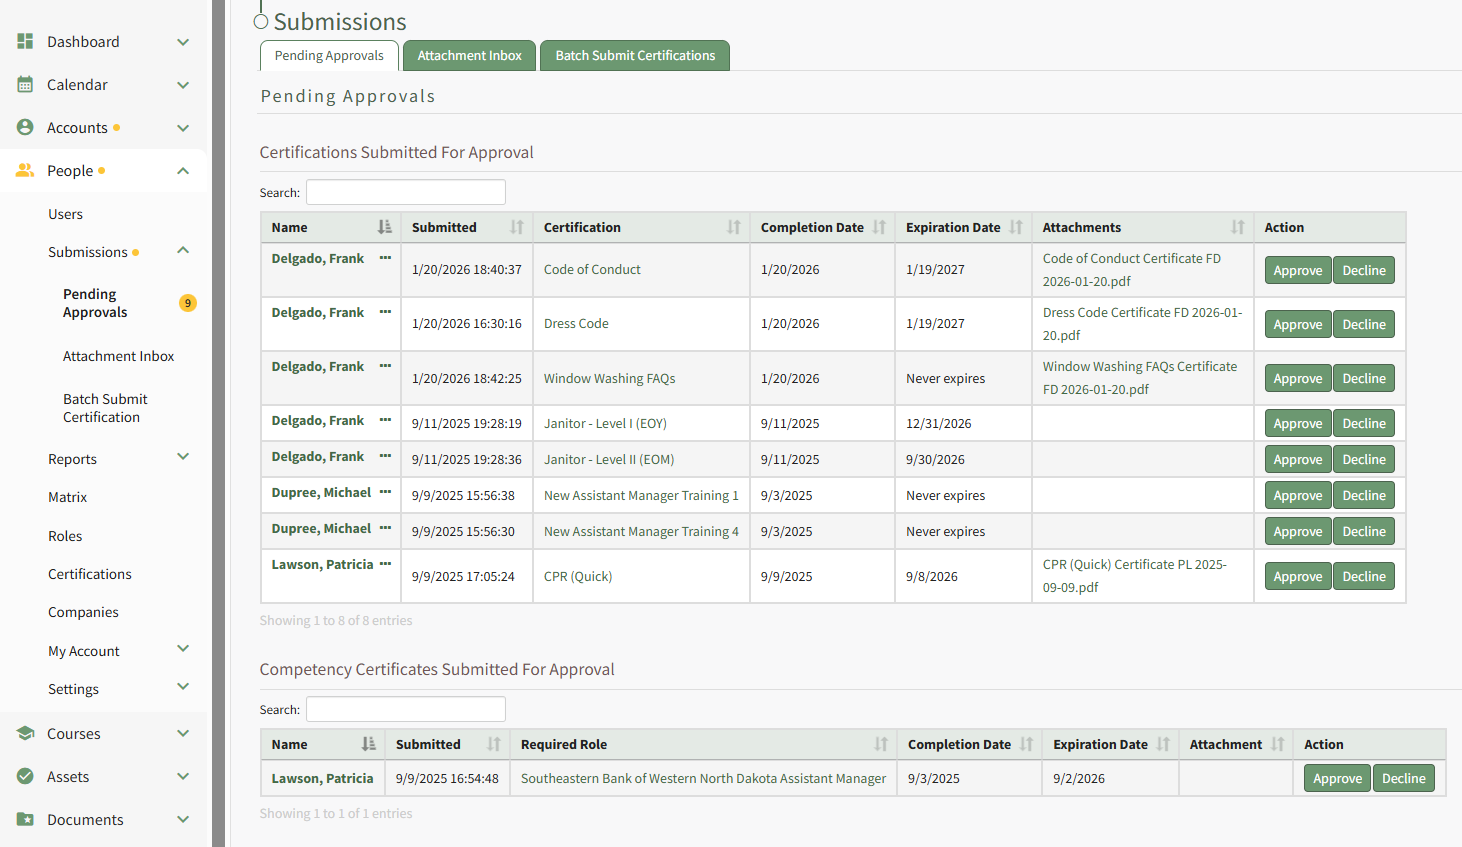
To approve the certification, click the Approve button in the Action column specific to the certification you want to approve. Selecting Approve from the context menu will initiate the same action.
A text box confirms that the certification was approved, and it is no longer visible on the Pending Approvals Tab.
How To: Approve Multiple Certifications Submitted for Approval for a Specific User
To easily approve multiple certifications that have been submitted for a specific user, open the Users Page in the People Module from the Main Menu. Click the name of the individual in the Users column whose certifications you want to approve.
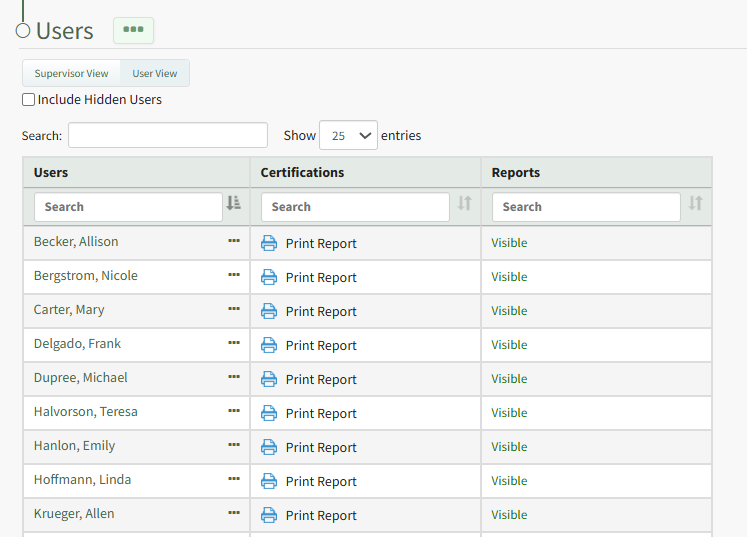
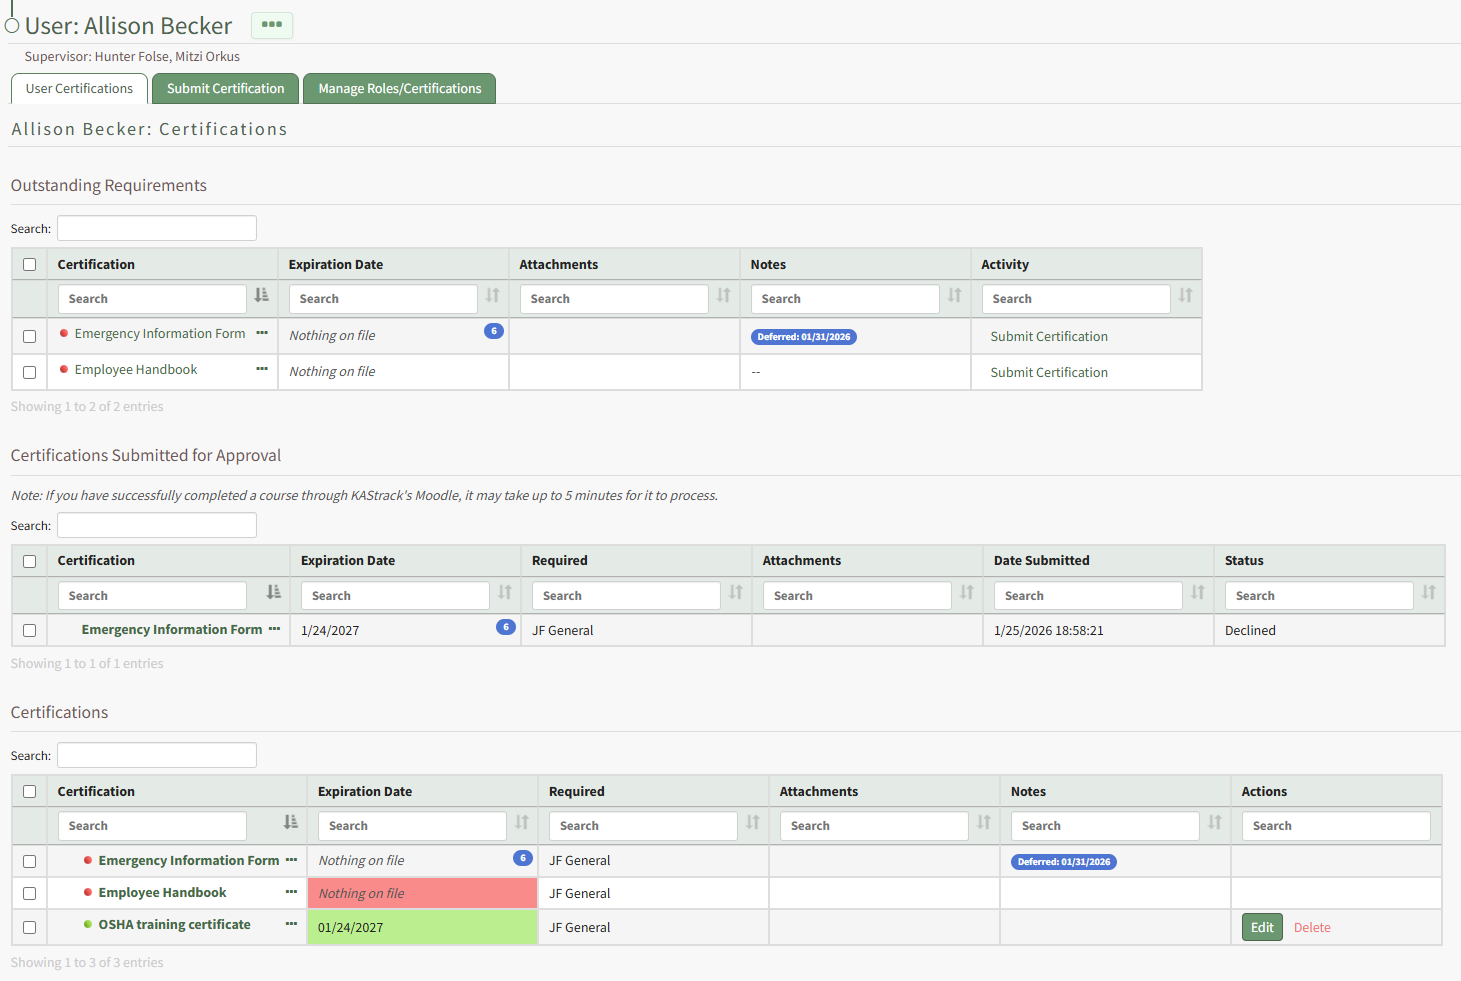
This opens the user's Certifications Details Page. Certifications pending approval are displayed in the Certification Submitted for Approval Section.
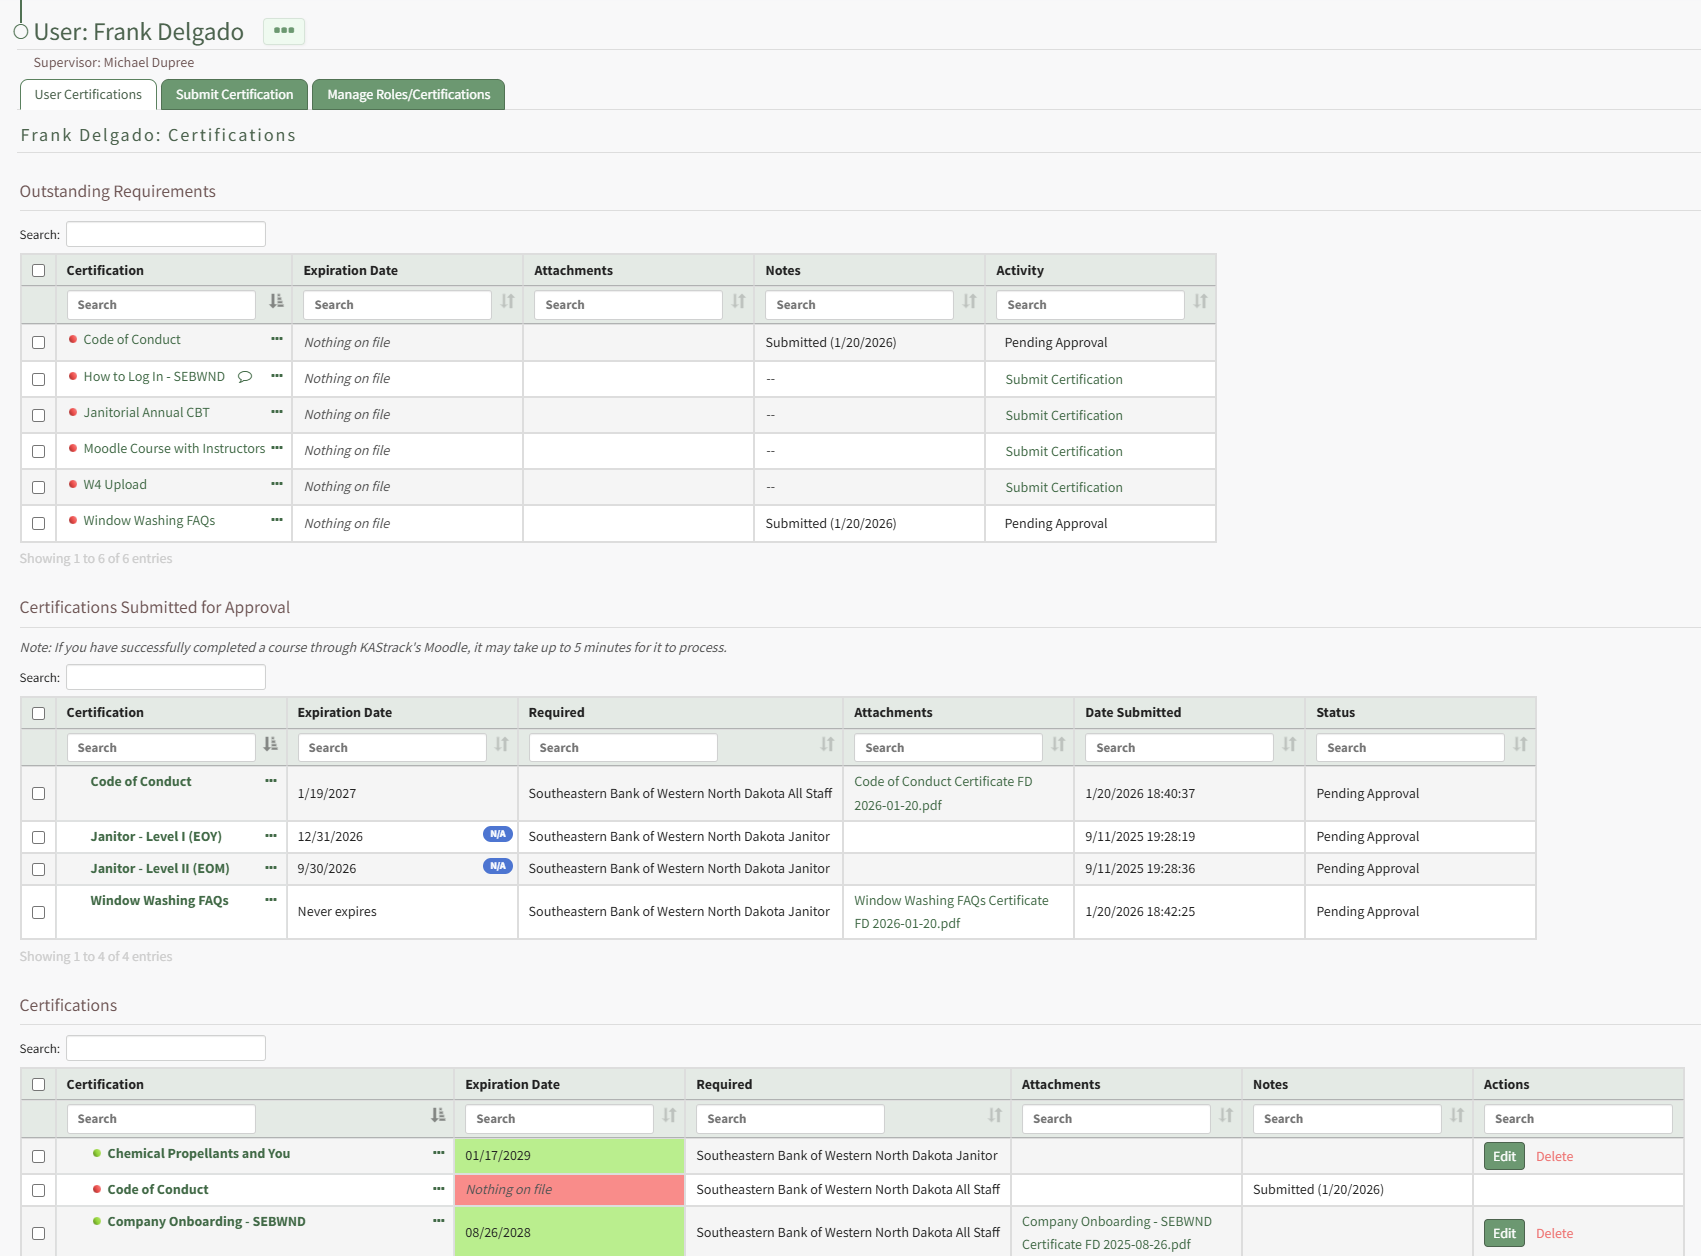
Clicking the three-dot icon to the right of the certification name in the Submitted Certifications Table opens a context menu with an option to Approve.
How To: Assign a Certification Role to Multiple Users at Once
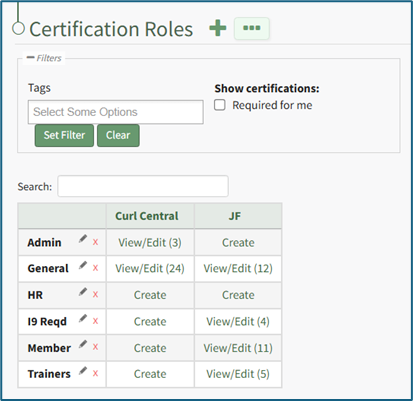
To assign a certification role to multiple users at once, select the Roles Page in the People Module from the Main Menu to open the Certification Roles Page.

Click the “View/Edit (#)” clickable link that pertains to the role you want to assign users to opening the Assigned Users Tab of the specified certification role's Details Page.
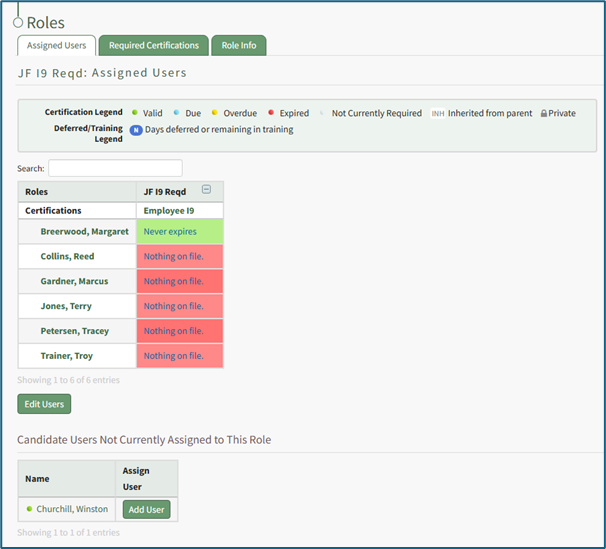
The Assigned Users Table shows the user’s names in the first column. The following columns show the certifications assigned to the role selected. Click the “Edit Users” button to open the Edit User Table on the Assigned Users Tab.
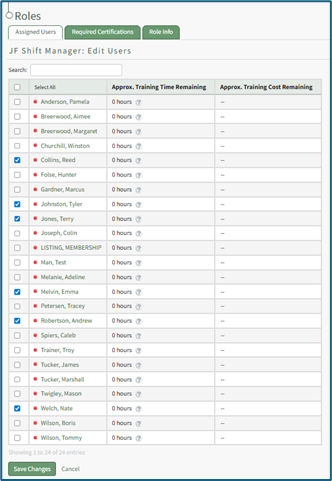
Use the checkboxes in the first column to identify the users the certification role now applies to.
Use the checkbox in the header row to select/deselect all available users.
Click the “Save Changes” button and return to the Assigned Users tab.
How To: Assign Candidate Users to a Certification Role
Candidate Users are users who, based on their current completed Certifications and the Certification Requirements for this role, would be valid (green status) if they were added to this Certification Role. Candidate Users are identified by KAStrack and shared on the Assigned Users Tab of a certification role's Details Page.
To see candidate user recommendations and assign them, select Roles in the People Module on the Main Menu. This opens the Certification Roles Page. Identify the specific role whose candidate users you wish to review and select the clickable link "View/Edit (#)".
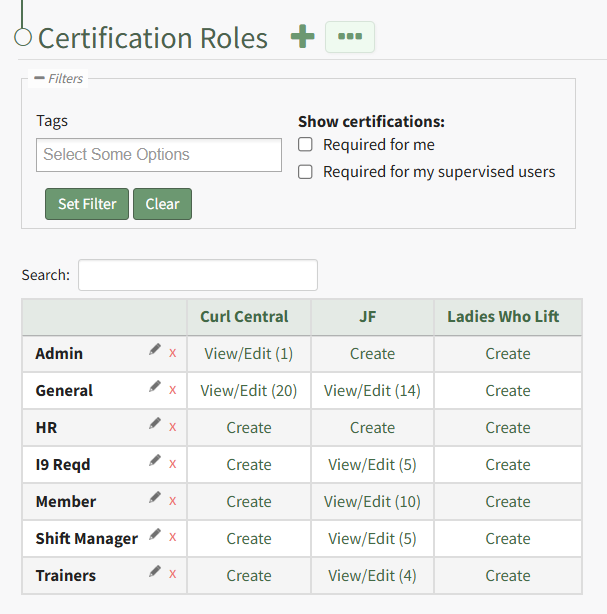 Identify the specific role whose candidate users you wish to review and select the clickable link "View/Edit (#)" opening the certification role's Details Page on the Assigned Users Tab.
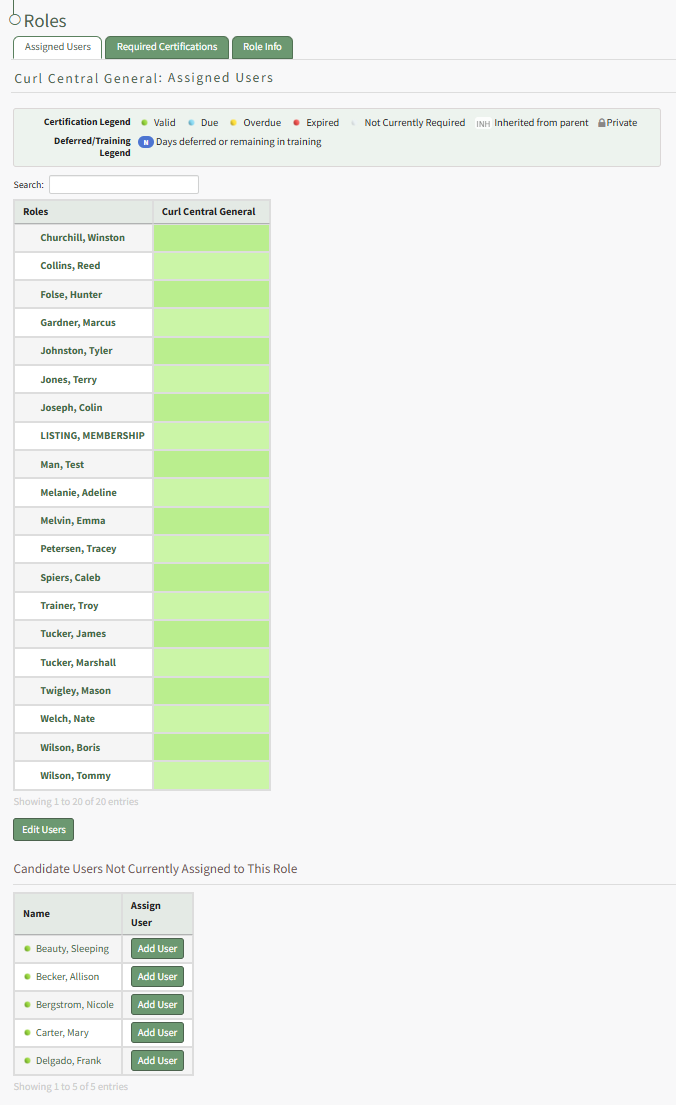
At the bottom of the tab will be the list of KAStrack generated candidate users that are not currently assigned to the role. Click the "Add User" button to the right of a candidate user's name and that user will now be included in the Assigned Users Table above.
How To: Assign Certifications to a User Independent of a Required Certification Role
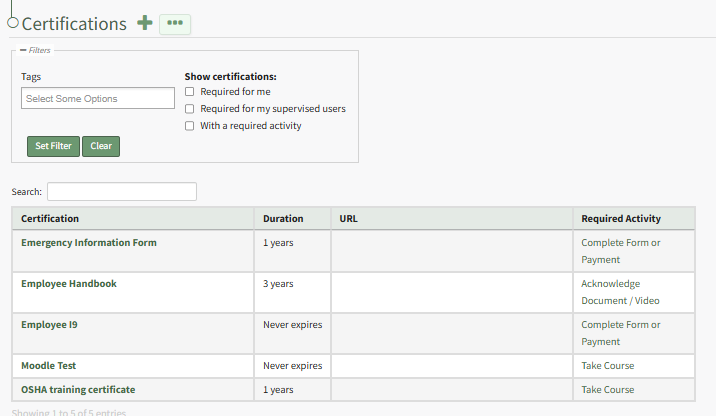
To assign a certification to users independent of a required certification role, open the Certifications Page in the People Module from the Main Menu.
Click the name of the certification you wish to assign to users opening the Certification Details Page.
Click the pencil icon opening the Select Assigned Users Modal.

Clicking the name of a user will move them from the available to assigned column, and vice versa. After assigning the appropriate available users, select the Save Assigned Users button.
The user will now show in the table. In the required column, you will see "Other Required Certification" instead of an associated certification role.
How To: Assign Users to a Certification Independent of a Required Certification Role
To assign a certification independent of a required certifications role, select Certifications in the People Module from the Main Menu to open the Certifications Page.
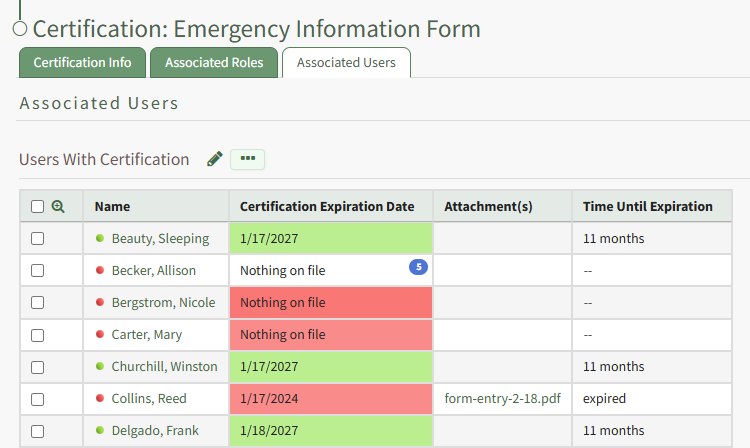
Click the name of the certification you wish to add users to independently of a required certification role opening the specified certification's Details Page. Open the Associated Users Tab.
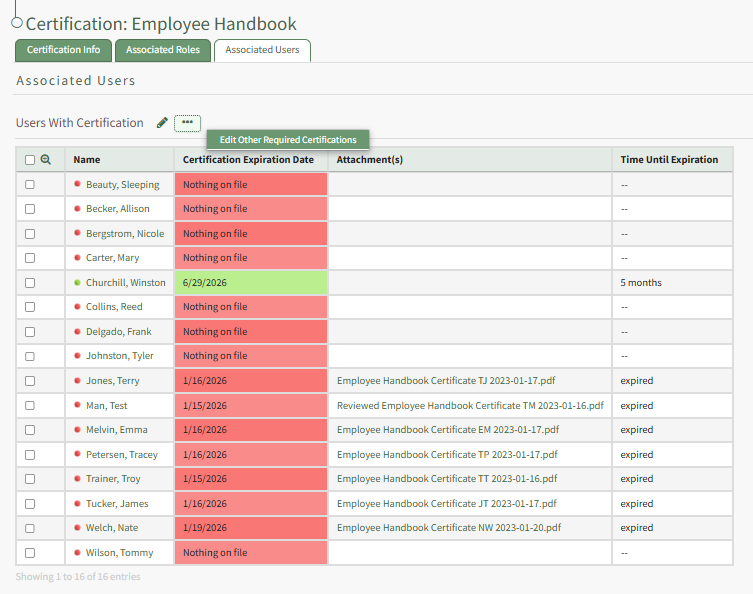
The pencil icon and the context menu option to "Edit Other Required Certifications" both initiate the same action, opening the Select Assigned Users Modal for the specific certification.
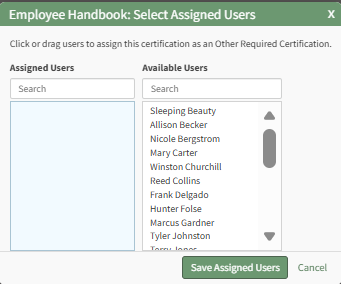
Clicking a user in one column will move them to the other. After selecting the users you wish to assign to the certification independently of their certification roles, click the Save Assigned Users button.
The users selected will now show on the Users with Certification table.
How To: Attach a File or Link to a User's Certification
To attach a file or link to a supervised user's certification, open the Users Page in the People Module and click the name of the user whose certification you want to attach a file or link to, opening the user's Certifications Details Page.
Click the certification name in the table opening the user's certification.
Select the "Drag Files Here or Click to Upload" button to attach a file to the user's certifications.
Select the Add Link button to include a URL Link with the certification.
Click the Save Changes button when complete.
A textbox beneath the User Certification Tab confirms that your changes were submitted.
How To: Batch Submit Certifications in Bulk
To simultaneously submit a Certification for multiple users’ accounts, open the Batch Submit Certifications Tab on the Submissions page. Select the certification you would like to submit from the dropdown menu at the top of the page. The information for the selected certification is shown above the required bulk certification validation inputs.
Certifications with a required activity will show a green activity button in their Certification Information box above the required bulk certification validation inputs. Be aware that this button will launch the activity for your account as if you are personally completing the Certification. If you do not need to complete the certification yourself, you can ignore this button.
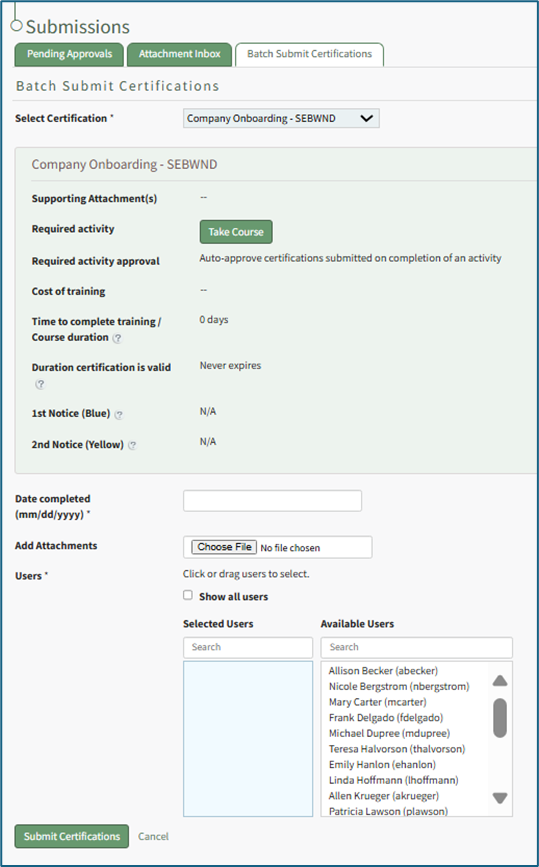
To batch submit, input the Date Completed in MM/DD/YYYY format. Select “Choose File” to upload any attachments.
By default, all available users associated with the selected certifications will show under Available Users. Select the “Show all users” checkbox to see all users in the system, regardless of if they are currently associated with the certification.
Click a user’s name to move it between the Selected Users and Available Users list. You can also drag and drop names.
Select “Submit Certifications” to complete the batch submission process, or select “Cancel” to reset the Batch Submit Certifications Tab.
How To: Complete a Form Associated with a Required Certification
One of the possible required activities for a certification is to require a form to be submitted or a payment to be made.
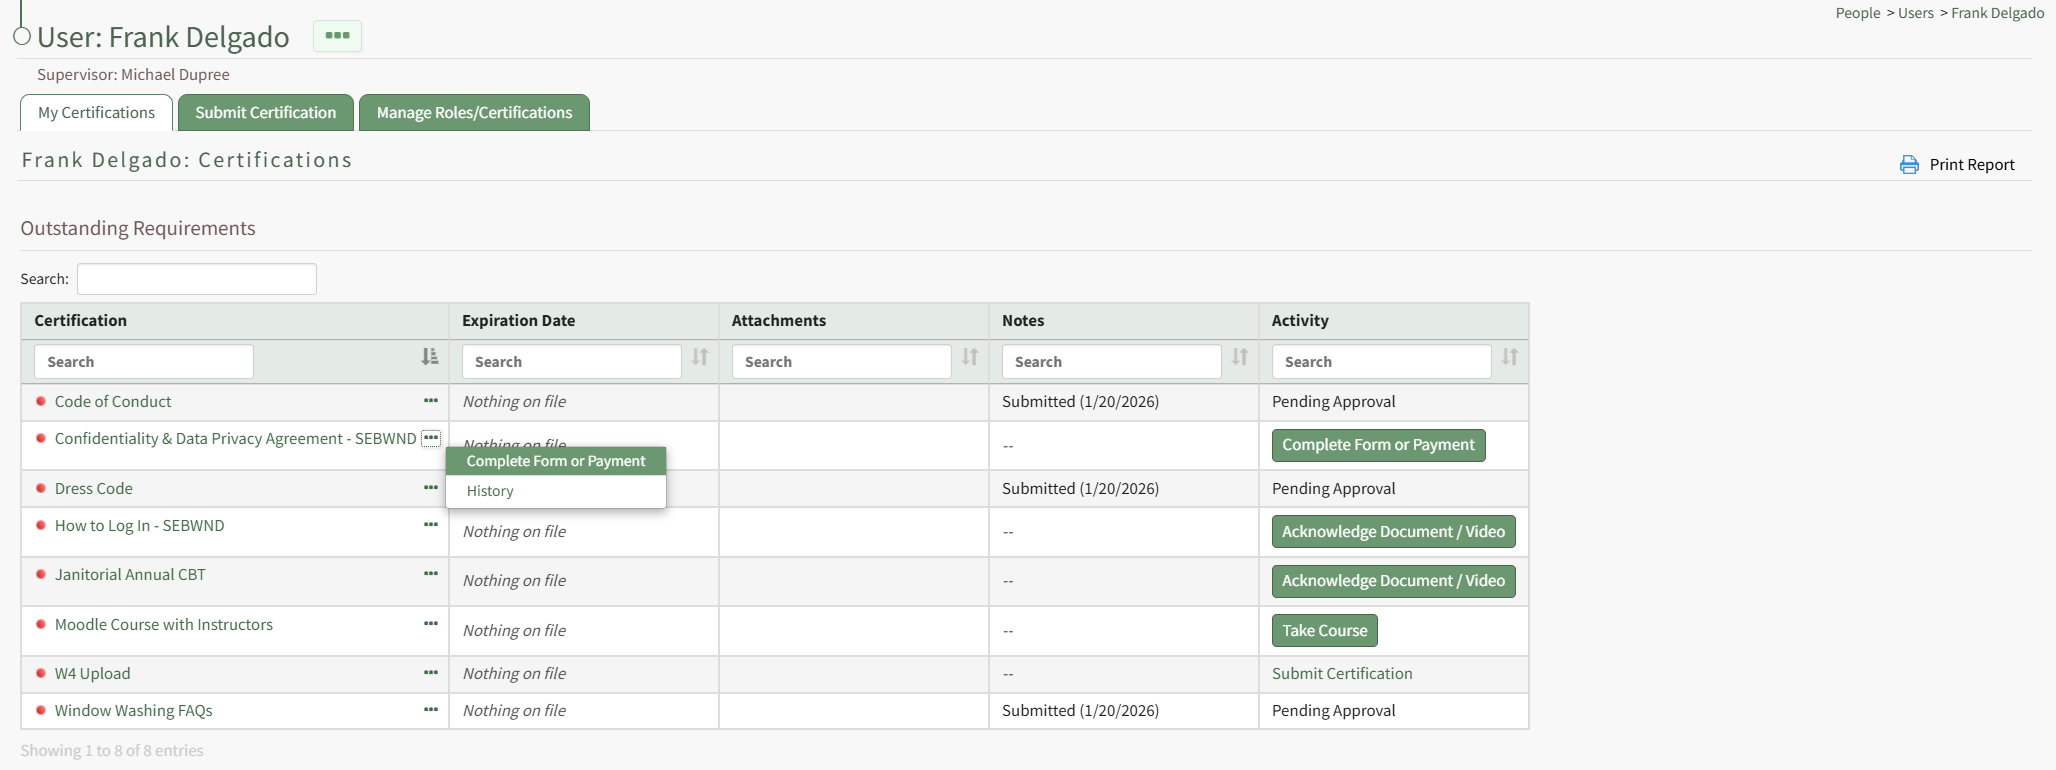
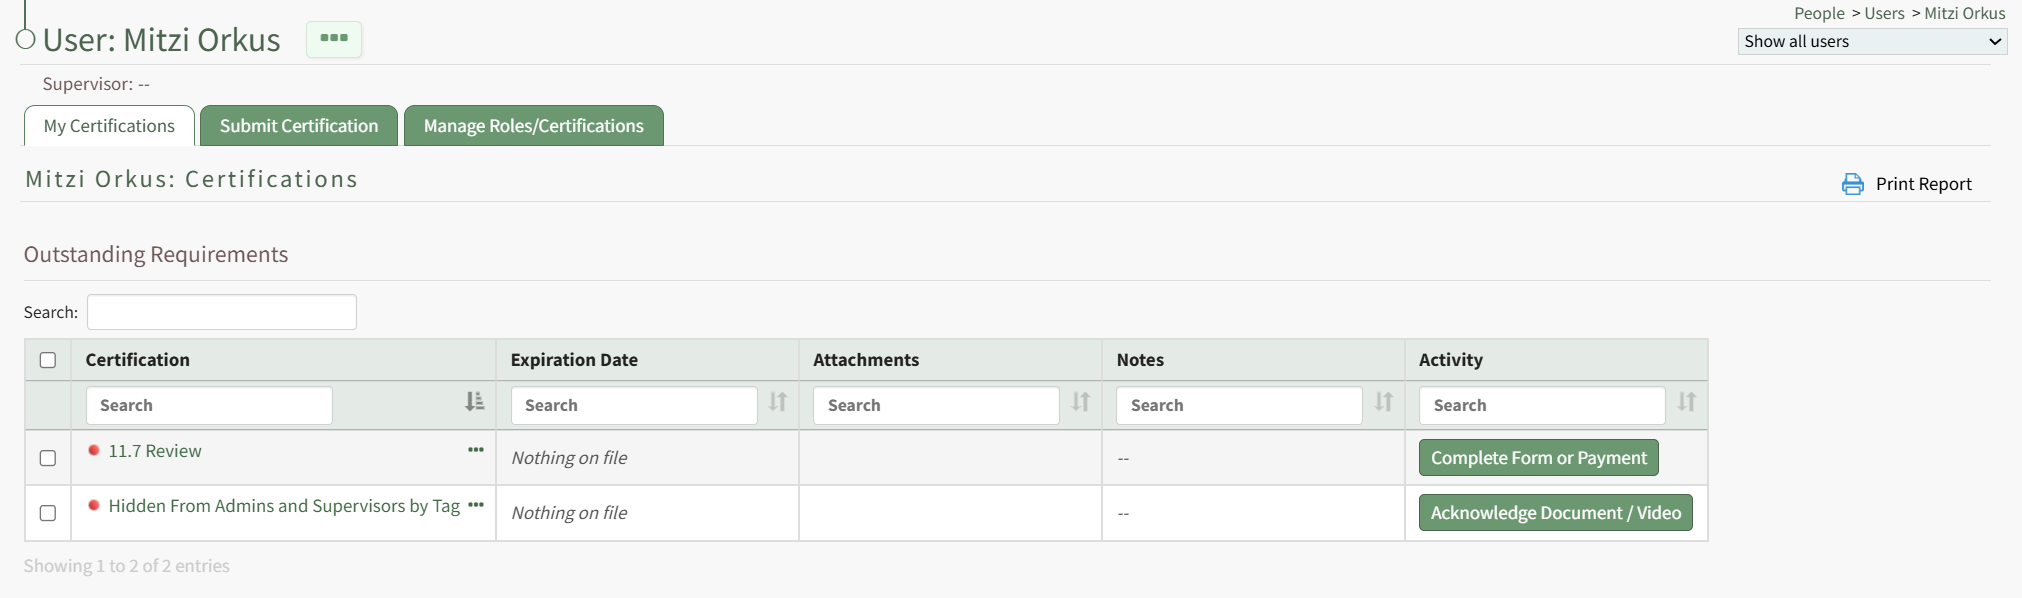
Complete Form or Payment is a context menu open as well as a button in the Activity column on a user's My Certifications Tab on the My Account Page of the People Module. It is also a clickable link in the Required Activity column on a User's Certifications Page.

Select Complete Form or Payment to open the Complete a Form Modal, which displays the required activity directly in the modal.
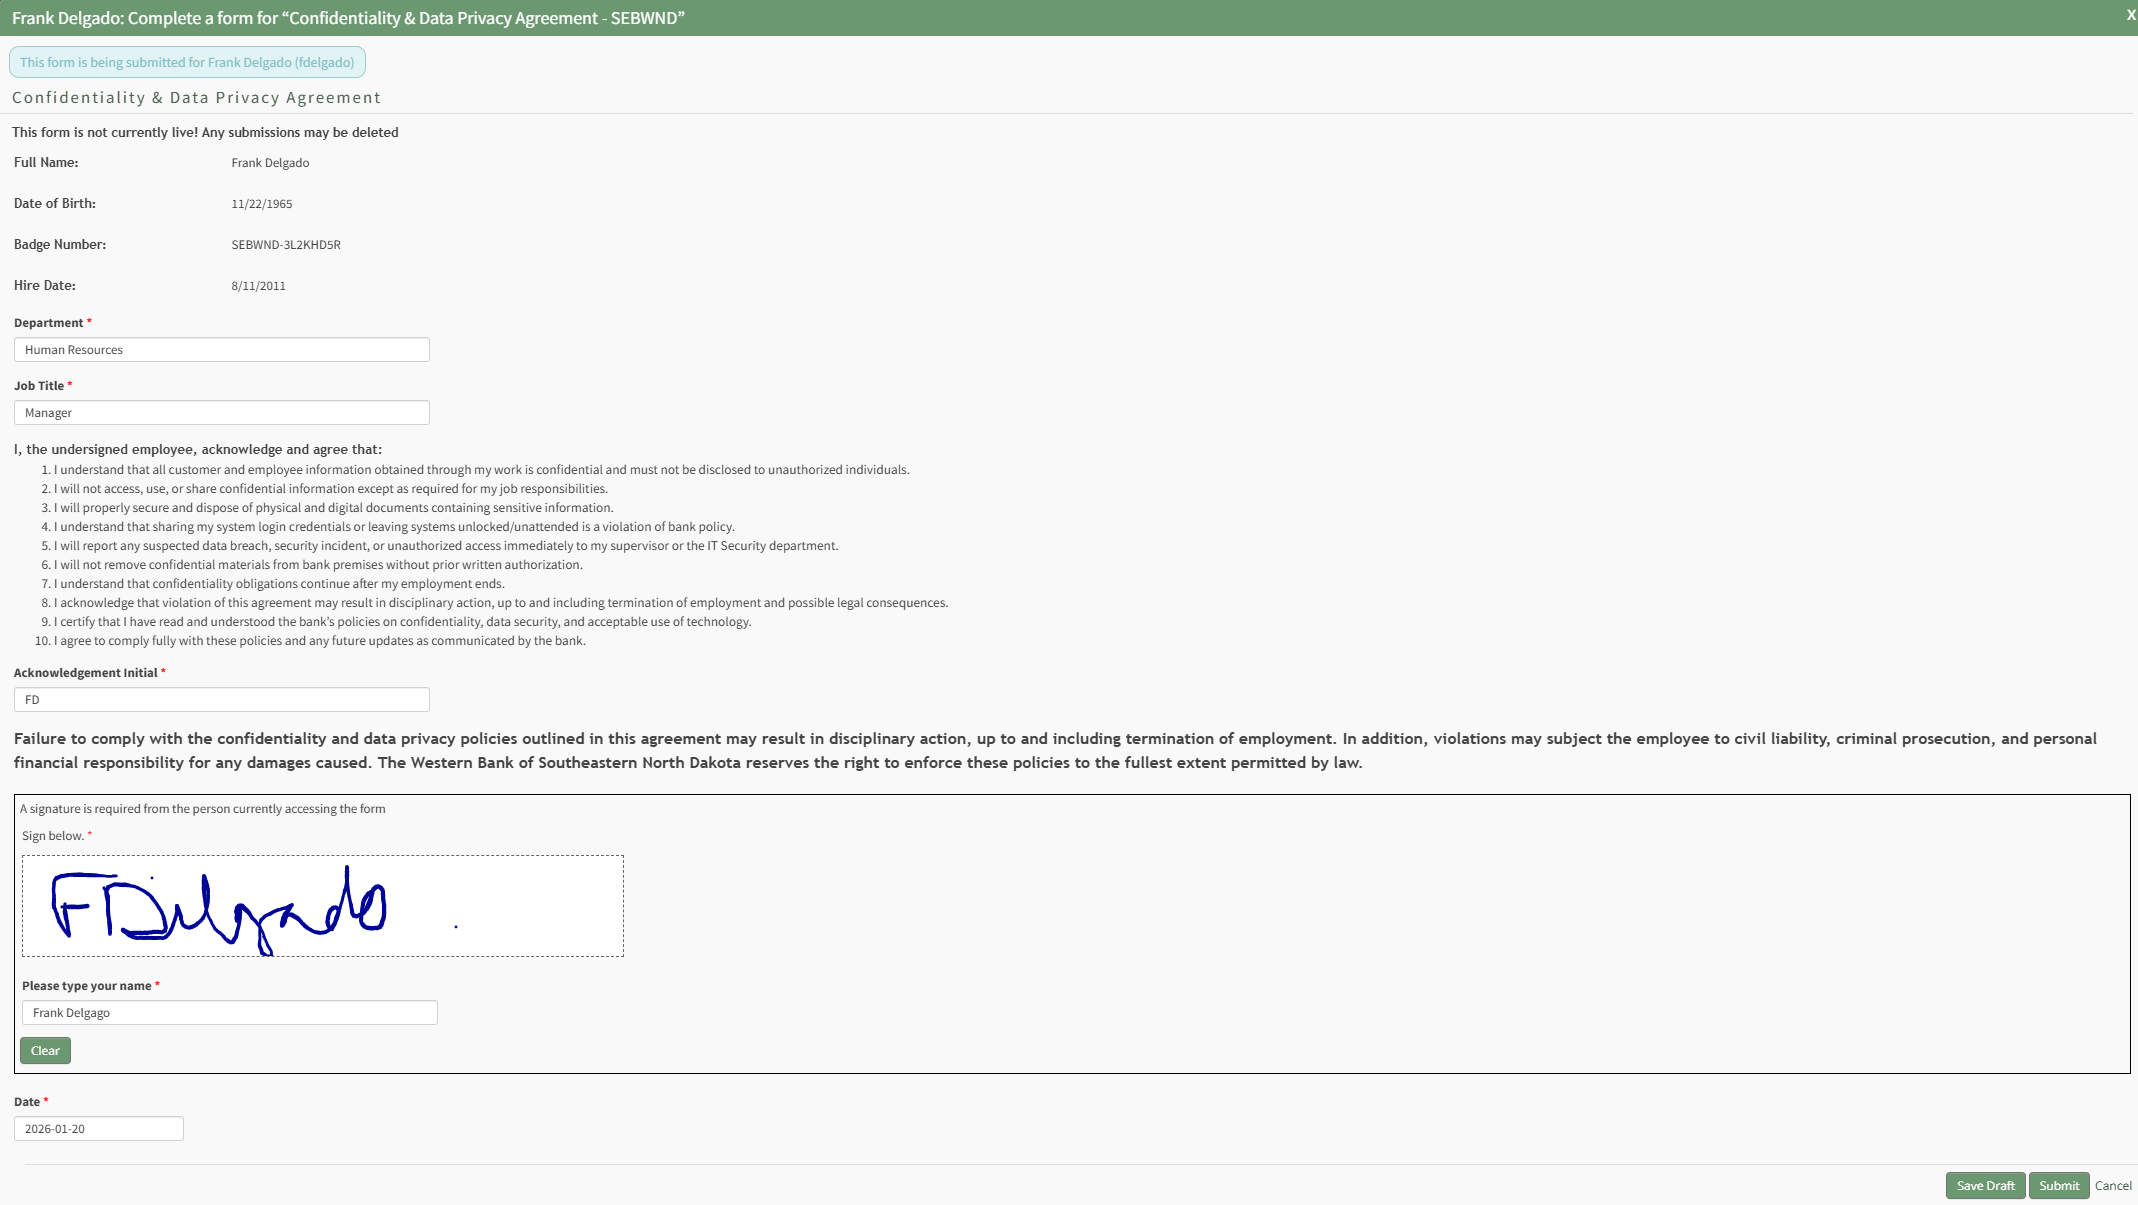
Any Form associated with a required activity has already been created in the Forms Module and Integrated with the People Module. Forms can be customized so that drafts can both be saved as progress is made and submitted from the modal.
Select "Submit" from the Complete a Form Modal and a modal confirms that the certification's required actitivity has been met.
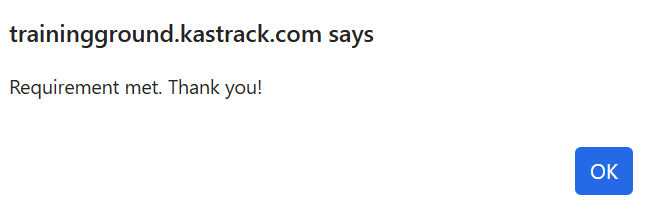
Select "OK" to return to the table you initiated completing the activity in.
How To: Complete Payment for a Required Certification
To complete a payment for a required certification, open the My Certifications Tab on the My Account Page in the People Module from the Main Menu.
The certification that required a payment will be visible in the Outstanding Requirements Table. Select the Complete Form or Payment button in the Activity column to the right of the certification opening the Complete Payment Modal.
The fields on the modal can vary. Complete the instructions on the modal to make payment and complete the certification requirement.
How To: Create a Certification
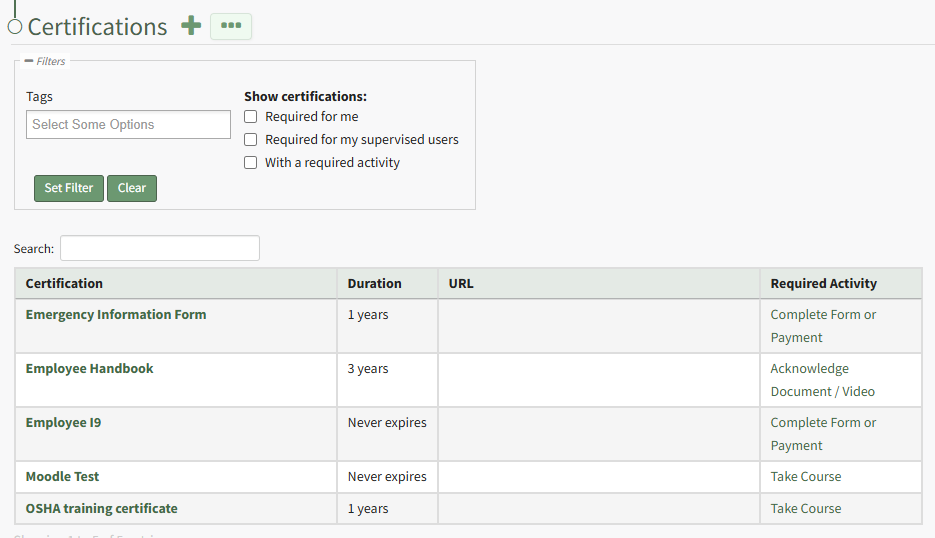
To create a new certification in KAStrack, select the Certifications Page in the People Module from the Main Menu. Select the plus sign icon to the right of the page header or use the three dot (…) icon to the right of the header to open a context menu and select “Create Certification”.
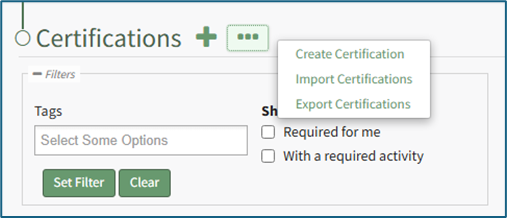
This opens the Add Certification Page, which is divided into five sections: General, Tracking Settings, Activities, Privacy, and Advanced Settings. A detailed explanation of options within each section is provided below. The only required fields are the Certification Name (General section), and, if the certification expires, the duration the Certification is valid, the first notice period, and the second notice period (Tracking Settings section).
After selecting the appropriate parameters from the five sections for the new certification, select the “Submit” button and the Certification: (Certification Name) Page will open on the Certification Info Tab.
General Section
The General Section requires a Certification Title. Optional additions include an Information textbox, an external/reference URL, and Supporting Attachments.
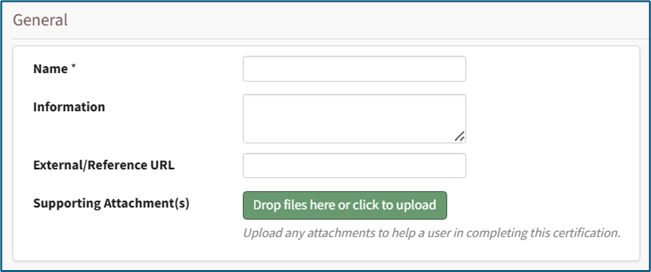
External URLs allow a user to access online documents, forms, videos, PDF documents, or third-party websites as an additional reference when completing the Certification. Supporting Attachments allow for uploading of files directly to the Certification that may assist the user in completing the Certification.
PDFs are the recommended file type for supporting attachments for ease of use, but a file of any type can be attached.
Tracking Settings Section
The Tracking Settings Section allows an account administrator to define metrics for the Certification and the timing of recertification periods. The first two fields allow input of cost and time details for the training; including this information is optional.

Input an estimate or exact cost for the training.
Input the time required to complete the training. The dropdown menu offers the following units: Hours, Days, Weeks, Months, or Years.
KAStrack will check “Certification never expires” as a default parameter. If the certification has an expiration date, deselect the checkbox and the Tracking Setting Section expands to show additional parameters that can be defined to establish the expiration date for a user’s submission.
When a certification is assigned to a new user in KAStrack, the Expiration Date cell will be Red. There is no expiration date associated with the certification, and the cell shows “Nothing on File”, as there is currently no submission for this Certification by the user. This implies that the Certification is due immediately for this user. To set an expiration date for a newly assigned certification, defer the certification or put the user in training.
How To: Designate that an Employee is in Training
Setting a user as “In Training” denotes to others that the user is still onboarding into the role that is assigned to them. While certifications in that role are required of the user, they are not technically considered as “due” while the user is In Training. This allows an organization to give a new employee a grace period to complete their certifications upon admittance to a new certification role.
To set a user as In Training, first select the Users Page in the People Module.
Click on the name of the desired user to be put in training status which opens the User: (Name) Certifications Page.
Select the “Manage Roles/Certifications” tab and click the three dot (…) icon to the right of the Required Role.
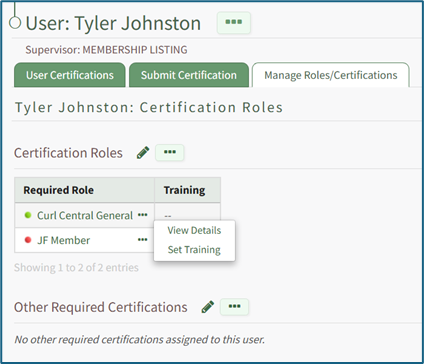
Select “Set Training” from the dropdown menu to open the Set Training Modal.
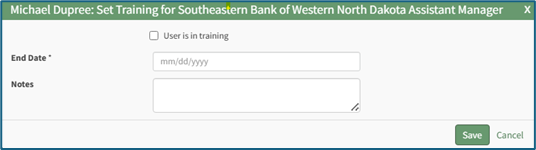
Select the “User in in training” checkbox to indicate that a user is in training.
You are required to input a training end date in MM/DD/YYYY format. Optionally add comments about the training period in the Notes textbox.
If an employee is set as being in training for a role, a blue oval with the full training end date will appear in the Notes column of all certifications required by that role. The number of days remaining in training is shown in a blue oval in the expiration date cell.
If a certification is both deferred for the employee and the employee is In Training for the role that requires that certification, the blue oval will reference the latest end date between the Deferred Until date and the Training End dates.
If a certification is required by multiple roles for which the user is set to In Training, the blue oval will reference the earliest Training End date available.
If a certification is required by multiple roles, but the user isn't In Training for all of the roles that require the certification, the certification will still show as required.
How To: Defer a Certification for a Specified User
To defer a specific certification for a supervised user, open the Users Page of the People Module from the Main Menu. Click the name of the user whose certification you want to defer opening the user's Certifications Details Page.

The Certifications Table will display the user's required certifications. Click the three-dot icon to the right of the user's certifications name opening the context menu and select Not Applicable / Defer. This opens the Defer Certification Modal.
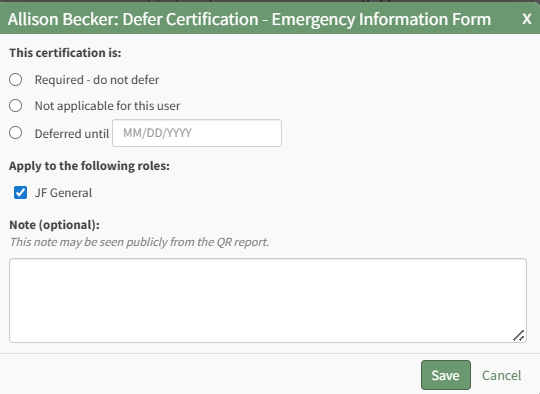
Click to indicate that the certification should be deferred and designate the date the deferment ends. Indicate any relevant notes
If the certification is deferred, a valid date is required to indicate the end of the deferment period.
Any notes made regarding the deferment on this modal will be publicly visible on the user's QR Report.

Select the Save button and the certification will now show as deferred on the Certifications Table. In the Expiration Date column, the number of days until deferment ends is displayed. In the notes column, the date the deferment ends is stated.
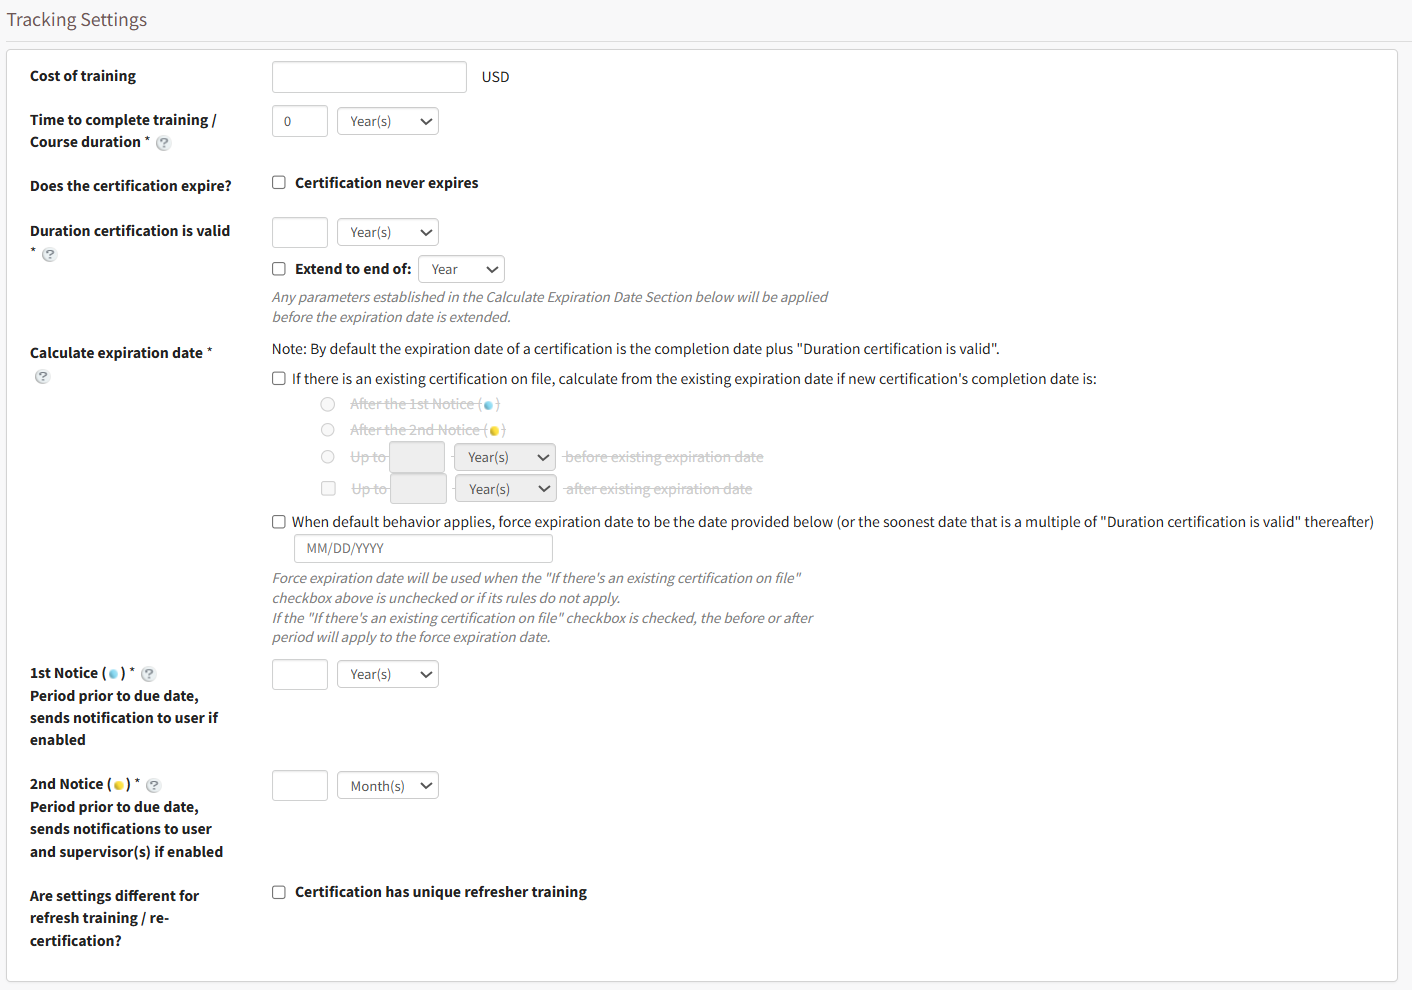
The expiration date being established in the Tracking Setting Section is referring to the period the completed certification is valid for. This in part determines when email notices warning about upcoming recertification will be sent and helps to calculate the re-certification’s due date.
Duration a Certificate is Valid Explanation
KAStrack’s default behavior is to calculate the expiration date for a certification based on the most recent completion date for the Certification by the user, plus the duration a certification is valid. The “Duration a Certificate is Valid” section requires the certification creator to select a time frame (in days, weeks, months, or years) until the Certification is once again due. For example, if this is set to 1 year, and a user completes the Certification on July 1st, 2026, then the Certification will next be due on July 1st, 2027.
Selecting the “Extend to end of” checkbox tells KAStrack to extend the expiration date (to the end of the month or year) that the expiration date falls in. For example, if the certification expires on October 17th selecting this button would extend the deadline until October 31st if set to the end of the month, or December 31st if set to the end of the year.

Selecting the “Extend to the end of” option will not extend the expiration date until after all applicable rules in the Calculate expiration date section have been applied to calculate the expiration date.
Calculating the Expiration Date for a Recertification Explanation
The default expiration date for a user submitted certification in KAStrack is to set the expiration date based on the duration a certificate is valid. In most scenarios, this basic setup is sufficient, especially where a recertification has a fixed expiration schedule based on a calendar period. However, sometimes a more advanced method of calculating the expiration date is necessary.
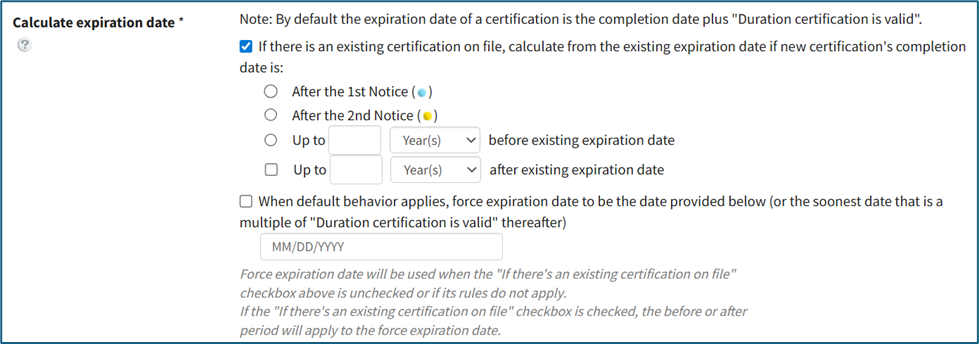
If you want the default behavior to otherwise apply, but desire to force recertification to an exact expiration date, select the “When default behavior applies, force expiration date to be the date provided below” checkbox and input the force expiration date in MM/DD/YYYY format. For example, say you want users to complete a Certification annually on July 1st. If you’ve set the “Duration Certification is Valid” to 1 year, you may then enable the Force Expiration setting and set it to July 1st, 2025. In this example, a user who then completes the Certification on August 1st, 2025, will see their expiration date be July 1st, 2026, the following year. This would also be the case for a user who completes the certification on November 13th, 2025, or even February 17th, 2026, for example.

The Force Expiration Date will be used when the “If there’s an existing certification on file” checkbox above is unchecked or if its rules do not apply. If the “If there’s an existing certification on file” checkbox is checked, the before or after period will apply to the force expiration date.
KAStrack also has the capability to calculate an expiration date so that the early completion of an existing certification does not negatively impact the user’s future expiration date. For example, If a user completes a certification a month early and you want the recertification expiration date to be established for a fixed duration from the original expiration date, instead of the completion date, there are a few ways to accomplish this.
Select the “If there is an existing certification on file, calculate from the existing expiration date if new certification’s completion date is:” checkbox if this applies.

There are three options to choose from: “After the 1st Notice”, “After the 2nd Notice”, and “Up to ___________ before existing expiration date” (more information about 1st Notice and 2nd Notice below). “After the 1st Notice” is generally the recommended selection to ensure users do not need to resubmit the certification more often than necessary.
Selecting “Up to ________ after existing expiration date” can be applied in addition to any of the three previous choices and takes into account when a user submits a certification after its expiration date. The period established (days, weeks, months, or years) essentially acts as a grace period. For example, if a user submits a certification after expiration but within the period of time established here, the new certification’s expiration date will still be based on the last expiration date.
These settings can then be combined with the Force Expiration date feature described above. Continuing with the example of a Certification with a Forced Expiration date set to July 1st, 2025, you might then check the “If there is an existing certification on file, calculate from the existing expiration date if new certification’s completion date is:” checkbox, and select After the 1st Notice. You may then optionally pick “Up to ________ after existing expiration date” and fill in 2 weeks. In practice, this means that a user who previously completed the Certification with an expiration date of July 1st, 2026 could complete the Certification any time after the 1st warning notice and up to 2 weeks after July 1st, 2026, and their following expiration date would still line up to one year later on July 1st, 2027.
This grace period created by the “Up to ________ after existing expiration date” option does not imply that the Certification isn’t expired after the expiration date, but rather that completing the Certification within that period will still keep the user “on schedule”.
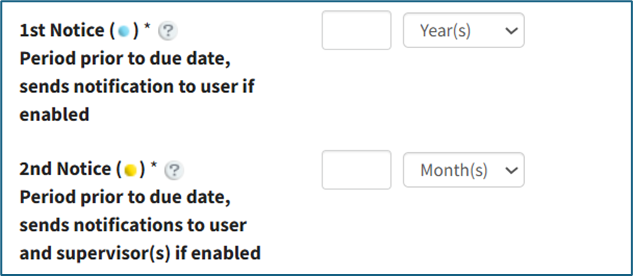
The 1st Notice sends an alert to an employee at a customizable time period before the certification’s expiration date. Input a numerical value and select the appropriate units (days, weeks, months, or years). The 1st Notice implies that the certification is now due and is ready for the user to recertify. This will show on the user’s My Certifications table and in various reports as a Blue dot / cell.
The 2nd Notice sends an alert to both the employee and supervisor at a customizable time period before the certification’s expiration date. Input a numerical value and select the appropriate units (days, weeks, months or years). The 2nd Notice implies that the certification is now overdue and the user is running low on time to recertify before expiration. This will show on the user’s My Certifications table and in various reports as a yellow dot / cell.
In practice, the 2nd Notice should be set to a shorter time period than the 1st Notice. If a user’s expiration date is July 1st, 2026, you may desire to have the user warned one month and one week before their Certification expires. In this example, set 1st Notice to 1 Month, and 2nd Notice to 1 Week. The user’s Certification will then turn Blue on June 1st, Yellow on June 24th, and each time they will be notified via email.
Refresher Training Customization Explanation
KAStrack will also take into account when the settings are different for re-certification than the initial certification. Select the “Certification has unique refresher training” checkbox opening the Unique Refresher Training Settings box in the Tracking Setting Section.
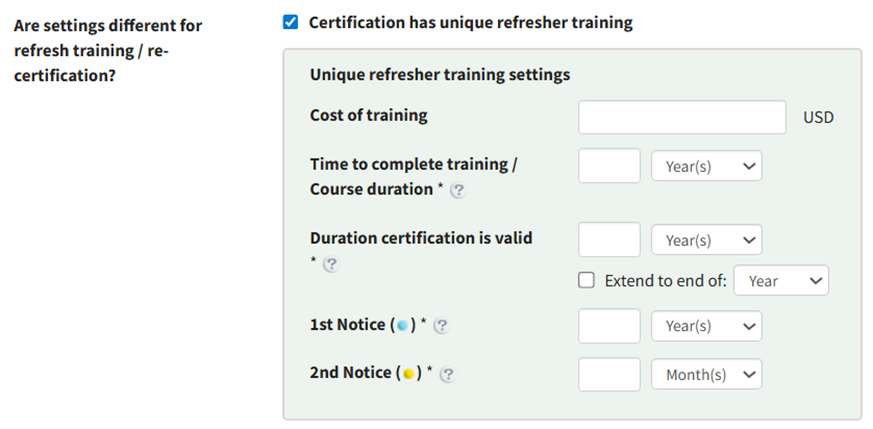
The Unique Refresher Training Settings box allows the user to estimate the cost of special training, the time to complete the refresher training, the duration the refresher certification is valid, and set the desired timing for the first and second notice that will be sent as a reminder to the user to complete the certification.
Activities Section
The Activities Section on the Add Certification Page allows an account administrator to designate an activity that an employee must complete in order to validate their certification. Required Activity options include None, Course – KAStrack, Course – Moodle, Document or Video Acknowledgement, and Form or Payment. A detailed explanation of each is included below.
Required Activity Option: None

Selecting “None” from the dropdown menu indicates that the user is not required to complete any additional activities in order to complete the certification.
Required Activity Option: Course - KAStrack
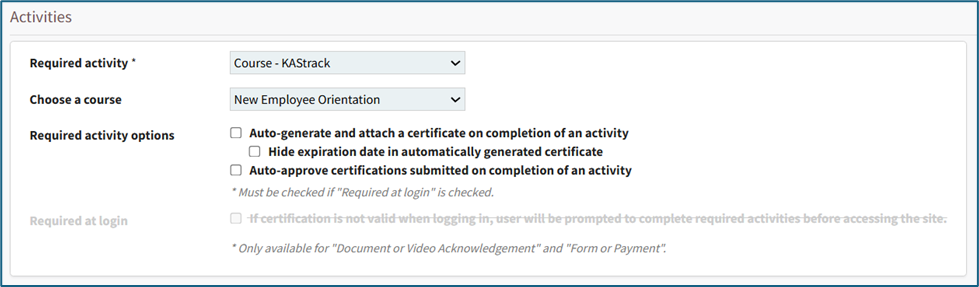
Selecting “Course – KAStrack” from the dropdown menu indicates that the user must complete a course within KAStrack in order to complete the certification.
Select the course required for this certification from the Choose a Course dropdown menu. All available courses created in the Courses Module of KAStrack will appear here.
How To: Create a Course in KAStrack
Select “Home” under the Courses heading on the Main Menu, which takes the user to the Manage Courses Page. Courses will be listed alphabetically by title in the table.
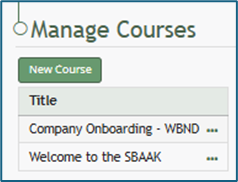
Select the green “New Course” button underneath the header to create a new course, opening the New Course modal.

Input the desired course title.
Input the maximum number of times a user can take the course. Leave this blank to allow for unlimited attempts.
If this course is being graded, indicate the value that will be considered passing here. A passing grade can be calculated as a percentage (%) or number (#) of correctly answered questions. Each question/question group has its own passing grade and can be set to be part of the total passing grade. (Ex: 70% or 7/10)
If the course is not being graded, input 0 for the passing grade.
Select the “Allow the student to navigate freely” checkbox to give permission to navigate the course freely (allowing users to skip ahead in the course). If this box is not selected, users will be forced to progress to the next page, but may still return to the previous pages
The course creator can customize review options for the users. Select “Only When Passed,” “Always,” or “Never” from the drop-down list to indicate your preference.
Selecting the “Show non-graded questions in the review” checkbox will include any non-graded questions in the post test review.
Click “Save” at the bottom of the modal to create the new course. The new course is now added to the table on the Course homepage.
There are Required Activity options available via checkbox. All or none of the checkboxes can be selected.
Selecting “Auto-generate and attach a certificate on completion of an activity” tells KAStrack to automatically generate and attach a certificate of completion for a user on completion of the course. If this option is checked, another option appears. Selecting “Hide expiration date in automatically generated certificate” will remove the required renewal date from the certificate of completion.
If a supervisor does not want to manually approve all submissions of this Certification, select “Auto-approve certifications submitted on completion of an activity” and KAStrack will automatically approve user submissions when the course is completed.
Required Activity Option: Course - Moodle
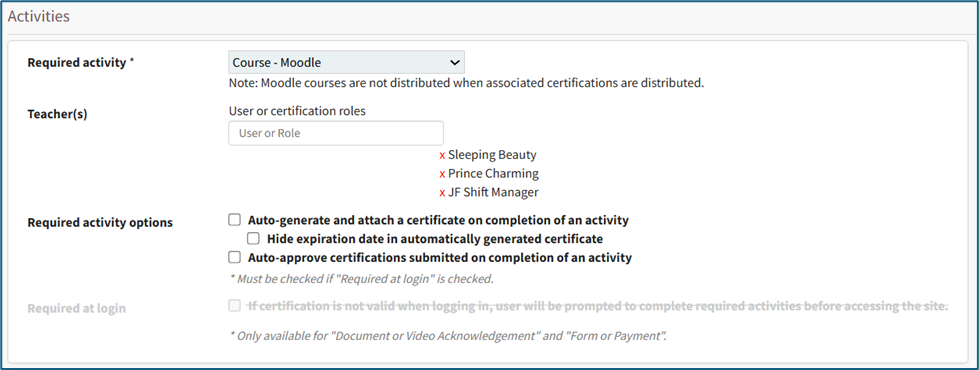
Selecting “Course – Moodle” from the dropdown menu indicates that the user must complete a course within Moodle in order to complete the certification.
Moodle is an online learning management system that is integrated into KAStrack. There is a time delay between a Moodle Course completion and its recognition in the KAStrack system.
Use the Teacher(s) textbox to type in a username or role, clicking on the desired name. Identifying a user as a teacher in Moodle grants that user the ability to edit a course. The selection will now show beneath with an “X” to the left of the name. Multiple users and roles can be selected. If the wrong username was selected, click on the “X” to delete the user or role.
There are Required Activity options available via checkbox. All or none of the checkboxes can be selected.
Selecting “Auto-generate and attach a certificate on completion of an activity” tells KAStrack to automatically generate and attach a certificate of completion for a user on completion of the course. If this option is checked, another option appears. Selecting “Hide expiration date in automatically generated certificate” will remove the required renewal date from the certificate of completion.
If a supervisor does not want to manually approve all submissions of this Certification, select “Auto-approve certifications submitted on completion of an activity” and KAStrack will automatically approve user submissions when the course is completed.
Required Activity Option: Document or Video Acknowledgement
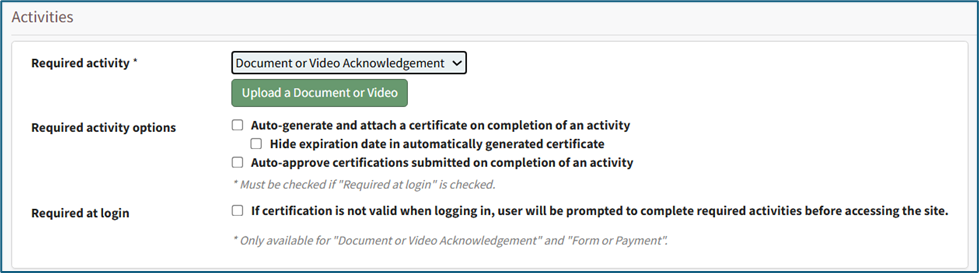
Selecting “Document or Video Acknowledgement” from the dropdown menu indicates that the user must read a document or view a video to complete the certification.
Click the “Upload a Document or Video” button opening the Upload a Document or Video Modal.
The Modal will prompt the user to select the file they want to upload by pressing the “Choose File” button. Enter a title for the file or video, indicate the revision and revision date, and add any document owners from a dropdown menu that includes individual users and roles. Select the “Save” button and return to the Activities Section on the Add Certification Page.

There are Required Activity options available via checkbox. All or none of the checkboxes can be selected.
Selecting “Auto-generate and attach a certificate on completion of an activity” tells KAStrack to automatically generate and attach a certificate of completion for a user after review of the file / video. If this option is checked, another option appears. Selecting “Hide expiration date in automatically generated certificate” will remove the required renewal date from the certificate of completion.
If a supervisor does not want to manually approve all submissions of the Certification, select “Auto-approve certifications submitted on completion of an activity” and KAStrack will automatically approve user certificates when the associated file / video has been reviewed.
When the Required Activity is set to Document or Video Acknowledgement, completion of the review can be required when the user logs into KAStrack by selecting the Required at Login checkbox. Requiring certification at login automatically selects “Auto-approve certifications submitted on completion of an activity”.

If Required at Login is selected, a user will be presented with the Certification immediately upon their next login and will not be able to conduct any other action within KAStrack until the Certification is completed. Auto-approval of Certifications is required so that a user will immediately be able to access the KAStrack system after Certification completion.
Required Activity Option: Form or Payment
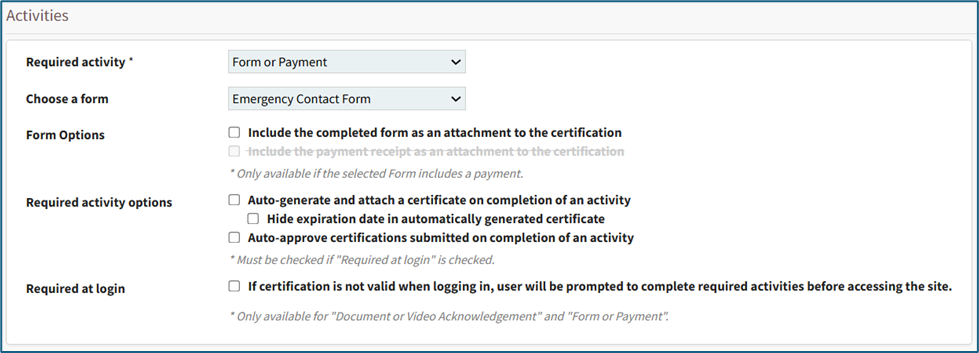
Selecting “Form or Payment” from the dropdown menu indicates that the user must complete a form or make a payment in order to complete the certification.
How To: Create a Form
To create a new form, open the Home Page in the Forms Module from the Main Menu and select the Create Form button beneath the page header.

This will open the New Form Modal.

Input the Form Title (a required field), form notes, and any open/permissive/restrictive tags to be associated with the form.
There are three additional sections to the New Form Modal that expand when clicked with additional options for customization. Modal images and explanations of each input are included below.
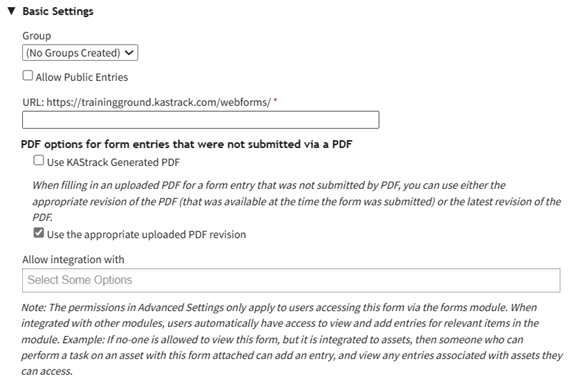
Basic Settings Section
New Form Modal: Basic Settings Section Explanation | ||
Modal Input | Explanation | |
Group | A dropdown menu will list all existing form groups. The form will automatically be placed in the group selected. | |
Allow Public Entries Checkbox | If the checkbox is selected, public entries (individuals not registered with KAStrack) will be allowed to submit form entries. | |
URL Link | A URL Link is used to share the form publically. KAStrack will autofill the URL Link with the form title, but this can be customized if desired. You cannot use spaces or symbols in the URL link. They will replaced with a hypen if used. | |
The next two checkboxes are specific to the PDF options for form entries that are not submitted via a PDF. To understand which option is better for this specific form, be sure to read about the relationship between PDFs and Forms. | ||
Use KAStrack Generated PDF | If you have a PDF entry on file but do not want the downloaded form entry to utilize the customized PDF form, select this checkbox and KAStrack will use the generic PDF format. | |
Use the Appropriate Uploaded PDF Revision | If you have a PDF entry on file and want the downloaded form entry to utilize the customized PDF form, select this checkbox and KAStrack will use the most recent version of the PDF submitted. | |
Allow Integration With | Allow integrations with is a dropdown menu that lists all modules you can use a form for. Selecting a module here will enable this form to be visible in the modules selected. Possible uses are listed below. | |
Module | Purpose | |
Assets | Attach to Task | |
Attendance | Integrate with the Attendance Log Module | |
Datbase | Reference from Database | |
Dispatch | Include in a Dispatch | |
Documents | Add to Photo | |
Forms | Reference from a Form | |
Grid | Integrate with the Grid Module | |
Kanban | Integrate with the Kanban Module | |
People | Use as activity for certification | |
Advanced Settings Section
New Form Modal: Advanced Settings Section Explanation | ||
Modal Inputs | Explanation | |
Allow Payment Checbox (Expands when selected) | Payment Profile | Select “All Enabled Configurations” from the dropdown menu for payments to be allowed. |
Payment Description | This description is what will show on a payment receipt. | |
Default Pattern for Entries | This textbox uses mail merge fields. | |
Allow the User to Save AS Draft Checkbox (Expands when selected) | Allow Logged Out User to Save as a Draft | Selecting this checkbox will allow logged out users and public entries to save their response as a draft and come back to the form (on the same device). |
Validate Fields when Saving as Draft | Fields with validation don’t validate on a draft, so inputting fields here tells the system to validate fields when the draft is saved. | |
Save Draft Button Text | The form creator can customize the text on the Save button. | |
Auto Save | When auto-save is enabled, any edits made to a field will automatically be saved. When auto-save is disabled, the information will only be saved when the save draft button is clicked. | |
Allow Default Access Checkbox | When Selected | The form will follow module level permissions in regards to what access an individual will have. |
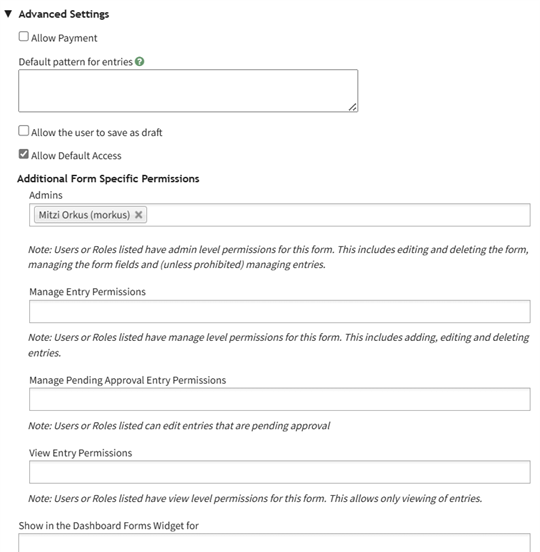
If allow default access is not selected, the additional form specific permissions are now required. The system will ignore module level distinctions for this form and will be guided by the form specific permissions listed below. | ||
Admins | A checkbox allows for admins to be prohibited from viewing entries. Users or roles listed here will have admin level permissions for this form. This includes editing and deleting the form, managing the form fields and (unless prohibited) managing entries. | |
Manage Entry Permissions | Users or roles listed here have manage level permissions for this form. This includes adding, editing and deleting entries. | |
Manage Pending Approval Entry Permissions | Users or roles listed here can edit entries that are pending approval. | |
Show in the Dashboard Forms Widget | Users and certification roles selected here will show this form in the Dashboard Forms Module Summary Widget. | |
Form Styling Section

New Form Modal: Form Styling Section | ||
Modal Inputs | Explanation | |
Save Button Text | Change the verbiage on the save button by inputting other text here. | |
Cancel Button Text | Change the verbiage on the cancel button by inputting other text here. | |
Submission Message | Change the verbiage on the form submission message by inputting other text here. | |
Show Green Checkmark Checkbox | Selecting the show green checkmark with submission message checkbox will show a green checkmark to the left of the submission message when a form is submitted. | |
Show the Form Title Checkbox | Select the Show the Form Title Checkbox will show the form title for a logged-out entry. This does not impact a system, modal based entry. | |
Apply Whole Form SCSS to | Logged Out Only | Select “Logged Out Only” if the styling doesn’t correspond with a popup modal or the regular form page. This would result is SCSS styling only applies to public entries. |
Logged In Only | Select “Logged In Only” if you only want to apply the SCSS formatting to the logged in, internal users. | |
Always | Selecting “Always” applies the SCSS formatting that has been established in both internal and external forms. | |
SCSS for Whole Form | This is the textbox where scripting language should be input, that allows for greater customization than what is generally available. | |
Select the Save button on the New Form Modal after customizing your form and the system will direct you to the form's Fields Tab where you can begin to input Form fields.
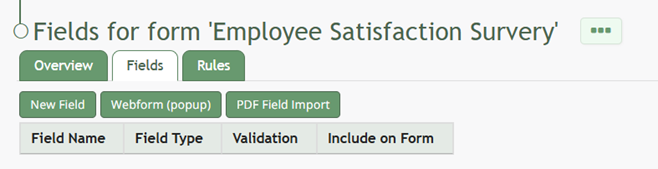
How To: Import Fields from a PDF Field Import
{{@400}}
How To: Import Form Fields from a CSV File
{{@402}}
How To: Upload a PDF Form
{{@408}}
Form options provide two checkboxes. An account administrator can select to “Include the completed form as an attachment to the certification” and/or “Include the payment receipt as an attachment to the certification”.
The option to include a payment receipt will only show if the selected form includes a payment option.
There are Required Activity options available via checkbox. All or none of the checkboxes can be selected.
Selecting “Auto-generate and attach a certificate on completion of an activity” tells KAStrack to automatically generate and attach a certificate of completion for a user on completion of the form entry. If this option is checked, another option appears. Selecting “Hide expiration date in automatically generated certificate” will remove the required renewal date from the certificate of completion.
If a supervisor does not want to manually approve all submissions of the Certification, select “Auto-approve certifications submitted on completion of an activity” and KAStrack will automatically approve user submissions when the form entry is completed (and payment is made, if applicable).
When the Required Activity is set to Form or Payment, completion of the form entry can be required when the user logs into KAStrack by selecting the Required at Login checkbox. Requiring certification at login automatically selects “Auto-approve certifications submitted on completion of an activity”.

If Required at Login is selected, a user will be presented with the Certification immediately upon their next login and will not be able to conduct any other action within KAStrack until the Certification is completed. Auto-approval of Certifications is required so that a user will immediately be able to access the KAStrack system after Certification completion.
Privacy Section
The Privacy Section on the Add Certification Page allows an account administrator to select from a table of Module Levels and/or Reports to hide selected information from unauthorized viewing.
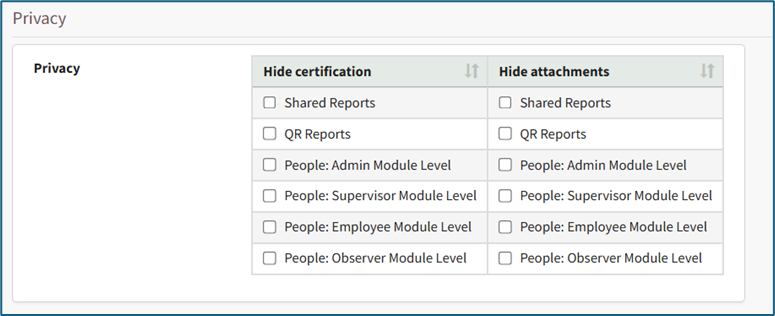
The Privacy Section displays a Privacy Table. The left column shows the Module Levels and Reports that the Certification can be hidden from. The right column shows the Module Levels and Reports that attachments to Certification submissions can be hidden from.
Select the appropriate checkboxes to designate the Certification itself or Certification submission attachments as private and thus not visible to the chosen Module Levels and/or Reports.
Selecting an item from the Hide Certifications column will automatically grey out that same item in the Hide Attachments column, as hiding the certification from that item includes hiding all associated submission attachments.
Advanced Settings Section
The Advanced Settings Section on the Add Certification Page allows an account administrator to make designations that are considered advanced settings.
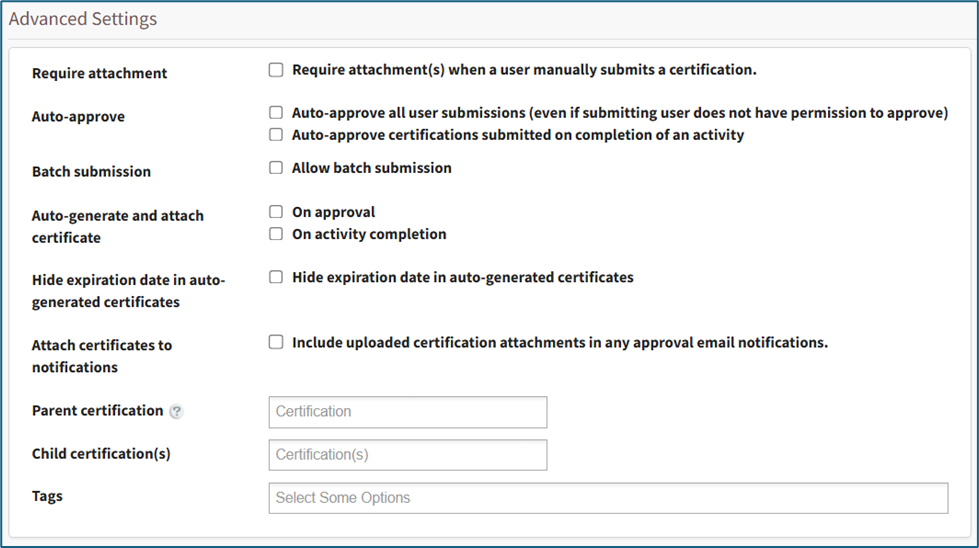
Selecting the Require Attachment checkbox requires a user to upload a file when manually submitting the Certification.
Auto-approve has two checkbox options. To auto-approve all user submissions regardless of if the submitting user has permission to approve, select the “Auto-approve all user submissions” checkbox. Select the second checkbox to “auto approve certifications submitted on completion of an activity” if desired.
Selecting the Allow batch submissions checkbox will open the Batch Submission Setting dialogue box which allows the account administrator to designate which Certification Roles are permitted to submit certification completions in bulk.

The auto-generation and attachment of a certificate of completion can be designated on approval or on activity completion by selecting the appropriate checkbox.
If you do not wish for a user to view the certification expiration date on the auto-generated certificate of completion, select the “Hide expiration date in auto-generated certificates” checkbox.
If you desire to have the system automatically attach any Certification attachments to approval notifications, select the “Include uploaded certification attachments in any approval email notifications” checkbox.
A Parent Certification is a specific kind of certification that also fulfills the requirements of additional certifications. The new certification being generated will be marked as valid if a user has a valid submission on file for the designated parent certification. Parent certifications can be selected from the Parent Certification dropdown menu.
A Child Certification operates conversely to a parent certification; if a child certification (or certifications) is designated here, a valid submission of this Certification will mark the user valid in the child certification(s). A Certification can only have either a Parent Certification or a Child Certification, but not both simultaneously; once a parent or child certification is selected, the other option will be hidden.
How To: Create a New Company
Select the Companies Page in the People Module of the Main Menu. Open the Create Company Tab.
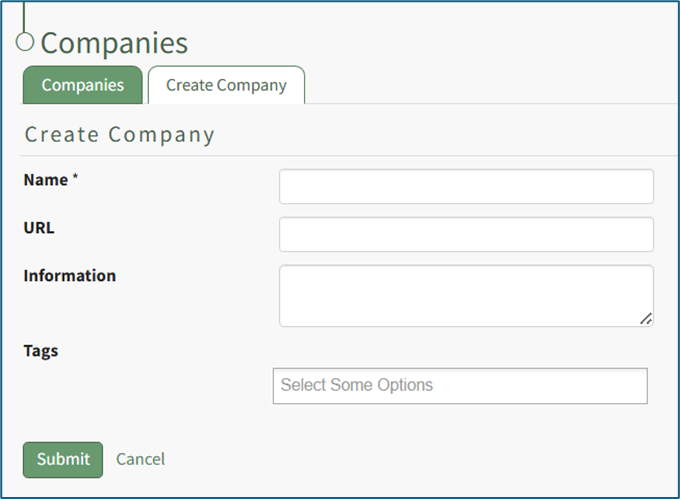
Input the new Company name (required), an associated URL, and any descriptive information you wish to be included on the Company: (Company Name) Page.
A URL entered here will be visible on the Companies Table on the main Companies Page relative to this company. If this company has an external website / homepage, it could be listed here.
Companies can be tagged for filtering purposes; however, Companies currently do not honor the permissions for Permissive and Restrictive tags, and will instead behave as if they’ve been tagged with Open tags.
Select the “Submit” button to save the information. The new company is now visible on the Companies Tab.
How To: Create a New Module Level (People Module)
To create a new Module Level in the People Module, select the Module Levels Tab on the Settings Page in the People Module on the Main Menu.
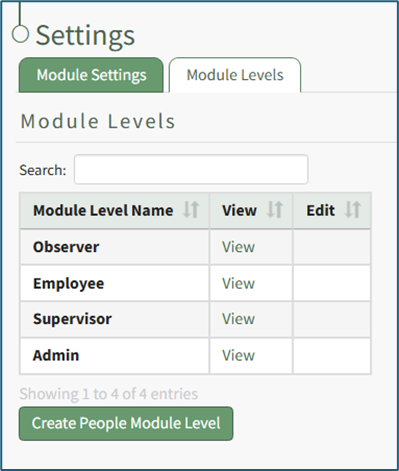
Select the “Create People Module Level” button opening the Create People Module Level Page.
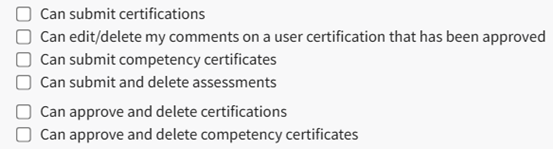
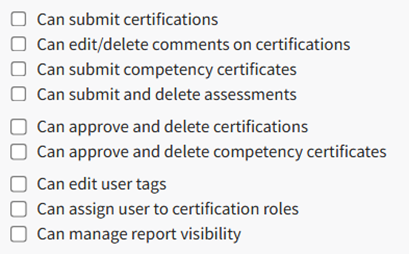
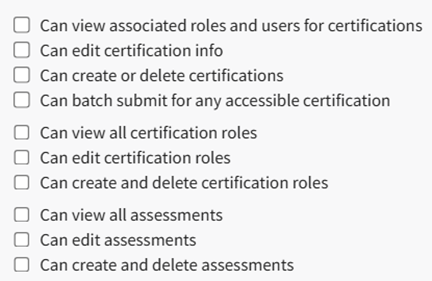
Input the new Module Level Name and select the permissions for the new user group by selecting the desired checkboxes. A comprehensive list of permissions is shown in the table below.
People Module Possible Permissions Organized by Permission Category | |
Permission Category | Possible Permissions |
My Account |
|
Reports |
|
Non-Supervised Users |
|
Supervised User |
|
Administration |
|
General Permissions |
|


A list of the module level hierarchy is provided at the bottom of this screen.
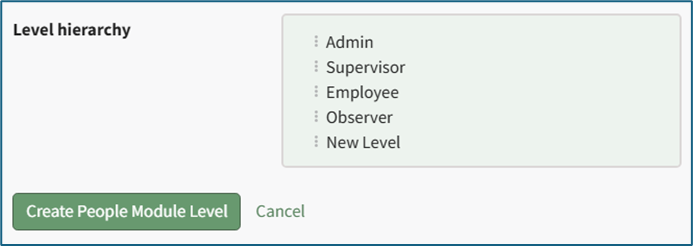
The different module levels can be dragged and dropped as needed in order to quickly and accurately organize as desired.
How To: Create a Shared Certification Report
To generate a new shared certifications report in the People Module, open the Reports Page in the People Module on the Main Menu. Open the Create Shared Reports Tab.
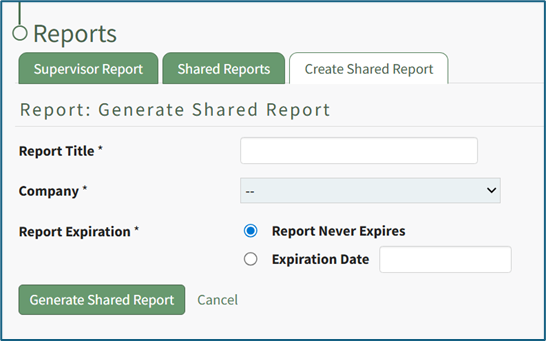
Input a title for the new shared report.
The Company dropdown menu will allow you to select the “Company name” or “Other Required Certifications”. Making a selection in the Company dropdown menu opens the People Module’s Certification Legend and the User/Role Report Selection table.
“Report Never Expires” is a default selection, but the report creator can select “Expiration Date” include a date for the report to expire.

In the User/Role Report Selection table, columns represent the company’s certification roles. The rows contain all available users. The colored dot next to the check boxes in each cell indicates the status of each user relative to the Certification Role. A dash with no checkbox indicates that the user is not assigned to that Certification Role.
Select the checkboxes for all certification information to be included in the report.
Selecting the checkbox in the first row will select all the checkboxes in that column. Selecting the checkbox in the first column will select all the checkboxes in that row.
To create the report, select the “Generate Shared Report” button or select “Cancel” to return to the Shared Reports tab on the Reports Page.

The message states, “Some of the selected employees have certifications that are not current or will become due soon. Are you sure you want to share this report?” Selecting “OK” will generate the report and open the Shared Report Page.

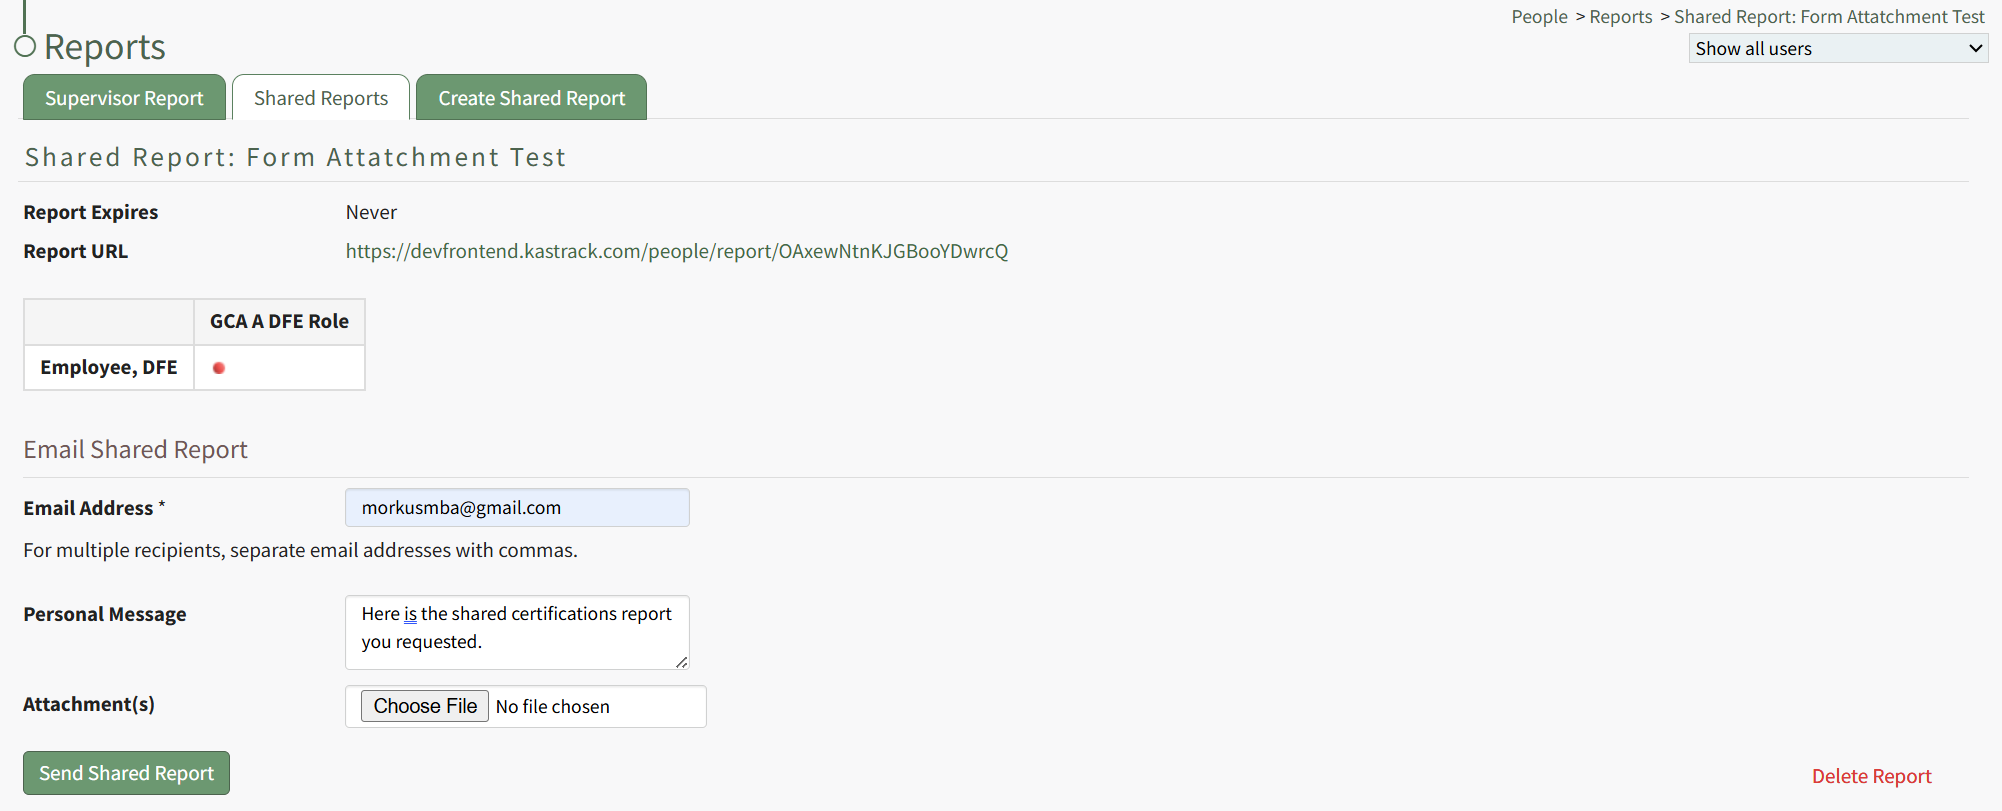
To simultaneously share the report with multiple email addresses, make sure each email address is separated with a comma. A personal message can be included in the textbox along with any desired attachments. To submit, select the “Send Shared Report” button. To delete the new report, select the “Delete Report” text on the right side of the screen.
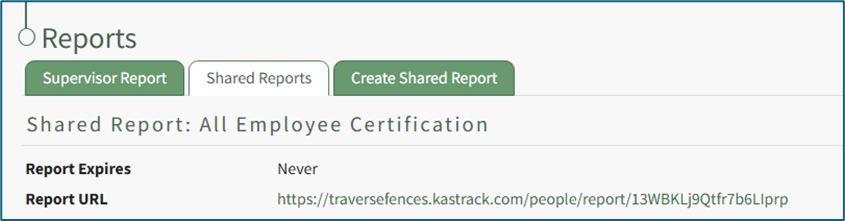
Once the report has been shared, the page will show “You successfully shared this report with (the input email addresses).”
If the URL is clicked, it will create a color-coded, clickable table with the users, their certifications, and their statuses.
How To: Create, Define, and Assign Users to a New Certification Role
To create and define a new certification role, select Roles in the People Module on the Main Menu opening the Certification Roles Page.
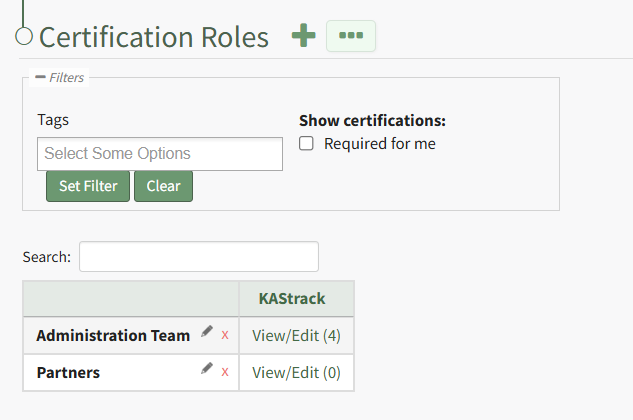
Click the plus sign icon to the right of the Certification Roles header to open the Add Role Name Modal.
Clicking the three-dot icon to the right of the header and selecting Add Role Name from the Certification Roles Page Context Menu will initiate the same action as selecting the plus sign icon.
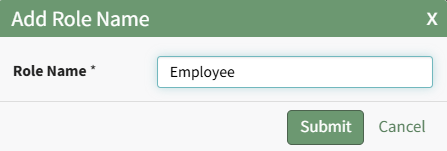
Input the new role's name and click the Submit button. The newly created role is now visible on the Certification Roles Table in alphabetical order.
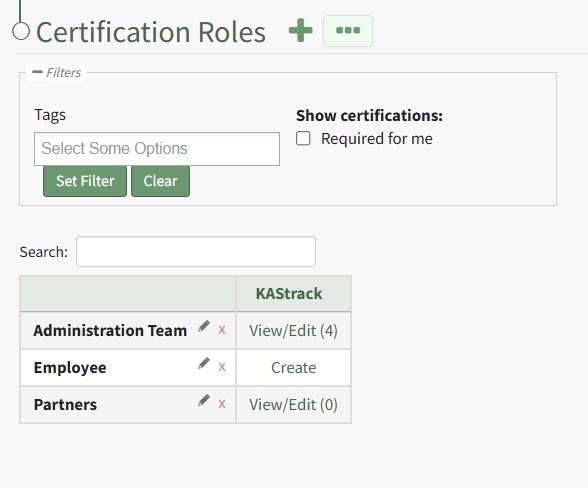
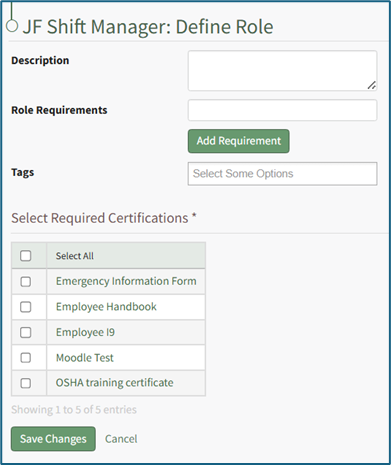
Select the clickable link to "Create" opening the Define Role Page.
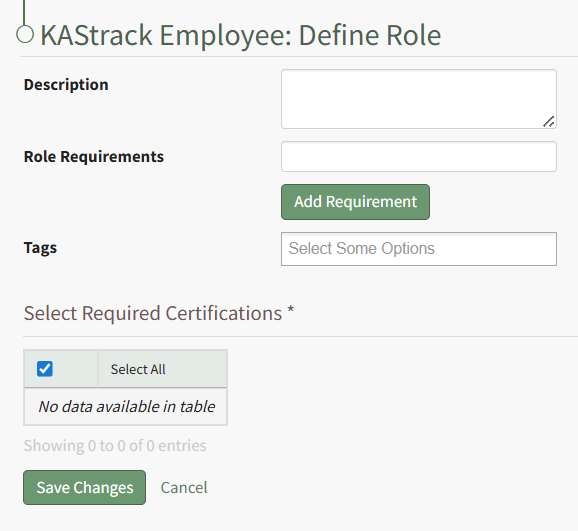
Input the role description and any relevant role requirements. Role requirements are specific to your organization. Multuple requirements can be included.
Any existing certifications will be listed in the table in the Select Required Certifications Table and can be selected via checkbox.
Certification roles are not required to have a certification associated with them.
Select "Save Changes" and certification role's Edit Users Page opens.

Identify the users that should be assigned to the certification role by selecting the checkbox to the left of the user's name.
Selecting the checkbox on the top row of the table will select/deselect all checkboxes in the table.
Click the Save Changes button below the table and the assigned users will now show in the newly created certification role.
How To: Decline a Submitted Certification Pending Approval
To decline a submitted certification that is pending approval, open the Pending Approvals Tab on the Submission Page of the People Module from the Main Menu.
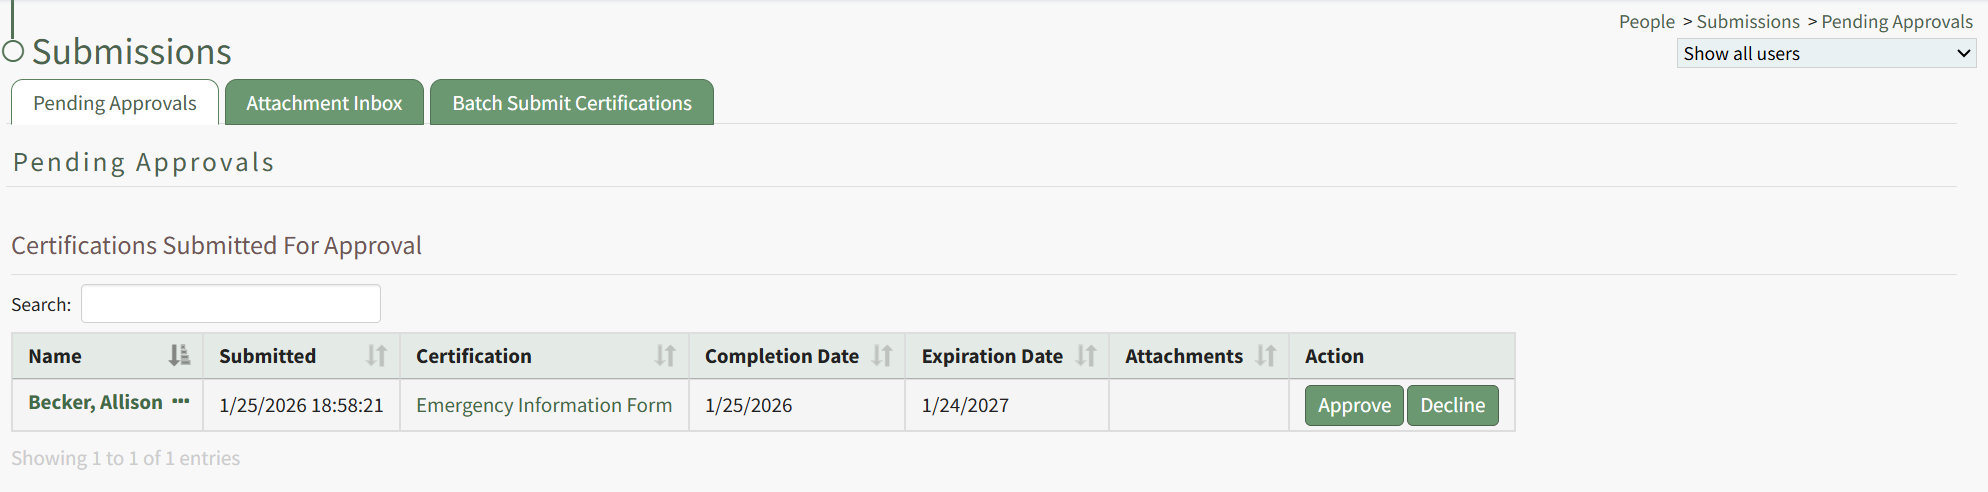
Any certifications pending approval will be displayed in the Submitted Certifications Table.
Click the Decline button in the Action column to the right of the user's name and certification. This opens the Decline Submitted Certification Modal.
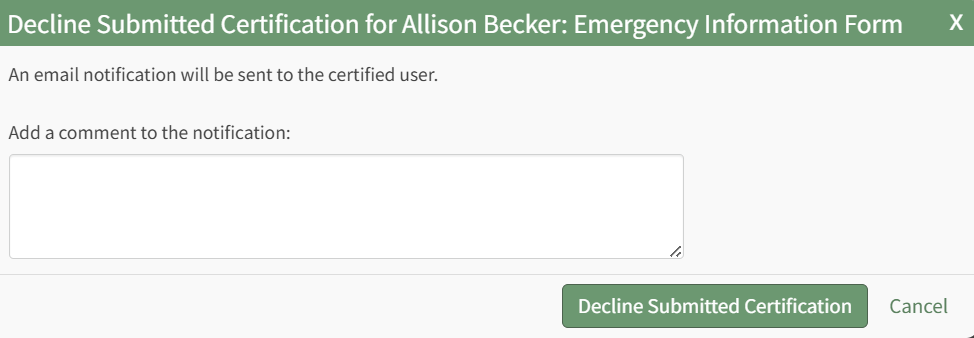
The system will send an email notification to the certified user. You can add comments that will be added to the notification email in the modal.
Select the Decline Submitted Certification button.
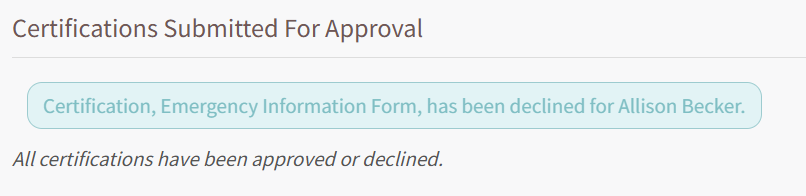
A textbox confirms that the certification was declined and the certification is removed from the Submitted Certifications Table.
How To: Defer a Certification for a Specified User
To defer a specific certification for a supervised user, open the Users Page of the People Module from the Main Menu. Click the name of the user whose certification you want to defer opening the user's Certifications Details Page.
The Certifications Table will display the user's required certifications. Click the three-dot icon to the right of the user's certifications name opening the context menu and select Not Applicable / Defer. This opens the Defer Certification Modal.
Click to indicate that the certification should be deferred and designate the date the deferment ends. Indicate any relevant notes
If the certification is deferred, a valid date is required to indicate the end of the deferment period.
Any notes made regarding the deferment on this modal will be publicly visible on the user's QR Report.
Select the Save button and the certification will now show as deferred on the Certifications Table. In the Expiration Date column, the number of days until deferment ends is displayed. In the notes column, the date the deferment ends is stated.
How To: Define Competency Settings for a Role
If competency tracking is enabled for your KAStrack installation, you can define the Competency Settings for a Certification Role while creating or editing the role. Competency allows your organization a way to track users’ fitness / competence to be assigned to a particular role. This provides a way to ensure users meet the necessary requirements and standards to perform the role they're in.
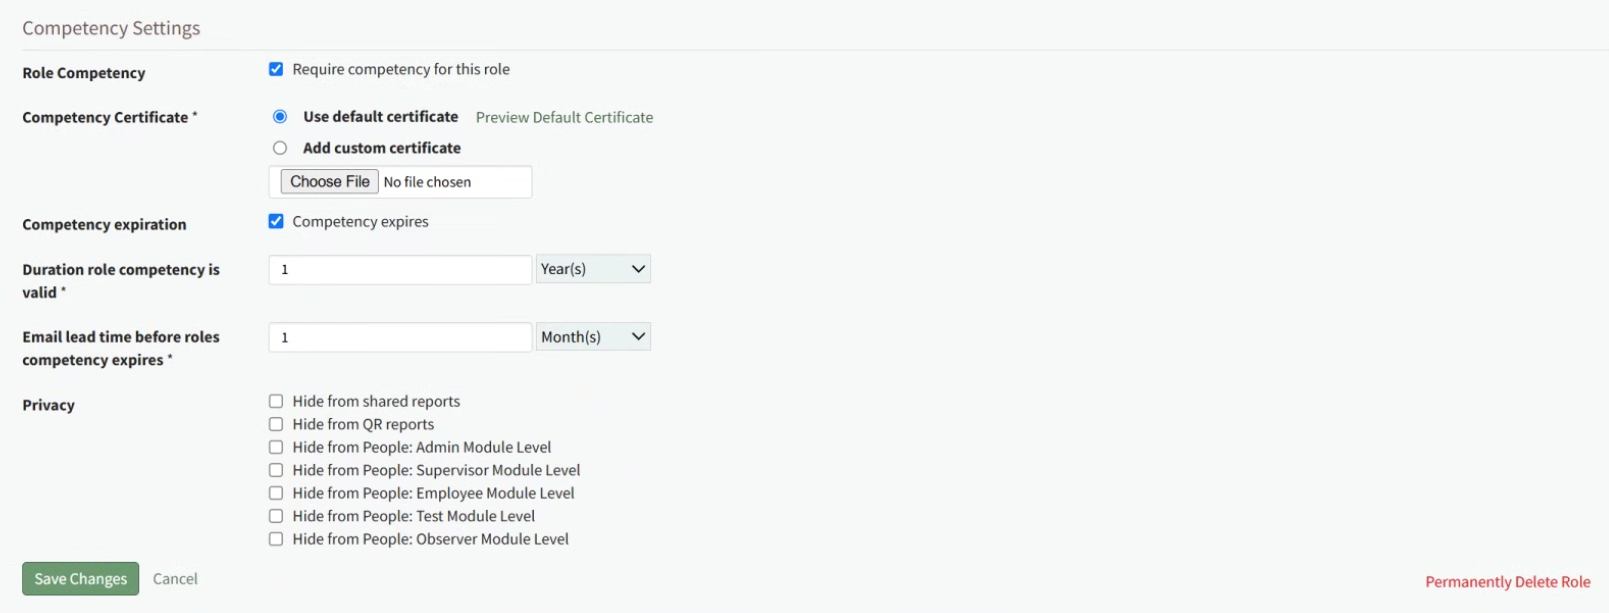
To enable Competency tracking for a Certification Role, click the checkbox next to “Require competency for this role”.
Next, choose whether to “Use default certificate” or “Add custom certificate” for Competency evaluation. Using the default certificate will assign a system-generated evaluation worksheet to be filled out when the assigned user’s competency requirement is being completed. If you’d like to use a different certificate for this purpose, choose “Add custom certificate” and then select the “Choose File” button underneath it and upload the desired file.
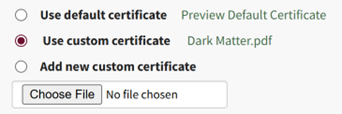
When editing Competency Settings after a custom certificate has been selected, these options change to allow selection between the default certificate, the existing custom certificate, and adding a new custom certificate.
If the competency expires after a certain amount of time, click the checkbox next to “Competency expires”. This allows you to define the “Duration role competency is valid” and “Email lead time before roles competency expires”. The duration the competency is valid refers to the time until the competency expires. The email lead time refers to the warning period given to the user before their competency has expired. Fill in a numerical value next to each field, and choose the time period of either years, months, weeks, or days. To ensure the user is properly alerted that their competency is expiring soon, make sure that the “Email lead time” value is sooner than the value for the “Duration role competency is valid”.
Privacy settings on the Competency allow you to hide competency for this role from various reports and/or users with specified People Module Levels. Click the checkbox next to any options you’d like to hide the role competency from. If choosing People Module Levels, users with only those Module Levels will not see the role competency when viewing reports that include it, and also will not see it as a required action If they are assigned to this Certification Role. If you’d like to hide the Competency from inclusion in any shared reports or QR reports, regardless of a user’s People Module Levels, select those options.
Selecting a People Module Level in Privacy hides the Competency from users with only that Module Level. If a user has multiple People Module Levels, they may still see the Competency unless the Competency is hidden from all of those Module Levels.
How To: Record a New Competency Certificate
The KAStrack team is writing a new how to for you! Coming soon!
How To: Define the Certifications Assigned to a Company's Certification Roles
To define the certification roles associated with a specific company, select Companies in the People Module from the Main Menu opening the Companies Page. Click on the name of the company whose roles you want to define in the Companies Table.
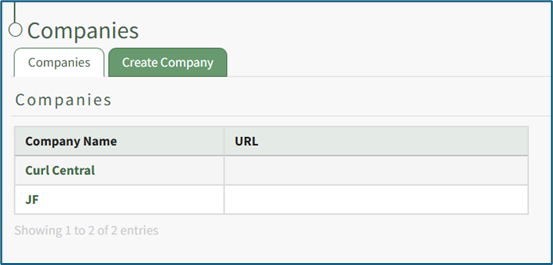
Clicking on the name of a company will open the company's Details Page that displays the company's certification roles with their description.
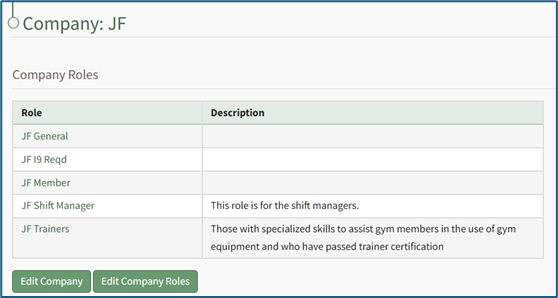
Select the “Edit Company Roles” button to open the Company Roles Description Table. A certification role can be assigned to different companies. The Company Role description allows you to customize the description of the certification role for that specific company.

If a Certification Role has not yet been defined, clicking “Define Role” in the Company column will open the company's Define Role Page.
Optionally input a description of the new role in the textbox.
Role requirements are shown on the Role Info Tab on the Roles Page. Any specific requirements for the certification role can be added. Clicking the “Add Requirement” button opens a new text box, allowing for unlimited Role Requirements. These Role Requirements serve as guidance for adding new users to a particular Certification Role; there is currently no mechanism in KAStrack that further defines the criteria of these requirements or enforces them.
Select the desired tags for additional filters.
Certification Roles can be tagged for filtering purposes; however, Certification Roles currently do not honor the permissions for Permissive and Restrictive tags and will instead behave as if they’ve been tagged with Open tags.
If competency tracking is enabled for your KAStrack installation, the next section will allow definition of the Competency Settings for the Certification Role.
How To: Define Competency Settings for a Role
If competency tracking is enabled for your KAStrack installation, you can define the Competency Settings for a Certification Role while creating or editing the role. Competency allows your organization a way to track users’ fitness / competence to be assigned to a particular role. This provides a way to ensure users meet the necessary requirements and standards to perform the role they're in.
To enable Competency tracking for a Certification Role, click the checkbox next to “Require competency for this role”.
Next, choose whether to “Use default certificate” or “Add custom certificate” for Competency evaluation. Using the default certificate will assign a system-generated evaluation worksheet to be filled out when the assigned user’s competency requirement is being completed. If you’d like to use a different certificate for this purpose, choose “Add custom certificate” and then select the “Choose File” button underneath it and upload the desired file.
When editing Competency Settings after a custom certificate has been selected, these options change to allow selection between the default certificate, the existing custom certificate, and adding a new custom certificate.
If the competency expires after a certain amount of time, click the checkbox next to “Competency expires”. This allows you to define the “Duration role competency is valid” and “Email lead time before roles competency expires”. The duration the competency is valid refers to the time until the competency expires. The email lead time refers to the warning period given to the user before their competency has expired. Fill in a numerical value next to each field, and choose the time period of either years, months, weeks, or days. To ensure the user is properly alerted that their competency is expiring soon, make sure that the “Email lead time” value is sooner than the value for the “Duration role competency is valid”.
Privacy settings on the Competency allow you to hide competency for this role from various reports and/or users with specified People Module Levels. Click the checkbox next to any options you’d like to hide the role competency from. If choosing People Module Levels, users with only those Module Levels will not see the role competency when viewing reports that include it, and also will not see it as a required action If they are assigned to this Certification Role. If you’d like to hide the Competency from inclusion in any shared reports or QR reports, regardless of a user’s People Module Levels, select those options.
Selecting a People Module Level in Privacy hides the Competency from users with only that Module Level. If a user has multiple People Module Levels, they may still see the Competency unless the Competency is hidden from all of those Module Levels.
How To: Record a New Competency Certificate
{{@919}}
Select the Required Certifications that apply to the new Certification Role. Use the checkbox in the header row to select all available Certifications.
Click the “Save Changes” button to save the new certification role details, automatically opening the Edit Users Table of the Assigned Users Tab.

Use the checkboxes in the first column to identify the users that the new role applies to. Use the checkbox in the header row to select all available users.
Click the “Save Changes” button and return to the Assigned Users tab.
How To: Delete a Certification
To delete a certification, open the Certifications Page in the People Module from the Main Menu. Click the name of the certification in the Certifications Table to open the certification's details page.

Select the “Edit Certification” button to open the Edit Certification Info Page, which is comprised parameters from five sections.
Click “Permanently Delete Certification” to delete the certification.

This opens a Deletion Confirmation Modal.
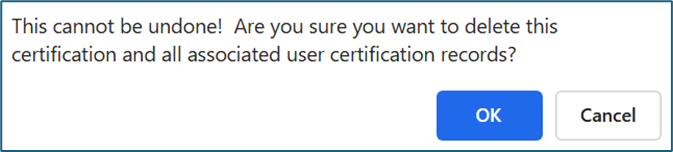
The modal states “This cannot be undone! Are you sure you want to delete this certification and all associated user certification records?” Click the “OK” button to permanently delete the certification.
How To: Delete a Certification Role
To permanently delete a certification role, select the Roles in the People Module from the Main Menu to open the Certification Roles Page.
Identify the certification role you wish to permanently delete and click the “View/Edit (#)” clickable link associated with it to open the certification role's Details Page. Select the Role Info Tab.

Click the “Edit Role Info” button to open the certification role's Edit Info Page.

Click “Permanently Delete Role” from the bottom right-hand corner of the Edit Info Page to delete the Certification Role, opening a Deletion Confirmation Modal.
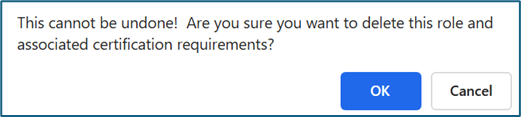
The modal states “This cannot be undone! Are you sure you want to delete this role and associated certification requirements?” Click the “OK” button to permanently delete the certification role.
Deleting a Certification Role does not delete associated Certifications or users, but rather the Certification Requirements assigned to users by the Role.
How To: Delete a Certification that is Pending Approval
To delete a certification that is pending approval, open the Pending Approvals Tab on the Submissions Page of the Main Menu.
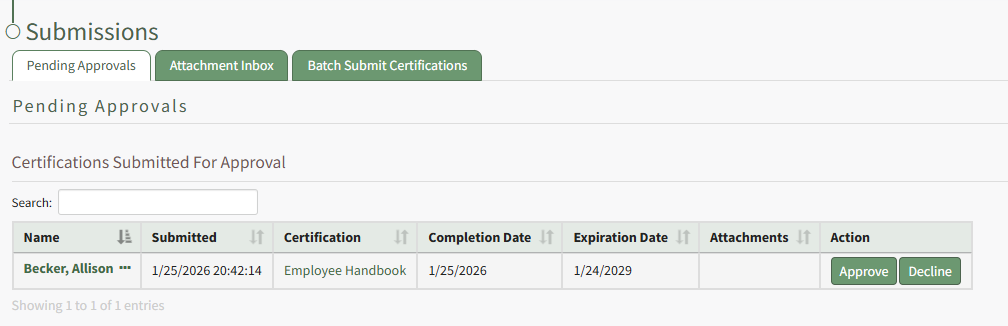
Click the three-dot icon to the right of the user's name in the Submitted Certifications Table opening a context menu.
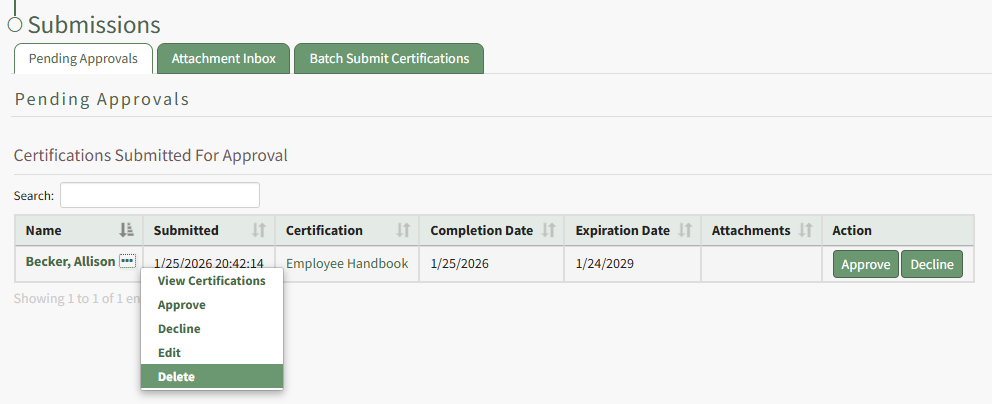
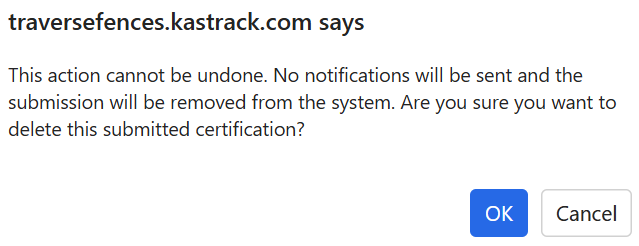
Select Delete opening a Deletion Confirmation Modal which states, "This action cannot be undone. No notifications will be sent and the submission will be removed from the system. Are you sure you want to delete this submitted certification?"
How To: Delete a Company
To delete a company, open the Companies Tab on the Companies Page in the People Module.

Clicking on the name of a Company will open the company's Details Page that displays the Company Roles with their description.

Select the “Edit Company” button to open the Edit Company Page.
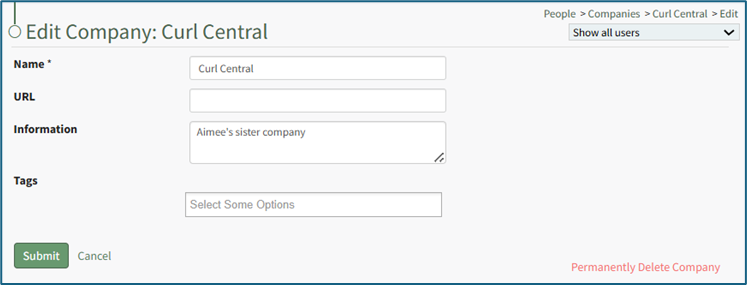
The original company cannot be deleted. This is a system-constraint.
Click “Permanently Delete Company” from the bottom right-hand corner to permanently delete the company, opening a Deletion Confirmation Modal.
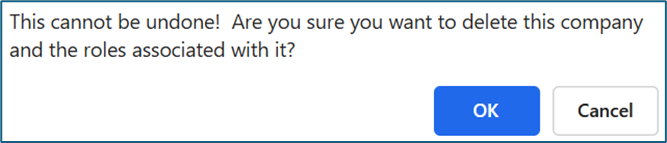
The modal states “This cannot be undone! Are you sure you want to delete this company and the roles associated with it?” Click the “OK” button to permanently delete the company.
How To: Delete a Shared Certifications Report

The Delete Report column of the Current Shared Reports Table houses a clickable red Delete link.
Click the link opening the Shared Report Deletion Confirmation Modal which states, "Are you sure you want to delete this report?"
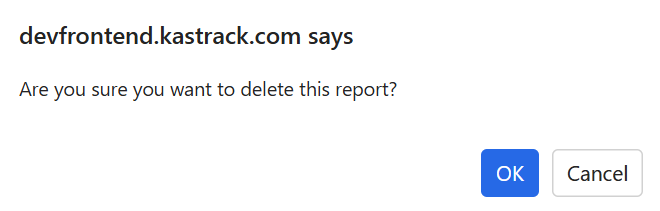
Click "OK" and the Shared Report is deleted and removed from the table.
You can also delete a shared certification report directly from a specific shared report page.
Click the red "Delete Report" link at the bottom left corner of any Shared Report Page opening the same Shared Report Deletion Confirmation Modal shown above.
How To: Designate an Individual a Hidden User on the Users Table
Designating an individual as a hidden user hides their User Roles and Certifications Report within the People Module. When reports are run on all users in the Reports Module, hidden users will be included in the report.
To designate an individual as a hidden user on the user table, open the Users Page in the People Module on the Main Menu. Click the three-dot icon to the right of the user you wish to designate as hidden opening the Users Table Context Menu.
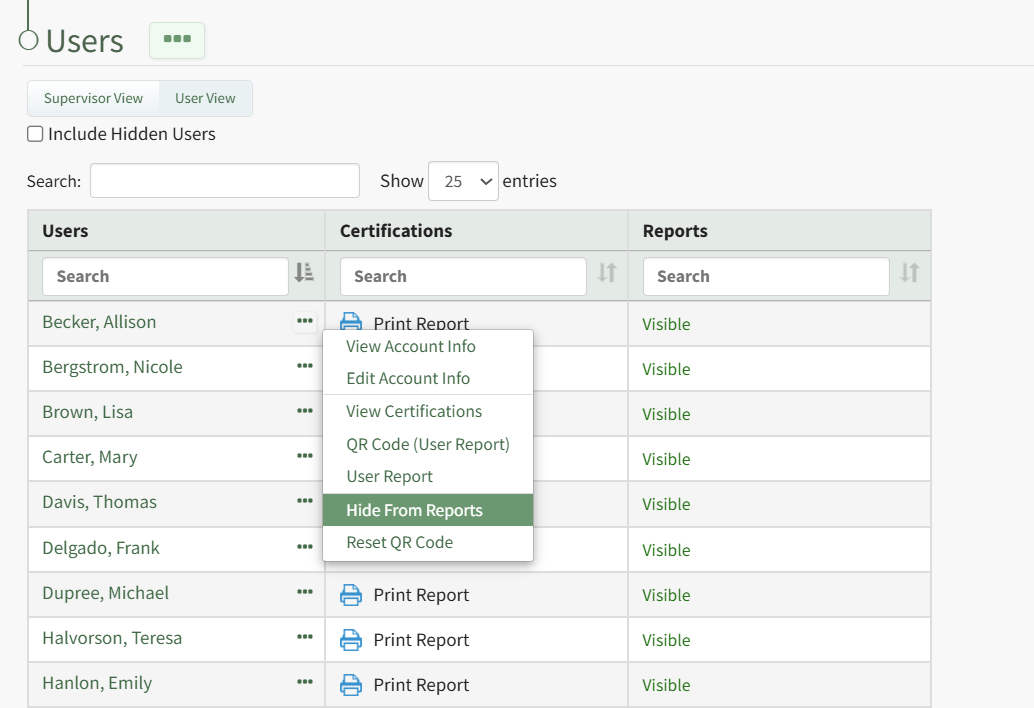
Select "Hide from Reports" from the context menu and the user is no longer visible on the Users Table unless the Include Hidden Users checkbox has been selected.
How To: Designate that an Employee is in Training
Setting a user as “In Training” denotes to others that the user is still onboarding into the role that is assigned to them. While certifications in that role are required of the user, they are not technically considered as “due” while the user is In Training. This allows an organization to give a new employee a grace period to complete their certifications upon admittance to a new certification role.
To set a user as In Training, first select the Users Page in the People Module.
Click on the name of the desired user to be put in training status which opens the User: (Name) Certifications Page.
Select the “Manage Roles/Certifications” tab and click the three dot (…) icon to the right of the Required Role.
Select “Set Training” from the dropdown menu to open the Set Training Modal.
Select the “User in in training” checkbox to indicate that a user is in training.
You are required to input a training end date in MM/DD/YYYY format. Optionally add comments about the training period in the Notes textbox.
If an employee is set as being in training for a role, a blue oval with the full training end date will appear in the Notes column of all certifications required by that role. The number of days remaining in training is shown in a blue oval in the expiration date cell.
If a certification is both deferred for the employee and the employee is In Training for the role that requires that certification, the blue oval will reference the latest end date between the Deferred Until date and the Training End dates.
If a certification is required by multiple roles for which the user is set to In Training, the blue oval will reference the earliest Training End date available.
If a certification is required by multiple roles, but the user isn't In Training for all of the roles that require the certification, the certification will still show as required.
How To: Edit a Company Specific Certification Role Description
To edit a company's certification role description, select the Companies in the People Module of the Main Menu to open the Companies Page and click on the Company Name in the Companies Table. Click the name of the company whose certification role you wish to edit in the Companies Table.

Clicking on the name of a Company will open the company's Detail Page that displays the Company Roles with their description.

Select the “Edit Company Roles” button to open the Company Roles Description Table.

Certification roles will be listed in the first column. A checked checkbox indicates that the Certification Role has been defined and applies the company. Unchecking a checked checkbox means that this role should no longer be associated with this company. A role that is not associated with this Company will show the clickable text Define Role.
Add or alter the desired description by placing the cursor in the Role Description textbox and editing the information. Select the "Save Changes" button and return to the company's Details Page.
How To: Edit a Supervised User's Account Information from the People Module
To edit a supervised user's account information from within the People Module, open the Users Page in the People Module on the Main Menu. Click the three-dot icon to the right of the specific user whose account information you wish to edit, opening the Users Table Context Menu.
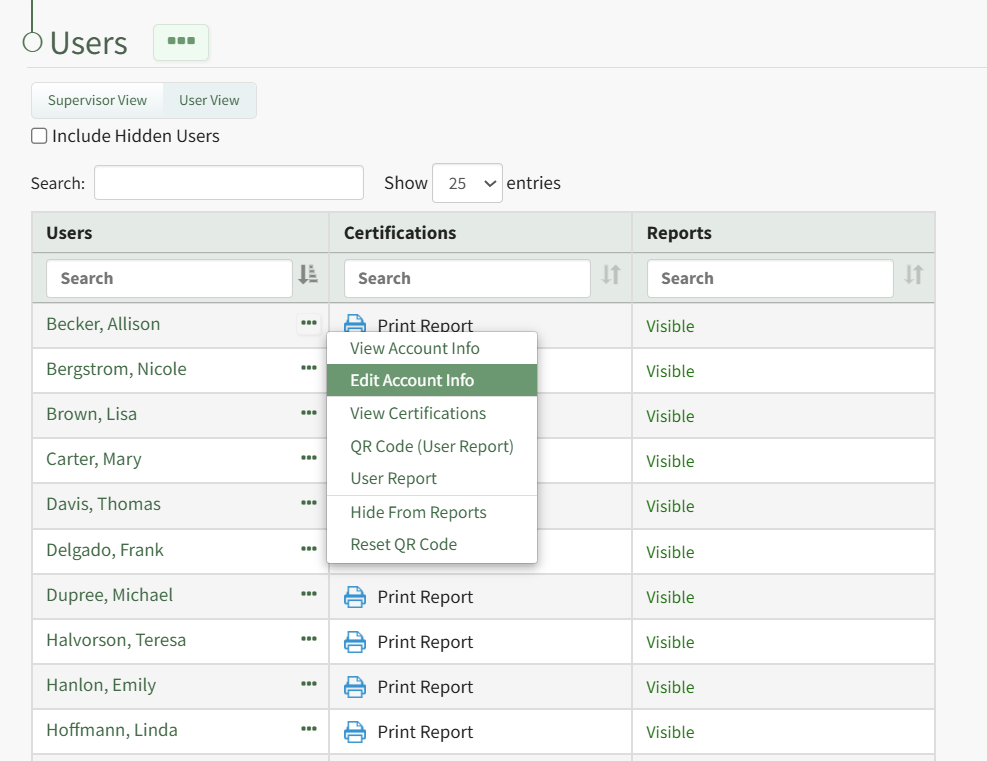
Select "Edit Account Info" from the context menu opening the Edit Account Info Page in the Accounts Module.

Make the desired changes to the user's account information and select the "Save" button when done.
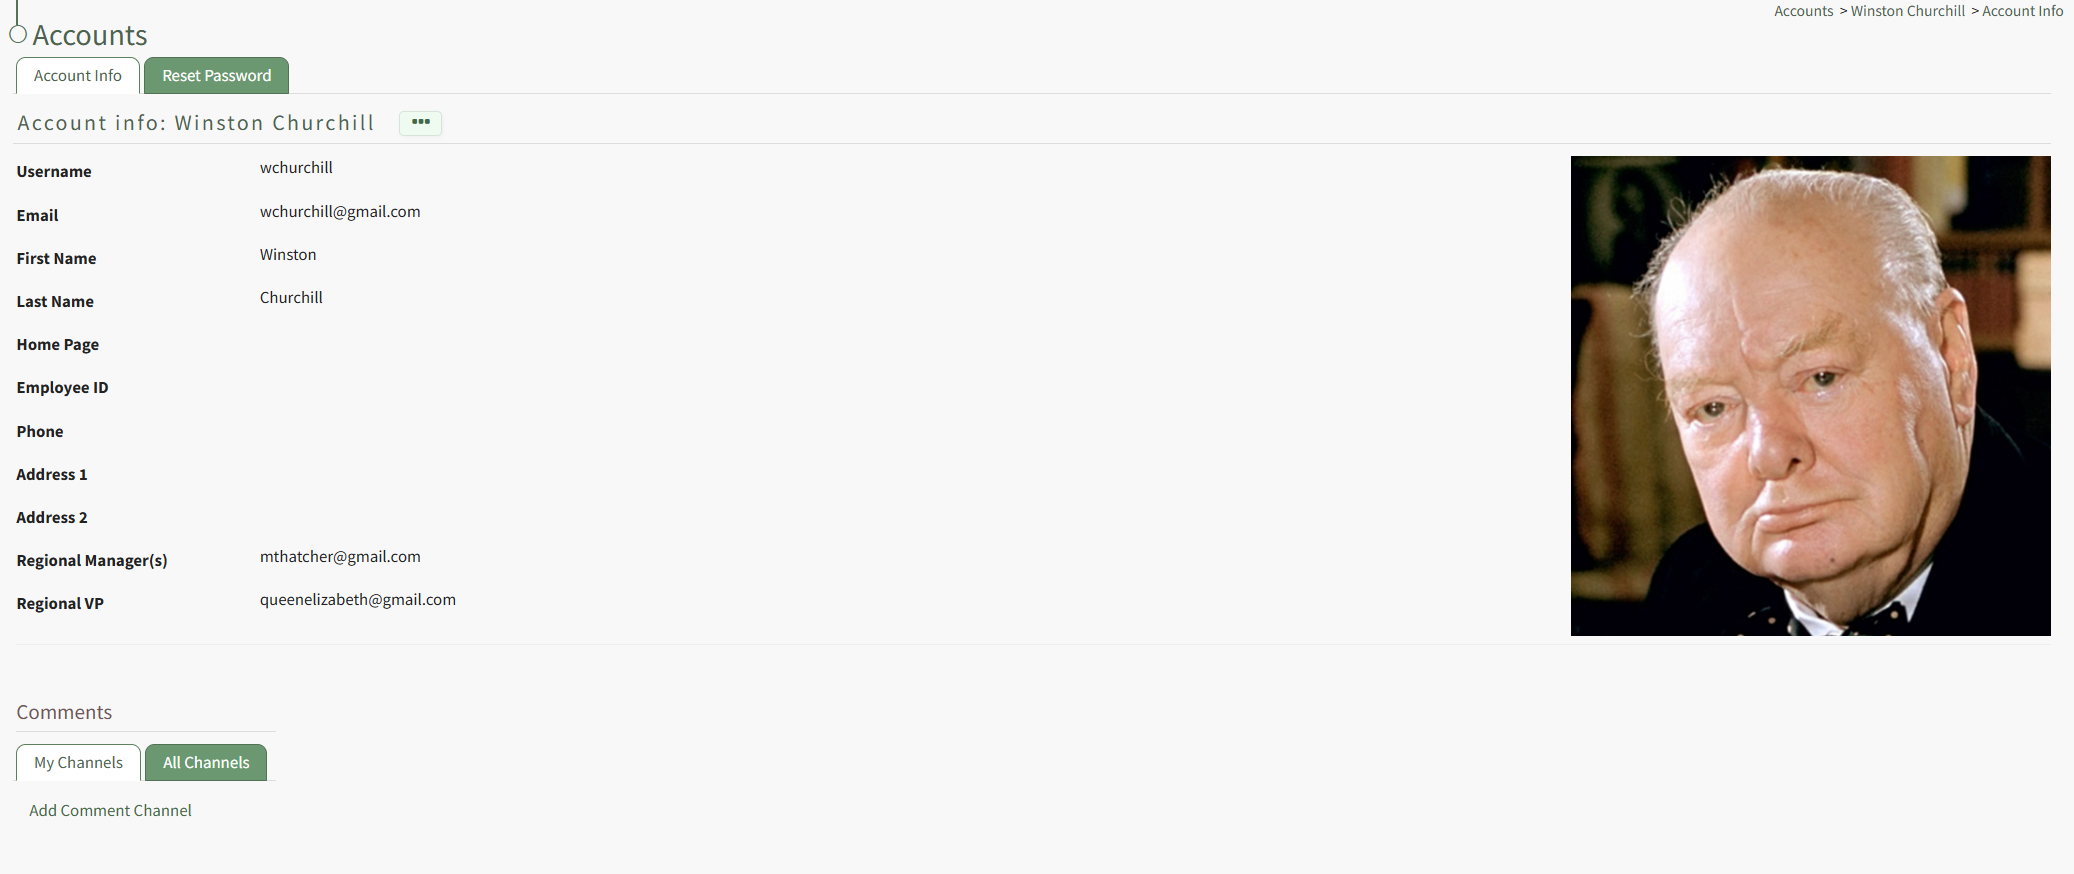
The updated information now shows on the user's Account Info Page.
How To: Edit a User's Certifications Completion/Expiration Dates
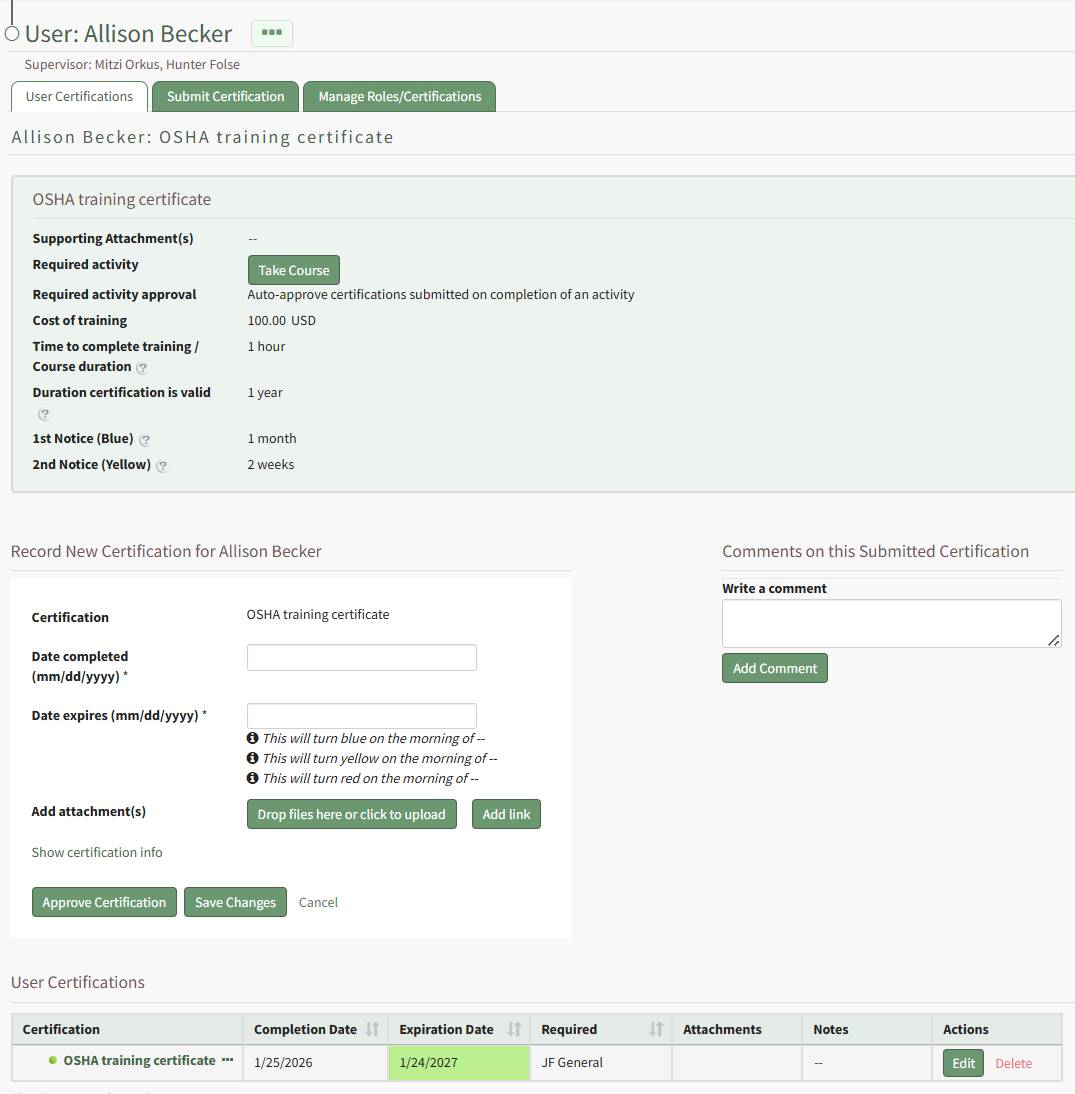
To edit a supervised user's certification completion or expiration dates, open the Users Page in the People Module and click the name of the user whose certification you want to attach a file or link to, opening the user's Certifications Details Page.
Click the Edit button in the Actions column to open the Edit Certification Modal.
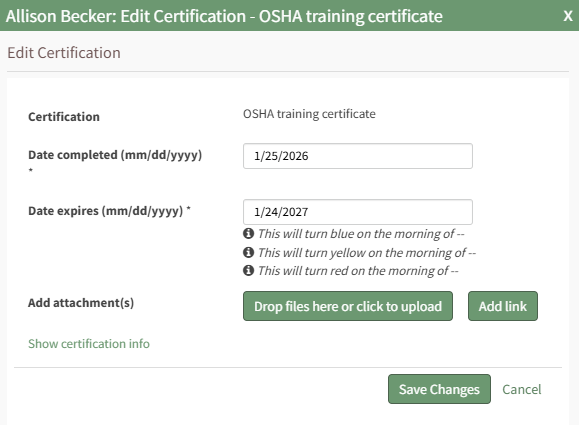
Editing the completion date will result in the system editing the certification expiration date. Select the Save Changes button.
Your edits will be reflected in the Certifications Table.
How To: Edit Attachment Naming Settings for the People Module
When the Attachment Naming Settings are turned on for the Attachment Inbox, KAStrack will require that every uploaded attachment be named according to a designated template within this section for organizational purposes.
To edit the attachment naming settings, open the Module Settings Tab on the Settings Page in the People Module from the Main Menu. ![]()
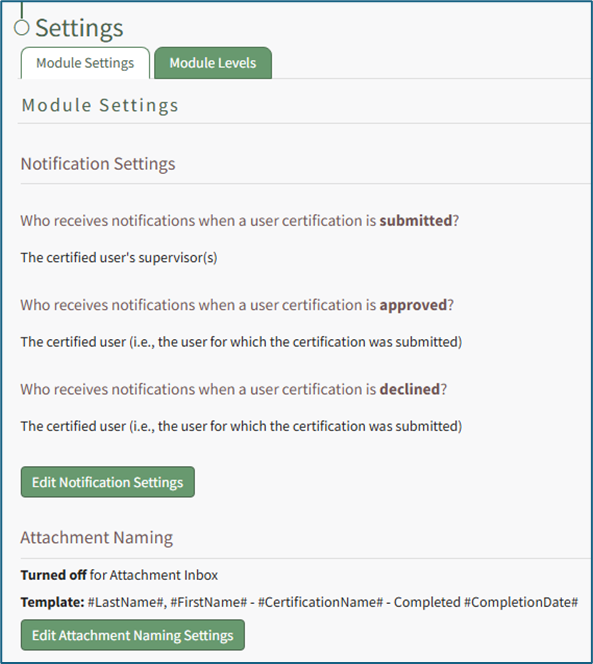
Select “Edit Attachment Naming Settings” to access the Edit Attachment Naming Settings Page.
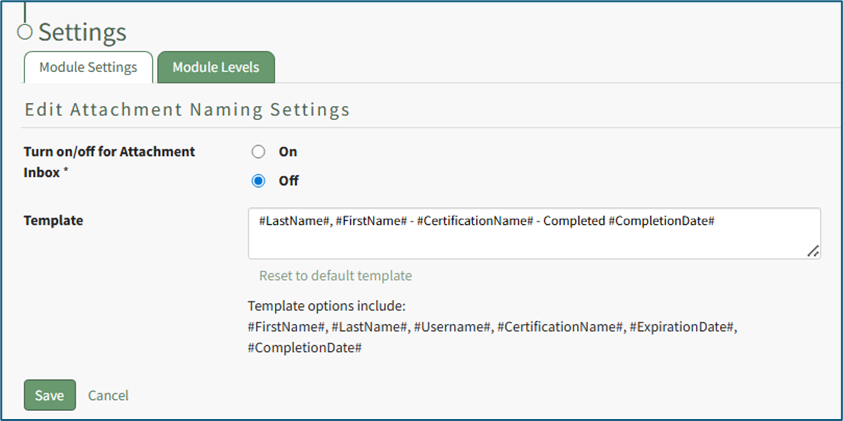
Selecting “On” will require that all attachments be named in a specific way, customized by the Attachment Naming Template.
The default template for Attachment Naming Settings is: Last Name, First Name, Certification Name – Completed, Completion Date
Template options include: #FirstName# , #LastName# , #Username# , #CertificationName# , #ExpirationsDate” , and “Completion Date#. These template options will fill data into the Attachment’s name based on the User Certification the Attachment is being associate with.
Customize the Naming Template to user preferences using the before/after hashtag and comma separated value format to establish recognizable computer language variables.
Select “Save” to update the Attachment Naming Settings or “Cancel” go back to the Module Settings tab on the Settings Page.
How To: Edit Certification Details
To edit the details of a certification, open the Certifications Page in the People Module from the Main Menu. Click the name of the certification whose details you wish to edit opening the Certification Details Page.
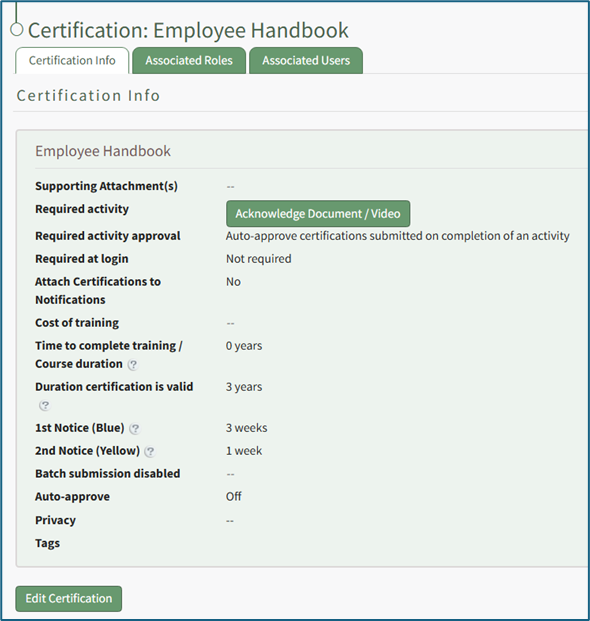
Select the “Edit Certification” button to open the Edit Certification Info Page, which is comprised parameters from five sections. Refer to the detailed explanation on the How To: Create a Certification Page for an explanation of customizable parameters.
How To: Create a Certification
To create a new certification in KAStrack, select the Certifications Page in the People Module from the Main Menu. Select the plus sign icon to the right of the page header or use the three dot (…) icon to the right of the header to open a context menu and select “Create Certification”.
This opens the Add Certification Page, which is divided into five sections: General, Tracking Settings, Activities, Privacy, and Advanced Settings. A detailed explanation of options within each section is provided below. The only required fields are the Certification Name (General section), and, if the certification expires, the duration the Certification is valid, the first notice period, and the second notice period (Tracking Settings section).
After selecting the appropriate parameters from the five sections for the new certification, select the “Submit” button and the Certification: (Certification Name) Page will open on the Certification Info Tab.
General Section
The General Section requires a Certification Title. Optional additions include an Information textbox, an external/reference URL, and Supporting Attachments.
External URLs allow a user to access online documents, forms, videos, PDF documents, or third-party websites as an additional reference when completing the Certification. Supporting Attachments allow for uploading of files directly to the Certification that may assist the user in completing the Certification.
PDFs are the recommended file type for supporting attachments for ease of use, but a file of any type can be attached.
Tracking Settings Section
The Tracking Settings Section allows an account administrator to define metrics for the Certification and the timing of recertification periods. The first two fields allow input of cost and time details for the training; including this information is optional.
Input an estimate or exact cost for the training.
Input the time required to complete the training. The dropdown menu offers the following units: Hours, Days, Weeks, Months, or Years.
KAStrack will check “Certification never expires” as a default parameter. If the certification has an expiration date, deselect the checkbox and the Tracking Setting Section expands to show additional parameters that can be defined to establish the expiration date for a user’s submission.
When a certification is assigned to a new user in KAStrack, the Expiration Date cell will be Red. There is no expiration date associated with the certification, and the cell shows “Nothing on File”, as there is currently no submission for this Certification by the user. This implies that the Certification is due immediately for this user. To set an expiration date for a newly assigned certification, defer the certification or put the user in training.
How To: Designate that an Employee is in Training
{{@426}}
How To: Defer a Certification for a Specified User
{{@867}}
The expiration date being established in the Tracking Setting Section is referring to the period the completed certification is valid for. This in part determines when email notices warning about upcoming recertification will be sent and helps to calculate the re-certification’s due date.
Duration a Certificate is Valid Explanation
KAStrack’s default behavior is to calculate the expiration date for a certification based on the most recent completion date for the Certification by the user, plus the duration a certification is valid. The “Duration a Certificate is Valid” section requires the certification creator to select a time frame (in days, weeks, months, or years) until the Certification is once again due. For example, if this is set to 1 year, and a user completes the Certification on July 1st, 2026, then the Certification will next be due on July 1st, 2027.
Selecting the “Extend to end of” checkbox tells KAStrack to extend the expiration date (to the end of the month or year) that the expiration date falls in. For example, if the certification expires on October 17th selecting this button would extend the deadline until October 31st if set to the end of the month, or December 31st if set to the end of the year.
Selecting the “Extend to the end of” option will not extend the expiration date until after all applicable rules in the Calculate expiration date section have been applied to calculate the expiration date.
Calculating the Expiration Date for a Recertification Explanation
The default expiration date for a user submitted certification in KAStrack is to set the expiration date based on the duration a certificate is valid. In most scenarios, this basic setup is sufficient, especially where a recertification has a fixed expiration schedule based on a calendar period. However, sometimes a more advanced method of calculating the expiration date is necessary.
If you want the default behavior to otherwise apply, but desire to force recertification to an exact expiration date, select the “When default behavior applies, force expiration date to be the date provided below” checkbox and input the force expiration date in MM/DD/YYYY format. For example, say you want users to complete a Certification annually on July 1st. If you’ve set the “Duration Certification is Valid” to 1 year, you may then enable the Force Expiration setting and set it to July 1st, 2025. In this example, a user who then completes the Certification on August 1st, 2025, will see their expiration date be July 1st, 2026, the following year. This would also be the case for a user who completes the certification on November 13th, 2025, or even February 17th, 2026, for example.
The Force Expiration Date will be used when the “If there’s an existing certification on file” checkbox above is unchecked or if its rules do not apply. If the “If there’s an existing certification on file” checkbox is checked, the before or after period will apply to the force expiration date.
KAStrack also has the capability to calculate an expiration date so that the early completion of an existing certification does not negatively impact the user’s future expiration date. For example, If a user completes a certification a month early and you want the recertification expiration date to be established for a fixed duration from the original expiration date, instead of the completion date, there are a few ways to accomplish this.
Select the “If there is an existing certification on file, calculate from the existing expiration date if new certification’s completion date is:” checkbox if this applies.
There are three options to choose from: “After the 1st Notice”, “After the 2nd Notice”, and “Up to ___________ before existing expiration date” (more information about 1st Notice and 2nd Notice below). “After the 1st Notice” is generally the recommended selection to ensure users do not need to resubmit the certification more often than necessary.
Selecting “Up to ________ after existing expiration date” can be applied in addition to any of the three previous choices and takes into account when a user submits a certification after its expiration date. The period established (days, weeks, months, or years) essentially acts as a grace period. For example, if a user submits a certification after expiration but within the period of time established here, the new certification’s expiration date will still be based on the last expiration date.
These settings can then be combined with the Force Expiration date feature described above. Continuing with the example of a Certification with a Forced Expiration date set to July 1st, 2025, you might then check the “If there is an existing certification on file, calculate from the existing expiration date if new certification’s completion date is:” checkbox, and select After the 1st Notice. You may then optionally pick “Up to ________ after existing expiration date” and fill in 2 weeks. In practice, this means that a user who previously completed the Certification with an expiration date of July 1st, 2026 could complete the Certification any time after the 1st warning notice and up to 2 weeks after July 1st, 2026, and their following expiration date would still line up to one year later on July 1st, 2027.
This grace period created by the “Up to ________ after existing expiration date” option does not imply that the Certification isn’t expired after the expiration date, but rather that completing the Certification within that period will still keep the user “on schedule”.
The 1st Notice sends an alert to an employee at a customizable time period before the certification’s expiration date. Input a numerical value and select the appropriate units (days, weeks, months, or years). The 1st Notice implies that the certification is now due and is ready for the user to recertify. This will show on the user’s My Certifications table and in various reports as a Blue dot / cell.
The 2nd Notice sends an alert to both the employee and supervisor at a customizable time period before the certification’s expiration date. Input a numerical value and select the appropriate units (days, weeks, months or years). The 2nd Notice implies that the certification is now overdue and the user is running low on time to recertify before expiration. This will show on the user’s My Certifications table and in various reports as a yellow dot / cell.
In practice, the 2nd Notice should be set to a shorter time period than the 1st Notice. If a user’s expiration date is July 1st, 2026, you may desire to have the user warned one month and one week before their Certification expires. In this example, set 1st Notice to 1 Month, and 2nd Notice to 1 Week. The user’s Certification will then turn Blue on June 1st, Yellow on June 24th, and each time they will be notified via email.
Refresher Training Customization Explanation
KAStrack will also take into account when the settings are different for re-certification than the initial certification. Select the “Certification has unique refresher training” checkbox opening the Unique Refresher Training Settings box in the Tracking Setting Section.
The Unique Refresher Training Settings box allows the user to estimate the cost of special training, the time to complete the refresher training, the duration the refresher certification is valid, and set the desired timing for the first and second notice that will be sent as a reminder to the user to complete the certification.
Activities Section
The Activities Section on the Add Certification Page allows an account administrator to designate an activity that an employee must complete in order to validate their certification. Required Activity options include None, Course – KAStrack, Course – Moodle, Document or Video Acknowledgement, and Form or Payment. A detailed explanation of each is included below.
Required Activity Option: None
Selecting “None” from the dropdown menu indicates that the user is not required to complete any additional activities in order to complete the certification.
Required Activity Option: Course - KAStrack
Selecting “Course – KAStrack” from the dropdown menu indicates that the user must complete a course within KAStrack in order to complete the certification.
Select the course required for this certification from the Choose a Course dropdown menu. All available courses created in the Courses Module of KAStrack will appear here.
How To: Create a Course in KAStrack
{{@233}}
There are Required Activity options available via checkbox. All or none of the checkboxes can be selected.
Selecting “Auto-generate and attach a certificate on completion of an activity” tells KAStrack to automatically generate and attach a certificate of completion for a user on completion of the course. If this option is checked, another option appears. Selecting “Hide expiration date in automatically generated certificate” will remove the required renewal date from the certificate of completion.
If a supervisor does not want to manually approve all submissions of this Certification, select “Auto-approve certifications submitted on completion of an activity” and KAStrack will automatically approve user submissions when the course is completed.
Required Activity Option: Course - Moodle
Selecting “Course – Moodle” from the dropdown menu indicates that the user must complete a course within Moodle in order to complete the certification.
Moodle is an online learning management system that is integrated into KAStrack. There is a time delay between a Moodle Course completion and its recognition in the KAStrack system.
Use the Teacher(s) textbox to type in a username or role, clicking on the desired name. Identifying a user as a teacher in Moodle grants that user the ability to edit a course. The selection will now show beneath with an “X” to the left of the name. Multiple users and roles can be selected. If the wrong username was selected, click on the “X” to delete the user or role.
There are Required Activity options available via checkbox. All or none of the checkboxes can be selected.
Selecting “Auto-generate and attach a certificate on completion of an activity” tells KAStrack to automatically generate and attach a certificate of completion for a user on completion of the course. If this option is checked, another option appears. Selecting “Hide expiration date in automatically generated certificate” will remove the required renewal date from the certificate of completion.
If a supervisor does not want to manually approve all submissions of this Certification, select “Auto-approve certifications submitted on completion of an activity” and KAStrack will automatically approve user submissions when the course is completed.
Required Activity Option: Document or Video Acknowledgement
Selecting “Document or Video Acknowledgement” from the dropdown menu indicates that the user must read a document or view a video to complete the certification.
Click the “Upload a Document or Video” button opening the Upload a Document or Video Modal.
The Modal will prompt the user to select the file they want to upload by pressing the “Choose File” button. Enter a title for the file or video, indicate the revision and revision date, and add any document owners from a dropdown menu that includes individual users and roles. Select the “Save” button and return to the Activities Section on the Add Certification Page.
There are Required Activity options available via checkbox. All or none of the checkboxes can be selected.
Selecting “Auto-generate and attach a certificate on completion of an activity” tells KAStrack to automatically generate and attach a certificate of completion for a user after review of the file / video. If this option is checked, another option appears. Selecting “Hide expiration date in automatically generated certificate” will remove the required renewal date from the certificate of completion.
If a supervisor does not want to manually approve all submissions of the Certification, select “Auto-approve certifications submitted on completion of an activity” and KAStrack will automatically approve user certificates when the associated file / video has been reviewed.
When the Required Activity is set to Document or Video Acknowledgement, completion of the review can be required when the user logs into KAStrack by selecting the Required at Login checkbox. Requiring certification at login automatically selects “Auto-approve certifications submitted on completion of an activity”.
If Required at Login is selected, a user will be presented with the Certification immediately upon their next login and will not be able to conduct any other action within KAStrack until the Certification is completed. Auto-approval of Certifications is required so that a user will immediately be able to access the KAStrack system after Certification completion.
Required Activity Option: Form or Payment
Selecting “Form or Payment” from the dropdown menu indicates that the user must complete a form or make a payment in order to complete the certification.
How To: Create a Form
{{@386}}
Form options provide two checkboxes. An account administrator can select to “Include the completed form as an attachment to the certification” and/or “Include the payment receipt as an attachment to the certification”.
The option to include a payment receipt will only show if the selected form includes a payment option.
There are Required Activity options available via checkbox. All or none of the checkboxes can be selected.
Selecting “Auto-generate and attach a certificate on completion of an activity” tells KAStrack to automatically generate and attach a certificate of completion for a user on completion of the form entry. If this option is checked, another option appears. Selecting “Hide expiration date in automatically generated certificate” will remove the required renewal date from the certificate of completion.
If a supervisor does not want to manually approve all submissions of the Certification, select “Auto-approve certifications submitted on completion of an activity” and KAStrack will automatically approve user submissions when the form entry is completed (and payment is made, if applicable).
When the Required Activity is set to Form or Payment, completion of the form entry can be required when the user logs into KAStrack by selecting the Required at Login checkbox. Requiring certification at login automatically selects “Auto-approve certifications submitted on completion of an activity”.
If Required at Login is selected, a user will be presented with the Certification immediately upon their next login and will not be able to conduct any other action within KAStrack until the Certification is completed. Auto-approval of Certifications is required so that a user will immediately be able to access the KAStrack system after Certification completion.
Privacy Section
The Privacy Section on the Add Certification Page allows an account administrator to select from a table of Module Levels and/or Reports to hide selected information from unauthorized viewing.
The Privacy Section displays a Privacy Table. The left column shows the Module Levels and Reports that the Certification can be hidden from. The right column shows the Module Levels and Reports that attachments to Certification submissions can be hidden from.
Select the appropriate checkboxes to designate the Certification itself or Certification submission attachments as private and thus not visible to the chosen Module Levels and/or Reports.
Selecting an item from the Hide Certifications column will automatically grey out that same item in the Hide Attachments column, as hiding the certification from that item includes hiding all associated submission attachments.
Advanced Settings Section
The Advanced Settings Section on the Add Certification Page allows an account administrator to make designations that are considered advanced settings.
Selecting the Require Attachment checkbox requires a user to upload a file when manually submitting the Certification.
Auto-approve has two checkbox options. To auto-approve all user submissions regardless of if the submitting user has permission to approve, select the “Auto-approve all user submissions” checkbox. Select the second checkbox to “auto approve certifications submitted on completion of an activity” if desired.
Selecting the Allow batch submissions checkbox will open the Batch Submission Setting dialogue box which allows the account administrator to designate which Certification Roles are permitted to submit certification completions in bulk.
The auto-generation and attachment of a certificate of completion can be designated on approval or on activity completion by selecting the appropriate checkbox.
If you do not wish for a user to view the certification expiration date on the auto-generated certificate of completion, select the “Hide expiration date in auto-generated certificates” checkbox.
If you desire to have the system automatically attach any Certification attachments to approval notifications, select the “Include uploaded certification attachments in any approval email notifications” checkbox.
A Parent Certification is a specific kind of certification that also fulfills the requirements of additional certifications. The new certification being generated will be marked as valid if a user has a valid submission on file for the designated parent certification. Parent certifications can be selected from the Parent Certification dropdown menu.
A Child Certification operates conversely to a parent certification; if a child certification (or certifications) is designated here, a valid submission of this Certification will mark the user valid in the child certification(s). A Certification can only have either a Parent Certification or a Child Certification, but not both simultaneously; once a parent or child certification is selected, the other option will be hidden.

At the bottom of the Edit Certification Info Page, select “Submit” to save the changes and return to the Certification Info Tab.
How To: Edit Certification Role Details
To edit the details of a certification role, open the Roles Page in the People Module from the Main Menu.

Click “View/Edit (#)” to open the Roles Page Assigned Users Tab. Select the Role Info Tab.

Click the “Edit Role Info” button to edit the role information specified when the certification role was created.
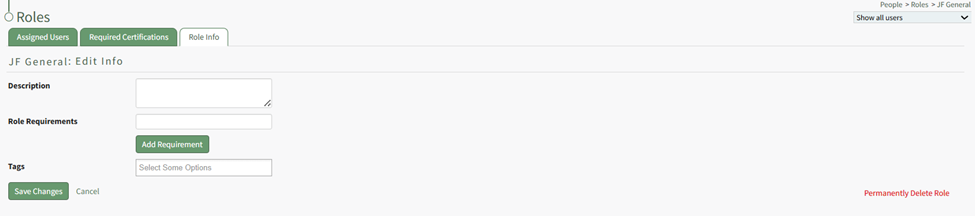
Alter the description, role required, tags, and/or any competency settings for the Certification Role (if competency tracking is enabled for your KAStrack installation), and then click the “Save Changes” button to return to the Role Info Tab.
How To: Edit Certification Role Information
To edit the information associated with a specific certification role, select Roles in the People Module from the Main Menu to open the Certification Roles Page.

Identify the certification role whose information you wish to edit and click the “View/Edit (#)” clickable link associated with it to open a specific certification role's Details Page. Select the Role Info Tab.
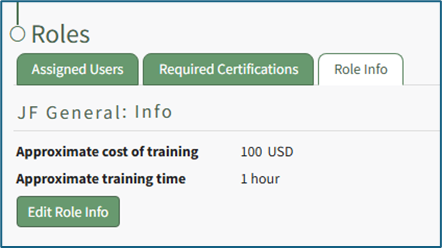
Click the “Edit Role Info” button opening the Edit Info Page allowing you to edit the certification role information specified when the certification role was created.

Alter the description, role required, tags, and/or any competency settings for the Certification Role (if competency tracking is enabled for your KAStrack installation), and then click the “Save Changes” button to return to the Role Info Tab.
How To: Define Competency Settings for a Role
If competency tracking is enabled for your KAStrack installation, you can define the Competency Settings for a Certification Role while creating or editing the role. Competency allows your organization a way to track users’ fitness / competence to be assigned to a particular role. This provides a way to ensure users meet the necessary requirements and standards to perform the role they're in.
To enable Competency tracking for a Certification Role, click the checkbox next to “Require competency for this role”.
Next, choose whether to “Use default certificate” or “Add custom certificate” for Competency evaluation. Using the default certificate will assign a system-generated evaluation worksheet to be filled out when the assigned user’s competency requirement is being completed. If you’d like to use a different certificate for this purpose, choose “Add custom certificate” and then select the “Choose File” button underneath it and upload the desired file.
When editing Competency Settings after a custom certificate has been selected, these options change to allow selection between the default certificate, the existing custom certificate, and adding a new custom certificate.
If the competency expires after a certain amount of time, click the checkbox next to “Competency expires”. This allows you to define the “Duration role competency is valid” and “Email lead time before roles competency expires”. The duration the competency is valid refers to the time until the competency expires. The email lead time refers to the warning period given to the user before their competency has expired. Fill in a numerical value next to each field, and choose the time period of either years, months, weeks, or days. To ensure the user is properly alerted that their competency is expiring soon, make sure that the “Email lead time” value is sooner than the value for the “Duration role competency is valid”.
Privacy settings on the Competency allow you to hide competency for this role from various reports and/or users with specified People Module Levels. Click the checkbox next to any options you’d like to hide the role competency from. If choosing People Module Levels, users with only those Module Levels will not see the role competency when viewing reports that include it, and also will not see it as a required action If they are assigned to this Certification Role. If you’d like to hide the Competency from inclusion in any shared reports or QR reports, regardless of a user’s People Module Levels, select those options.
Selecting a People Module Level in Privacy hides the Competency from users with only that Module Level. If a user has multiple People Module Levels, they may still see the Competency unless the Competency is hidden from all of those Module Levels.
How To: Record a New Competency Certificate
{{@919}}
How To: Edit Company Information
To edit company information (its name, URL link, Information, or tags), open the Companies Tab on the Companies Page in the People Module from the Main Menu.
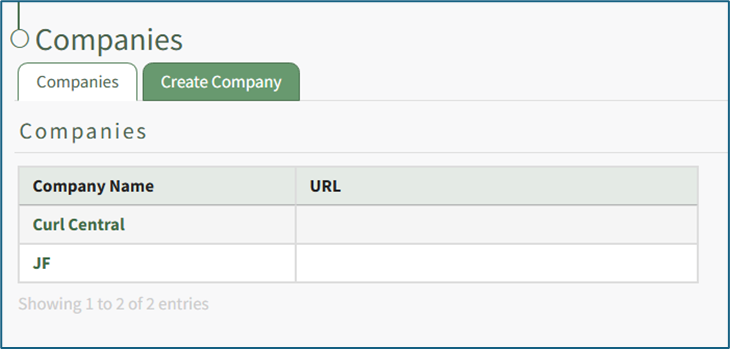
Clicking on the name of a Company will open the company's Detail Page that displays the Company Roles with their description.
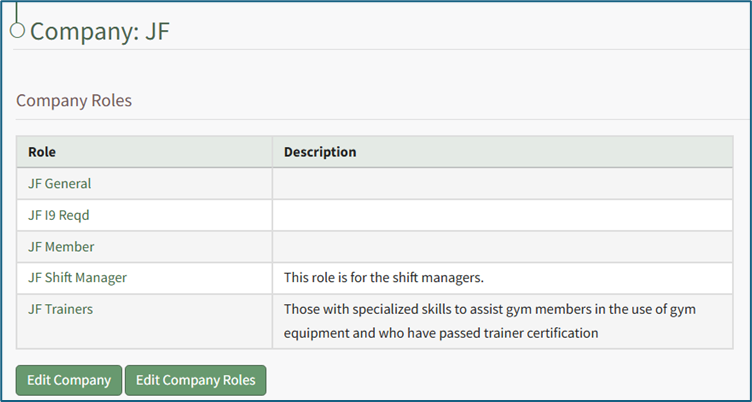
Select the “Edit Company” button to open the Edit Company: (Company Name) Page.
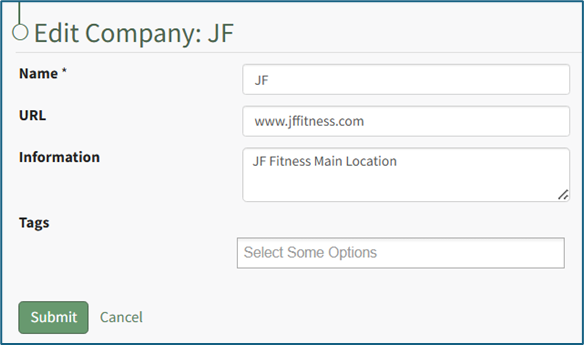
You can now make any desired changes to the Company Name, URL, Descriptive Information, or Tags.
Select “Submit” to save the changes and return to the company's Detail Page with the altered inputs now showing.
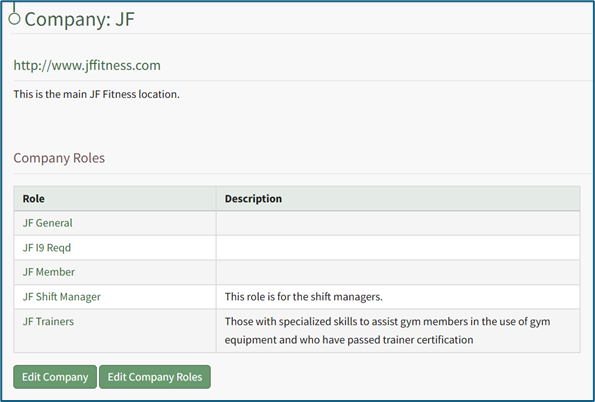
Click “Cancel” to return to the company's Detail Page without saving any changes.
How To: Edit Notification Settings
To edit the People Module Notification Settings, open the Module Settings Tab of the Settings Page in the People Module from the Main Menu.
Click the “Edit Notifications Settings” button to access the Notifications Settings Page which offers checkbox selections for three different notification scenarios.
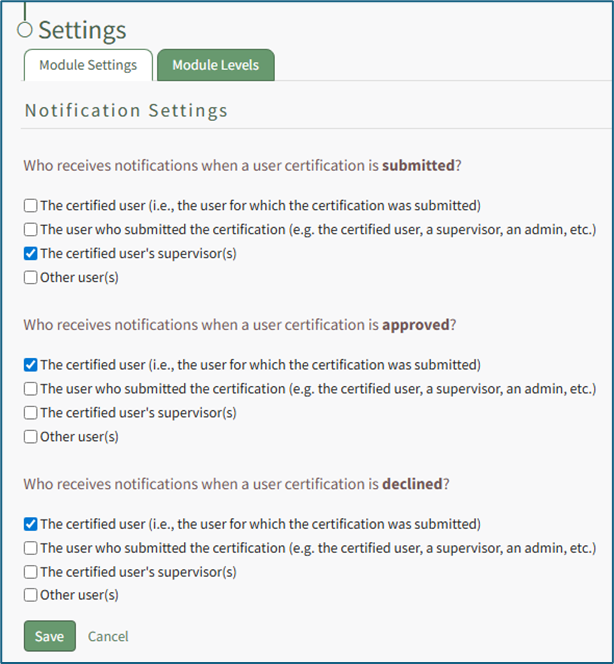
A user has the ability to customize who is notified when a user certification is submitted, when a user certification is approved, and when a user certification is declined.
There are four checkboxes for each of the three previous scenarios:
- The certified user (the user who completed the certification)
- The user who submitted the certification (could refer to the certified user, a supervisor, or and/or an administrator depending on the company’s certification submission procedures)
- The certified user’s supervisor(s) (refers to the individual’s direct supervisor)
- Other user(s) (allows for the selection of any user in the KAStrack system from a dropdown menu)
Multiple, all, or none of the checkboxes can be selected.
Select “Save” to update the default notifications or “Cancel” go back to the Module Settings tab on the Settings Page.
How To: Edit Required Certifications for a Certification Role
To edit the required certifications for a specified certification role, select Roles in the People Module from the Main Menu to open the Certification Roles Page.

Identify the certification role whose required certifications you wish to edit and click the “View/Edit (#)” clickable link to open the specified certification role's Details Page. Open the Required Certifications Tab.
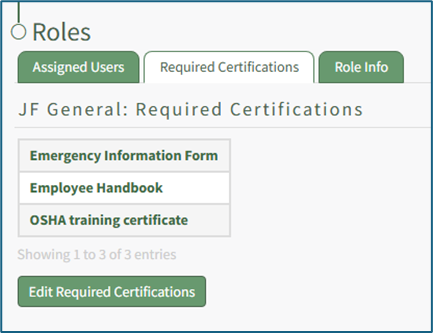
Click the “Edit Required Certifications” button to open the Edit Required Certifications page.
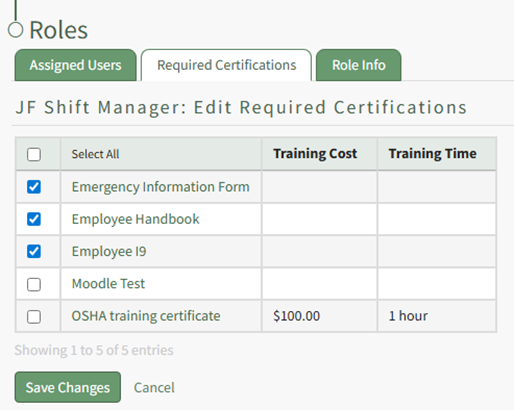
Select the checkboxes for the required certifications you would like to add to the certification role or deselect the checkboxes for required certifications that you no longer wish to be required.
Use the checkbox in the header row to select/deselect all available Certifications.
Select the “Save Changes” button to save the changes made and return to the Required Certifications Tab.
How To: Edit the Roles Associated with a Certification
To edit the roles associated with a certification, select Certifications in the People Module from the Main Menu opening the Certifications Page.
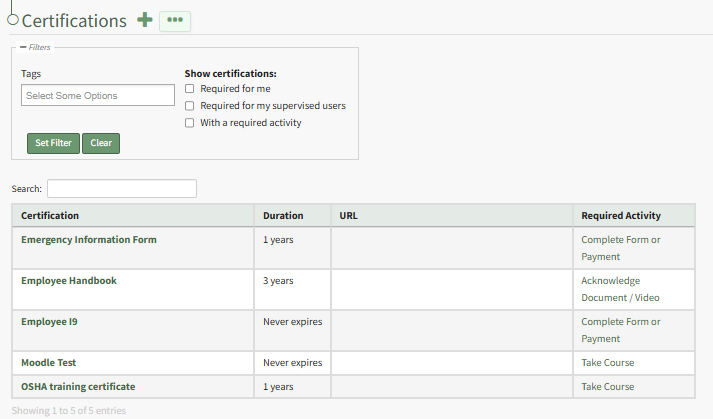
Click the certification name in the Certifications Table to open the certification's Details Page. Open the Associated Roles Tab to see a list of the Roles that have been assigned a specific certification.
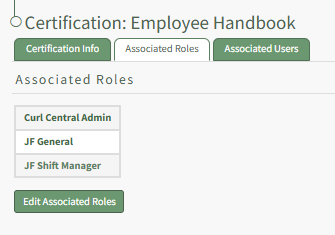
Select the “Edit Associated Roles” button to open the Edit Associated Roles Table.
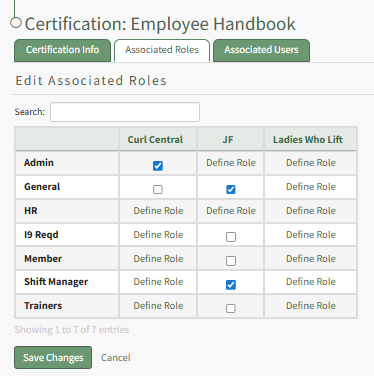
Role names are shown along the left side in the first column. The column headers refer to the names of Companies that have been established on the Companies page of the People Module. Selecting checkboxes in the table will add Certification Requirements for the Selected Roles. Deselecting the checkbox will remove the certification requirement from the associated certification role.
Select “Save Changes” and the associated roles will show in alphabetical order on the Associated Roles Table on the Associated Roles Tab.
How To: Export Certifications
Certifications can be exported from KAStrack into a CSV file.
Select the Certifications Page in the People Module from the Main Menu to open the Certification Table. Click the three-dot icon to the right of the header to open the Certifications Page Context Menu and select “Export Certifications”.

This opens the Export Certifications Modal.
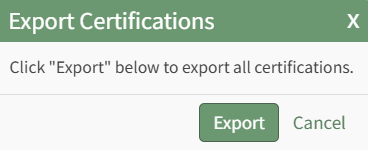
Select the “Export” button to download a CSV file into your device’s Downloads folder that contains all Certifications and their details.
How To: Export Role/Certification Assignments
Certification assignments to Certification Roles can be exported from KAStrack into a CSV file. Select Roles Page in the People Module from the Main Menu to open the Certification Roles Table. Click the three-dot icon to the right of the header to open the Certification Roles Page Context Menu and select “Export Roles/Certification Assignments”.
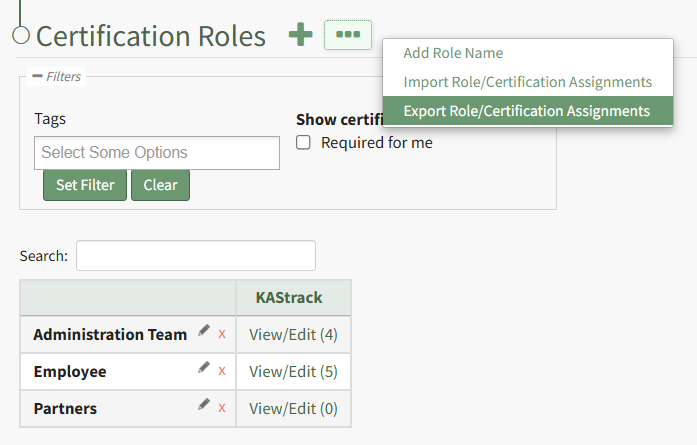
This opens the Export Role/Certification Assignments Modal.
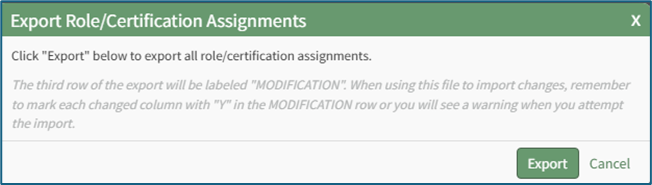
Select the “Export” button to download a CSV file into your device’s Downloads folder that contains all role/certification assignments.
How To: Export User Certifications
The KAStrack team is currently writing a new How To for you. Update coming soon!
How To: Import Certifications
Certifications can be imported in bulk into KAStrack from a CSV file.
To import certifications, open the Certifications Page in the People Module from the Main Menu to display the Certifications Table. Click the three dot (…) icon to the right of the header to open a context menu and select “Import Certifications”.
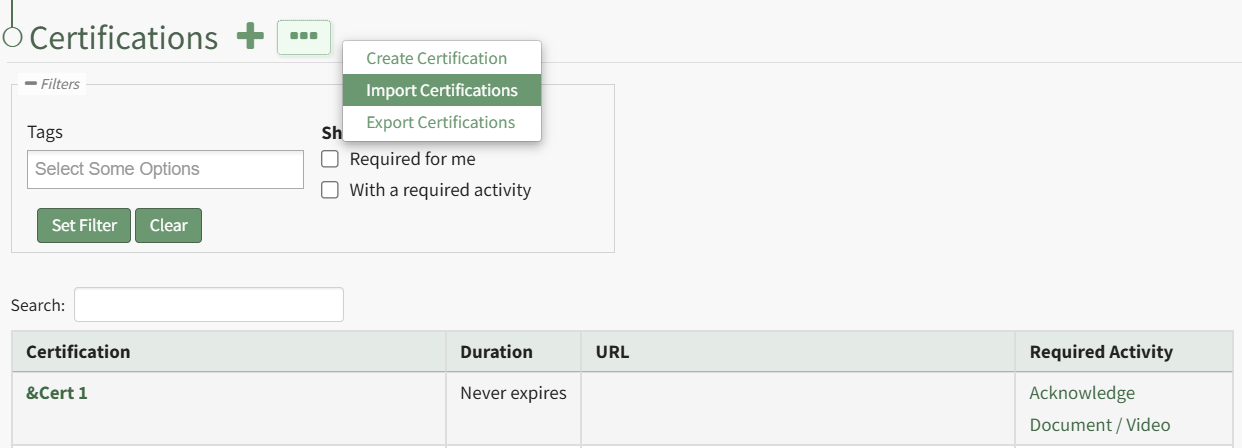
This opens the Import Certifications Page. A template is provided to simplify importing.
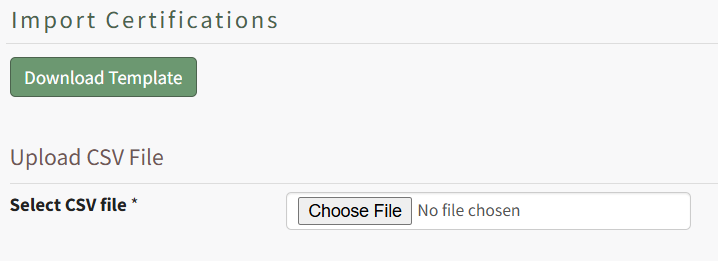
Click the “Download Template” button to download the Certifications Template CSV to your device.
If you'd like to modify existing Certifications in bulk using Certification Import, in contrast or in addition to using Certification Import to create new Certifications, you can first export all Certifications from KAStrack to a CSV file and work off of that file. Read more here.
When ready, open the downloaded file (or create a new CSV file, if desired) in your favorite text editor / spreadsheet software (e.g. Excel, Sheets, etc.).
When preparing a CSV file for import, the following fields must be included in the first row of the file, each in their own cell, acting as header columns. Information for the Certification(s) will be listed on subsequent rows beneath each column header. All column headers must be included even if they don't apply to all Certifications being imported.
Some of these fields require meeting certain criteria when filling them out for KAStrack to import the Certification properly. The fields and supplemental information are outlined below:
Column Header | Information |
Certification ID | To create a new Certification, leave this blank. On import and creation, KAStrack will assign the Certification a unique ID. To find out an existing Certification's ID, you can export all Certifications, or find it in the URL when viewing the Certification's page after clicking its name from the Certification's table. Listing an ID in the import, paired with the matching Certification's name, allows you to update information about that Certification through the import process. The ID will be a whole integer. |
Name | This is a required field. Cannot have the same name as another Certification in KAStrack. Cannot contain the characters ;<>\/ |
Information | Any text or none at all, used to describe the Certification. |
External URL | Optionally include a URL to a webpage that can be used to help guide the person submitting the Certification or provide them with important information. |
Cost of Training | Optionally include a decimal value if this Certification has an associated cost. |
Time to Complete | Optionally include a decimal value if this Certification takes a certain amount of time to complete that you'd like to keep track of. |
Time to Complete Period | Coupled with the field above to give a unit of time for the Time to Complete. Must be Hours, Days, Weeks, Months, Years, or None. |
Certification Expires | Must be (case-insensitive) Yes, Y, On, True, or 1 for affirmative, or (blank), No, N, Off, False, or 0 for negative. |
Duration | Must be a positive integer. |
Duration Period | Coupled with the field above to give a unit of time for the Duration. Must be Days, Weeks, Months, Years, or None. |
Extend Duration | Must be Month, Year, or None. |
Due | Must be a positive integer. |
Due Period | Coupled with the field above to give a unit of time for when the Certification will become Due. Must be Days, Weeks, Months, Years, or None. |
Overdue | Must be a positive integer. |
Overdue Period | Coupled with the field above to give a unit of time for when the Certification will become Overdue. Must be Days, Weeks, Months, or None. |
Refresher Training | Must be (case-insensitive) Yes, Y, On, True, or 1 for affirmative, or (blank), No, N, Off, False, or 0 for negative. |
Refresher Cost of Training | Optionally include a decimal value if this Certification's Refresher Training has an associated cost. |
Refresher Time to Complete | Optionally include a decimal value if this Certification's Refresher Training takes a certain amount of time to complete that you'd like to keep track of. |
Refresher Time to Complete Period | Coupled with the field above to give a unit of time for the Refresher Time to Complete. Must be Hours, Days, Weeks, Months, Years, or None. |
Refresher Duration | Must be a positive integer. |
Refresher Duration Period | Coupled with the field above to give a unit of time for the Refresher Duration. Must be Days, Weeks, Months, Years, or None. |
Refresher Extend Duration | Must be Month, Year, or None. |
Refresher Due | Must be a positive integer. |
Refresher Due Period | Coupled with the field above to give a unit of time for when the Certification's Refresher Training will become Due. Must be Days, Weeks, Months, Years, or None. |
Refresher Overdue | Must be a positive integer. |
Refresher Overdue Period | Coupled with the field above to give a unit of time for when the Certification's Refresher Training will become Overdue. Must be Days, Weeks, Months, or None. |
Hide From Shared Reports | Must be (case-insensitive) Yes, Y, On, True, or 1 for affirmative, or (blank), No, N, Off, False, or 0 for negative. |
Hide From QR Reports | Must be (case-insensitive) Yes, Y, On, True, or 1 for affirmative, or (blank), No, N, Off, False, or 0 for negative. |
Hide From People Module Levels | List the exact name of an existing Access Level(s) that this Certification should be hidden from. If listing multiple Access Levels, separate them with a semicolon. |
Hide Attachments From Shared Reports | Must be (case-insensitive) Yes, Y, On, True, or 1 for affirmative, or (blank), No, N, Off, False, or 0 for negative. |
Hide Attachments From QR Reports | Must be (case-insensitive) Yes, Y, On, True, or 1 for affirmative, or (blank), No, N, Off, False, or 0 for negative. |
Hide Attachments From People Module Levels | List the exact name of an existing Access Level(s) that Attachments for this Certification should be hidden from. If listing multiple Access Levels, separate them with a semicolon. |
Require Attachment | Must be (case-insensitive) Yes, Y, On, True, or 1 for affirmative, or (blank), No, N, Off, False, or 0 for negative. |
Auto Approve User Submissions | Must be (case-insensitive) Yes, Y, On, True, or 1 for affirmative, or (blank), No, N, Off, False, or 0 for negative. |
Auto Approve On Activity Completion | Must be (case-insensitive) Yes, Y, On, True, or 1 for affirmative, or (blank), No, N, Off, False, or 0 for negative. |
Allowed Batch Submission Roles | List the exact name of an existing Certification Role(s) that should have the ability to batch submit this Certification. If listing multiple Certification Roles, separate them with a semicolon. |
Generate Attachment On Approval | Must be (case-insensitive) Yes, Y, On, True, or 1 for affirmative, or (blank), No, N, Off, False, or 0 for negative. |
Generate Attachment On Activity Completion | Must be (case-insensitive) Yes, Y, On, True, or 1 for affirmative, or (blank), No, N, Off, False, or 0 for negative. |
Hide Expiration Date In Generated Attachments | Must be (case-insensitive) Yes, Y, On, True, or 1 for affirmative, or (blank), No, N, Off, False, or 0 for negative. |
Attach Certificates To Notifications | Must be (case-insensitive) Yes, Y, On, True, or 1 for affirmative, or (blank), No, N, Off, False, or 0 for negative. |
Parent Certification (?) | List the exact name of an existing Certification that is the Parent Certification of this Certification. |
Child Certification(s) (?) | List the exact name of an existing Certification(s) that is/are a Child Certification(s) of this Certification. If listing multiple Certifications, separate them with a semicolon. |
Once your file is ready for import, return to KAStrack's Import Certification's page. Click the “Choose File” button to select the CSV file from your device. The page will then update to show all of the expected fields, and a dropdown box to their right.
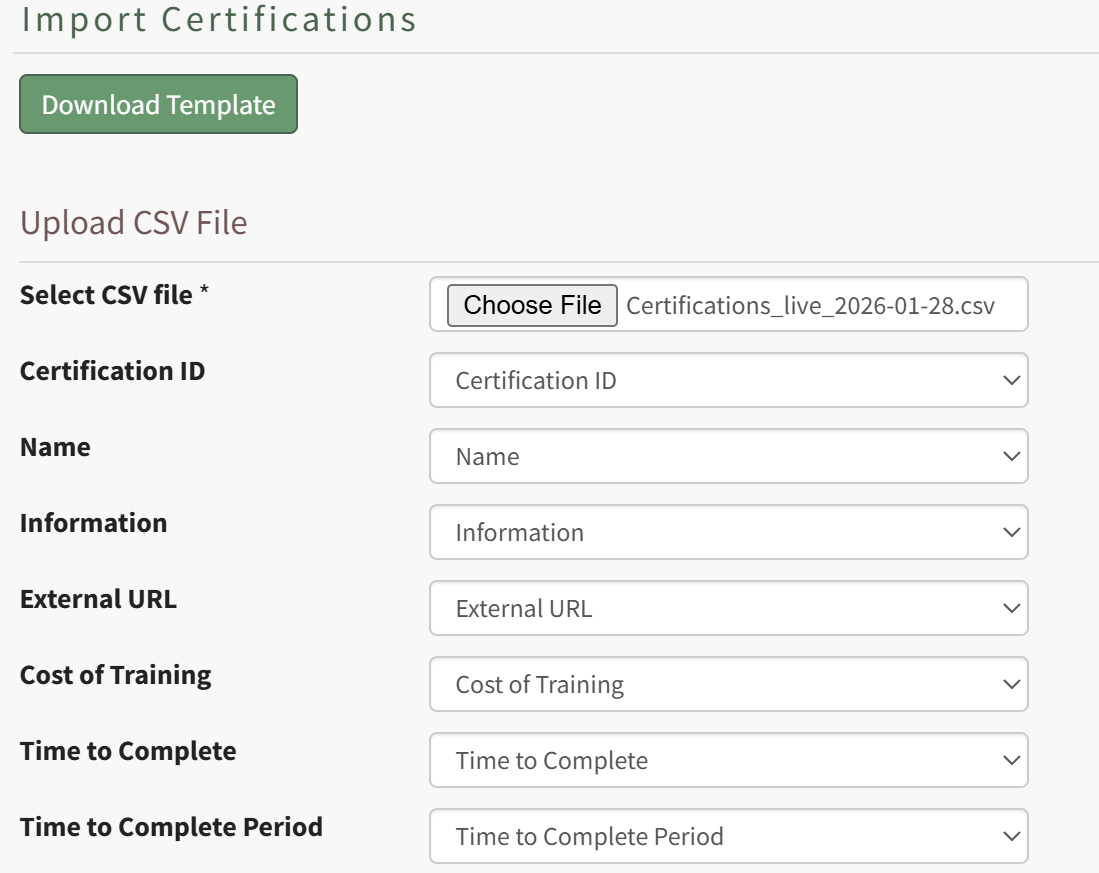
The dropdown box is used to map column headers from the CSV to the fields necessary for Certification Import. If the column header name matches the system field's name, KAStrack will automatically set that field's dropdown box to the matching name. If you have used different column header names in your CSV, you can manually select from the dropdown which column headers from your file go with which system field.
Click the “Import certifications” to upload the file and import the changes into KAStrack. The screen will then display a success or fail message, and, if failed, alert to any changes that should be made to the imported file. If the import fails, no certifications will be imported/created or updated. If successful, KAStrack will inform how many new Certifications were created, and how many existing ones have been updated.
How To: Import Role/Certification Assignments
Certification assignments to Certification Roles can be imported in bulk into KAStrack. Select the Roles Page in the People Module from the Main Menu to display the Certification Roles Table. Click the three dot (…) icon to open a context menu and select “Import Role/Certification Assignments”.
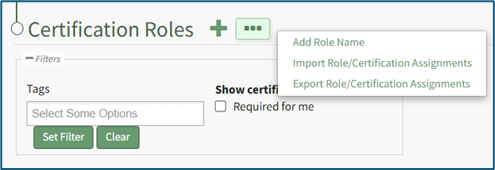
A template is provided to simplify importing.
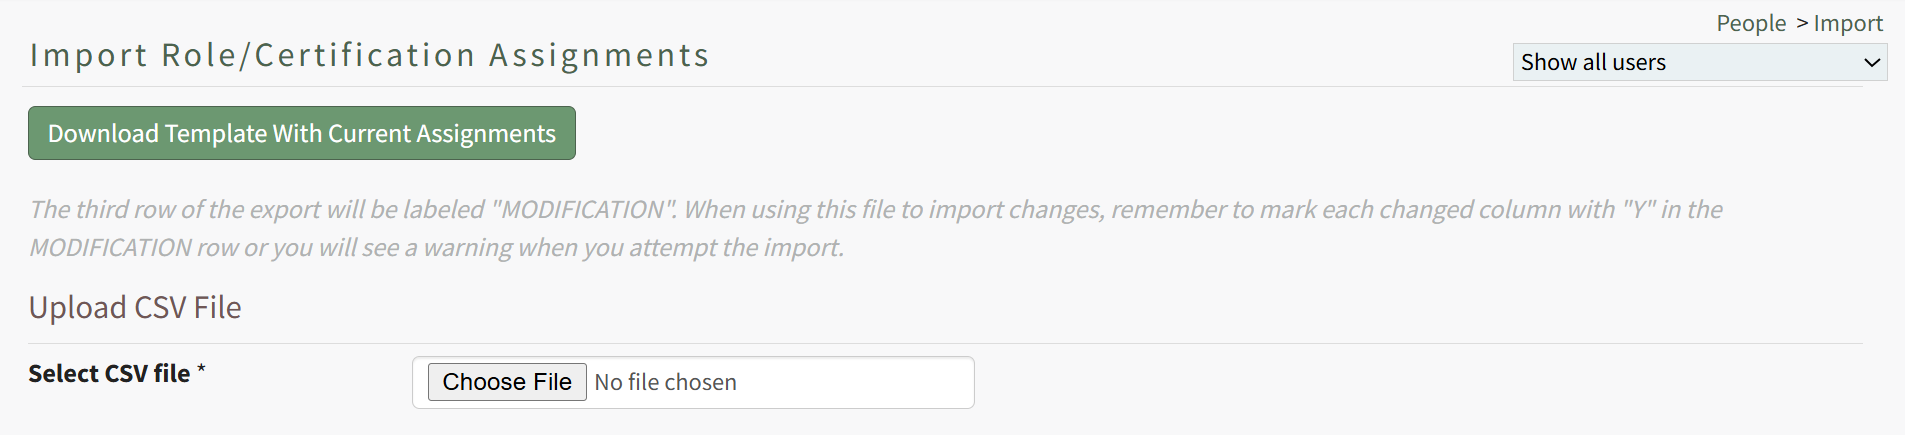
Click the “Download Template with Current Assignments” button to download the Role Certifications Template CSV to your device. This template includes the current assignment of Certifications to Certification Roles.
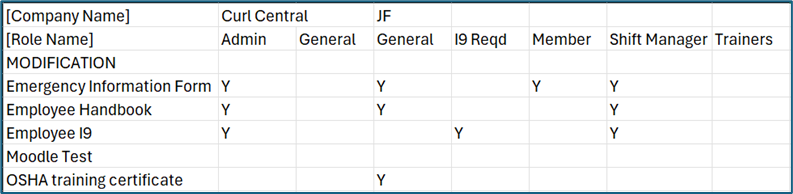
The first column of the template starting in the fourth row lists the name of all available Certifications in KAStrack. The first row of the template contains the name of the Company the Certification Role is associated with. The second row contains the names of Certification Roles. The Company Name will only be listed once in the [Company Name] row, in the cell above its first associated Certification Role. Thus, all Certification Roles to the right of that one are part of the same Company, until another Company Name appears in the top row (if applicable).
The third row of the template is labeled MODIFICATION. When using the downloaded template to import changes, each altered column must be marked with a capital ‘Y’ in the modification row to inform the system which roles have had changes made to their assigned certifications. (A warning will show when attempting to import if this is not done.)
To change which Certification Roles a Certification is assigned to, insert a capital ‘Y’ in the cell to the right of the desired Certification below the Certification Role you wish to have it assigned to. You can assign a Certification to any number of Certification Roles. To remove assignment of a Certification from a Role, simply remove the capital ‘Y’ from its cell (you will still need to enter a ‘Y’ in the MODIFICATION row to alert the system to this change). After making the desired changes to the template, save the spreadsheet with a UTF-8 CSV file format.
Back in KAStrack, click the “Choose File” button to select the file from your device.
Click the “Import role/certification assignments” to upload the file and import the changes into KAStrack. The screen will then display a success or fail message, and, if failed, alert to any changes that should be made to the imported file.
How To: Import User Certifications
The KAStrack team is currently writing a new How To for you. Update coming soon!
How To: Indicate a Required Certification Cannot Be Deferred
To indicate that a required certification cannot be deferred, open the Users Page of the People Module from the Main Menu. Click the name of the user whose certification you want to indicate cannot be deferred opening the user's Certifications Details Page.
The Certifications Table will display the user's required certifications. Click the three-dot icon to the right of the user's certifications name opening the context menu and select Not Applicable / Defer. This opens the Defer Certification Modal.
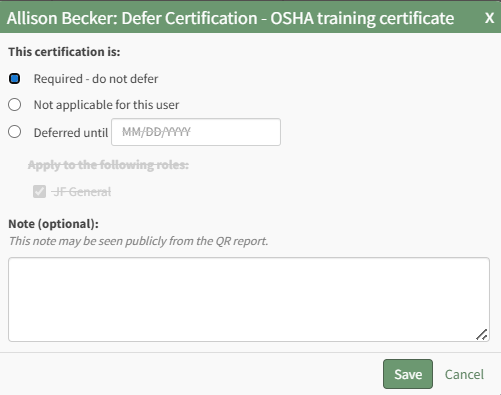
Click to indicate that the certification is required and cannot be deferred. The certification is no longer applied through a certification role. Add any relevant notes regarding the requirement.
Any notes made regarding the deferment on this modal will be publicly visible on the user's QR Report.
Select the Save button.
How To: Indicate a Required Certification is Not Applicable to a Specified User
To indicate that a required certification is not applicable to a specified user, open the Users Page of the People Module from the Main Menu. Click the name of the user whose certification you want to indicate is not applicable opening the user's Certifications Details Page.
The Certifications Table will display the user's required certifications. Click the three-dot icon to the right of the user's certifications name opening the context menu and select Not Applicable / Defer. This opens the Defer Certification Modal.
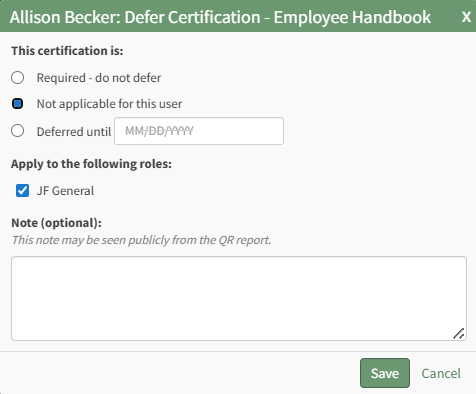
Click to indicate that the certification is not applicable for this user. Add any relevant notes regarding the requirement.
Any notes made regarding the deferment on this modal will be publicly visible on the user's QR Report.
Select the Save button.
How To: Make a Hidden User a Visible User on the Users Table
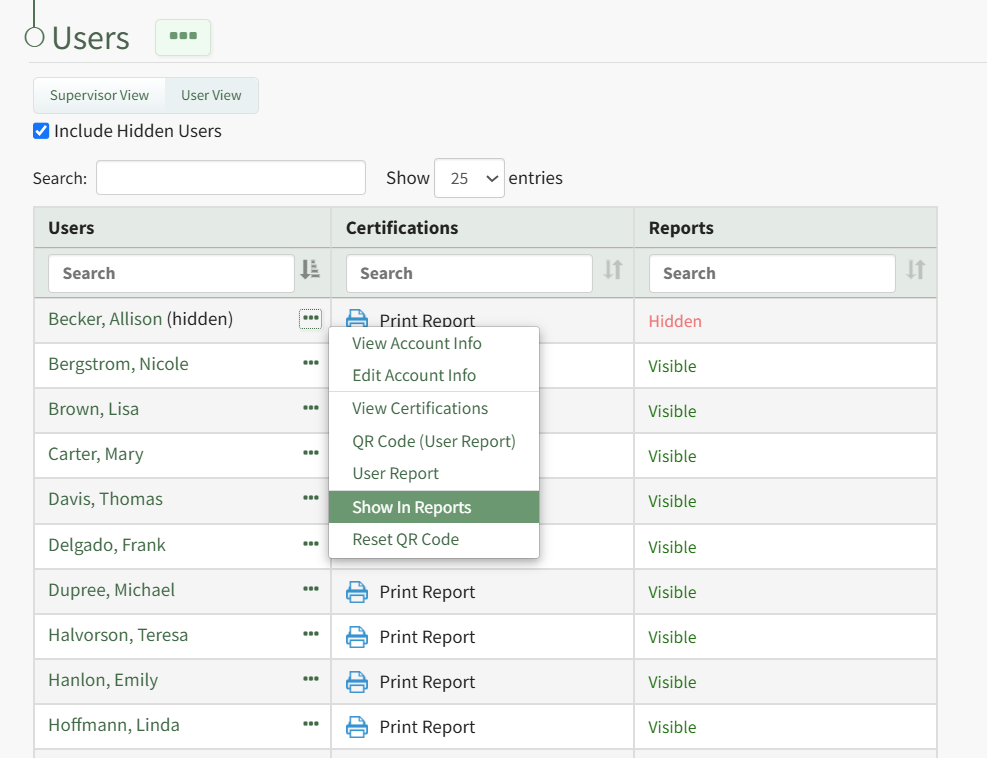
Click the three-dot icon to the right of the user's name who you wish to make visible opening the User Table Context Menu. Select "Show in Reports" from the context menu and the user is no longer hidden.
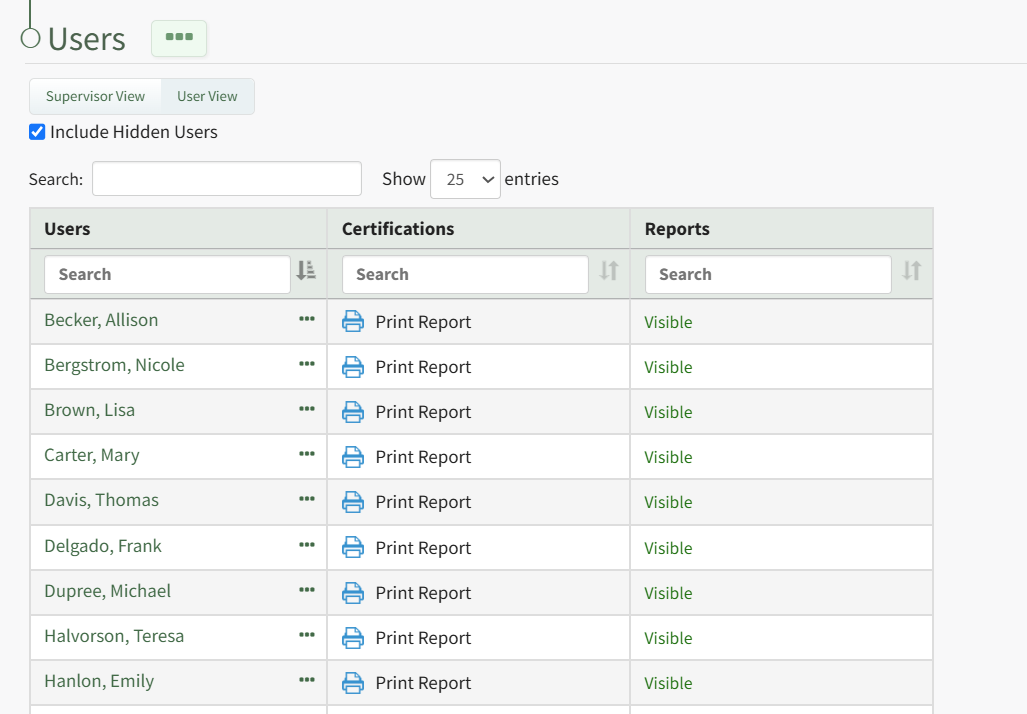
The individual and their user role and certifications report are now visible within the People Module.
How To: Record a New Competency Certificate
The KAStrack team is writing a new how to for you! Coming soon!
How To: Remove a Certification Role From a Company
To remove a certification role from a company, select Companies in the People Module on the Main Menu to open the Companies Page. Click on the name of a company you wish to remove a certification role from.
Clicking on the name of a Company will open the company's Detail Page that displays the Company Roles with their description.
Select the “Edit Company Roles” button to open the Company Roles Description Table.
Certification roles will be listed in the first column. A checked checkbox indicates that the Certification Role has been defined and applies the company. Unchecking a checked checkbox means that this role should no longer be associated with this company.
Deselect the appropriate checkbox and select the "Save Changes" button.
A Certification Role Deletion Confirmation Modal opens and states “Are you sure you want to permanently delete the [Role Name] roles and any associated certification requirements?” Click "OK" on the confirmation popup and return to the company's details page. The certification role will be removed from the Company Certification Roles Table.
How To: Reset a User's Roles and Certifications Report QR Code
To reset a user's Roles and Certifications Report QR Code, open the Users Page in the People Module from the Main Menu. Click the three-dot icon to the right of the user's name whose QR Code you want to reset opening the User Table Context Menu.
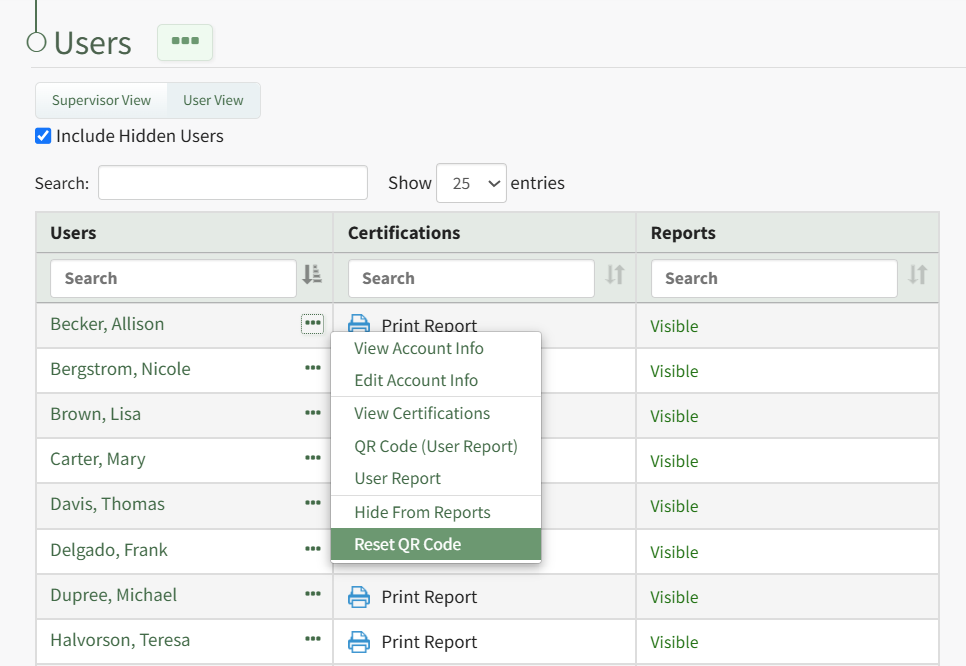
Select "Reset QR Code" from the context menu opening the QR Code Reset Confirmation Modal.
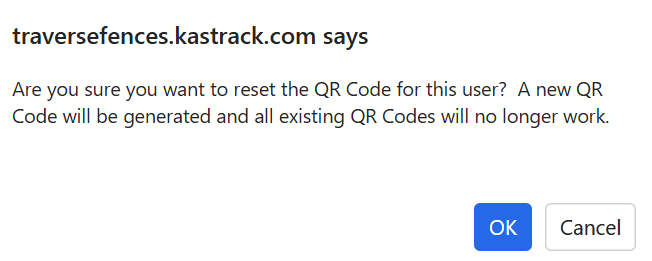
The modal states, "Are you sure you want to reset the QR Code for this user? A new QR Code will be generated and all existing QR Codes will no longer work." Select "OK".
The confirmation modal now states, "QR Code has been reset." Select "OK" to return to the Users Page in the People Module.
How To: Send a Shared Certifications Report via Email
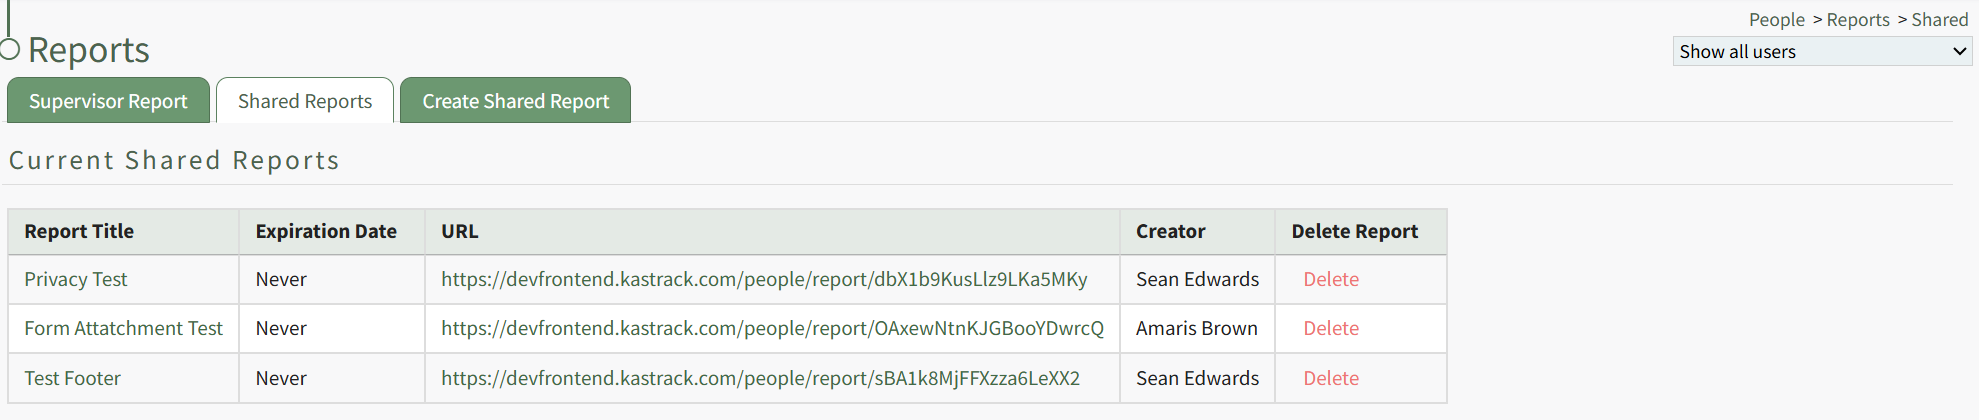
Click the title of the shared report you wish to email, opening a specific Shared Report Page.
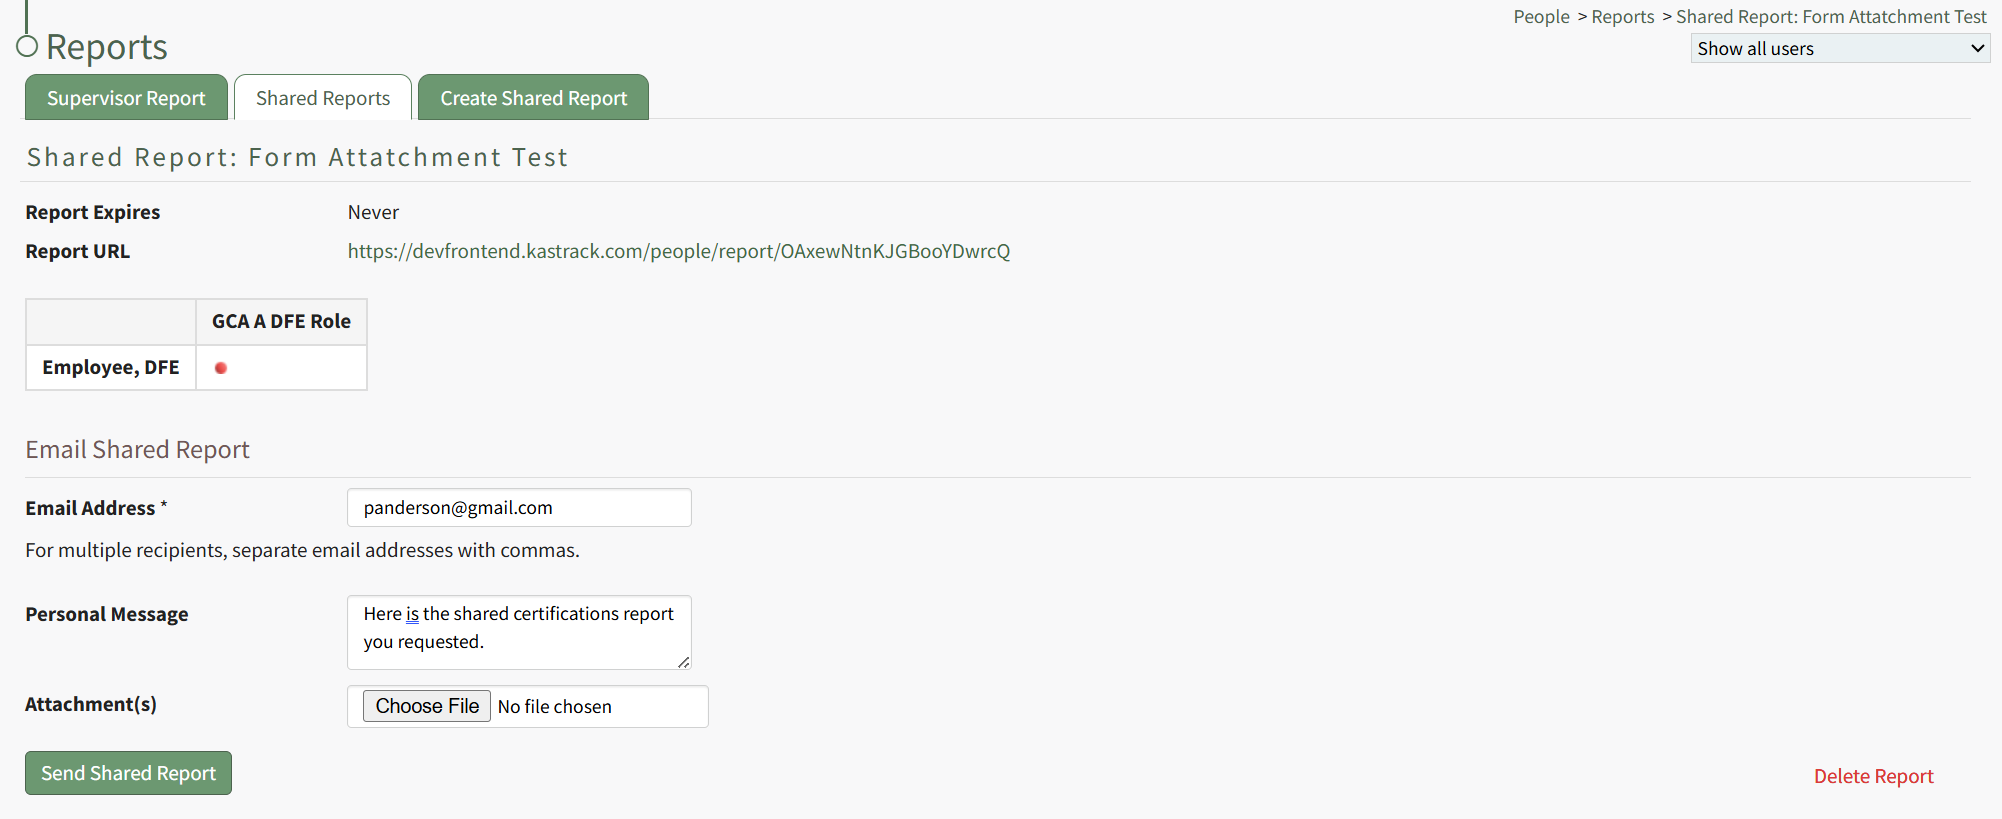
Input the email address(es) of the individuals you would like to share the shared certification reports with, using commas to separate email addresses as needed. Include a personal message and any desired file attachment(s). When done, click the "Send Shared Report" button.
Text appears above the button stating, "You successfully shared this report with panderson@gmail.com."
How To: Send a User an Email Notification Regarding a Certification
To send a user an email notification regarding a specific certification, you must open the supervised user's Certifications Details Page. To do so, select Users in the People Module from the Main Menu.
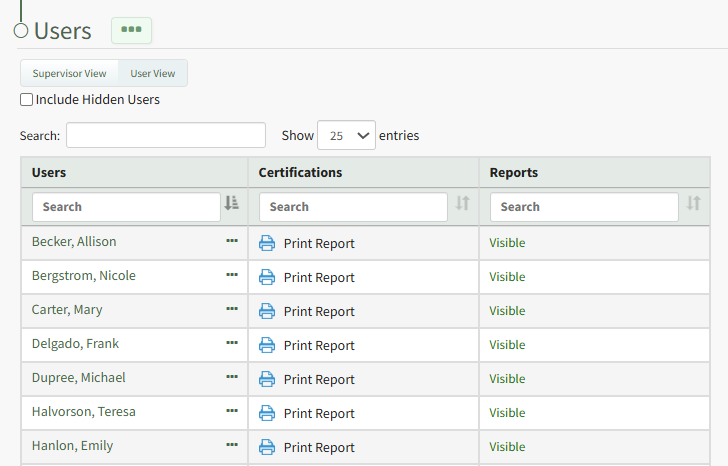
Click the name of the relevant user on the Users Table opening their Certification Details Page. To the right of a certification name in the Outstanding Requirements Table is a three-icon that opens the Outstanding Requirements Context Menu.
Notify is only a context menu option for the Outstanding Requirements Table.
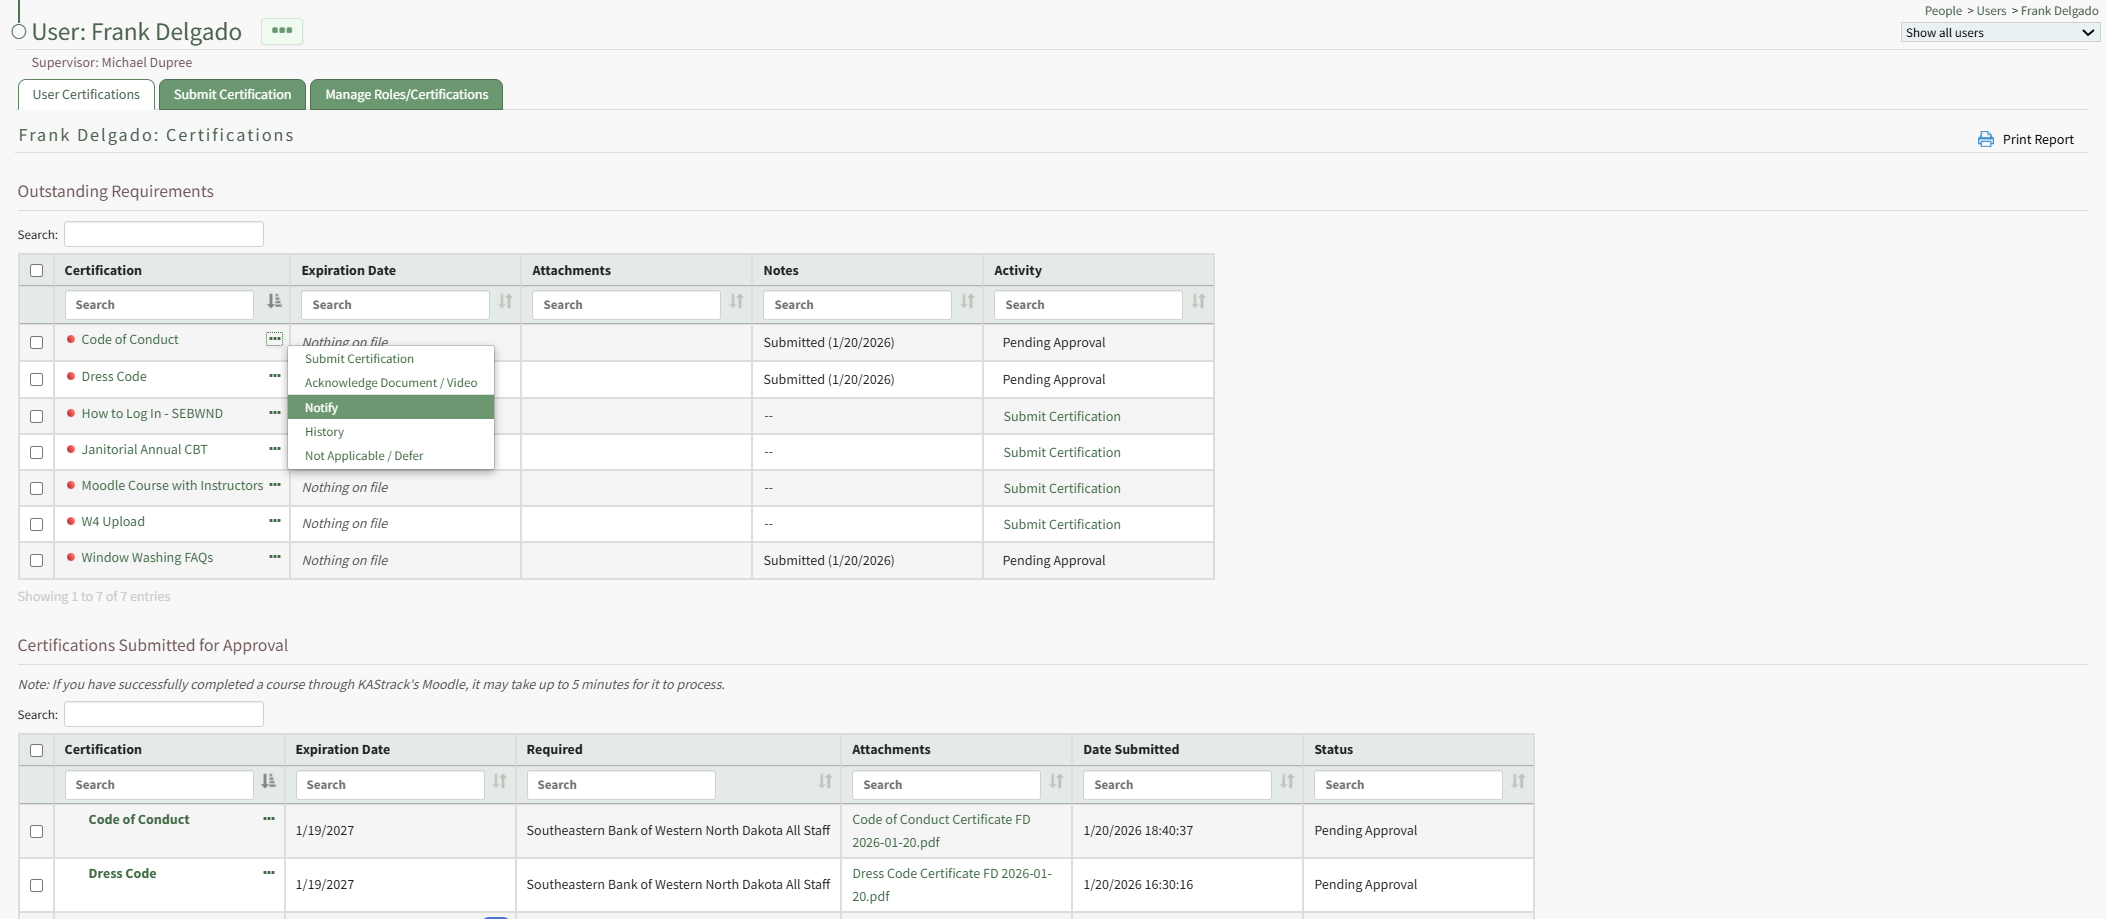
Select the option Notify opening the Send Notification Modal. Use the modal to include an optional message that will be included in the Certification Notification that will be sent to the user through the system via email.
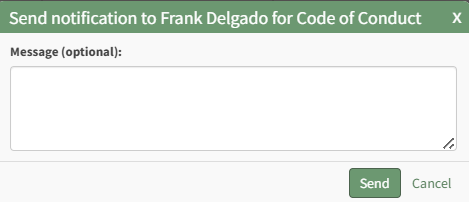
Select the Send button.

The modal changes, indicating that the email notification is sent.
How To: Submit a Certification
A user can submit a certification from the Submit Certification tab on the My Account Page in the People Module.
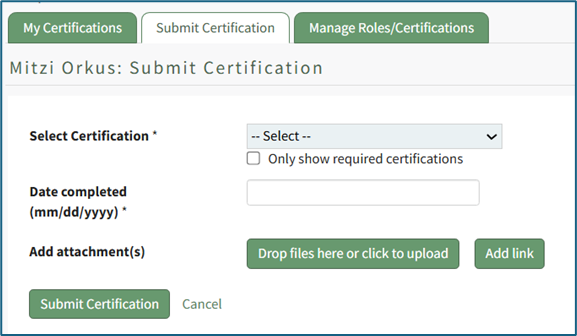
To submit a certification, select the certification to be submitted from the dropdown list. The “Only show required certifications” checkbox can be selected for ease.
Placing the cursor in the Date completed textbox opens a calendar modal allowing a user to select the certification completion date. The date can also be entered manually in MM/DD/YYYY format.
Add attachments by selecting the “Drop Files Here or Click to Upload” button.
Add a link by selecting the “Add Link” button.
Select the “Submit Certification” button to submit or “Cancel” to return to the My Certifications tab on the My Account Page.
How To: Submit Certifications/Competencies from the Supervisor Report Table
To submit certifications or competencies from the Report: Status table on the Supervisor Report Page of the People Module, confirm you are on the Supervisor Report tab.
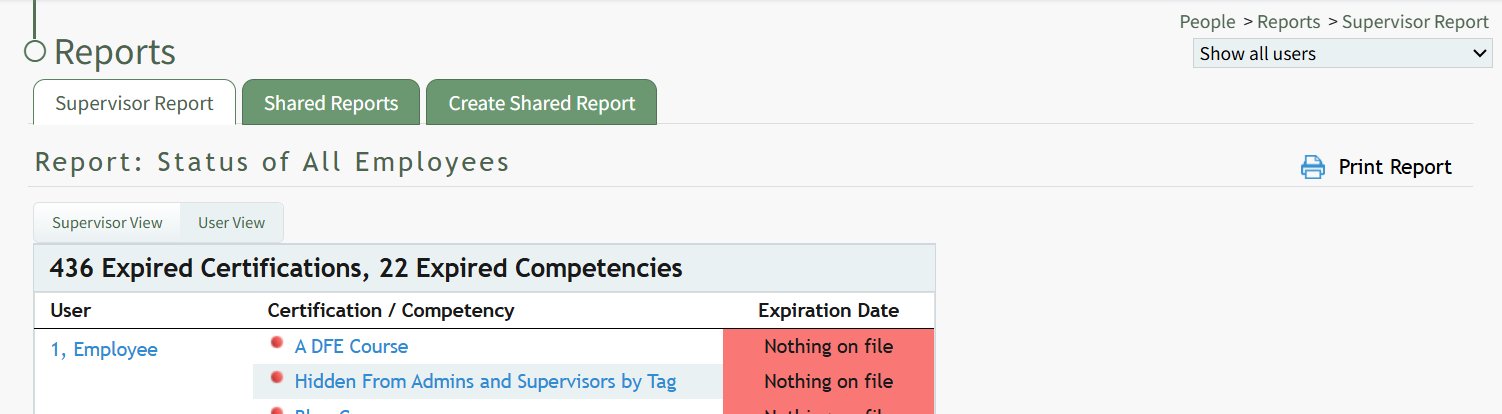
Click on the certification title listed in blue font, opening the User's Page on the User Certifications Tab to the specific Certification/Competency that you selected.
A red dot to the left of the certification title indicates that the certification is pending approval.
Scroll below the certification/competency information to the “Record New Certification for (User Name)” Section.
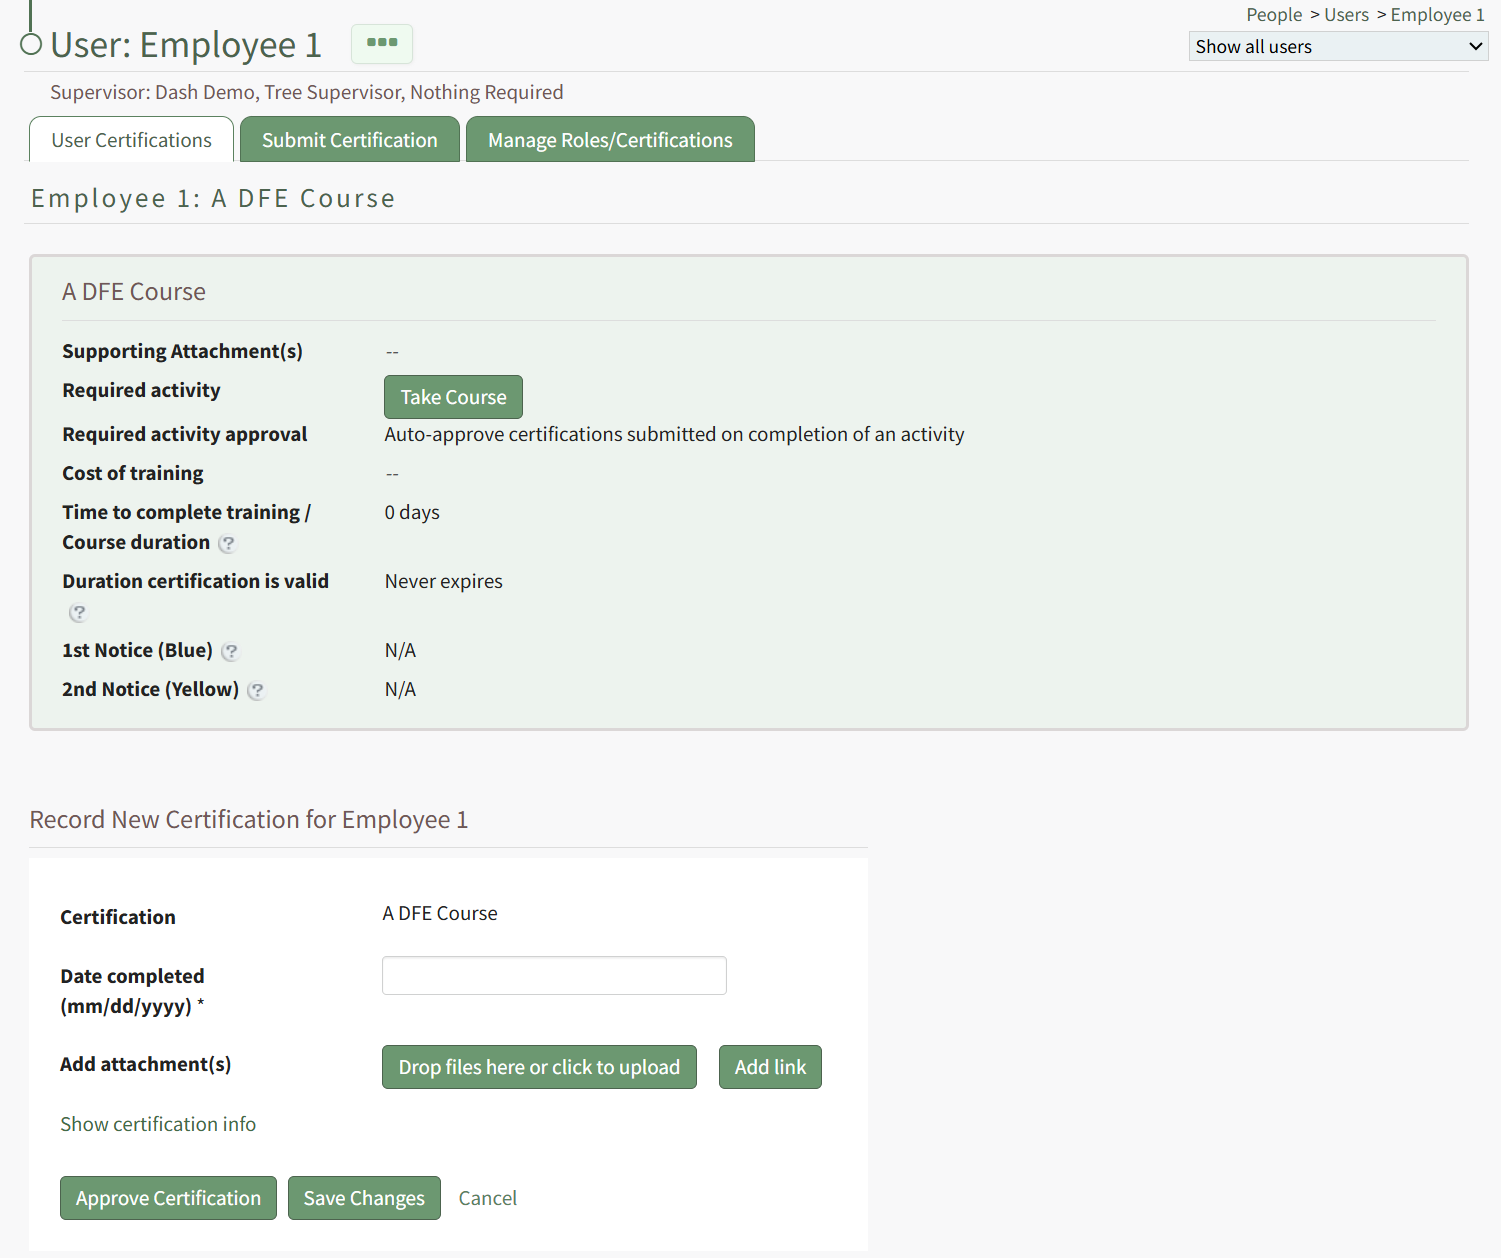
Input the dates that the certification/competency certificate was completed and expires in MM/DD/YYYY format.
To add any files, click “Drop files here or click to upload.” To add a URL link, select “Add link.”
To comment on the submitted certification, input your comments into the textbox and select “Add Comment”.
To set the certification/competency as complete, click “Approve Certification”.
How To: Take a Course Associated with a Required Certification
One of the possible required activities for a certification is to require a user to take a course.
Take Course is a context menu open as well as a button in the Activity column on a user's My Certifications Tab on the My Account Page of the People Module. It is also a clickable link in the Required Activity column on a User's Certifications Page.
Select Take Course. If the course was created in KAStrack's Courses Module, the option to Take Course will open the Course Instructions Page.
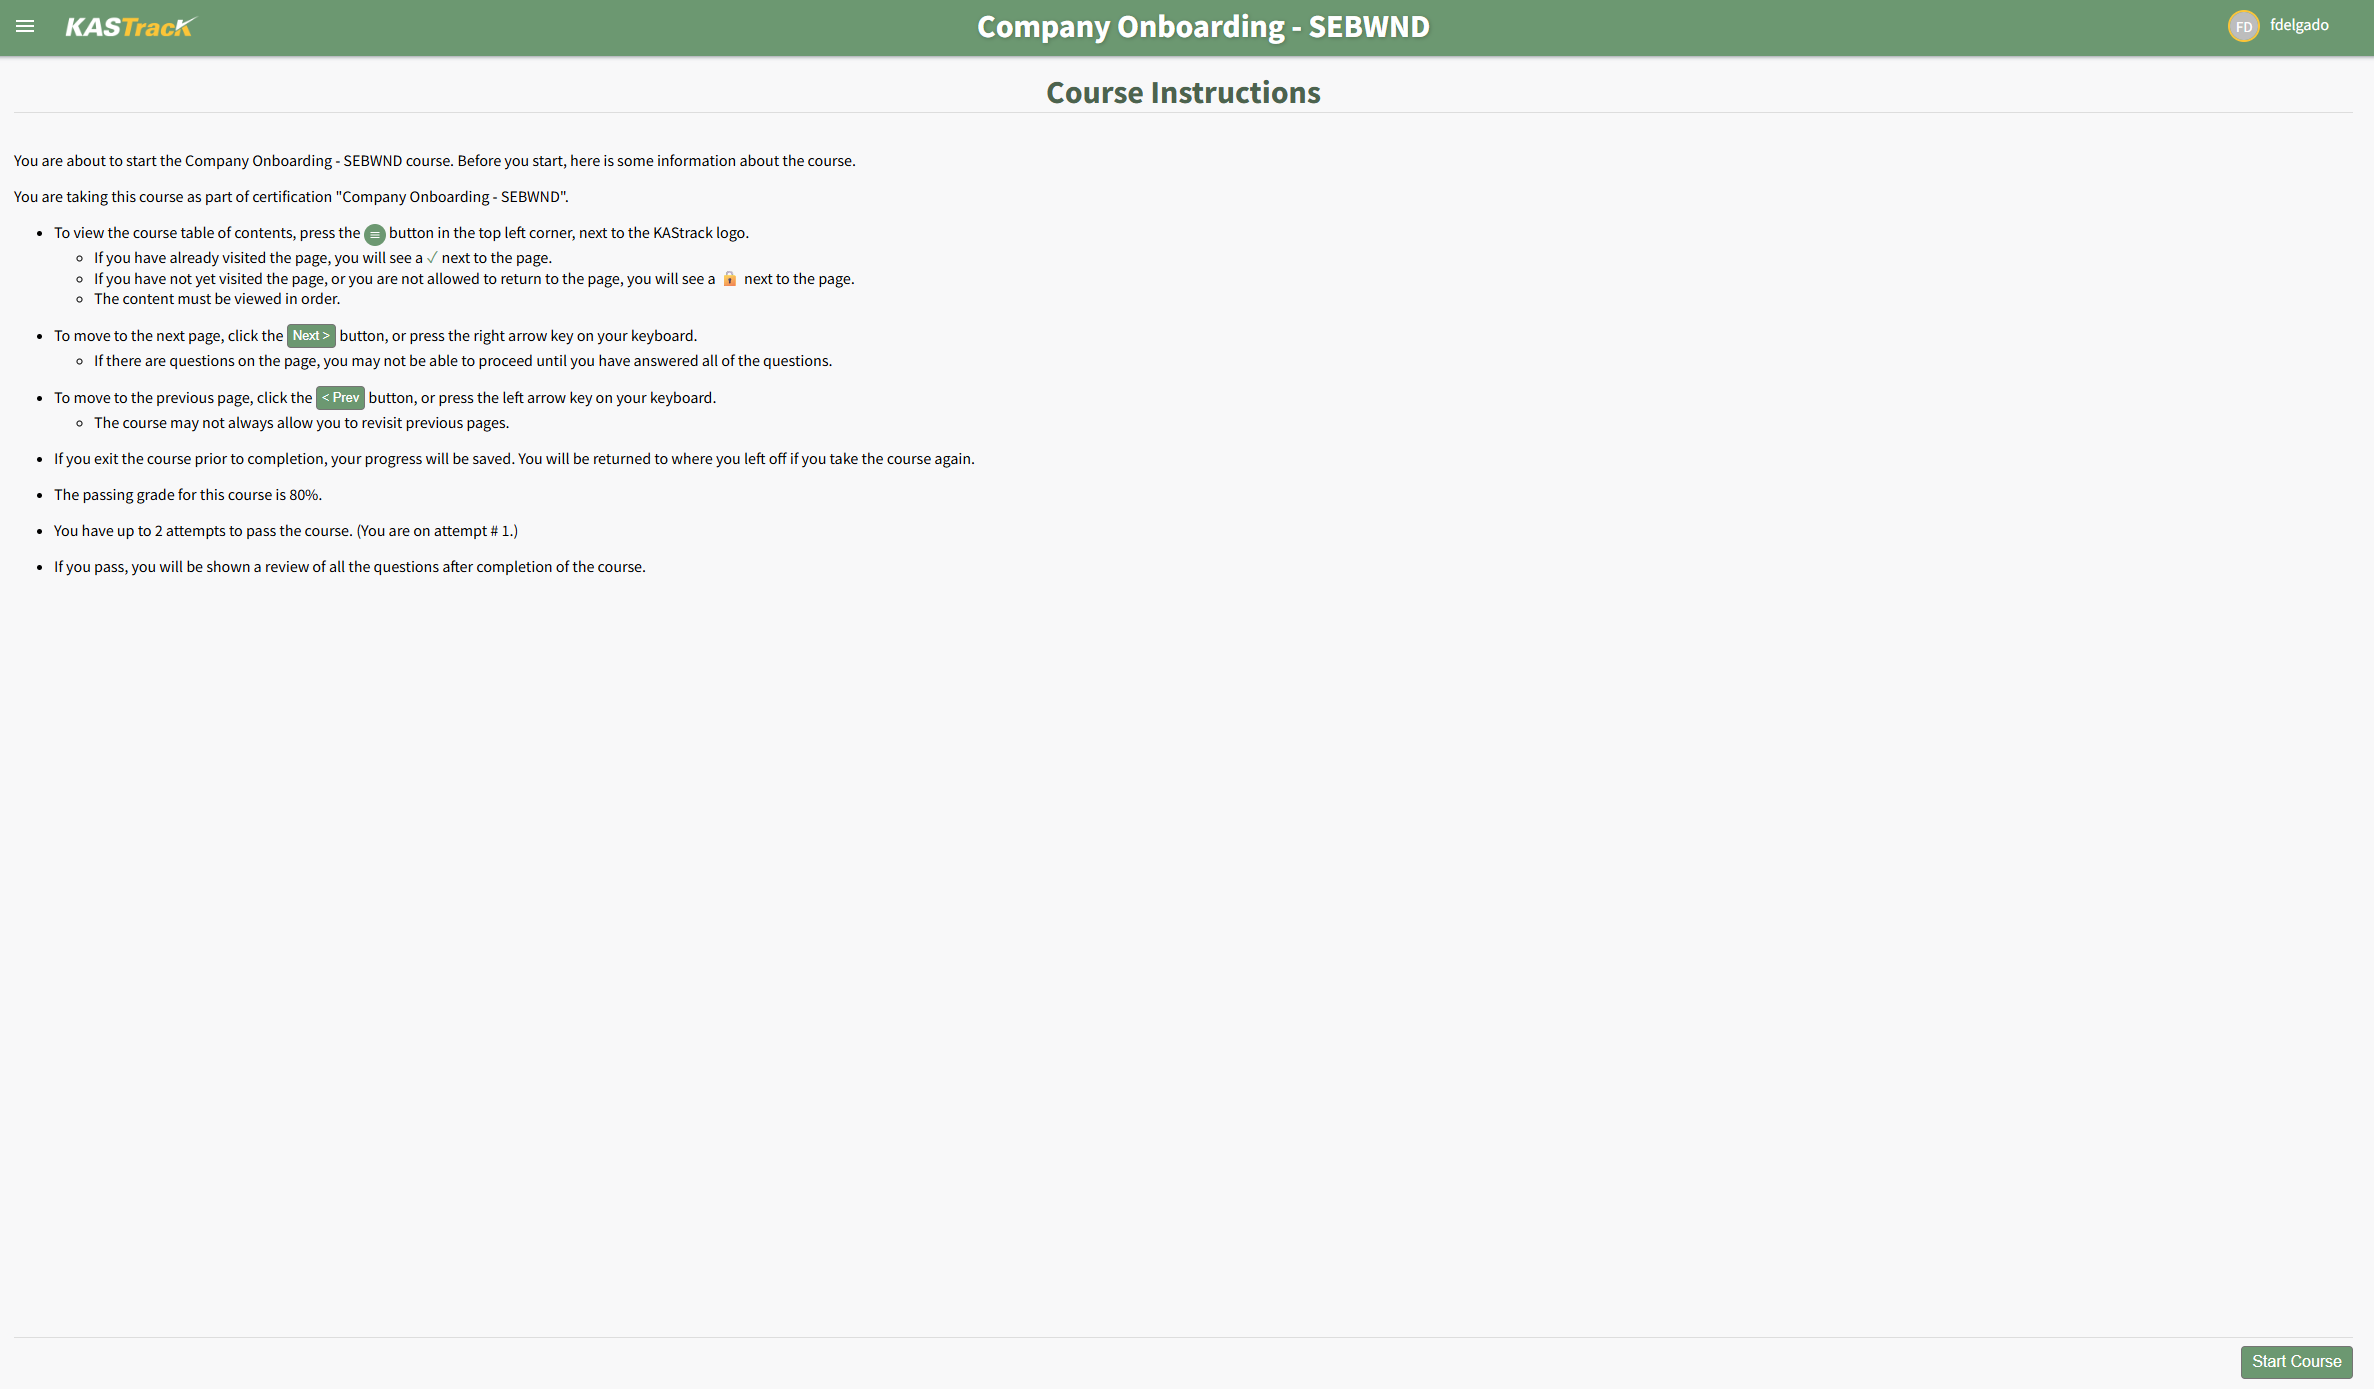
After completing the course, select the Back to KAStrack button to return to the People Module.

How To: Update Assigned Certification Records from the Matrix Table
To update assigned certification records directly from the Matrix Table, open the Matrix Page of the People Module from the Main Menu.
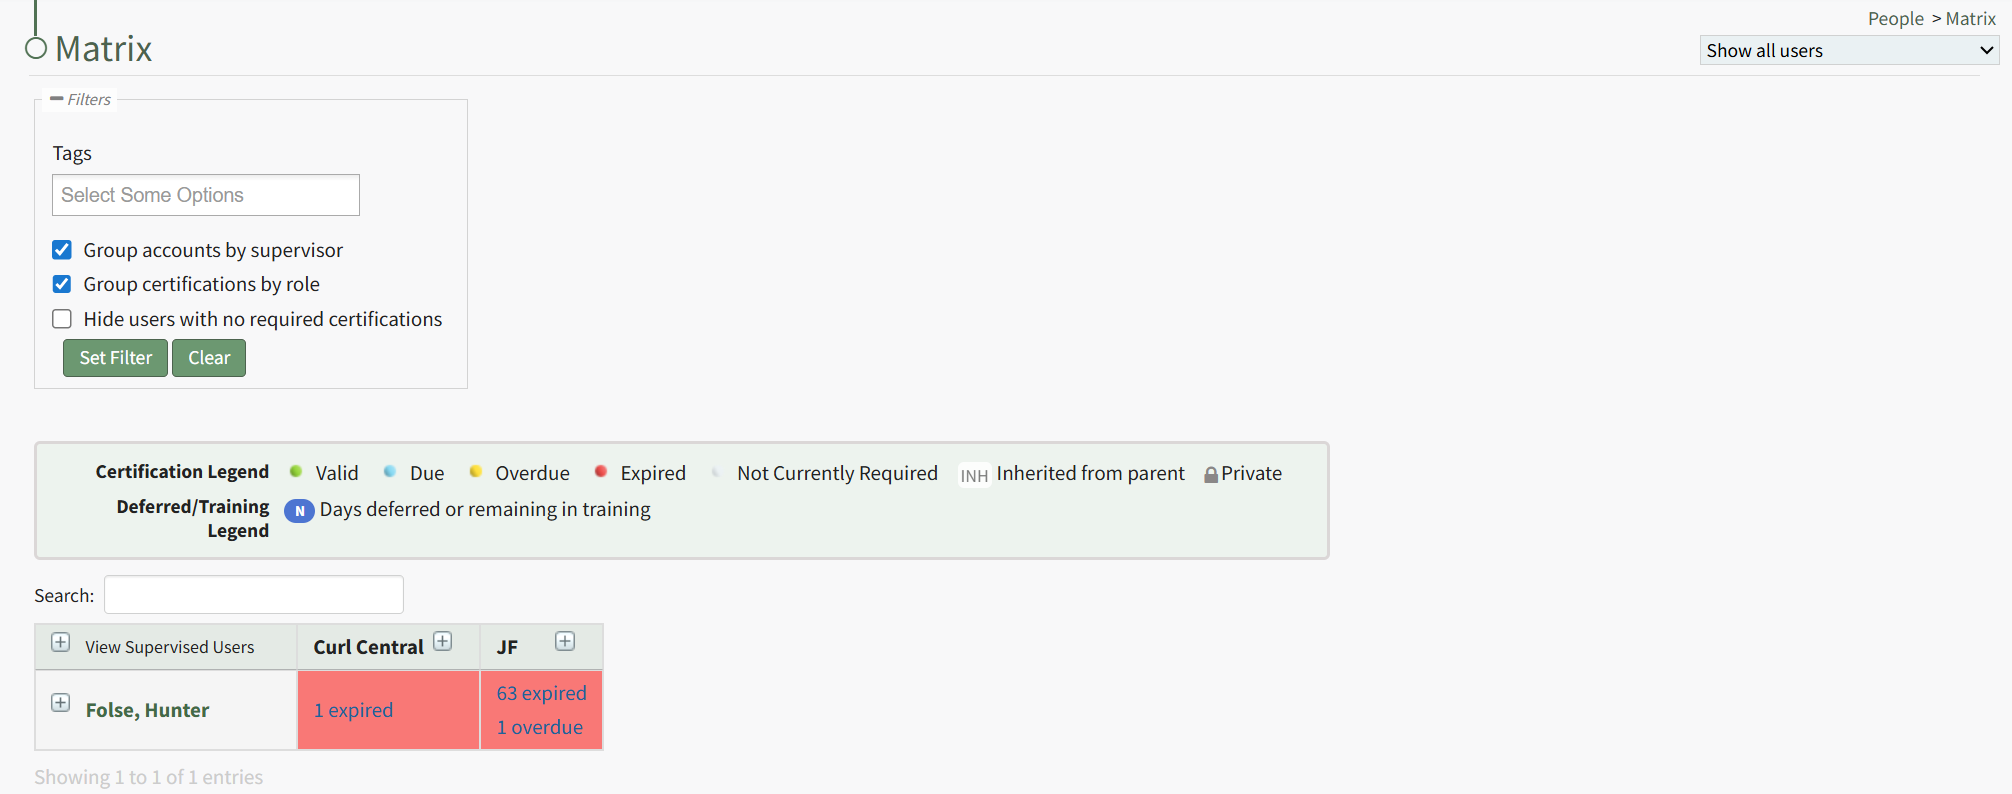
When the Matrix Page is initially opened, it is in a collapsed view. Expand the view as need to identify the relevant user and the specific certifications whose records you wish to update. The date or statement in each cell is a clickable link that when selected opens the specific user's Certification Details Modal.
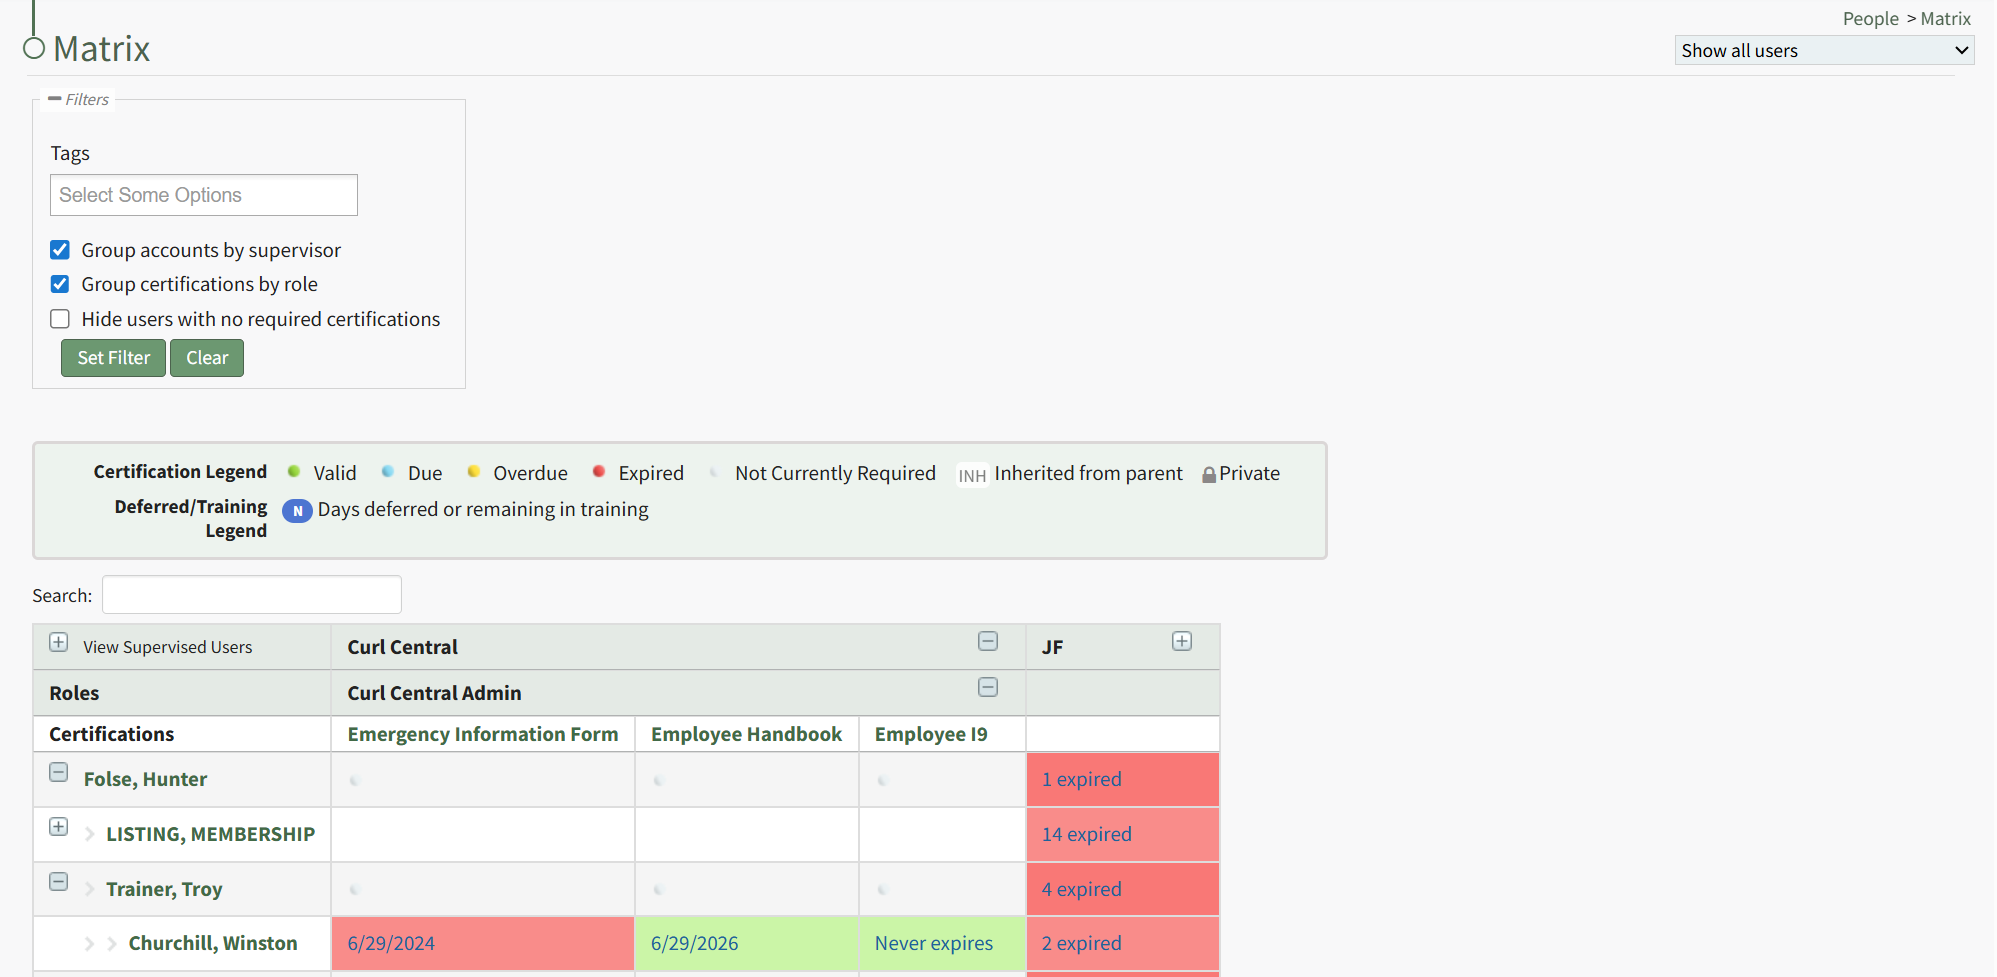
The date or statement in each cell is a clickable link that when selected opens the specific user's Certification Details Modal.
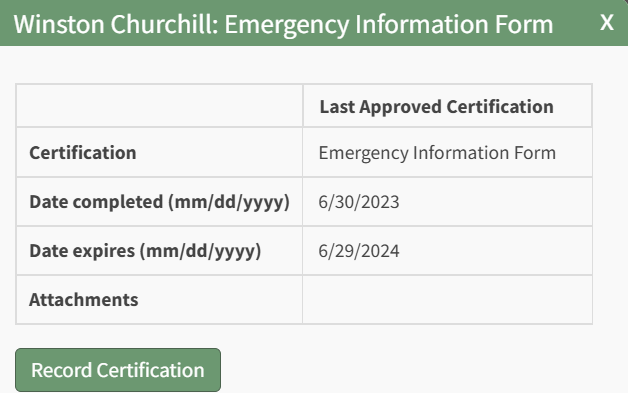
The modal lists the certification name, the date completed, the date the certification expires, and any file attachment. Click the "Record Certification" button to update the assigned certification. This opens the Submit Certifications Tab on the specific individual's User Page.
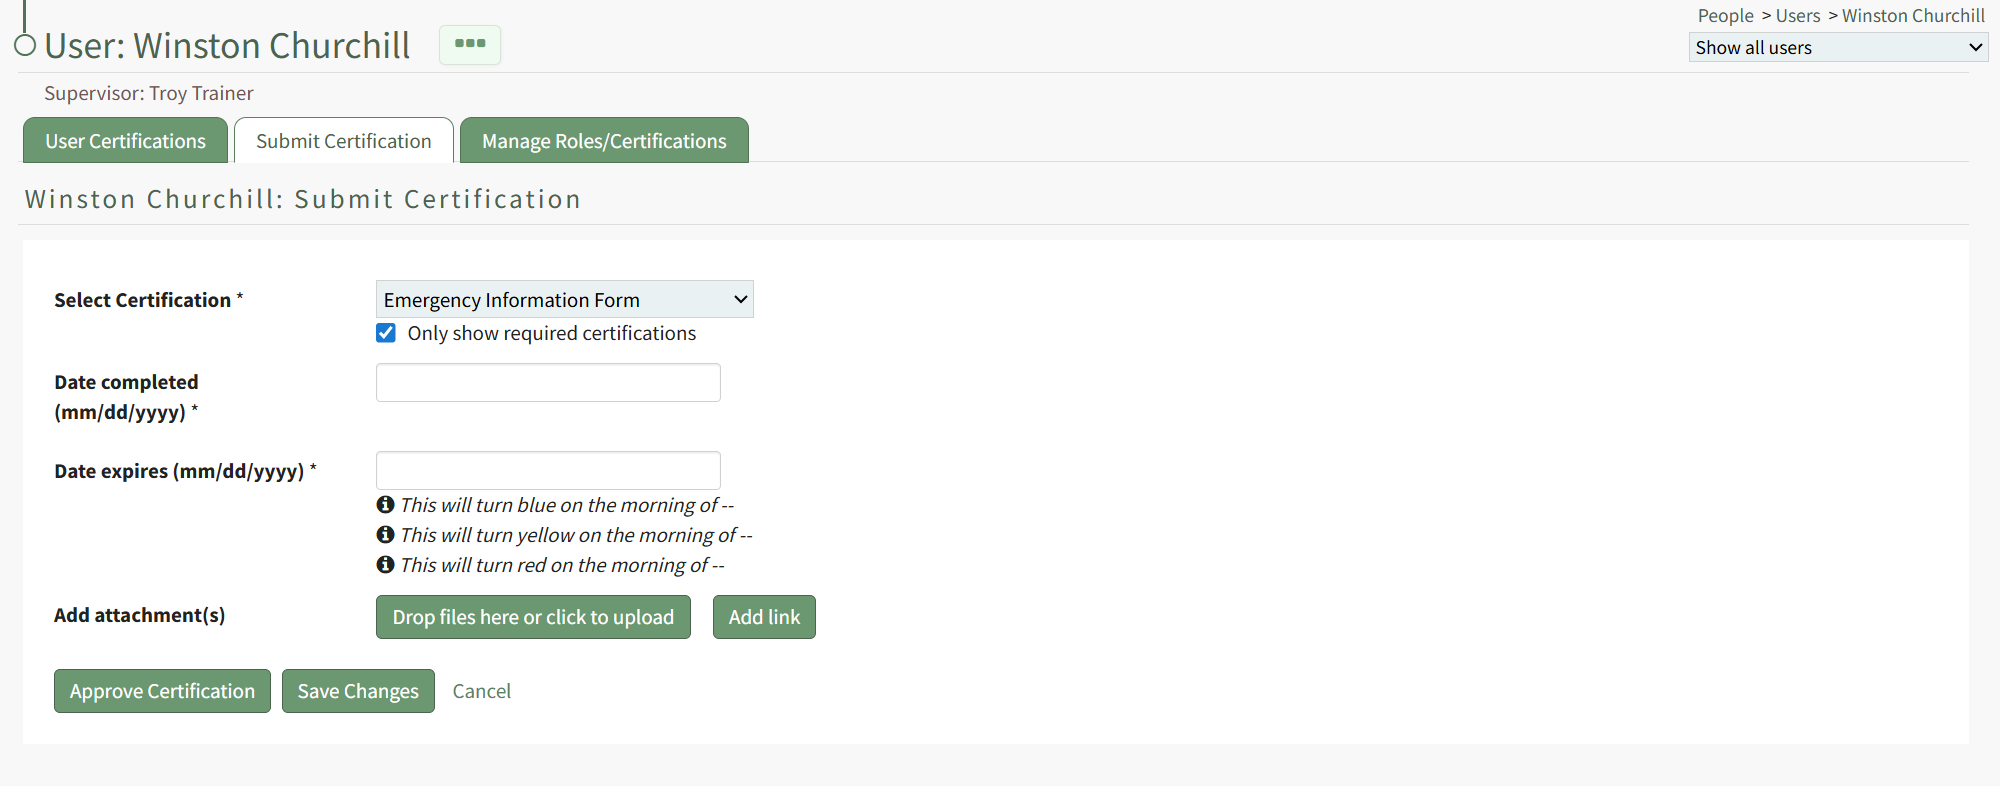
The certification being recorded is already indicated on the tab. Both the date completed and the date of expiration are required fields.
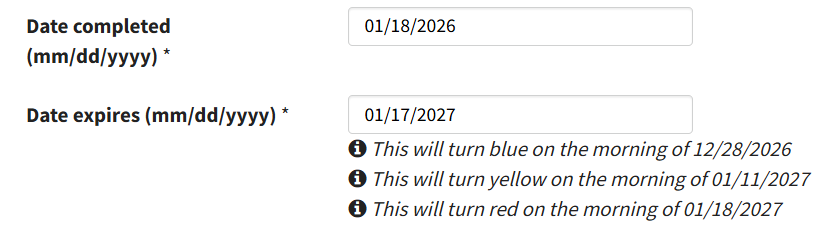
After inputting the completion date, the system fills out the date the certification expires and includes the dates the status will change from green to blue, blue to yellow, and yellow to red. (These details are determined by the specifics associated with the certification.)
Files or links can be included with the certification record.
Select the Save Changes button. If no links or files were attached, a Certification Record Confirmation Modal appears stating, "You have not included any attachments. Do you want to submit this certification without an attachment?"
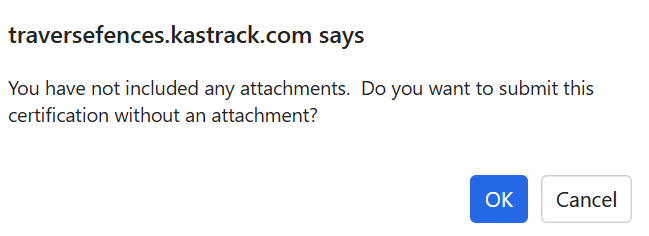
Select "OK".
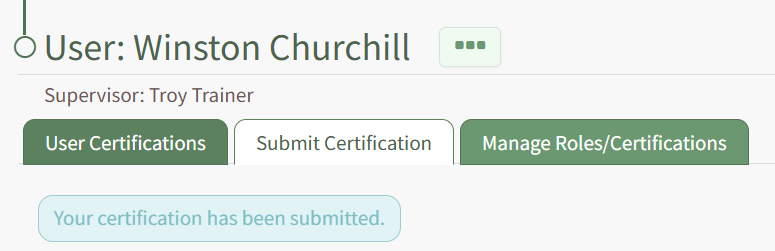
Your submission will be confirmed beneath the User Page tabs.
How To: Use Attachment Inbox to Upload a File and Attach it to a Certification
To upload files in the attachment inbox and add them to user certifications, open the Submissions Page in the People Module from the Main Menu. Open the Attachment Inbox Tab.
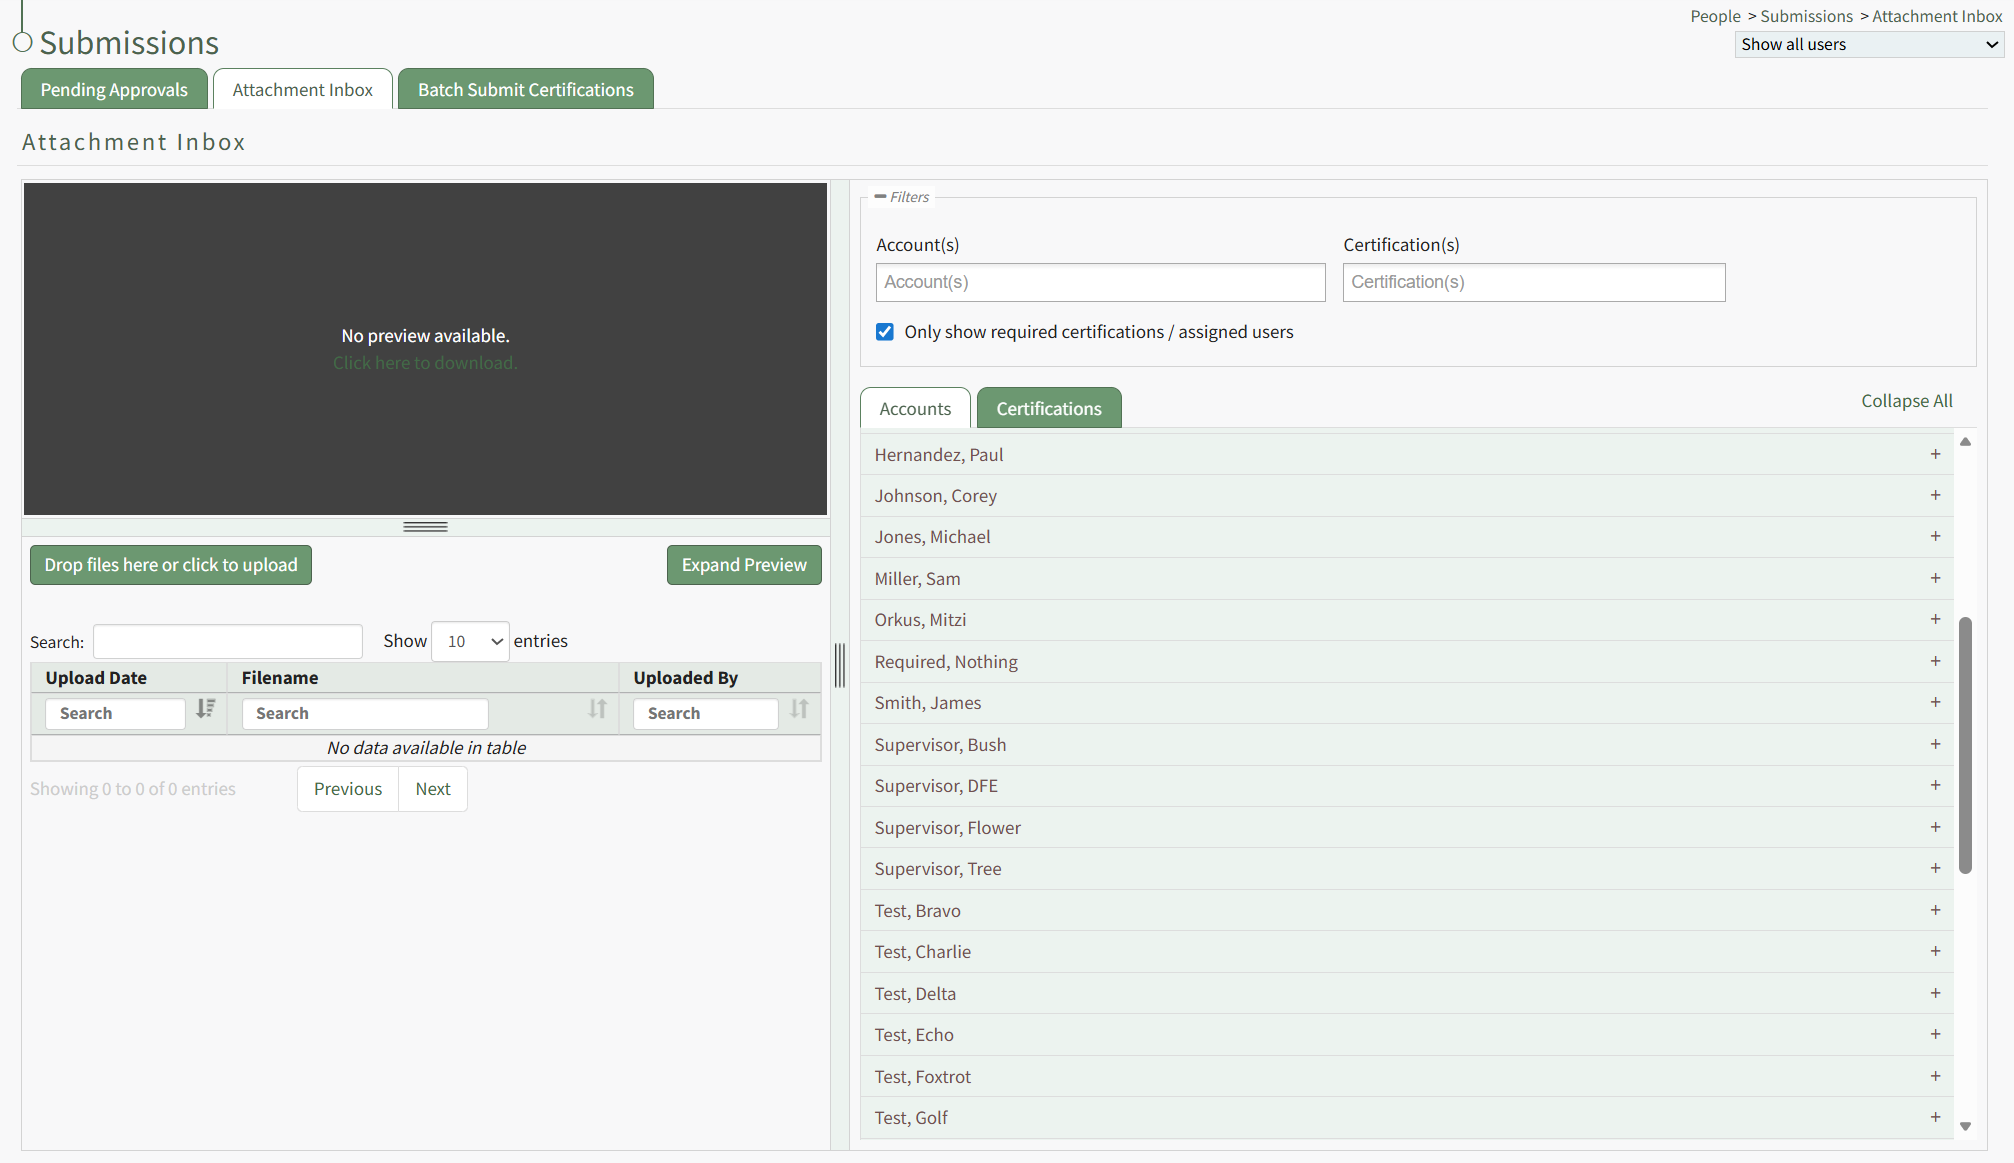
Drag and drop the desired files or click the "Drop Files Here or Click to Upload" button to upload the appropriate files.
PDF files will be visible in the preview window. Other file types can be downloaded if desired.
For flexibility, the file can be assigned to user accounts or a specified certification. Select the view best for your purposes and click the plus sign icon to the right of the account or certification to expand it.
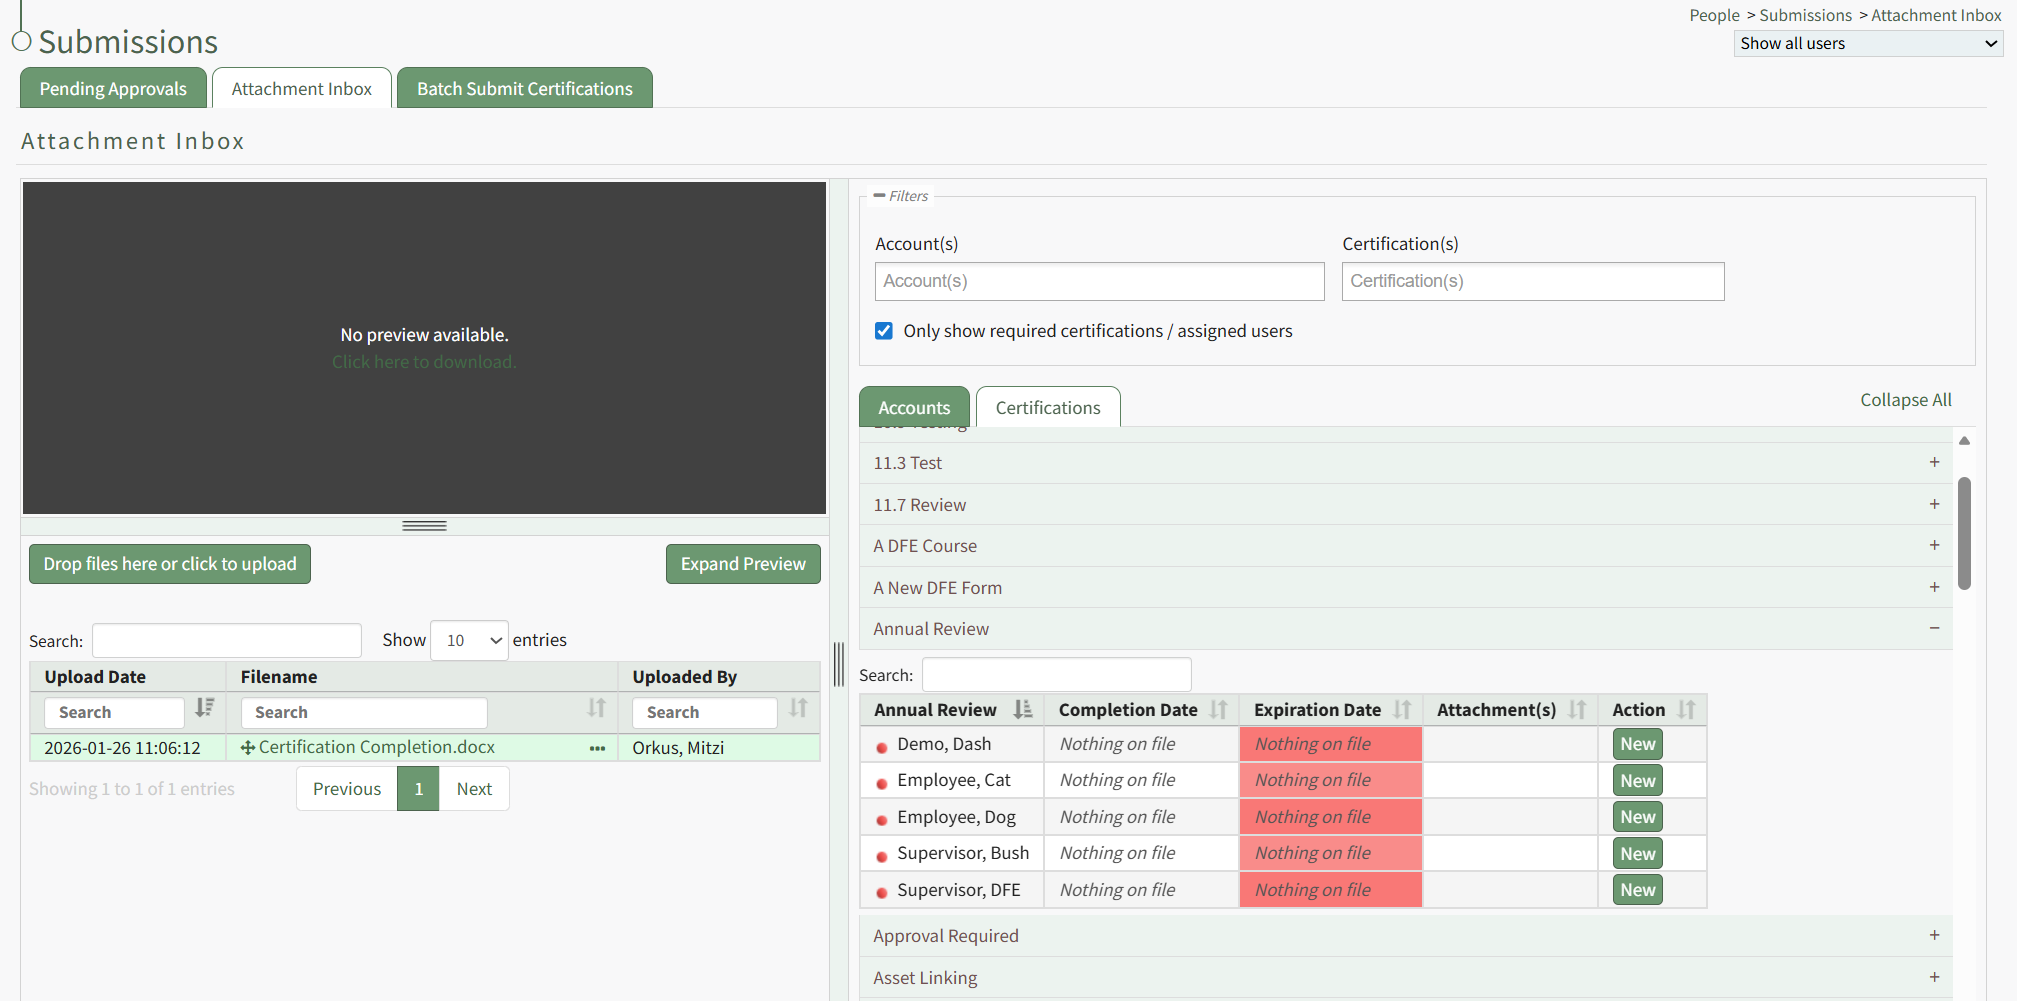
A table shows the users assigned to the certification. Click the New button in the Action column opening the Rename Attachment Modal.
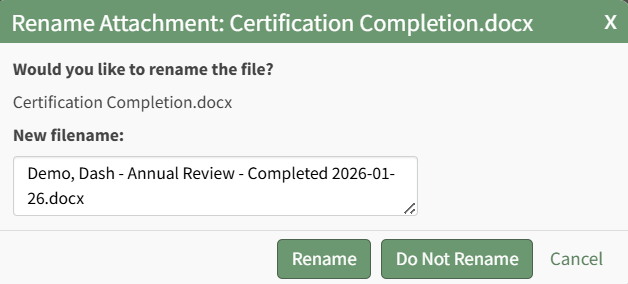
The modal renames the file according to the customizable People Module attachment naming settings, but you have the ability to edit the filename if desired.
When the Attachment Naming Settings are turned on for the Attachment Inbox, KAStrack will require that every uploaded attachment be named according to a designated template within this section for organizational purposes.
To edit the attachment naming settings, open the Module Settings Tab on the Settings Page in the People Module from the Main Menu. ![]()
Select “Edit Attachment Naming Settings” to access the Edit Attachment Naming Settings Page.
Selecting “On” will require that all attachments be named in a specific way, customized by the Attachment Naming Template.
The default template for Attachment Naming Settings is: Last Name, First Name, Certification Name – Completed, Completion Date
Template options include: #FirstName# , #LastName# , #Username# , #CertificationName# , #ExpirationsDate” , and “Completion Date#. These template options will fill data into the Attachment’s name based on the User Certification the Attachment is being associate with.
Customize the Naming Template to user preferences using the before/after hashtag and comma separated value format to establish recognizable computer language variables.
Select “Save” to update the Attachment Naming Settings or “Cancel” go back to the Module Settings tab on the Settings Page.
Click the Rename button, opening the Submit Certification Modal.
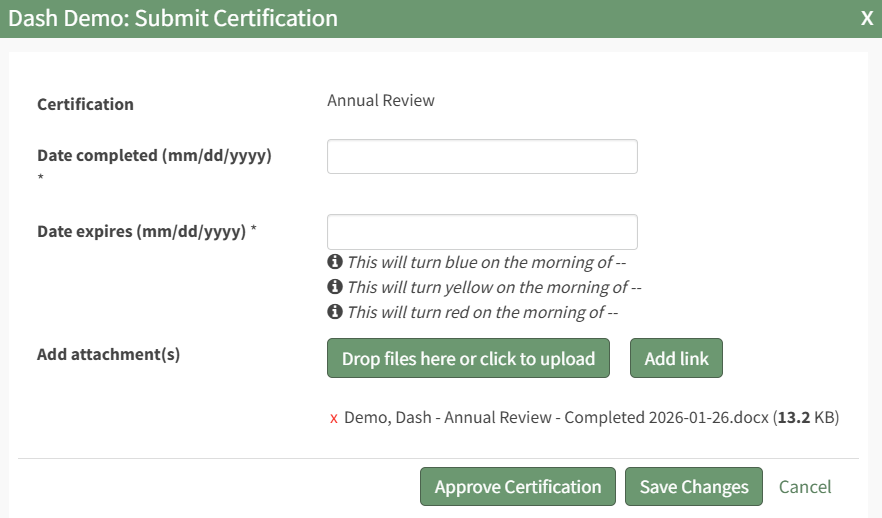
To submit the certification, include the date the certification was completed and select the Save Changes button.
To submit and approve the certification, include the date the certification was completed and select the Approve Certification button.
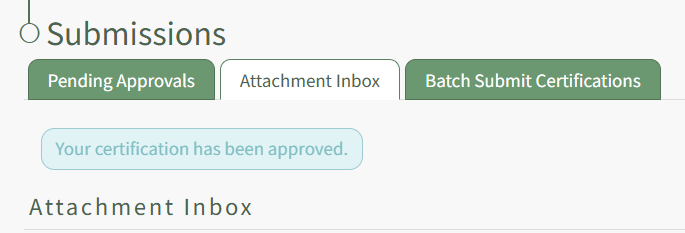
A textbox below the tabs confirms the completed action.
How To: View a User's Certification History Modal
Supervisors and admins can access a supervised user's certification History Modal by opening the User Certification Tab on specific user's Certifications Details Page. Select the name of the relevant user from the Users Page to open the user's Certifications Details Page.
User's can access the History Modal for one of their assigned certifications by opening the My Certification Tab on the My Account Page of the People Module.

History is a context menu option in each of the User Certification Tables. Select History from the context menu opening the user's Certification History Modal.
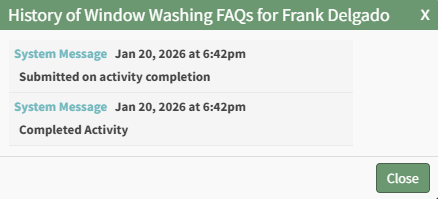
The read-only modal shows any history regarding the user's certification. Select close to return to the page you were previously viewing.
How To: View a User's Roles and Certifications Report
To view a User's Roles and Certifications Report, open the Users Page in the People Module from the Main Menu. Click the three-dot icon to the right of the user whose roles and certifications report you wish to view.
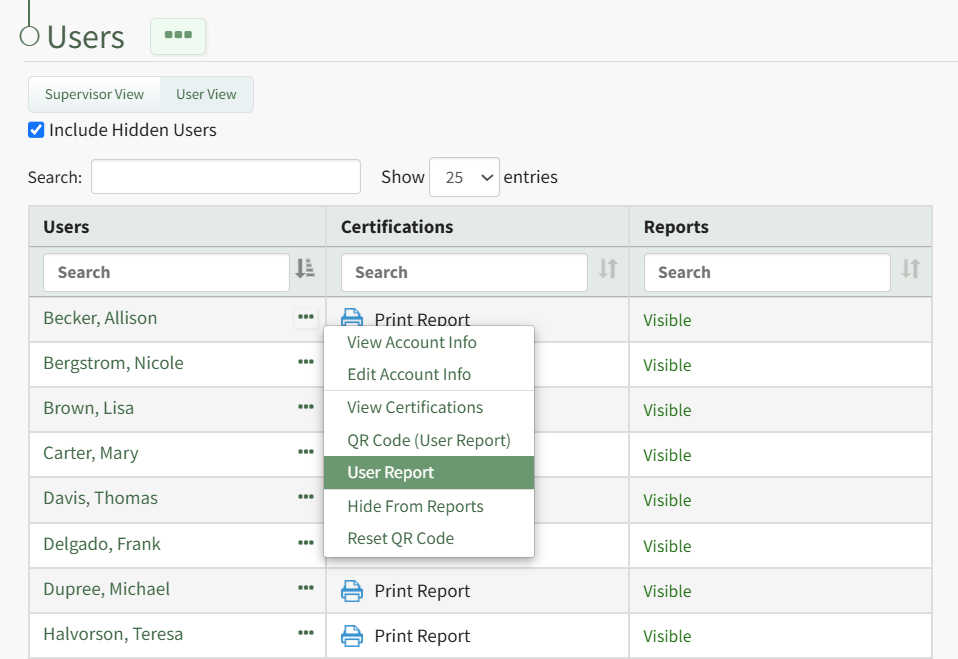
Select "User Report" from the context menu opening the individuals User Report.
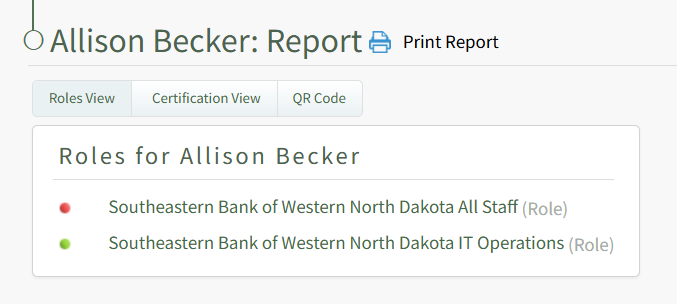
The User Report displays the user's roles and certifications, as well as the QR Code that can be used to access this specific user report.
No comments to display
No comments to display