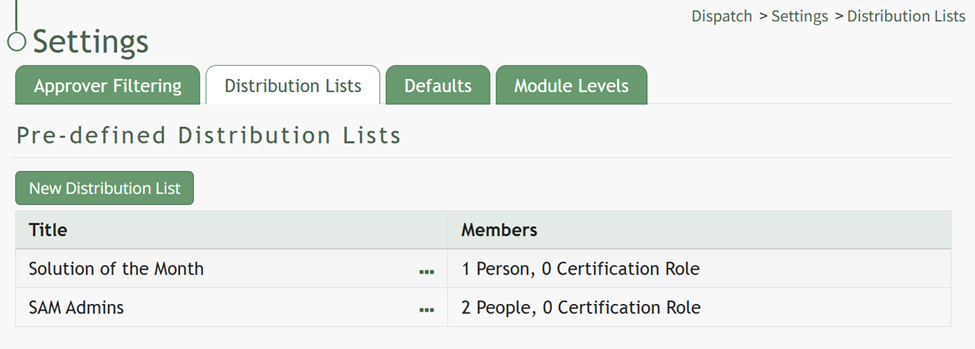
Dispatch Settings: Distribution Lists Tab
The Distribution Lists Tab on the Settings Page of the Dispatch Module is where new pre-defined distribution lists are created. Distribution List members can be People (Users) or Certification Roles. The Pre-defined Distribution List Table shows the title of the distribution list as well as the number of people and certification roles that are members of the distribution list.
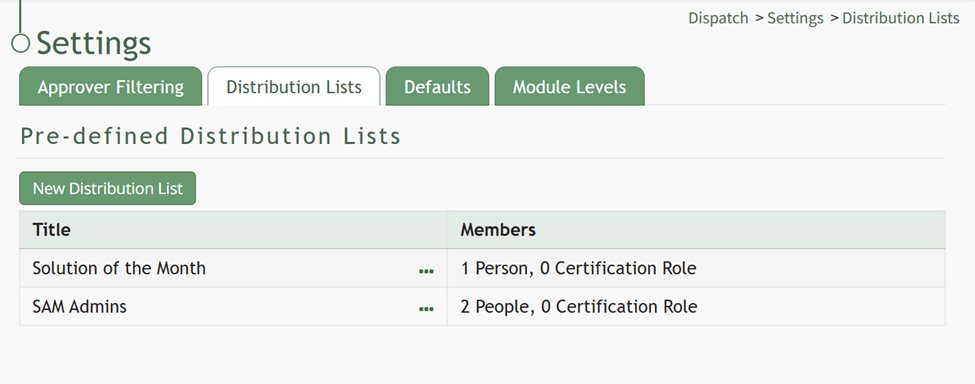
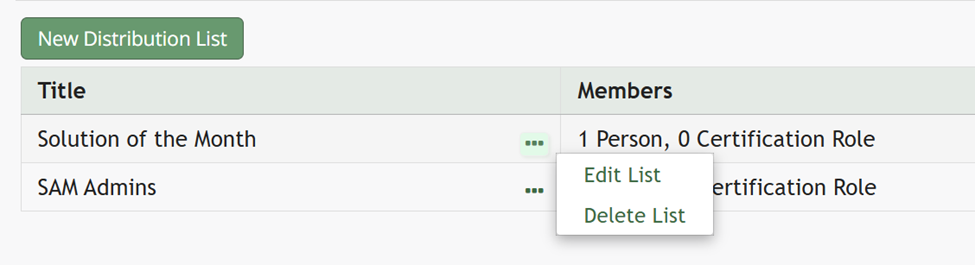
Selecting the three dot icon to the right of the distribution list title opens a context menu. Context menu options are explained on the table below.
Pre-Defined Distribution List Table Context Menu Option Explanations | |
Options | Explanation |
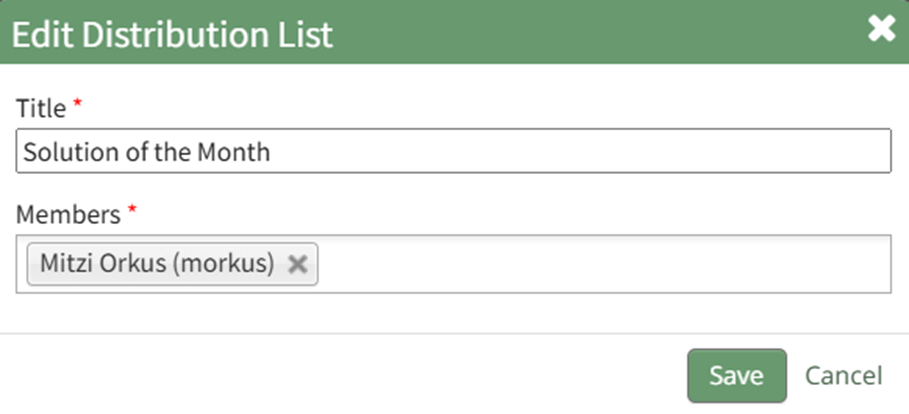
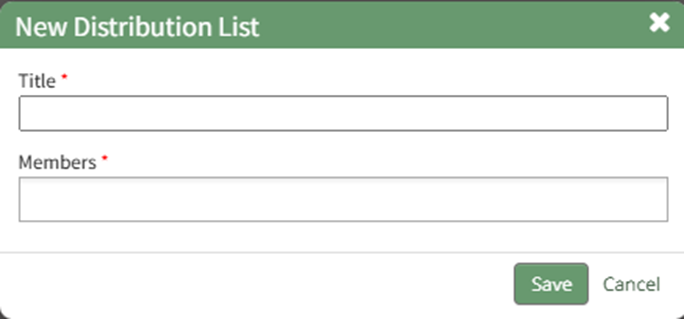
Edit List | Selecting Edit List from the context menu opens the Edit Distribution List Modal. How To: Edit a Pre-Defined Distribution ListTo edit a pre-defined distribution list, go to the Distribution List Tab on the Settings Page of the Dispatch Module.
Selecting the three-dot icon to the right of the distribution list title you wish to edit will open the Pre-Defined Distribution List Table Context Menu.
Select “Edit List” opening the Edit Distribution List Modal.
Edit the title or members of the distribution list as desired. Select the “Save” button. The edits made to the distribution list will now be visible in the Pre-Defined Distribution List Table. |
Delete List | Selecting Delete List from the context menu opens the Delete Distribution List Confirmation Modal which lists the title of the distribution list being deleted and asks, “Are you sure you want to delete this Distribution List?” How To: Delete a Distribution ListTo delete a pre-defined distribution list, go to the Distribution List Tab on the Settings Page of the Dispatch Module.
Selecting the three-dot icon to the right of the distribution list title you wish to delete will open the Pre-Defined Distribution List Table Context Menu.
Select “Delete List” opening the Delete Distribution List Confirmation Modal. 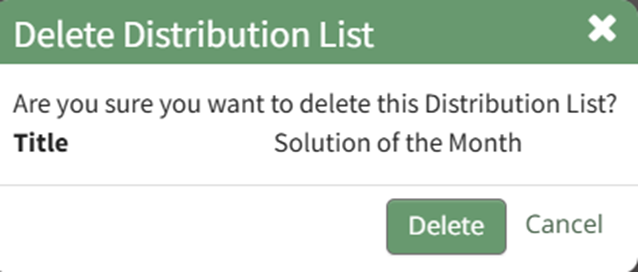
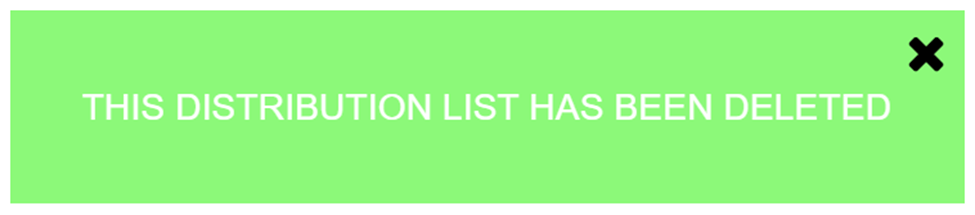
The modal identifies the title of the distribution list being deleted and states, “Are you sure you want to delete this Distribution List?” Click the “Delete” button and a pop up confirms that the Distribution List was deleted.
The distribution list has been removed from the pre-defined distribution list table. |


Clicking the New Distribution List button beneath the header opens the New Distribution List Modal which is used in the creation of new pre-defined distribution lists.
How To: Create a Pre-Defined Distribution List
To create a new pre-defined distribution list, go to the Distribution Lists Tab on the Settings Page of the Dispatch Module.

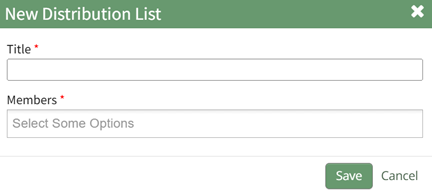
Click the “New Distribution List” button above the Pre-Defined Distribution List Table opening the New Distribution List Modal.
Input the Title of the new distribution list. Clicking the Members field will open a dropdown menu of all Users and Certification Roles that can be added to the Distribution Lists. Multiple selections can be made.
Select the “Save” button and the new distribution list will now show in the Pre-Defined Distribution List Table.
No comments to display
No comments to display