Complete List of Dispatch Module How Tos
How To: Access a Dispatch Log
To access a specific dispatch log with record of all dispatch activity, go to the Home Page of the Dispatch Module. Click the ID or Title of the specific dispatch whose log you wish to access.

This opens the Dispatch Details Page.

Click the book icon in the header row opening the Dispatch Log Page.
Click the Dispatch Title in the header to return to the Dispatch Details Page.
How To: Access a Dispatch QR Code
To access a dispatch QR code, go to the Home Page of the Dispatch Module. Click the ID or Title of the specific dispatch whose QR code you wish to access.

This opens the Dispatch Details Page.

Click the QR Code icon to the right of the dispatch status opening the QR Code Modal.
Select the “Close” button to return to the Dispatch Details Page.
How To: Add a Waypoint to an Itinerary
To add a waypoint to a dispatch itinerary, open the specific dispatch whose itinerary you wish to edit by adding a waypoint. Go to the Dispatch Module Home Page and alter the filter view as needed. Click the Dispatch Number or Title to open the specific dispatch page.

This opens the Dispatch Details Page.

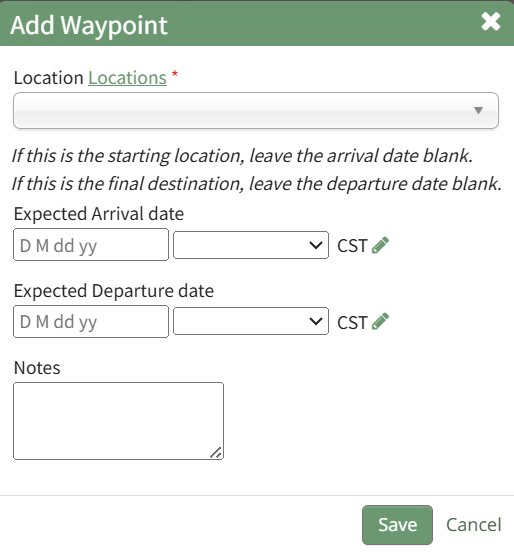
Select the location icon to the right of the Itinerary header, opening the Add Waypoint Modal.
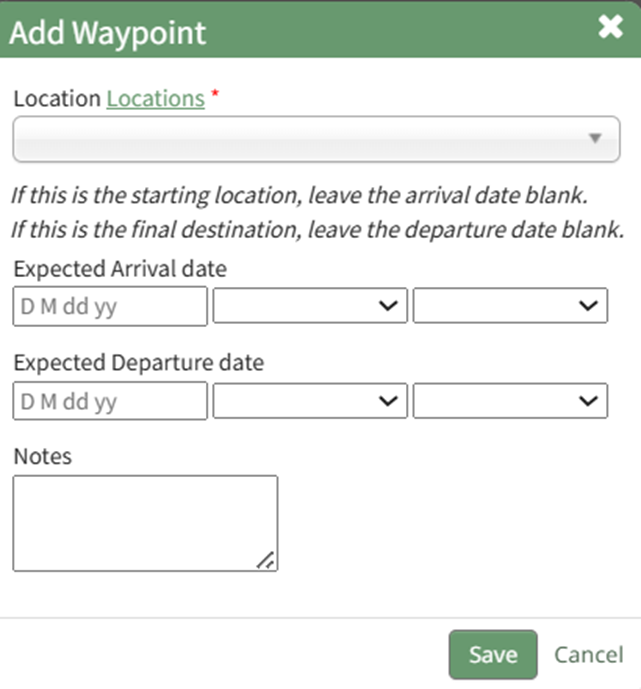
Select a specific location from the Waypoint Location from the dropdown menu or select on-off location if applicable. If one-off is selected, the modal expands so the specific location can input into a textbox.
If this waypoint is the starting location or final destination, leave the arrival date / departure date blank.
Customized locations can be added to the dropdown menu by clicking the “Locations” clickable link. This opens the Locations Database in the Database Module. WIKI LINK HOW TO ADD DISPATCH LOCATIONS TO THE LOCATIONS DATABASE FORM
Include the expected arrival date, departure date, and any notes relevant to the waypoint.
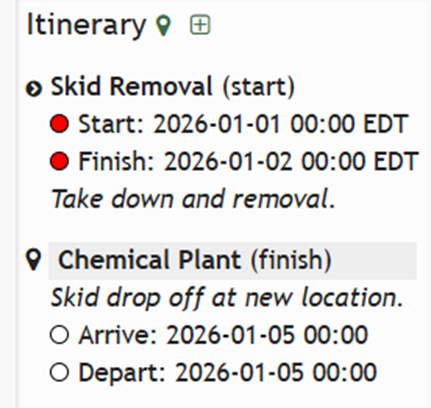
Select the “Save” button and the new waypoint now shows on the itinerary.
How To: Add Actions to a Dispatch
To add actions to a dispatch, the action group template being linked to the dispatch must already have been created.
How To: Create a New Action Group Template
To create a New Action Group Template, select Templates from the Actions Module Main Menu, opening the Manage Templates Page.
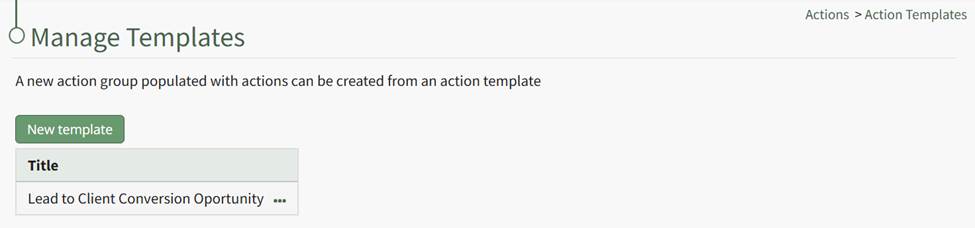
Select the “New Template” button, opening the New Template Modal.
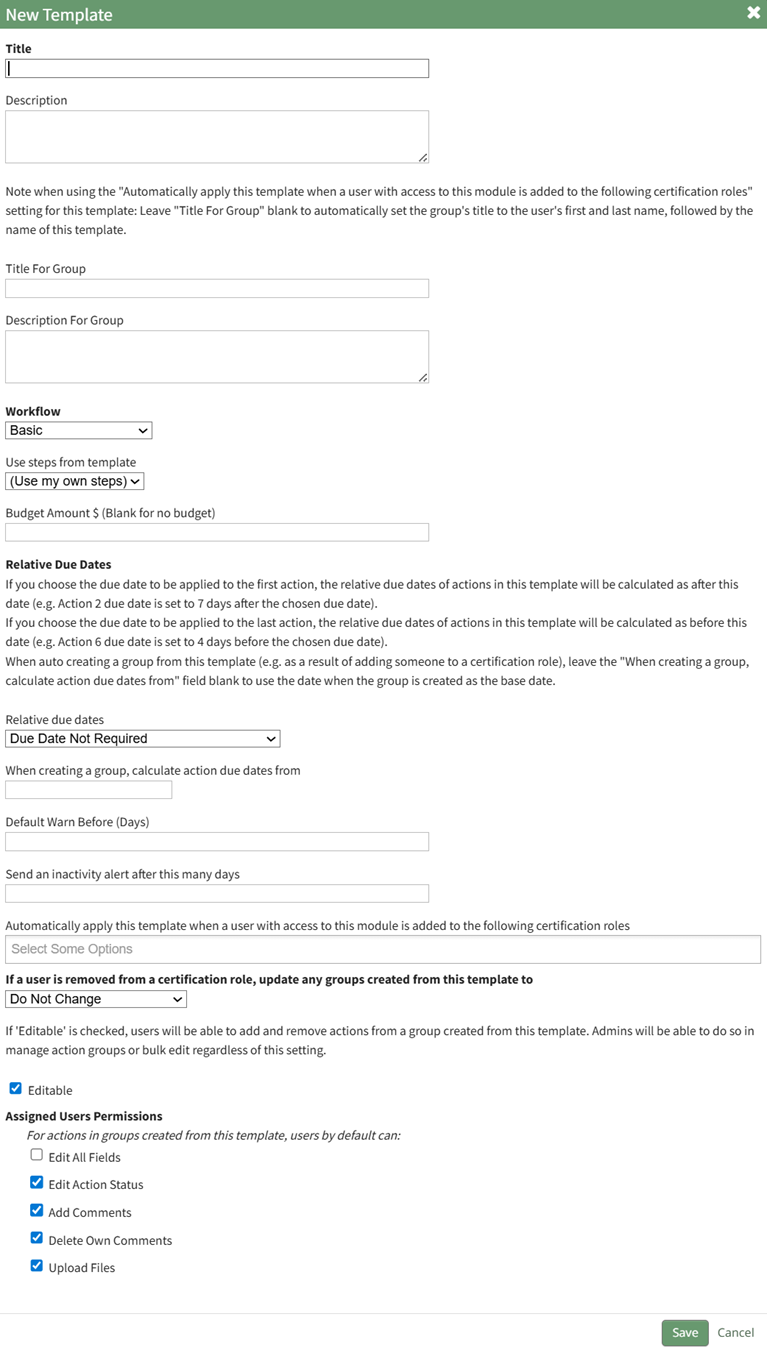
There are several fields associated with the creation of an action group template.
Action Group Field Input Explanations | |
Field | Explanation |
Title | Input the title for the new action group. |
Status | An action group can be assigned a status of Active, Needs Attention, Canceled, or Archived. Select the appropriate status from the Status dropdown menu on the modal. The status of an action group is manually applied and edited. How To: Edit an Action Group Status{{@613}} |
Workflow | The workflow dropdown menu will offer the system default workflows (Basic, Basic with Approval, Complex with Approval), as well as any workflows that have been created by your organization. |
Default Warn Before | Input a numerical value for the number of days a default warning will be sent. This input determines when action within the action group will turn from blue (the action is outstanding) to yellow (the action is nearing its due date). |
Date | The Action Group Date is flexible in concept and can be used as bet fit by your organization. |
Description | Input a description for the action group. |
Tags | Include any open, permissive, or restrictive tags as desired. |
Budget ($) | Leave this blank if you do not want to generate a new budget in the Finance Module for the Action Group. Input a dollar amount to create the budget. |
Budget Alerts | Click "Add Alert" in the Budget Alerts Section to create a budget alert to be associated with the action group budget. This will expand the modal displaying budget alert preferences. How To: Add A Budget Alert for an Action Group{{@612}} |
Budget Approvers | Select the desired budget approver group from the dropdown menu. Note: Budget approval groups at the Action Group level must be created on the Settings Page: Budget Approvers Tab. |
Send an Inactivity alert after # of days | An Action Group inactivity alert will be sent to the designated users / roles after a specified number of days of inactivity. Input a numerical value telling the system to send a notice after the specified days of inactivity. Within an action group, a workflow status change, creating or completing an action, a file upload, or action comment will reset the inactivity alert. Permission for comments to reset the inactivity alert is a customizable preference. |
Send the inactivity alert to | Input the users and roles you wish to receive the inactivity alert. |
Admins | Input the users who are to be identified as Admins for the Action Groups. |
Users / Roles who can view this group | Select the Users / Roles who can view this action group. The users / roles selected will have view only permissions for every action within the action group. |
Users / Roles who can edit their own actions | Select the Users / Roles who can edit their own actions. The users / roles selected will have the ability to edit any actions they created or are assigned to in the action group. |
Focal Point User For this Group | Identify the focal point user of the group. This field is purely informational. There are no permissions associated with the focal point designation. Organization can utilize this field to identify a key contact for an action group. If this action group is being utilized for certification or training processes, using the relevant individual’s name as the focal point provides a database reference that enables reports and organizational capabilities. Only one user can be designated as the focal point. |
Assigned User Permissions Section The permissions established in this section will be applied to all users in the group by default. | |
Edit All Fields | Selecting the "Edit All Fields" checkbox will remove all other checkboxes from the modal and will give all users in the action group the ability to edit action status, add comments, delete own comments, and upload files. |
Edit Action Status | Selecting the "Edit Action Status" checkbox will give all assigned users in the action group the ability to edit the action status. |
Add Comments | Selecting the "Add Comments" checkbox will give all users in the action group the ability to add comments to an action. |
Delete Own Comments | Selecting the "Delete Own Comments" checkbox will give all users in the action group the ability to delete their own comments made regarding an action. |
Upload Files | Selecting the "Upload Files" checkbox will give all users in the action group the ability to upload files to an action. |
After inputting the appropriate information into the modal, select “Save”.
The new Action Group Template will be displayed on the Templates Page in the Action Group Templates Table.
To add actions to a dispatch, open the specific dispatch you wish to add an action to. Go to the Dispatch Module Home Page and alter the filter view as needed. Click the Dispatch Number or Title to open the specific dispatch details page.
Actions can be added to a dispatch by selecting the plus sign icon to the right of the Actions section header. Selecting this icon opens the Add Actions Modal.
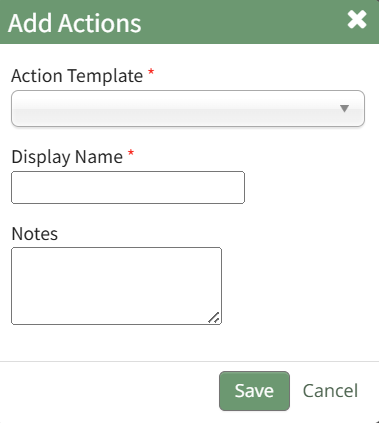
Select the appropriate pre-created action group template from the drop-down menu. Input the name you want displayed on the dispatch details page. Include any notes relevant to the asset and select the “Save” button.
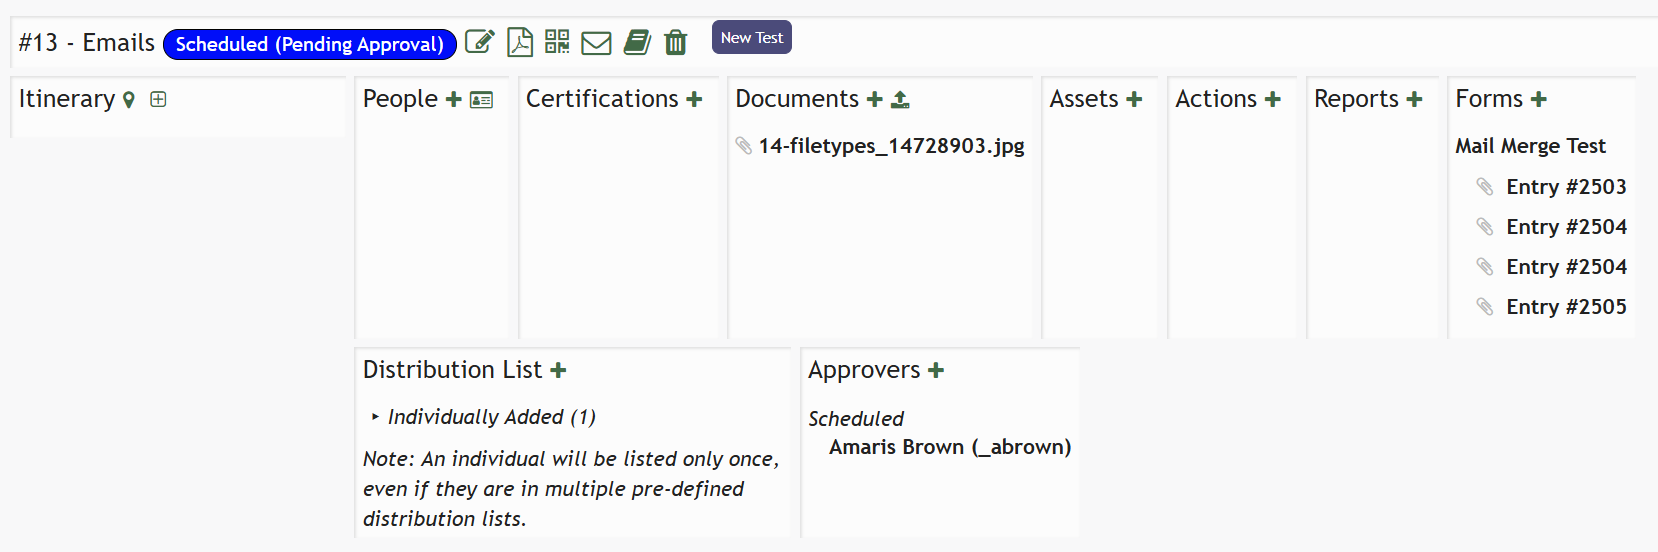
The action group will now show on the Dispatch Details Page.
How To: Add an Activity to a Dispatch Itinerary
To add an activity to the dispatch itinerary, go to the Home Page of the Dispatch Module. Click the ID or Title of the specific dispatch you wish to add an activity to.

This opens the Dispatch Details Page.

Select the plus sign box icon to the right of the Itinerary header, opening the Add Activity Modal.
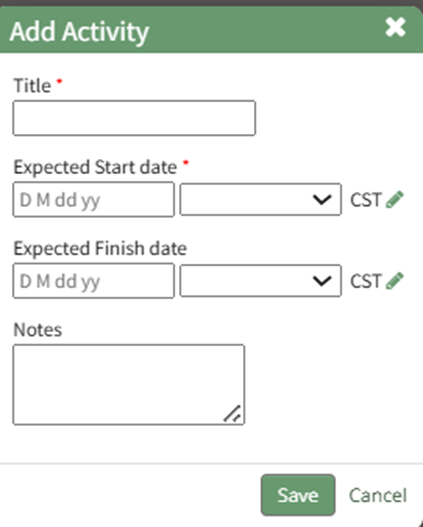
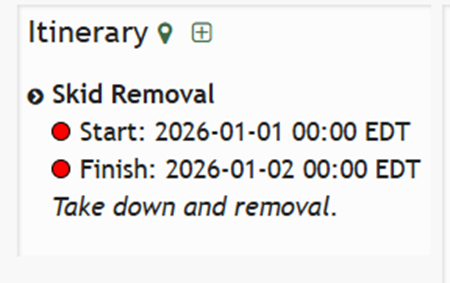
Input the new activity title, expected start and finish dates, as well as any relevant activity note.
Selecting the pencil icon will allow you to edit time zones as needed.
Select “Save” and the Activity now shows on the Dipatch Details Page.
How To: Add Approvers to a Dispatch
To add approvers to a dispatch, open the specific dispatch you wish to add approvers to. Go to the Dispatch Module Home Page and alter the filter view as needed. Click the Dispatch Number or Title to open the specific dispatch details page.

Approval can be required for any dispatch status change (Scheduled, Ready to Dispatch, Dispatched, Completed, Canceled, and Archived). Approvers can be added to a dispatch by selecting the plus sign icon to the right of the People column header.

Selecting the plus sign icon to the right of Approvers opens the Add Approvers Modal.
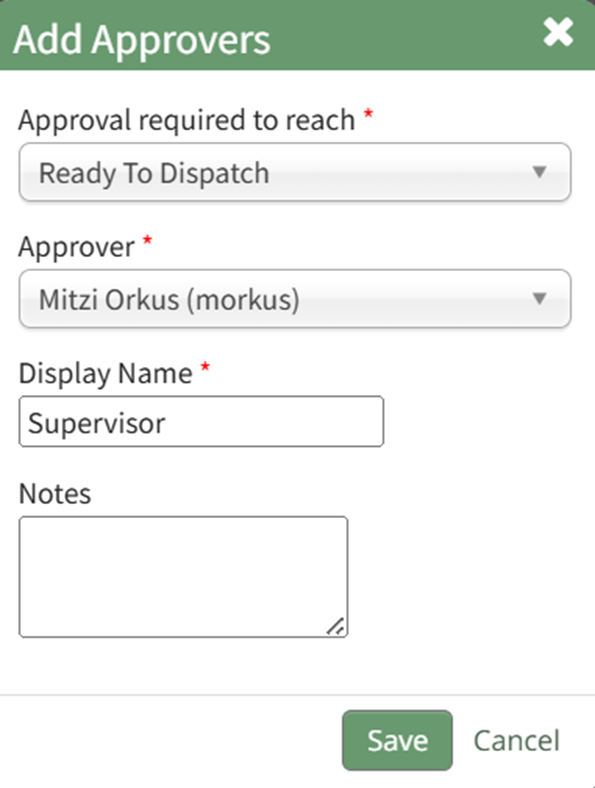
The first dropdown menu opens to dispatch statuses.
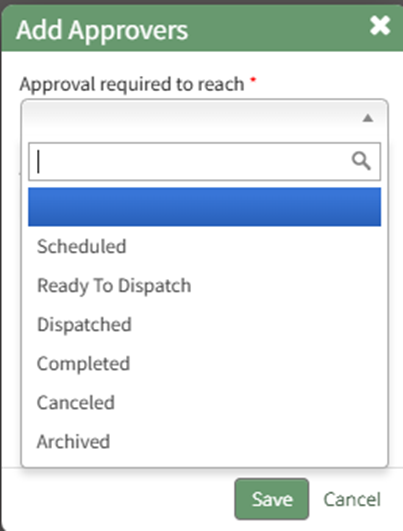
Select what part of the dispatch process needs approval.
Use the second dropdown menu to select the user or role that needs to approve the status change.
Edit the display name if desired and select the “Save” button.
The approvers and the status their approval is required to reach are now displayed on the Dispatch Details Page.
How To: Add Assets to a Dispatch
To add assets to a dispatch, open the specific dispatch you wish to. Go to the Dispatch Module Home Page and alter the filter view as needed. Click the Dispatch Number or Title to open the specific dispatch details page.

Assets can be added to a dispatch by selecting the plus sign icon to the right of the Assets column header.

Selecting the plus sign icon opens the Add Assets Modal.
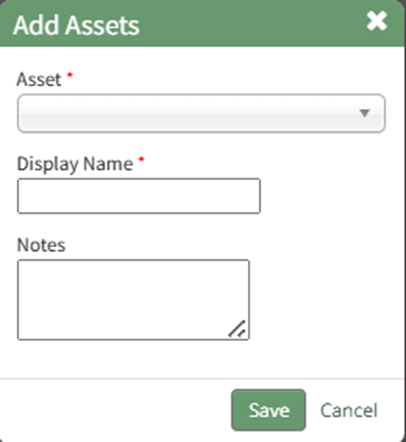
Select the asset you wish to add to the dispatch from the dropdown menu. Edit the display name if desired. Include any notes relevant to the asset and select the “Save” button.
The asset will now show on the Dispatch Details Page.
How To: Add Certifications to a Dispatch
To add certifications to a dispatch, open the specific dispatch you wish to add certifications to. Go to the Dispatch Module Home Page and alter the filter view as needed. Click the Dispatch Number or Title to open the specific dispatch details page.

Certifications can be added to a dispatch by selecting the plus sign icon to the right of the Certifications column header.

This opens the Add Certifications Modal.

Certifications can be selected from the dropdown menu. Edit the display name as desired, and add any notes relevant to the certification.
Select “Save” and the certification now shows on the dispatch.
How To: Add Dispatch Locations to the Locations Database Form
To add dispatch location entries to the locations database form in the Dispatch Module, open the specific dispatch you wish to. Go to the Dispatch Module Home Page and alter the filter view as needed. Click the Dispatch Number or Title to open the specific dispatch details page.
Assets can be added to a dispatch by selecting the plus sign icon to the right of the Assets column header.
Click the geo tag icon to the right of the Itinerary section header opening the Add Waypoint Modal.
Select the green clickable "Locations" link to open the Locations Database Entries Page.
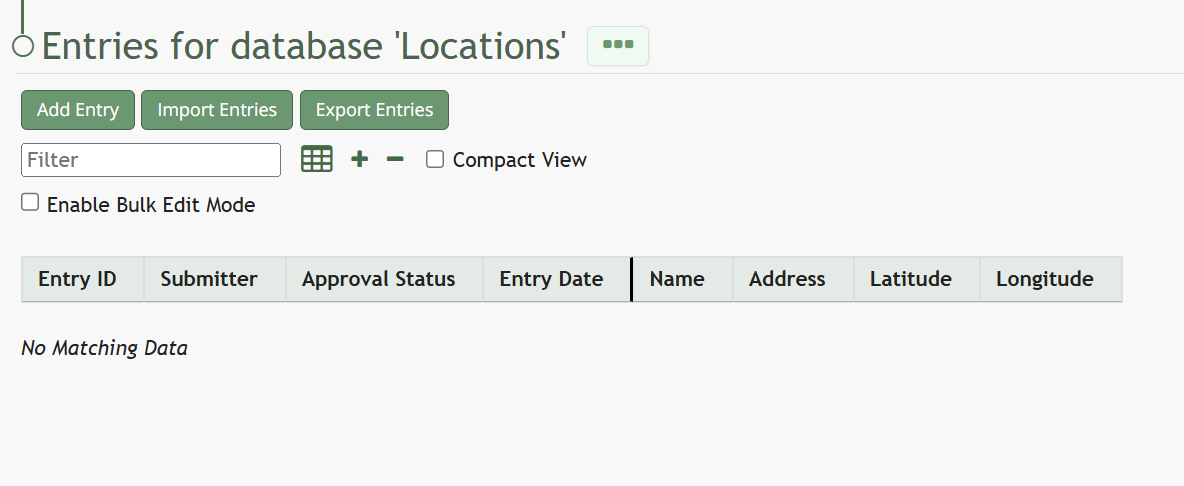
Click the Add Entry button beneath the page header opens the New Database Entry Modal.
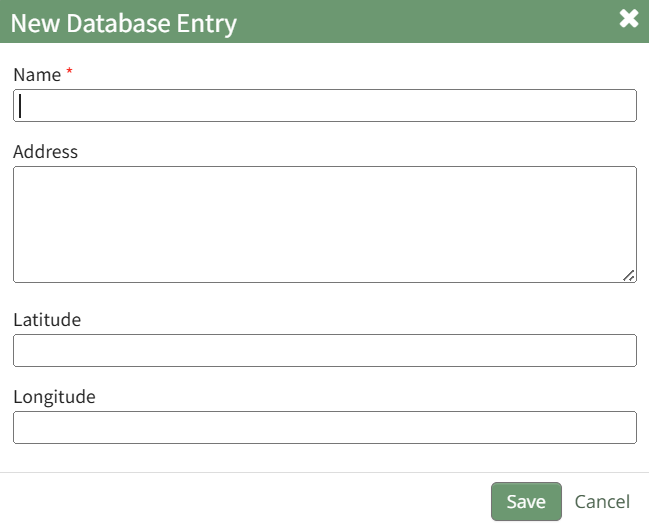
Input the name of the new location. The address, latitude and longitude are optional entries.
Database entries can also be imported into KAStrack via a CSV file.
How To: Import Database Entries from a CSV
To import database entries from a CSV, database fields must already have been created.
How To: Add a Database Field
{{@321}}
How To: Import Fields from a CSV File Into a Database
{{@339}}
How To: Import Fields from a PDF Field Import
{{@340}}
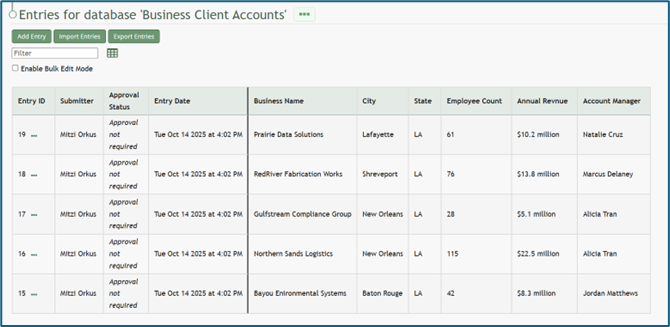
To import database entries from a CSV, go to the Home Page of the Database Module and click the three dot menu to the right of the database you wish to import entries into.
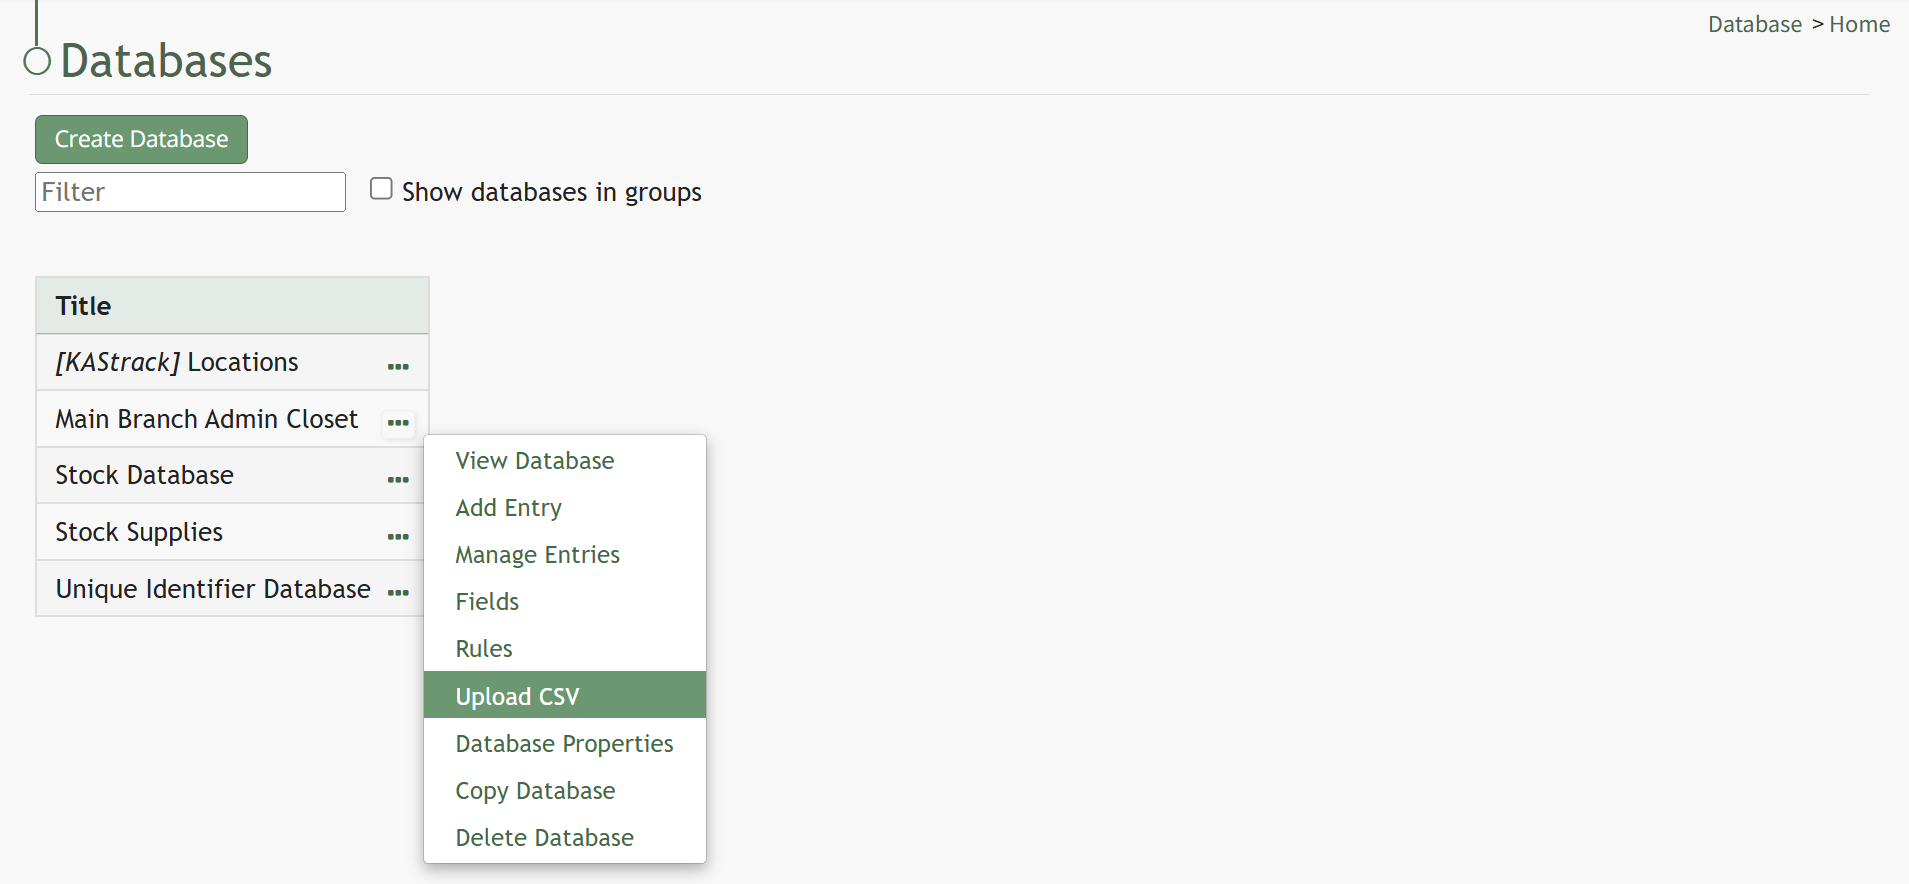
Select “Upload CSV” opening the Upload CSV for (DatabaseName) Modal.
You can also import entries by selecting “Manage Entries” from the context menu and selecting the “Import Entries” button underneath the Database Entries Page header, which opens the same Upload CSV Modal.
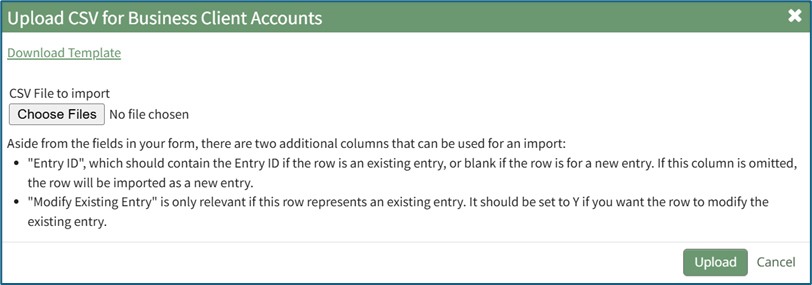
Click the “Download Template” link at the top of the modal and a CSV file will be downloaded to your personal device. See Notes on the Download Template before uploading your CSV file to ensure it is done correctly.
Notes Regarding the Downloadable Template for Uploading CSV Files
The first row of the CSV file is for each of the database fields. If you download a CSV Template from the Upload CSV Modal, two additional column headers will show that are not database fields: Entry ID and Modify Existing Entry.
If you are importing database entries and no entries have been added to the database yet, leave these columns blank in your upload.
If database entries already exist in the database, the Entry ID column will contain the unique system generated ID for each pre-existing database entry. Leave this column blank if the row is to be imported as a new entry. The second column, Modify Existing Entry, should have a “Y” input if the existing entry is being modified and an “N” input if it has not been modified. Leave it blank if the entry is new.

After creating your Database Fields CSV File, save it as a CSV UTF-8 for importing.
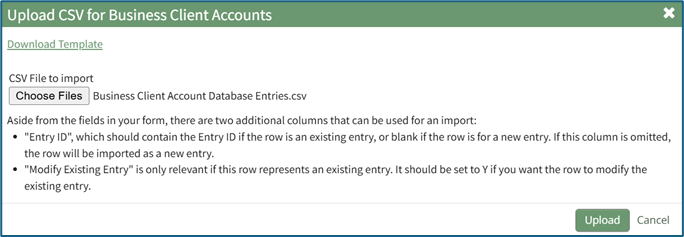
Click the “Choose File” button and open the relevant file from your personal device.

Confirm that the correct CSV file now shows in the Upload CSV Modal.
Select the “Upload” button.
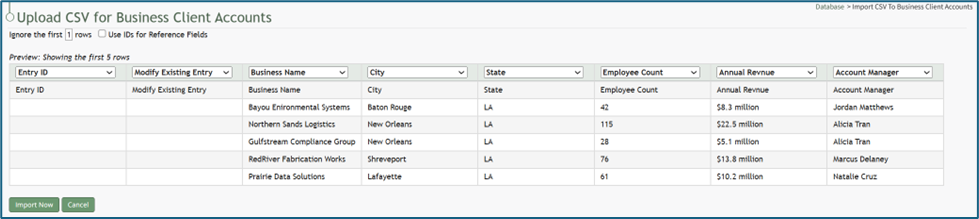
The entries imported from the CSV file will now show on the Upload CSV for (DatabaseName) Page.
The system automatically indicates to ignore the first row. Click “Import Now” if there are no errors.
A summary of the import will now show on the CSV Upload Page.
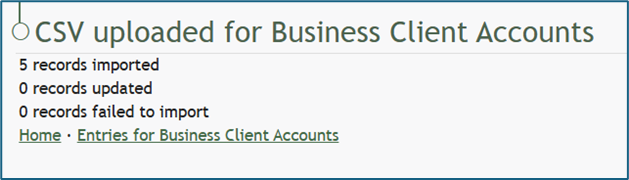
Click the “Entries for (DatabaseName)” link to see all imported entries in the Manage Entry Table.
Click the Save button and the new location will now show in the Locations Database as well as the dropdown menu in the Add Waypoint Modal.
How To: Add Distribution Lists to a Dispatch
Distribution Lists are the individuals designated to receive a PDF copy of the dispatch orders, sent through the KAStrack Communications Module. They can be pre-defined in the Dispatch Module
To add distribution lists to a dispatch, open the specific dispatch you wish to add a distribution list to. Go to the Dispatch Module Home Page and alter the filter view as needed. Click the Dispatch Number or Title to open the specific dispatch details page.

Distribution Lists can be added to a dispatch by selecting the plus sign icon to the right of the Distribution List column header.

Selecting the plus sign icon to the right of Distribution List opens the Add People and Certification Roles Modal.
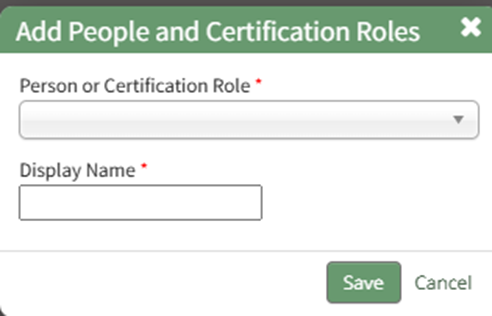
Pre-defined distribution lists, users, and certification roles can all be selected via the dropdown menu. Pre-existing distributions lists can be created within this module.
How To: Create a Pre-Defined Distribution List
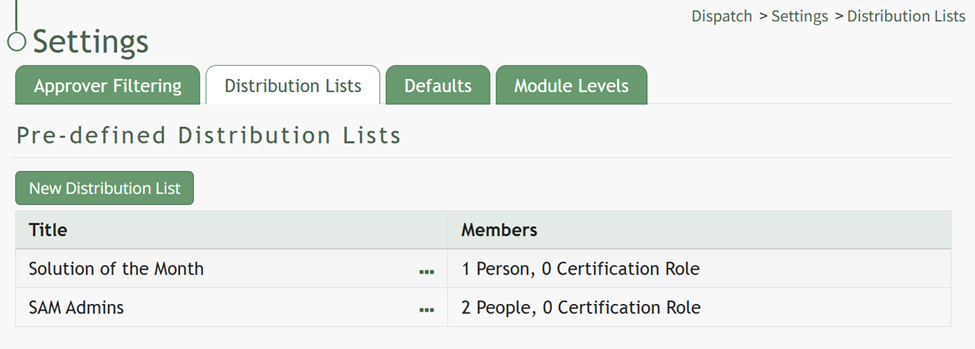
To create a new pre-defined distribution list, go to the Distribution Lists Tab on the Settings Page of the Dispatch Module.

Click the “New Distribution List” button above the Pre-Defined Distribution List Table opening the New Distribution List Modal.
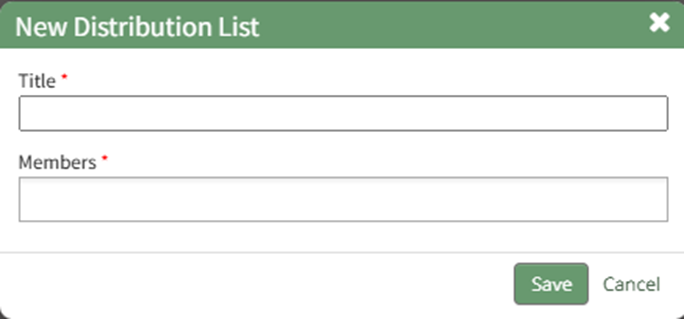
Input the Title of the new distribution list. Clicking the Members field will open a dropdown menu of all Users and Certification Roles that can be added to the Distribution Lists. Multiple selections can be made.
Select the “Save” button and the new distribution list will now show in the Pre-Defined Distribution List Table.
Edit the display name if desired and select the “Save” button. The individuals on the distribution list will now show on the dispatch details page.
An individual will only be listed once even if they are in multiple pre-defined distribution lists.
How To: Add Forms to a Dispatch
To add forms to a dispatch, open the specific dispatch you wish to add forms to. Go to the Dispatch Module Home Page and alter the filter view as needed. Click the Dispatch Number or Title to open the specific dispatch details page.

Forms can be added to a dispatch by selecting the plus sign icon to the right of the Forms column header.

Selecting the plus sign icon to the right of Forms opens the Add Forms Modal.
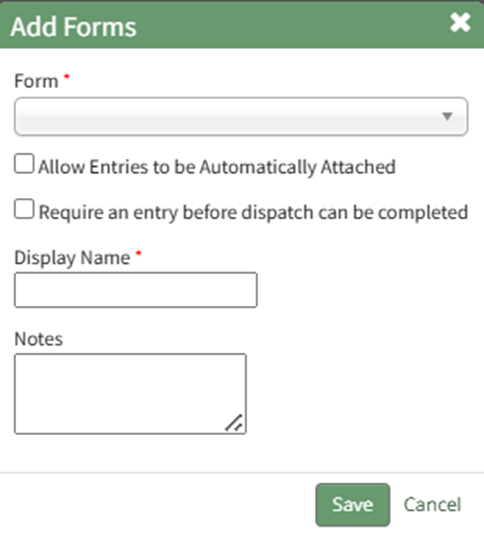
Select the form you wish to add to the dispatch from the dropdown menu.
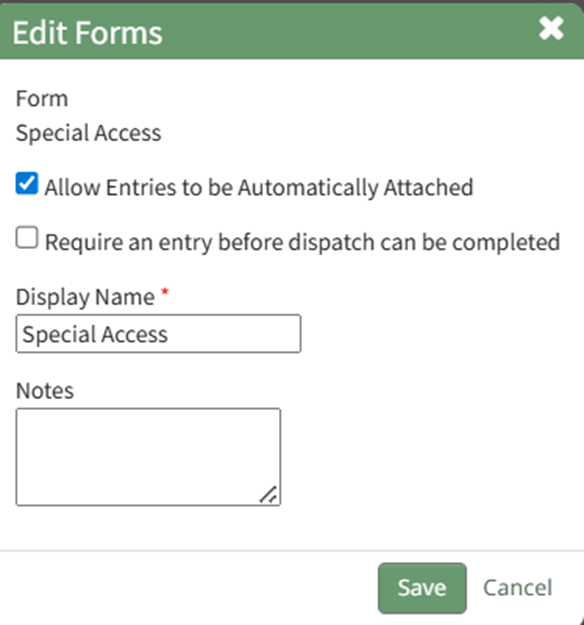
Select the “Allow Entries to be Automatically Attached” of you would like the entries on this form to be linked to the Dispatch Details Page.
Select the “Require an entry before dispatch can be completed” checkbox if you would like to require that a form entry is submitted before the dispatch can be marked as completed.
Edit the display name if desired. Include any notes relevant to the report and select the “Save” button.
The form will now show on the Dispatch Details Page.
How To: Add KAStrack Documents Module Files to a Dispatch
To add documents to a dispatch, open the specific dispatch you wish to add documents to. Go to the Dispatch Module Home Page and alter the filter view as needed. Click the Dispatch Number or Title to open the specific dispatch details page.

Documents can be added to a dispatch by selecting the plus sign icon to the right of the Documents column header.

This opens the Add Documents Modal.
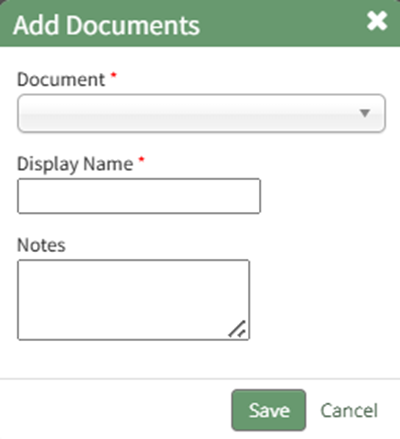
Select the appropriate document to be added to the dispatch from the drop-down menu.
Only the documents the user has permissions to view and access will be displayed.
Edit the display name as desired and input any notes regarding the document.
Select the “Save” button and the document will be added to the dispatch.
How To: Add New Form Entries in the Dispatch Module
To add form entries in the Dispatch Module, go to the Home Page of the Dispatch Module. Click the ID or Title of the specific dispatch you want to submit a form entry on.

This opens the Dispatch Details Page.

Hover your cursor over a form’s displayed name and select the clipboard icon.
The clipboard icon opens the webform modal, allowing an entry to be submitted directly from the dispatch details page.
Select “Submit” when done completing the form entry.
How To: Add Notes to a Dispatch
To add notes to a dispatch, go to the Dispatch Module Home Page and click the title or dispatch number of the specific dispatch whose status you wish to change.

This opens the dispatch details page.

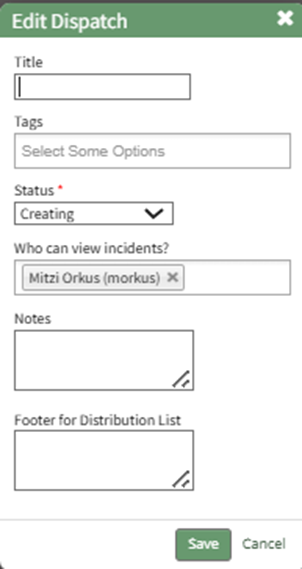
The edit dispatch icon is to the right of the dispatch status. Click the Edit Icon to open the Edit Dispatch Modal.
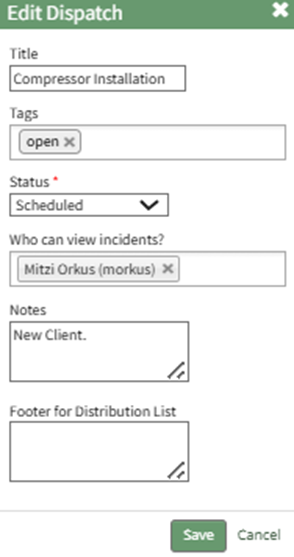
Add the desired notes in the text box and select “Save” returning to the specific dispatch page.
The notes added will now be visible in the header row beneath the Dispatch Number and Title.

How To: Add People to a Dispatch
To add people to a dispatch, open the specific dispatch you wish to add people to. Go to the Dispatch Module Home Page and alter the filter view as needed. Click the Dispatch Number or Title to open the specific dispatch details page.

People can be added to a dispatch by selecting the plus sign icon to the right of the People column header or by selecting the identification icon. Selecting the identification icon will allow you to add people through their certification role.

To Add People to a Dispatch through People
Select the plus sign to the right of the People Section header. This opens the Add People Modal.
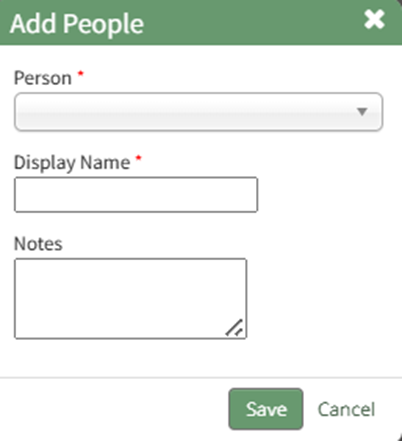
Select the KAStrack user to be added to the dispatch from the dropdown menu. There is an External User option if the individual is a not a KAStrack user. The system will automatically input the First , Last and username as the Display Name. This can be edited.
Add any notes regarding the user being added to the dispatch as desired.
Select “Save” and the user is added to the dispatch page.
To Add People to a Dispatch through their Certification Role
To add people to a dispatch through a certification role, select the identification card Icon to the right of the plus sign in the People Column. This opens the Add People by Certification Role Modal.
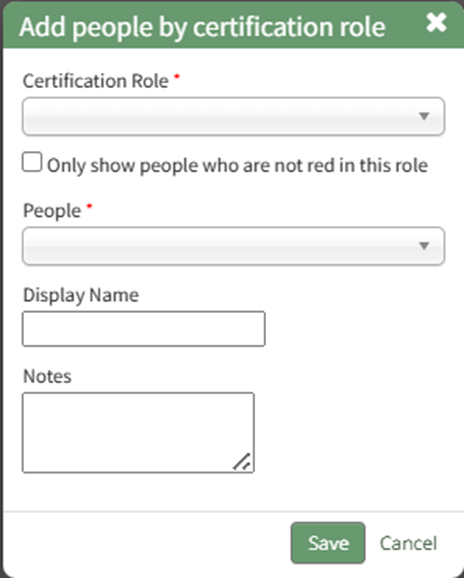
First, select the desired Certification Role from the dropdown menu.
Selecting the checkbox will only show people who are not red in this role. The People associated with the selected certification role will now be displayed in the the People dropdown menu.
The Display Name will auto populate with the First, Last, and username of the individual. Edit as desired to indicate the display name and add relevant notes.
Select “Save” and return to the dispatch page.
How To: Add Reports to a Dispatch
To add reports to a dispatch, open the specific dispatch you wish to add reports to. Go to the Dispatch Module Home Page and alter the filter view as needed. Click the Dispatch Number or Title to open the specific dispatch details page.

Reports can be added to a dispatch by selecting the plus sign icon to the right of the Reports column header.

Selecting the plus sign icon to the right of Reports opens the Add Reports Modal.
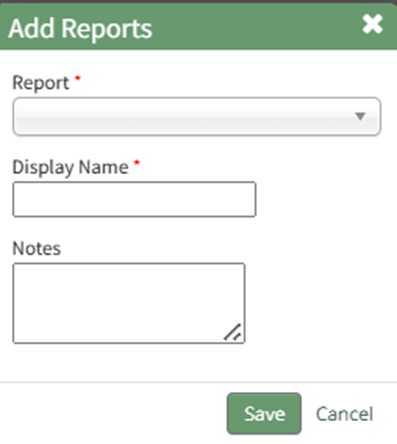
Select the report you wish to add to the dispatch from the dropdown menu. Edit the display name if desired. Include any notes relevant to the report and select the “Save” button.
The report will now show on the Dispatch Details Page.
How To: Add Tags to a Dispatch

This opens the dispatch details page.

Select the edit icon to the right of the dispatch status to open the Edit Dispatch Modal.
Select the appropriate tag from the dropdown menu, or type in the new tag title and press enter.
How To: Create a New Tag from an Entity in Another Module
To create a new tag while creating or editing a new entity in a module other than tags, type in the desired new tag name in the tag field for the entity. For aid in visibility, emojis can be used in the tag name.
How To Determine if a New Tag Can be Created when an Entity is Created / Edited | |
Some modules allow for a new tag to be created when an entity is being created or edited. You can identify if this feature is enabled for an entity by typing in the desired tag name. If this feature is enabled, you will see a line under the Tags Field that states, “Press Enter to add new tag.” If this feature is not enabled, you will see a line under the Tags Field that states, “No options”. | |
Possible |
|
Not Possible |
|


Press “Enter” after typing in the new tag name.

Finish creating / editing the entity as desired. After saving your changes to the entity, the Tag will be created. By default, the new Tag will have Open behavior, and be assigned the “uncategorized” category. To make changes to these settings, go to the Manage Page of the Tags Module.

The newly created tag will be available on the Tags List on the Tags Tab.
Click the vertical dot icon on the far right opening the tag context menu. Select “Edit” opening the Edit Tag Modal.

Alter the Tag Title, Category and Behavior as desired.
How To: Edit a Tag
{{@86}}
Select the “Update Tag” button and your changes will be saved.
Select "Save".
How To: Approve a Pending Dispatch Status Change
To approve or reject a dispatch status change, go to the Pending Approvals Page in the Dispatch Module.

Click the dispatch number or title of the dispatch whose status is pending approval, opening the Dispatch Details Page.
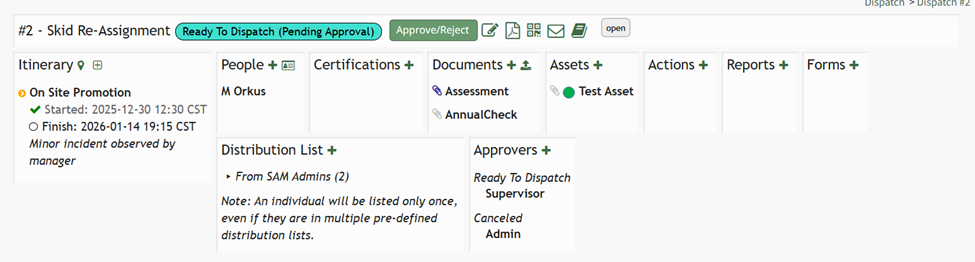
An Approve/Reject button now shows to the right of the dispatch number and title. Click the “Approve/ Reject” button opening the Approval Required Modal.
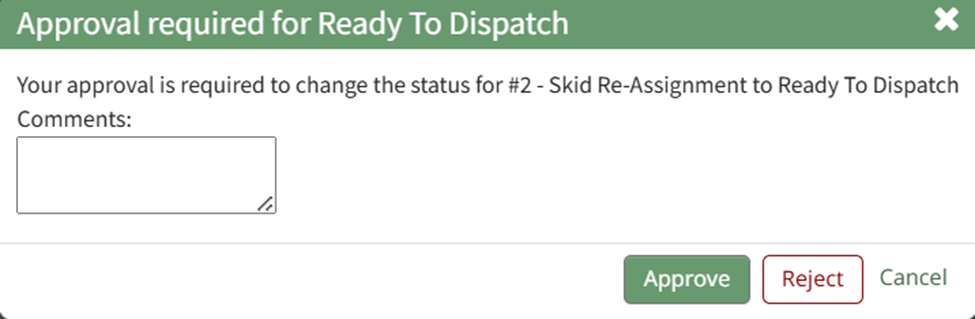
Input any comments relevant to approval / rejection and select the appropriate button.
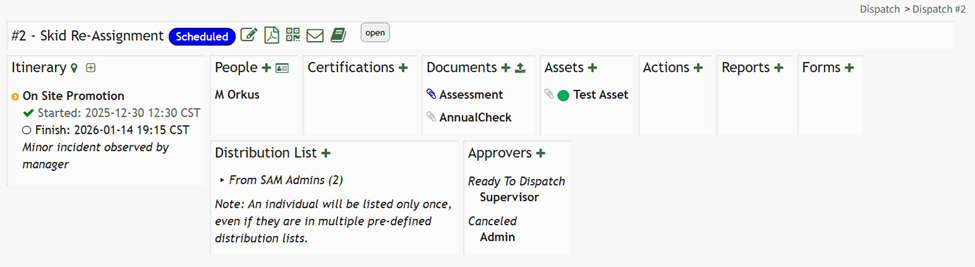
If you approve the status change, a confirmation pop up states, “Status has been approved,” and the new status shows on the Dispatch Details Page.

If you rejected the status, a confirmation pop up states, “Status has been rejected.”

The Dispatch Details Page reverts back to the previous status and the dispatch no longer shows on the pending approval page until another attempt to change the status.
How To: Change the Dispatch Status
To change the dispatch status, go to the Dispatch Module Home Page and click the title or dispatch number of the specific dispatch whose status you wish to change.

This opens the dispatch details page.

Select the edit dispatch properties icon immediately to the right of the dispatch status to open the Dispatch Properties Modal.
Select the desired dispatch status from the dropdown menu and select “Save” and return to the specific dispatch page.
How To: Create a Footer for a Dispatch Distribution List

This opens the dispatch details page.

The edit dispatch properties icon is immediately to the right of the dispatch status. Click it to open the Dispatch Properties Modal.
Add the desired footer for the distribution list and select “Save” returning to the specific dispatch page.
How To: Create a New Dispatch
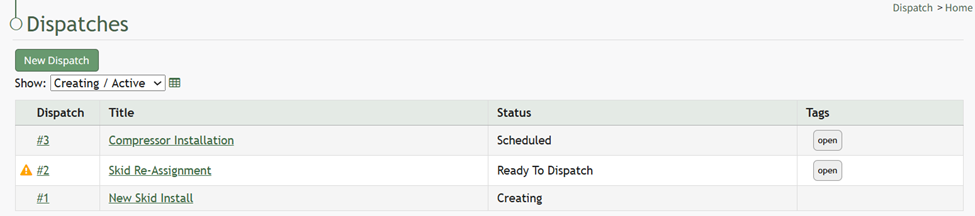
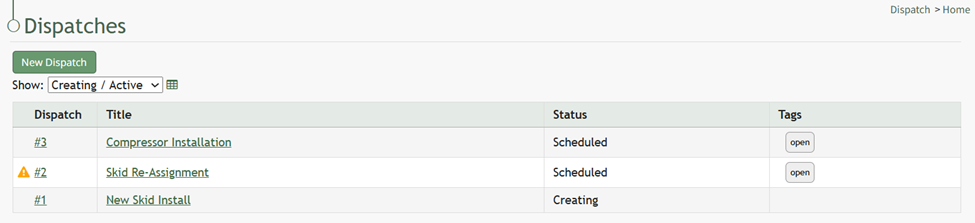
To create a new dispatch, go to the Dispatch Module Home Page.

Click the “New Dispatch” button, which automatically opens to a new dispatch details page.

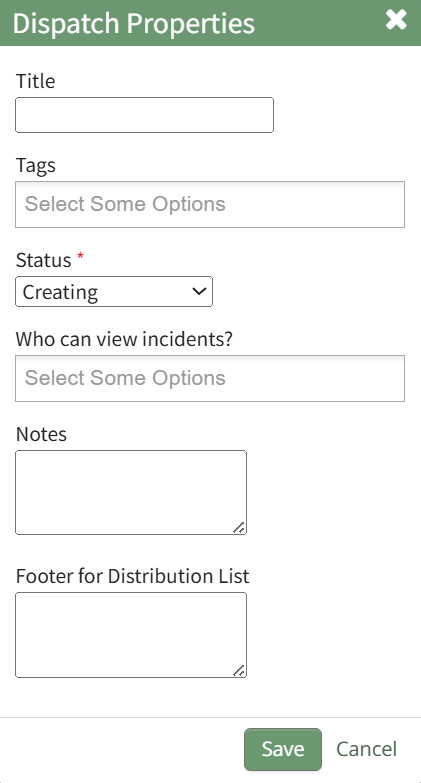
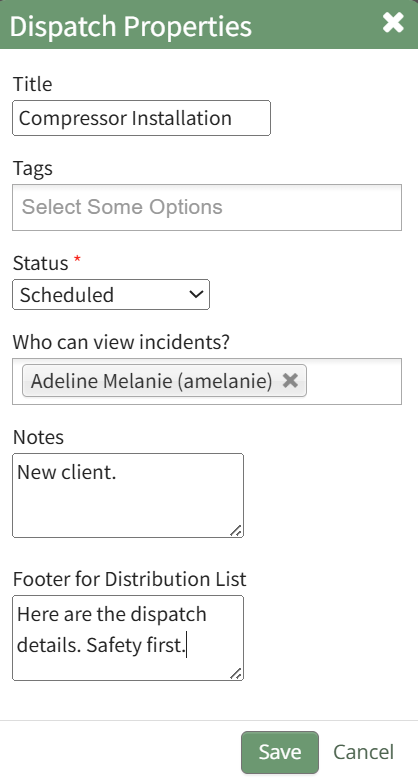
Select the edit dispatch properties icon to the right of the dispatch status to open the Dispatch Properties Modal.

Input a dispatch title and appropriate tags. Select the dispatch status and who can view incidents from the menu provided. Input and relevant dispatch notes and a footer for the distribution list if desired. Select the “Save” button and the changes are now reflected on the Dispatch Details Page.
A title field is not required for a dispatch, as the dispatch number is the unique identifier.

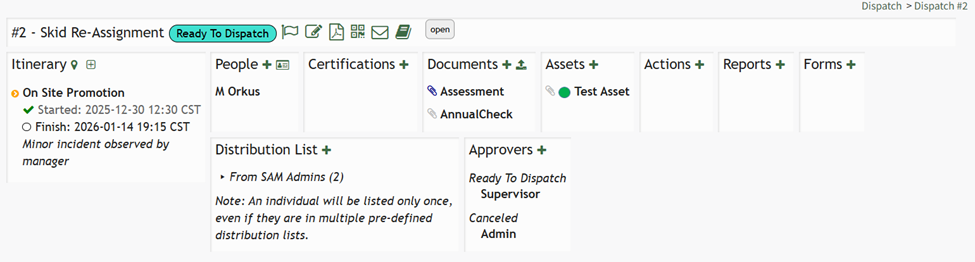
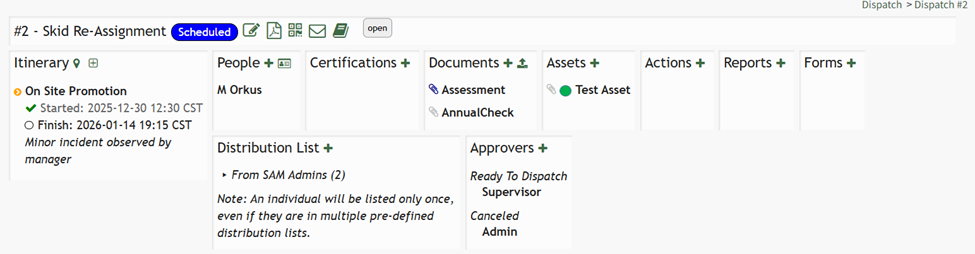
There are ten sections that comprise a dispatch. An explanation of each section is included in the table below.
Dispatch Detail Page Section Explanations | |||||||||||
Section | Explanation | ||||||||||
Itinerary | The itinerary section can be added to the dispatch details page, outlining any activity and waypoints associated with the dispatch.
How To: Add a Waypoint to an ItineraryHow To: Add an Activity to a Dispatch ItineraryTo add an activity to the dispatch itinerary, go to the Home Page of the Dispatch Module. Click the ID or Title of the specific dispatch you wish to add an activity to.
This opens the Dispatch Details Page.
Select the plus sign box icon to the right of the Itinerary header, opening the Add Activity Modal.
Input the new activity title, expected start and finish dates, as well as any relevant activity note. Selecting the pencil icon will allow you to edit time zones as needed. Select “Save” and the Activity now shows on the Dipatch Details Page.
| ||||||||||
People | People can be added to the dispatch details page. How To: Add People to a DispatchTo add people to a dispatch, open the specific dispatch you wish to add people to. Go to the Dispatch Module Home Page and alter the filter view as needed. Click the Dispatch Number or Title to open the specific dispatch details page.
People can be added to a dispatch by selecting the plus sign icon to the right of the People column header or by selecting the identification icon. Selecting the identification icon will allow you to add people through their certification role.
To Add People to a Dispatch through PeopleSelect the plus sign to the right of the People Section header. This opens the Add People Modal.
Select the KAStrack user to be added to the dispatch from the dropdown menu. There is an External User option if the individual is a not a KAStrack user. The system will automatically input the First , Last and username as the Display Name. This can be edited. Add any notes regarding the user being added to the dispatch as desired. Select “Save” and the user is added to the dispatch page. To Add People to a Dispatch through their Certification RoleTo add people to a dispatch through a certification role, select the identification card Icon to the right of the plus sign in the People Column. This opens the Add People by Certification Role Modal.
First, select the desired Certification Role from the dropdown menu. Selecting the checkbox will only show people who are not red in this role. The People associated with the selected certification role will now be displayed in the the People dropdown menu. The Display Name will auto populate with the First, Last, and username of the individual. Edit as desired to indicate the display name and add relevant notes. Select “Save” and return to the dispatch page. Once added, hovering your cursor over the displayed name shows icons that open the individual user page, that edit the People attachment, and delete the People attachment from the dispatch details. | ||||||||||
Certifications | Certification roles can be added to the dispatch details page. How To: Add Certifications to a DispatchTo add certifications to a dispatch, open the specific dispatch you wish to add certifications to. Go to the Dispatch Module Home Page and alter the filter view as needed. Click the Dispatch Number or Title to open the specific dispatch details page.
Certifications can be added to a dispatch by selecting the plus sign icon to the right of the Certifications column header.
This opens the Add Certifications Modal.
Certifications can be selected from the dropdown menu. Edit the display name as desired, and add any notes relevant to the certification. Select “Save” and the certification now shows on the dispatch. | ||||||||||
Documents | Documents can be added to the dispatch details page. How To: Add KAStrack Documents Module Files to a DispatchTo add documents to a dispatch, open the specific dispatch you wish to add documents to. Go to the Dispatch Module Home Page and alter the filter view as needed. Click the Dispatch Number or Title to open the specific dispatch details page.
Documents can be added to a dispatch by selecting the plus sign icon to the right of the Documents column header.
This opens the Add Documents Modal.
Select the appropriate document to be added to the dispatch from the drop-down menu. Only the documents the user has permissions to view and access will be displayed. Edit the display name as desired and input any notes regarding the document. Select the “Save” button and the document will be added to the dispatch. Once added, hovering your cursor over the displayed name shows icons that view the attached file, that edit the Documents attachment, and delete the Documents attachment from the dispatch details. | ||||||||||
Assets | Assets can be added to the dispatch details page. How To: Add Assets to a DispatchTo add assets to a dispatch, open the specific dispatch you wish to. Go to the Dispatch Module Home Page and alter the filter view as needed. Click the Dispatch Number or Title to open the specific dispatch details page.
Assets can be added to a dispatch by selecting the plus sign icon to the right of the Assets column header.
Selecting the plus sign icon opens the Add Assets Modal.
Select the asset you wish to add to the dispatch from the dropdown menu. Edit the display name if desired. Include any notes relevant to the asset and select the “Save” button. The asset will now show on the Dispatch Details Page. | ||||||||||
Actions | Actions can be added to the dispatch details page. How To: Add Actions to a DispatchTo add actions to a dispatch, the action group template being linked to the dispatch must already have been created. How To: Create a New Action Group Template{{@602}} To add actions to a dispatch, open the specific dispatch you wish to add an action to. Go to the Dispatch Module Home Page and alter the filter view as needed. Click the Dispatch Number or Title to open the specific dispatch details page.
Actions can be added to a dispatch by selecting the plus sign icon to the right of the Actions section header. Selecting this icon opens the Add Actions Modal.
Select the appropriate pre-created action group template from the drop-down menu. Input the name you want displayed on the dispatch details page. Include any notes relevant to the asset and select the “Save” button. The action group will now show on the Dispatch Details Page. | ||||||||||
Reports | Reports can be added to the dispatch details page. How To: Add Reports to a DispatchTo add reports to a dispatch, open the specific dispatch you wish to add reports to. Go to the Dispatch Module Home Page and alter the filter view as needed. Click the Dispatch Number or Title to open the specific dispatch details page.
Reports can be added to a dispatch by selecting the plus sign icon to the right of the Reports column header.
Selecting the plus sign icon to the right of Reports opens the Add Reports Modal.
Select the report you wish to add to the dispatch from the dropdown menu. Edit the display name if desired. Include any notes relevant to the report and select the “Save” button. The report will now show on the Dispatch Details Page. | ||||||||||
Forms | Forms can be added to the dispatch details page. How To: Add Forms to a DispatchTo add forms to a dispatch, open the specific dispatch you wish to add forms to. Go to the Dispatch Module Home Page and alter the filter view as needed. Click the Dispatch Number or Title to open the specific dispatch details page.
Forms can be added to a dispatch by selecting the plus sign icon to the right of the Forms column header.
Selecting the plus sign icon to the right of Forms opens the Add Forms Modal.
Select the form you wish to add to the dispatch from the dropdown menu. Select the “Allow Entries to be Automatically Attached” of you would like the entries on this form to be linked to the Dispatch Details Page. Select the “Require an entry before dispatch can be completed” checkbox if you would like to require that a form entry is submitted before the dispatch can be marked as completed. Edit the display name if desired. Include any notes relevant to the report and select the “Save” button. The form will now show on the Dispatch Details Page. | ||||||||||
Distribution List | Users and certification roles can be added to the dispatch distribution list. How To: Add Distribution Lists to a DispatchDistribution Lists are the individuals designated to receive a PDF copy of the dispatch orders, sent through the KAStrack Communications Module. They can be pre-defined in the Dispatch Module To add distribution lists to a dispatch, open the specific dispatch you wish to add a distribution list to. Go to the Dispatch Module Home Page and alter the filter view as needed. Click the Dispatch Number or Title to open the specific dispatch details page.
Distribution Lists can be added to a dispatch by selecting the plus sign icon to the right of the Distribution List column header.
Selecting the plus sign icon to the right of Distribution List opens the Add People and Certification Roles Modal.
Pre-defined distribution lists, users, and certification roles can all be selected via the dropdown menu. Pre-existing distributions lists can be created within this module. How To: Create a Pre-Defined Distribution List{{@684}} Edit the display name if desired and select the “Save” button. The individuals on the distribution list will now show on the dispatch details page. An individual will only be listed once even if they are in multiple pre-defined distribution lists. Pre-defined Distribution Lists can be created on the Settings Page of the Dispatch Module and added to the dispatch. How To: Create a Pre-Defined Distribution ListTo create a new pre-defined distribution list, go to the Distribution Lists Tab on the Settings Page of the Dispatch Module.
Click the “New Distribution List” button above the Pre-Defined Distribution List Table opening the New Distribution List Modal.
Input the Title of the new distribution list. Clicking the Members field will open a dropdown menu of all Users and Certification Roles that can be added to the Distribution Lists. Multiple selections can be made. Select the “Save” button and the new distribution list will now show in the Pre-Defined Distribution List Table.
| ||||||||||
Approvers | Approvers can be added to a dispatch and approval can be required for any dispatch status change. How To: Add Approvers to a DispatchTo add approvers to a dispatch, open the specific dispatch you wish to add approvers to. Go to the Dispatch Module Home Page and alter the filter view as needed. Click the Dispatch Number or Title to open the specific dispatch details page.
Approval can be required for any dispatch status change (Scheduled, Ready to Dispatch, Dispatched, Completed, Canceled, and Archived). Approvers can be added to a dispatch by selecting the plus sign icon to the right of the People column header.
Selecting the plus sign icon to the right of Approvers opens the Add Approvers Modal.
The first dropdown menu opens to dispatch statuses.
Select what part of the dispatch process needs approval. Use the second dropdown menu to select the user or role that needs to approve the status change. Edit the display name if desired and select the “Save” button. The approvers and the status their approval is required to reach are now displayed on the Dispatch Details Page. Once added, hovering your cursor over the displayed name shows icons that edit and delete the approver attachment to the dispatch details. | ||||||||||
How To: Create a New Module Level (Dispatch Module)
To create customized module levels in the Dispatch Module, go to the Module Levels Tab on the Settings Page of the Dispatch Module.
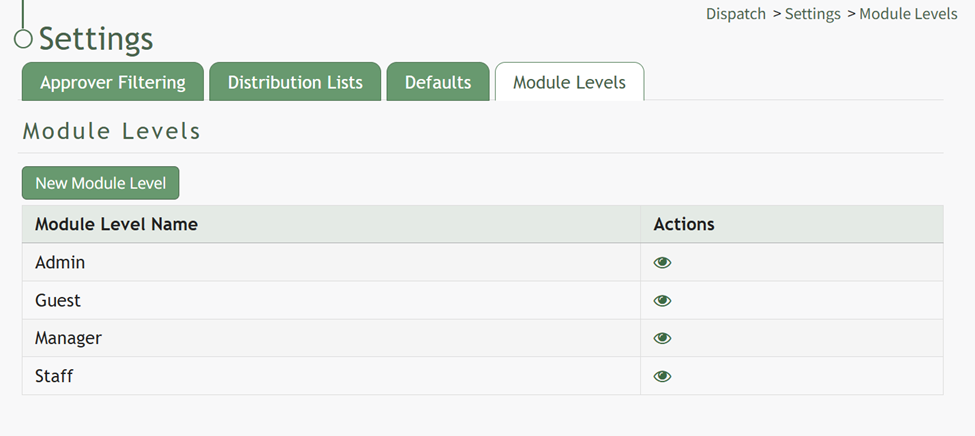
Select the “New Module Level” button opening the New Module Level Modal.
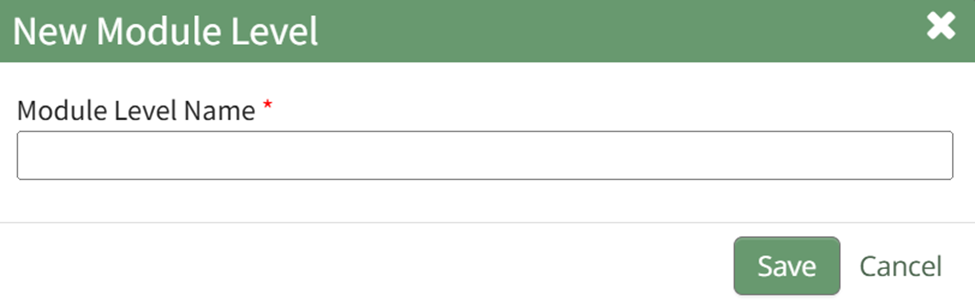
Input the New Module Level Name and select “Save”. The new module level now appears on the Module Level Table with action icons explained in the table below.
Module Level Customization Icons | |
Icon | Explanation |
| The eyeball icon allows you to view users assigned to the module level as well as the permissions assigned to them. |
| The bulleted list icon allows you to assign permissions to customized module levels. |
| The pencil icon opens the Edit Module Level Modal. |
| The trashcan icon opens the Delete Module Level Confirmation Modal. |
Select the Bulleted List Icon to open the Permissions Modal.
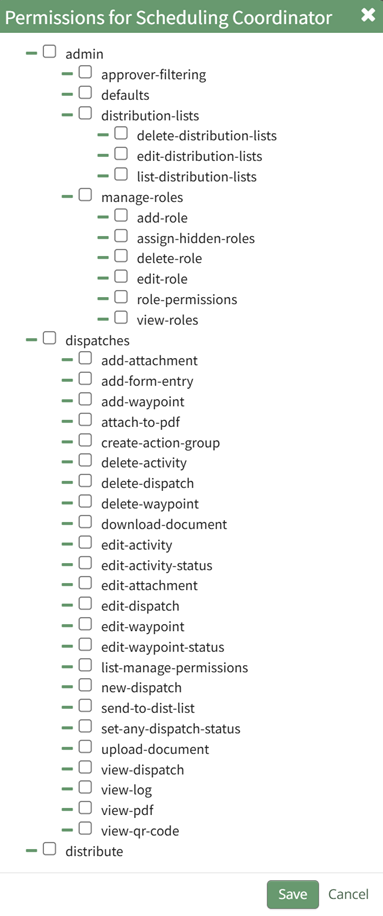
Select all permissions appropriate for the new module level and select “Save”.
How To: Create a Pre-Defined Distribution List
To create a new pre-defined distribution list, go to the Distribution Lists Tab on the Settings Page of the Dispatch Module.
Click the “New Distribution List” button above the Pre-Defined Distribution List Table opening the New Distribution List Modal.
Input the Title of the new distribution list. Clicking the Members field will open a dropdown menu of all Users and Certification Roles that can be added to the Distribution Lists. Multiple selections can be made.
Select the “Save” button and the new distribution list will now show in the Pre-Defined Distribution List Table.
How To: Delete a Dispatch
To delete a dispatch, go to the Home Page of the Dispatch Module. Click the ID or Title of the specific dispatch you wish to delete.

This opens the Dispatch Details Page.

Click the trashcan icon in the header row opening the Dispatch Deletion Confirmation Modal.

The modal states, “Are you sure you wish to delete this dispatch? This cannot be undone!”
Select the “Delete” button and the dispatch has been permanently deleted.
How To: Delete a Dispatch Attachment
To delete a specific attachment from a dispatch details page, go to the Home Page of the Dispatch Module. Click the ID or Title of the specific dispatch with the attachment you wish to delete.

This opens the Dispatch Details Page.

Hover your cursor over the attachment you wish to remove (in any section on the dispatch display page) and the trashcan icon will appear to the right of the attachment display name.
Select the trashcan icon opening the Deletion Confirmation Modal, confirming that you wish to delete the dispatch attachment. Click the “Confirm” button and the user will be removed from the dispatch display page.
How To: Delete a Distribution List
To delete a pre-defined distribution list, go to the Distribution List Tab on the Settings Page of the Dispatch Module.

Selecting the three-dot icon to the right of the distribution list title you wish to delete will open the Pre-Defined Distribution List Table Context Menu.

Select “Delete List” opening the Delete Distribution List Confirmation Modal.
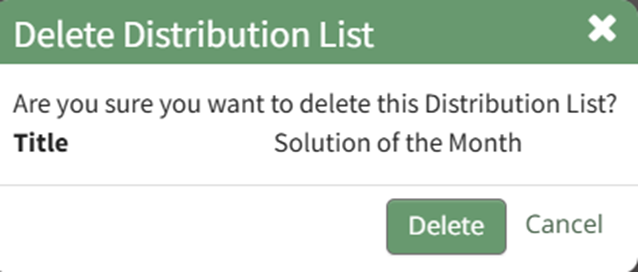
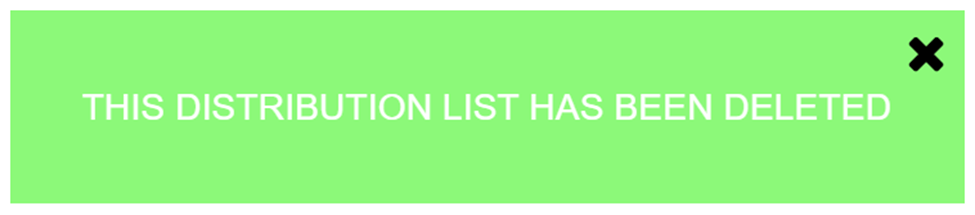
The modal identifies the title of the distribution list being deleted and states, “Are you sure you want to delete this Distribution List?” Click the “Delete” button and a pop up confirms that the Distribution List was deleted.
The distribution list has been removed from the pre-defined distribution list table.
How To: Edit a Dispatch
To edit a dispatch, go to the Home Page of the Dispatch Module. Click the ID or Title of the specific dispatch you wish to edit.

This opens the Dispatch Details Page.

Click the edit dispatch properties icon to the right of the dispatch status opening the Dispatch Properties Modal.

Edit the dispatch title, add/remove tags, change the dispatch status, indicate who has incident visibility, add notes or a footer for the distribution list.
Select the “Save” button and your edits have been saved.
How To: Edit a Dispatch Attachment
To edit a specific attachment on a dispatch, go to the Home Page of the Dispatch Module. Click the ID or Title of the specific dispatch whose attachment information you wish to edit.

This opens the Dispatch Details Page.

Hover your cursor over the attachment you wish to edit (in any section on the dispatch display page) and the edit icon will appear to the right of the attachment display name.
Select the edit the icon opening the Edit Modal. Make the desired changes and select the “Save” button for attachment changes to be processed.
How To: Edit a Pre-Defined Distribution List
To edit a pre-defined distribution list, go to the Distribution List Tab on the Settings Page of the Dispatch Module.

Selecting the three-dot icon to the right of the distribution list title you wish to edit will open the Pre-Defined Distribution List Table Context Menu.
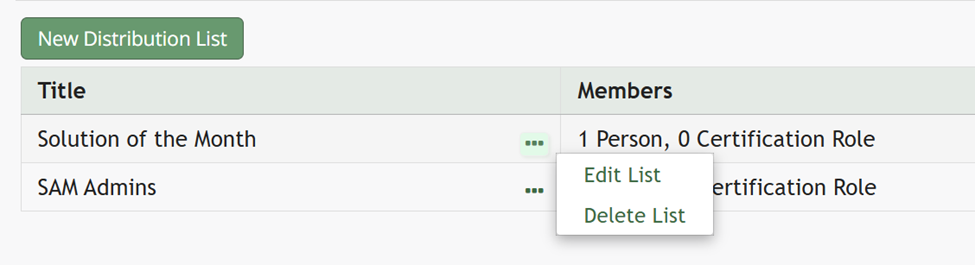
Select “Edit List” opening the Edit Distribution List Modal.
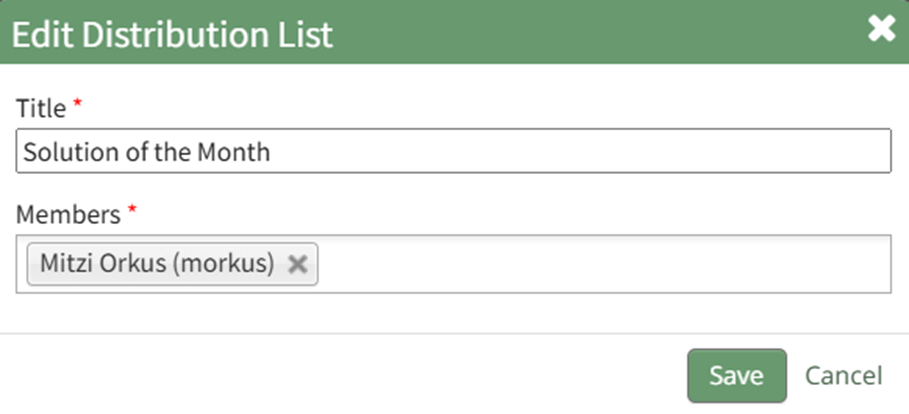
Edit the title or members of the distribution list as desired. Select the “Save” button. The edits made to the distribution list will now be visible in the Pre-Defined Distribution List Table.
How To: Edit Users and Certification Roles Available as Dispatch Approvers
To edit the users and certification roles that are available via dropdown menu as dispatch approvers, open the Approver Filtering Tab of the Settings Page in the Dispatch Module.
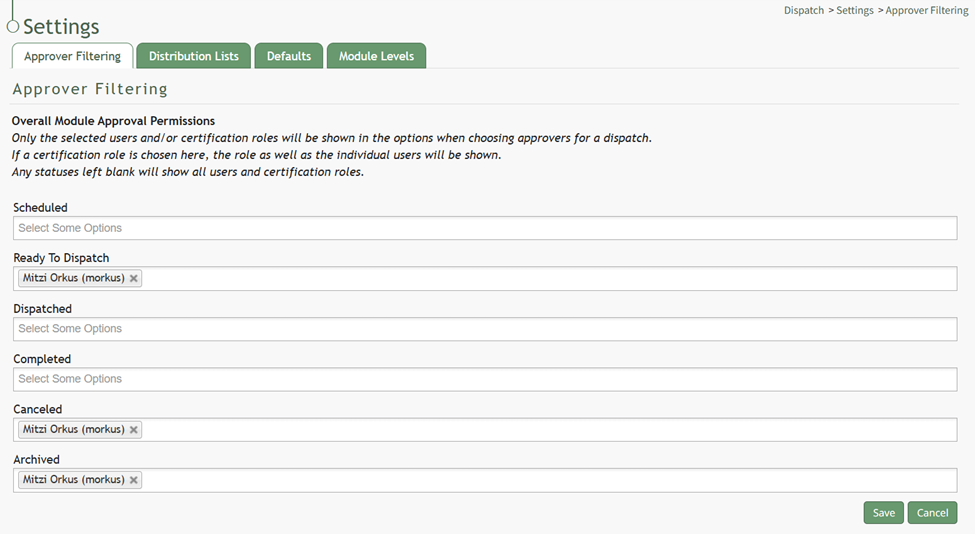
Click below the status to open the dropdown menu. Add People or Certification Roles as desired. If certification roles are selected, both the role and the users associated with it will be shown on the dropdown menu.
If the status is left blank, all users and certification roles will show on the dropdown menu.
Select the “Save” button when finished and a popup will confirm that the filter was saved.

The filter will remain this way until altered.
How To: Give Default Permission to Approve all Incidents
To give individuals, certification roles or access levels the ability to view all dispatch incidents, go to the Dispatch Module Settings Page Defaults Tab.
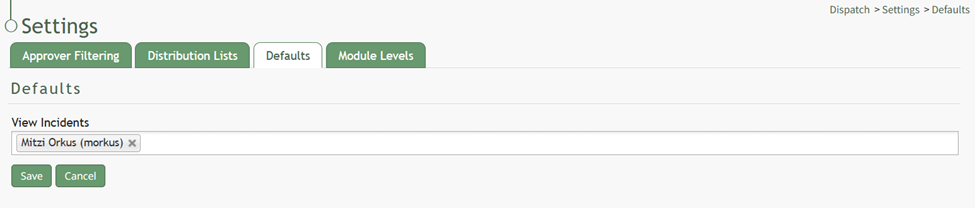
Placing your cursor in the text box opens a dropdown menu with all individuals users, certification roles, and access levels. Multiple selections can be made. If you would like all KAStrack users to have permission to view dispatch incidents, select “Everyone” as an option.
Select the “Save” button and a confirmation modal states, “Defaults Have Been Saved.”

How To: Include Document Attachments in Dispatch Orders
To include a document attachment with the Dispatch Order, go to the Home Page of the Dispatch Module. Click the ID or Title of the specific dispatch with the attachment you wish to delete.

This opens the Dispatch Details Page.

Click the gray paperclip to the left of the document name changing the paperclip color to dark blue.
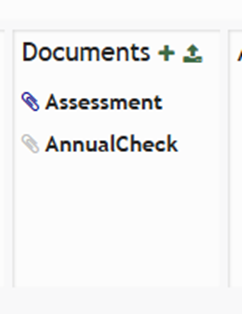
The selected file will now be included in the Dispatch Order.
How To: Indicate a Dispatch Incident
To indicate there was a dispatch incident, go to the Home Page of the Dispatch Module. Click the ID or Title of the specific dispatch you need to indicate an incident for.

This opens the Dispatch Details Page.

Hover the cursor over the itinerary activity. Select the clock icon to opening the Edit Activity Status Modal to edit start or finish information.

Select the “Incident” checkbox and click the “Save” button.
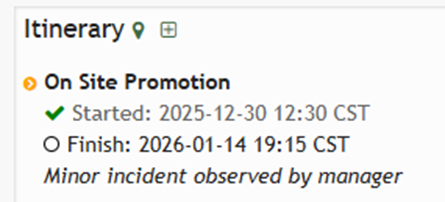
The yellow icon to the right of the Itinerary Activity title indicates that there was an incident.
How To: Send a Dispatch Order via Email
To send a dispatch order, go to the Home Page of the Dispatch Module. Click the ID or Title of the specific dispatch whose dispatch order you wish to send out.

This opens the Dispatch Details Page.

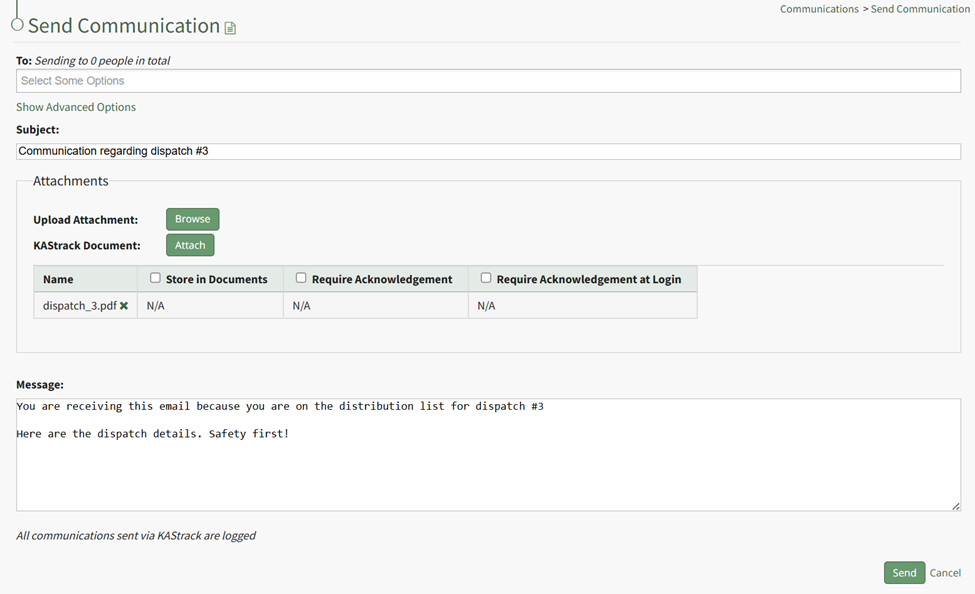
Click the envelope icon to the right of the dispatch status opening the Send Communications Page in the Communications Module.
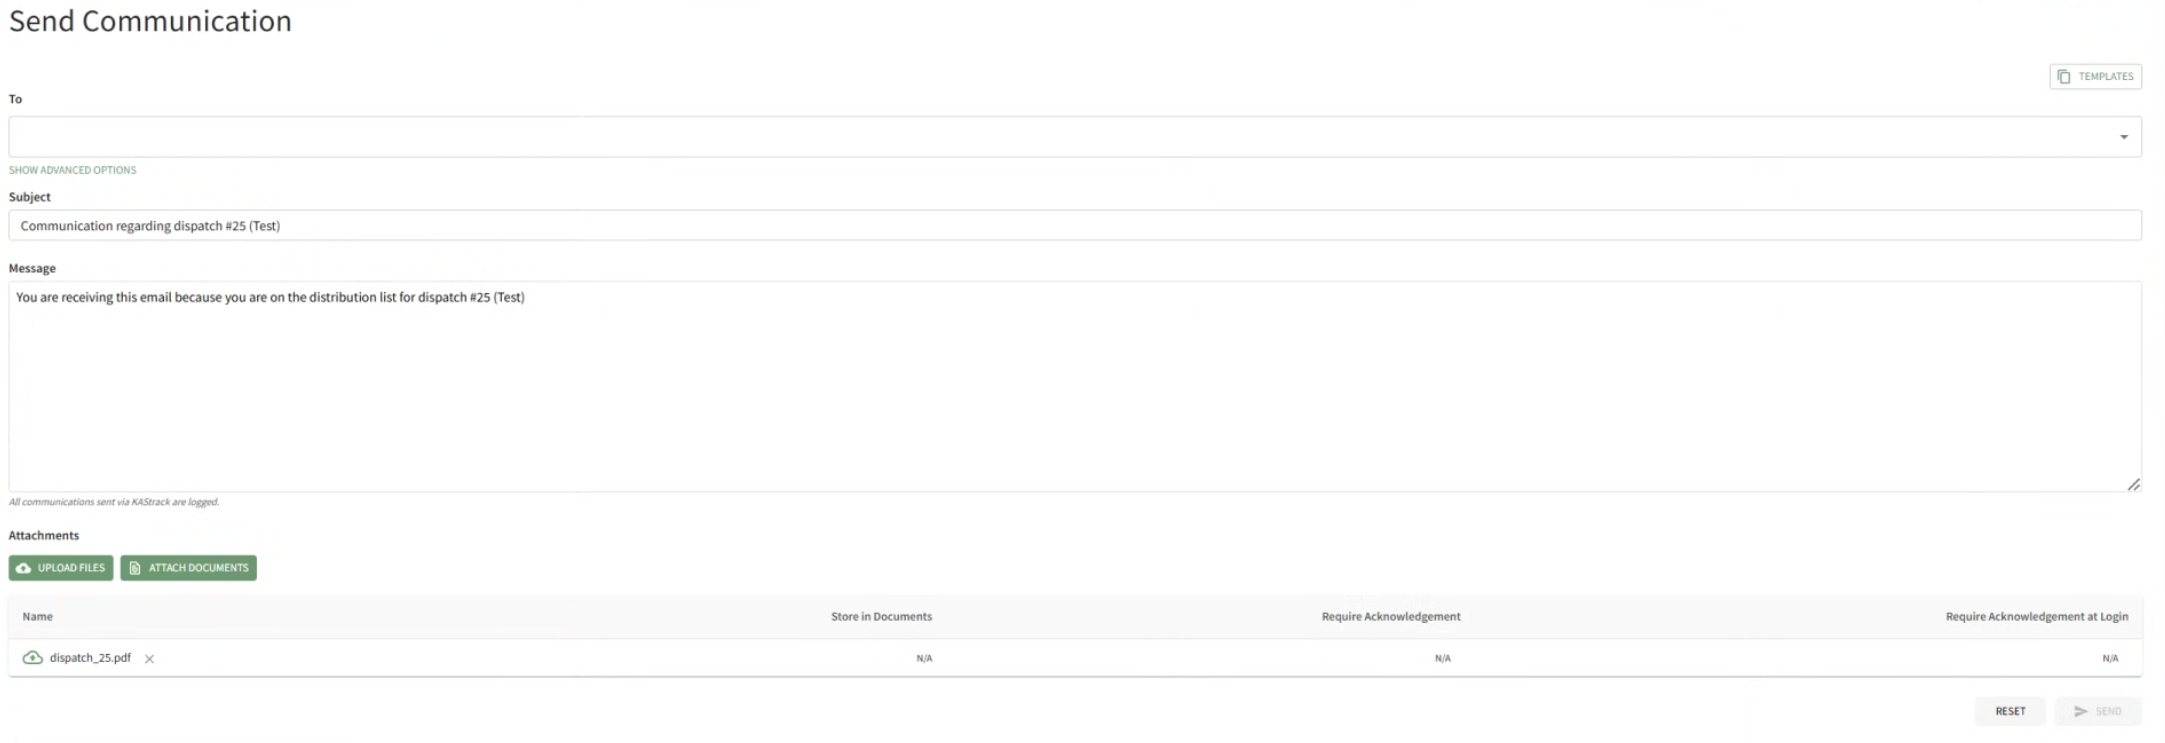
The distribution list for the dispatch has automatically been included in the To: field, A generic subject and message are included. The specific dispatch orders have already been attached to the email.
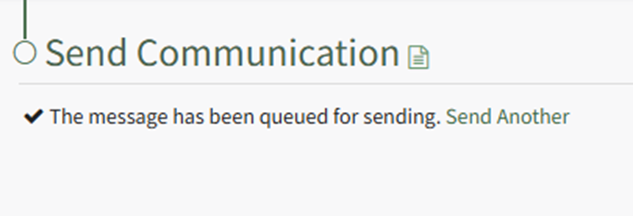
Select the “Send” button, and a check confirms that the message has been qued for sending.
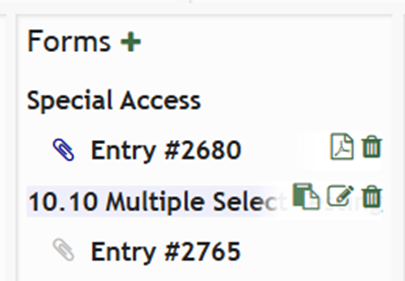
How To: Show Individual Form Entries on a Dispatch
To show individual form entries on a dispatch, go to the Home Page of the Dispatch Module. Click the ID or Title of the specific dispatch you want form entries to be visible on.

This opens the specified dispatch’s details page. Hover your cursor over the form whose entries you want to be visible, and three icons show.

Select the Edit Attachment Icon to the right of the form title, opening the Edit Forms Modal.
Select the “Allow Entries to be Automatically Attached” checkbox, and individual form entries will be included on the dispatch.
Selecting the PDF icon to the right of the entry opens the PDF with the entry’s information.
How To: Update Estimated Activity Status with Actual Date / Time
To update an estimated activity status with actual date and times, go to the Home Page of the Dispatch Module. Click the ID or Title of the specific dispatch whose activity status you wish to update.

This opens the Dispatch Details Page.

Select the clock icon to opening the Edit Activity Status Modal to edit start or finish information.
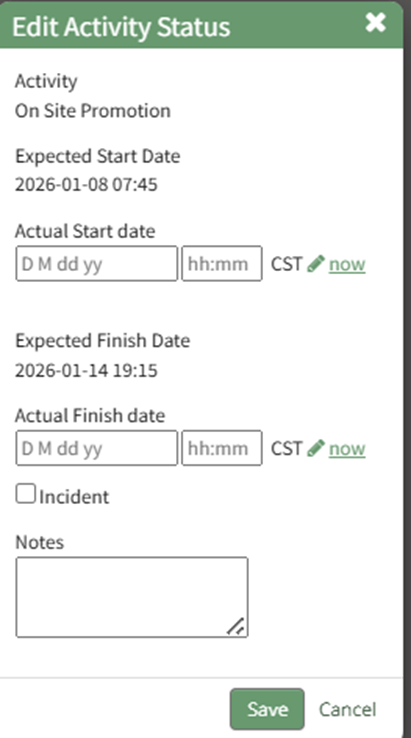
Edit start and/or finish dates, as well as any relevant activity notes. Select the “Save” button.
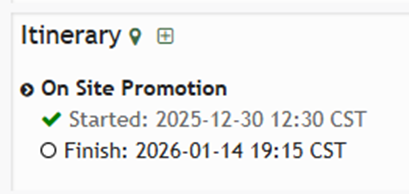
The checkmark indicates the actual start time has been entered on the dispatch details page.
How To: Update Waypoint Arrival/Departure Status
To update a waypoint with actual arrival/ departure data, go to the Home Page of the Dispatch Module. Click the ID or Title of the specific dispatch you need to indicate an incident for.
This opens this dispatch details page.
Select the flag icon on the header row to open the Update Itinerary Modal.
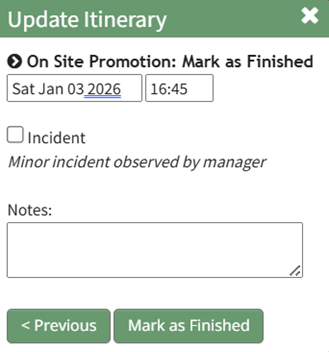
The current time/date are automatically input into the modal but can be edited if needed. Incidents and notes can be included.
Select the “Mark as Finished” modal and a confirmation pop up states, “Waypoint status has been updated."

How To: Upload a File as a Dispatch Document
To upload a PDF as a dispatch document, open the specific dispatch you wish to add a file to. Go to the Dispatch Module Home Page and alter the filter view as needed. Click the Dispatch Number or Title to open the specific dispatch page.

Files can be uploaded and added to a dispatch by selecting the upload icon to the right of the plus sign icon next to the Documents column header.

Selecting the Upload Icon opens the Upload File Modal. Select the “Choose File” button to upload the appropriate file from your personal device.
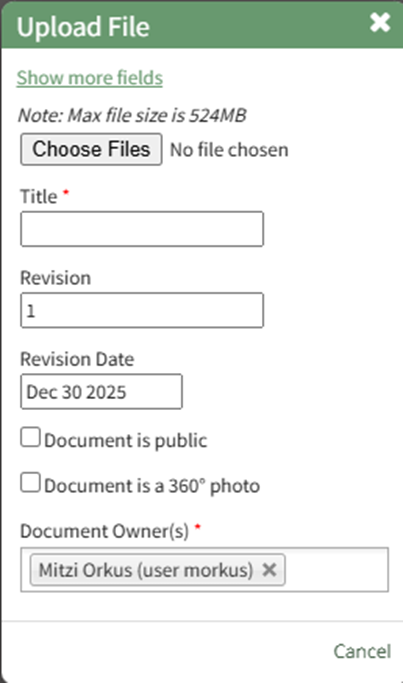
Input the File Title, revision number and revision date.
If the document is designated as public and available for anyone to access, select the “Document is public” checkbox.
If the file being uploaded is a 360 degree photo, select the “Document is a 360 degree photo” checkbox.
Indicate the document owners.
Select the “Save” button and a confirmation modal confirms the document was uploaded. It is now visible on the dispatch page in the documents column.
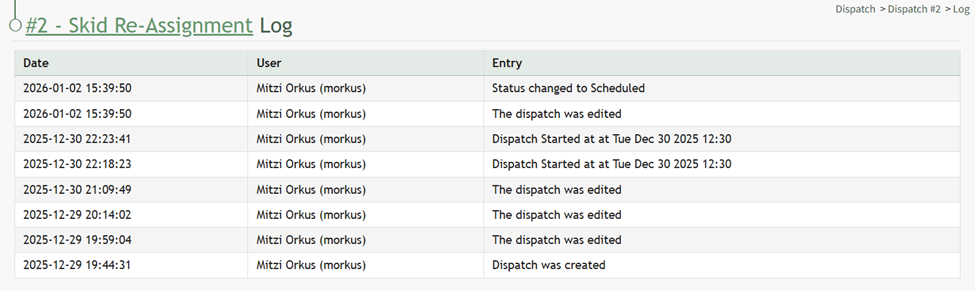
How To: View a Dispatch Log
To view a dispatch log, go to the Home Page of the Dispatch Module. Click the ID or Title of the specific dispatch whose read-only orders you wish to view.

This opens the specified dispatch’s detail page.
Click the book icon in the header row to open the Dispatch log showing all dispatch activity, along the with time/date stamp and the user who made the entry.

How To: View a Dispatch Order
To view a dispatch order, go to the Home Page of the Dispatch Module. Click the ID or Title of the specific dispatch whose dispatch order you wish to view.

This opens the Dispatch Details Page.

Click the PDF icon to the right of the dispatch status opening the View Document Modal, which displays the Dispatch Order.
The Dispatch Order can be downloaded and printed from this modal.
How To: View the Dispatch Orders PDF
To view a dispatch log, go to the Home Page of the Dispatch Module. Click the ID or Title of the specific dispatch whose read-only orders you wish to view.
This opens the specified dispatch’s detail page.

Click the book icon in the header row to open the Dispatch log showing all dispatch activity, along the with time/date stamp and the user who made the entry.
No comments to display
No comments to display