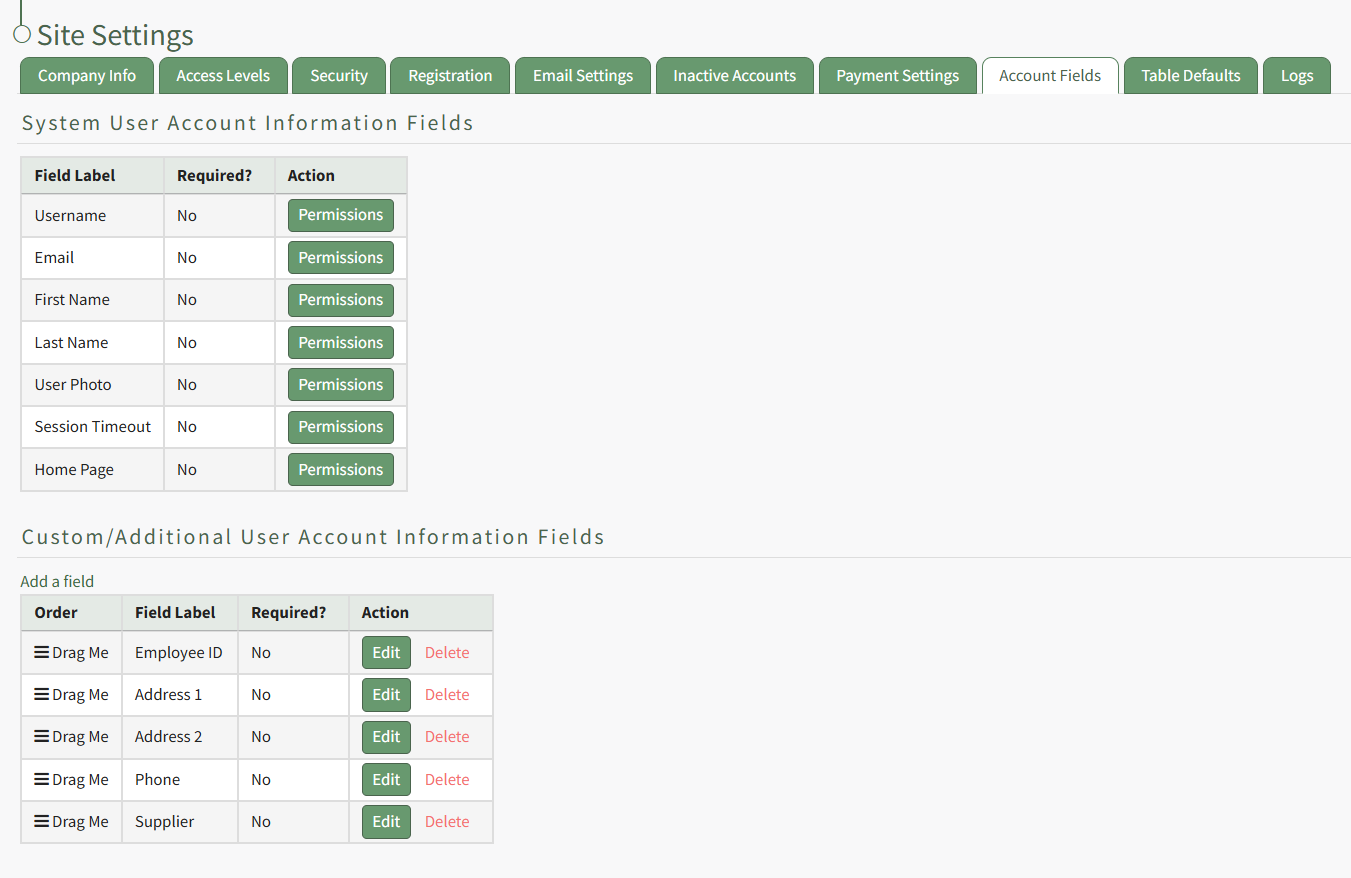
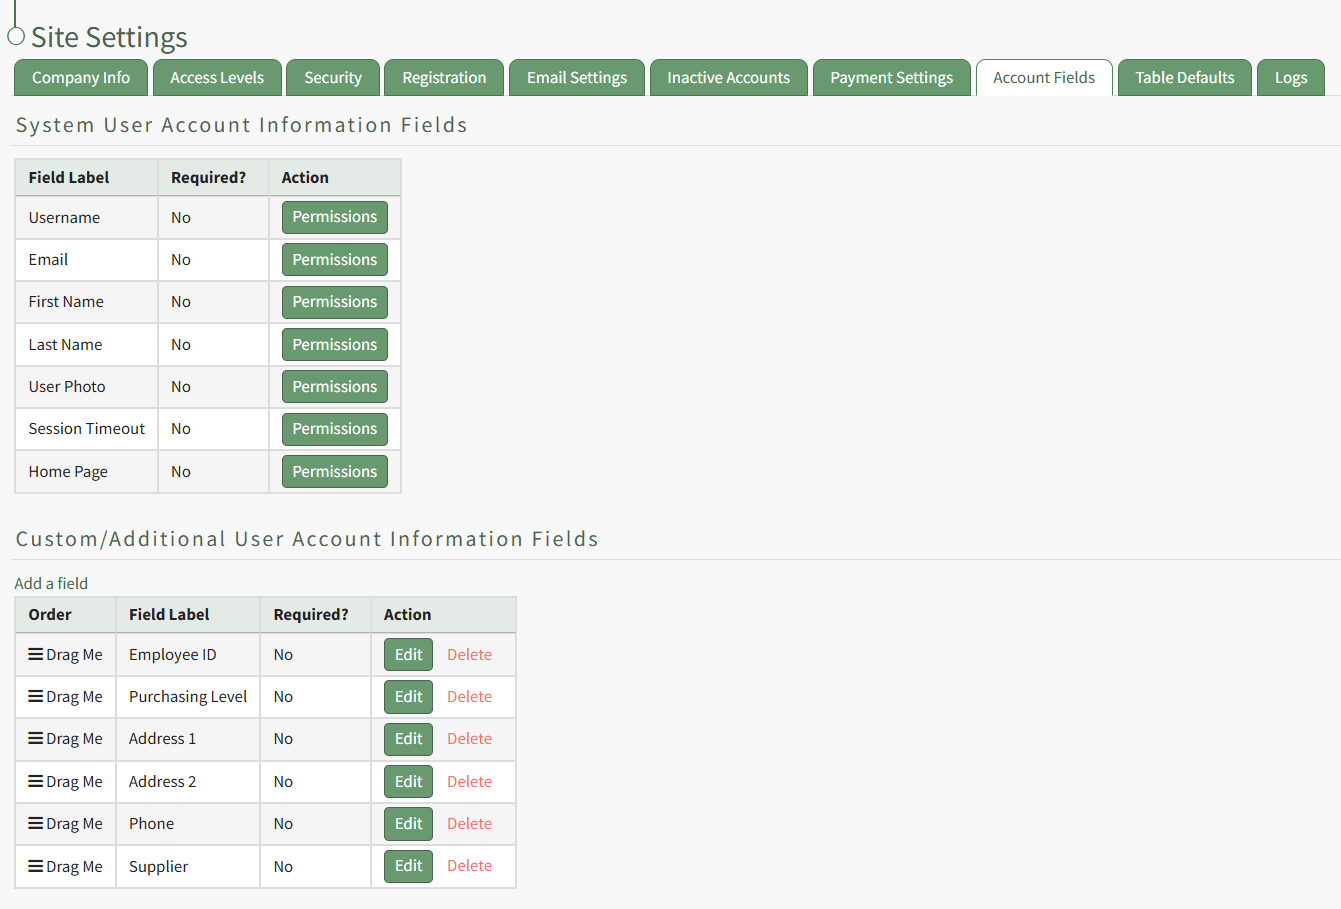
Account Fields Tab
The Account Fields Tab in the Site Settings Module shows the default fields used in tables in several modules in the KAStrack system and is broken into two groups: System User Account Information Fields and Custom/Additional User Account Information Fields. Permissions are set for these fields on the Account Fields Tab, and custom fields are added/edited/deleted there as well.
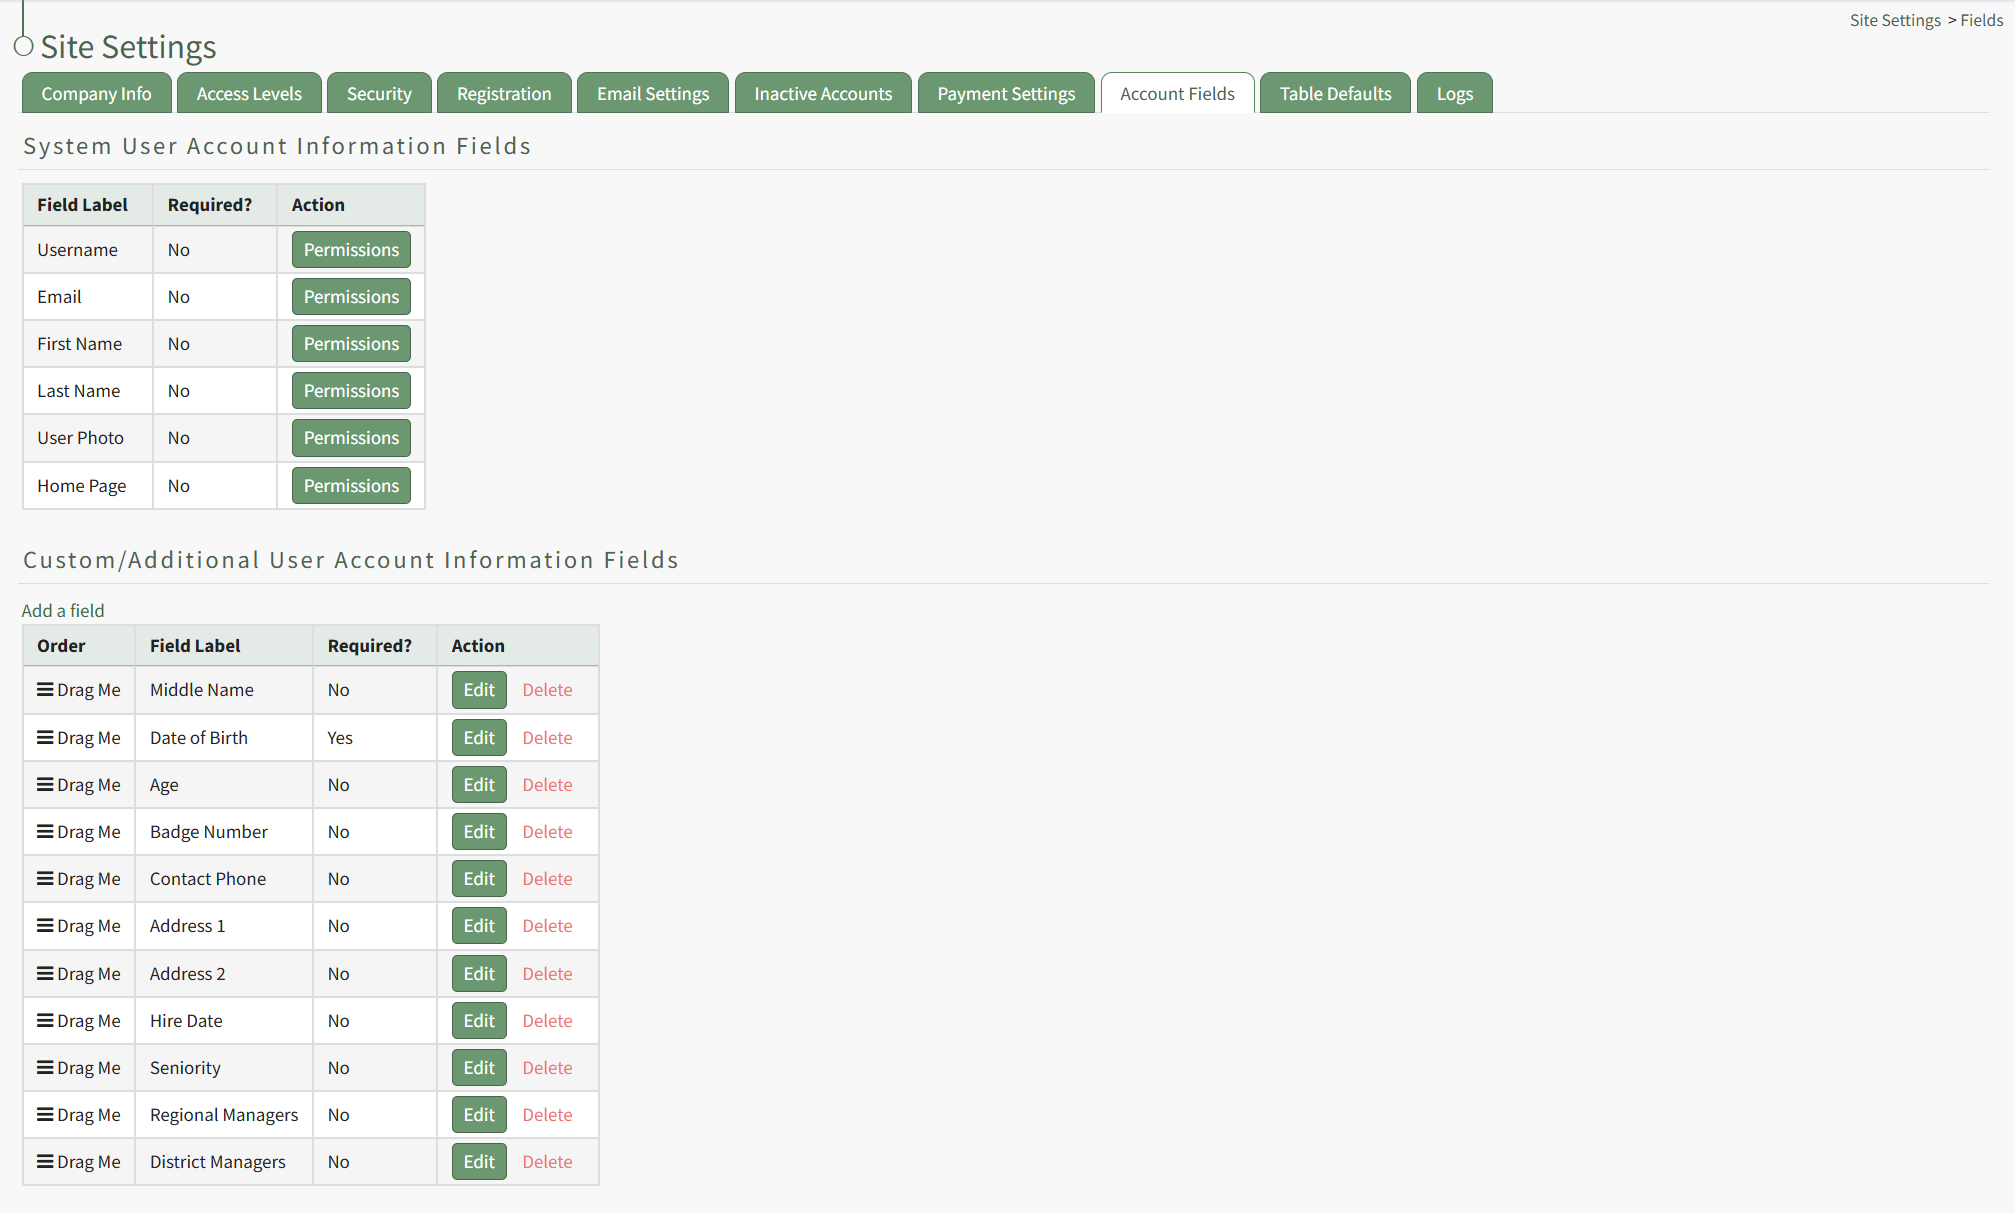
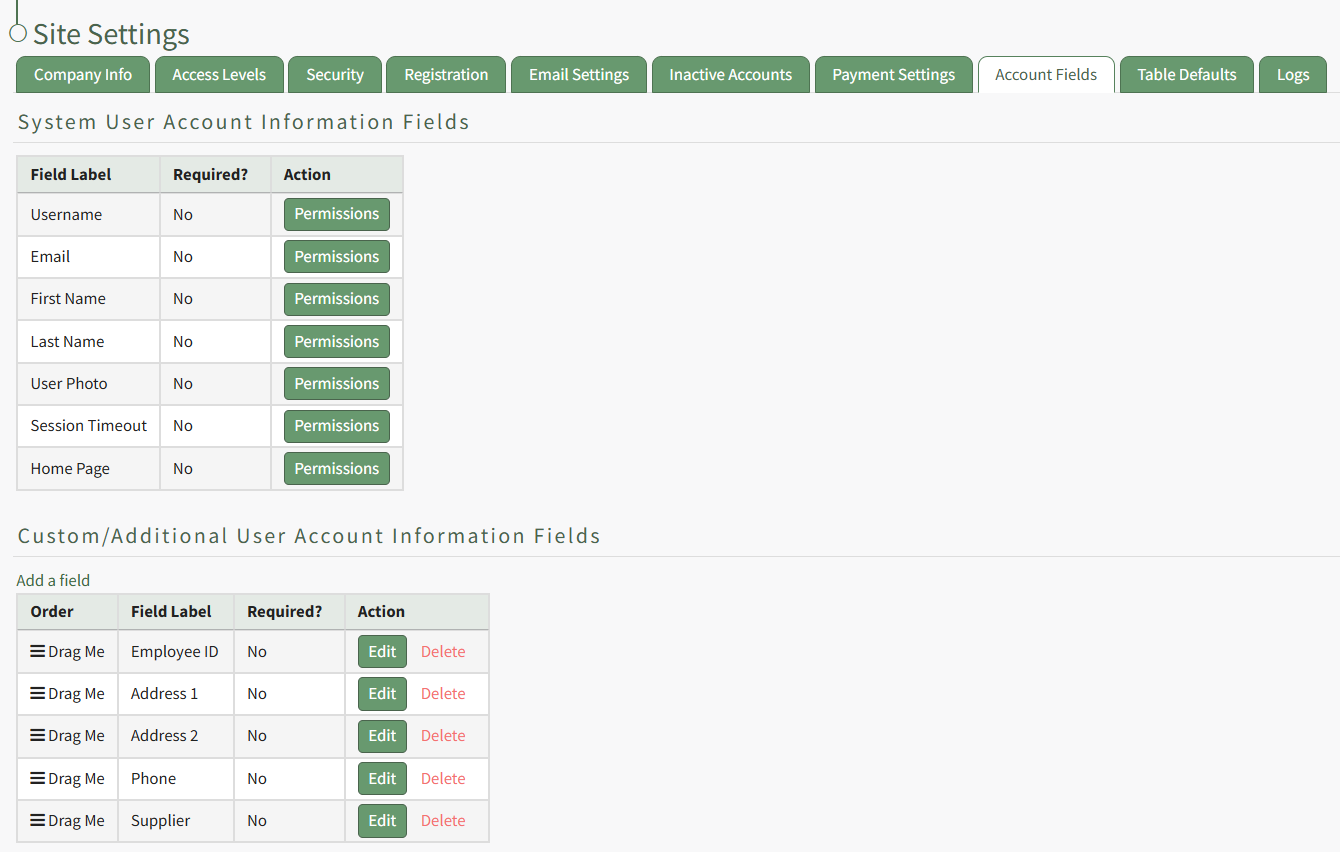
System User Account Information Fields
System User Account Fields are default fields that cannot be edited or deleted because they are essential for software functionality and are referenced in various places across KAStrack.

Permissions for system user account information fields can be changed for different access levels.
Session Timeout is a KAStrack Admin managed setting (not an Access Level admin) that coincides with security best practices. Users will receive a 20-minute warning, and a session will timeout after 30 minutes of inactivity. When a user logs back into the system, they will be taken back to the page they were on when the session timeout occurred. To alter this timing, please contact you KAStrack account specialist or tech support.
How To: Edit Permissions for System User Account Information Fields
To edit the permissions associated with system user account information fields, open the Account Fields Tab in the Site Settings Module from the Main Menu.
System User Account Information Fields are displayed in the first table. Select the Permissions button in the Action column opening the Edit Field Restrictions Modal.
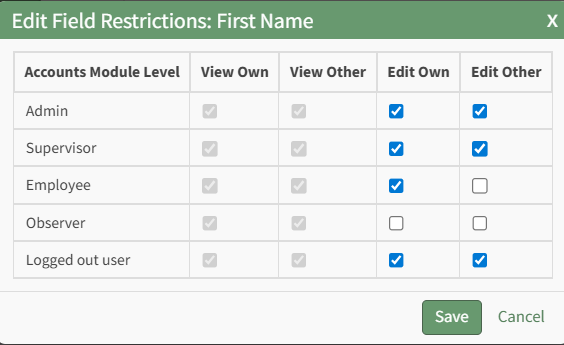
Selecting a checkbox will give permission to the module level. Deselecting the checkbox will remove the permission from the module level.
Select the Save button and return to the Account Fields Tab.
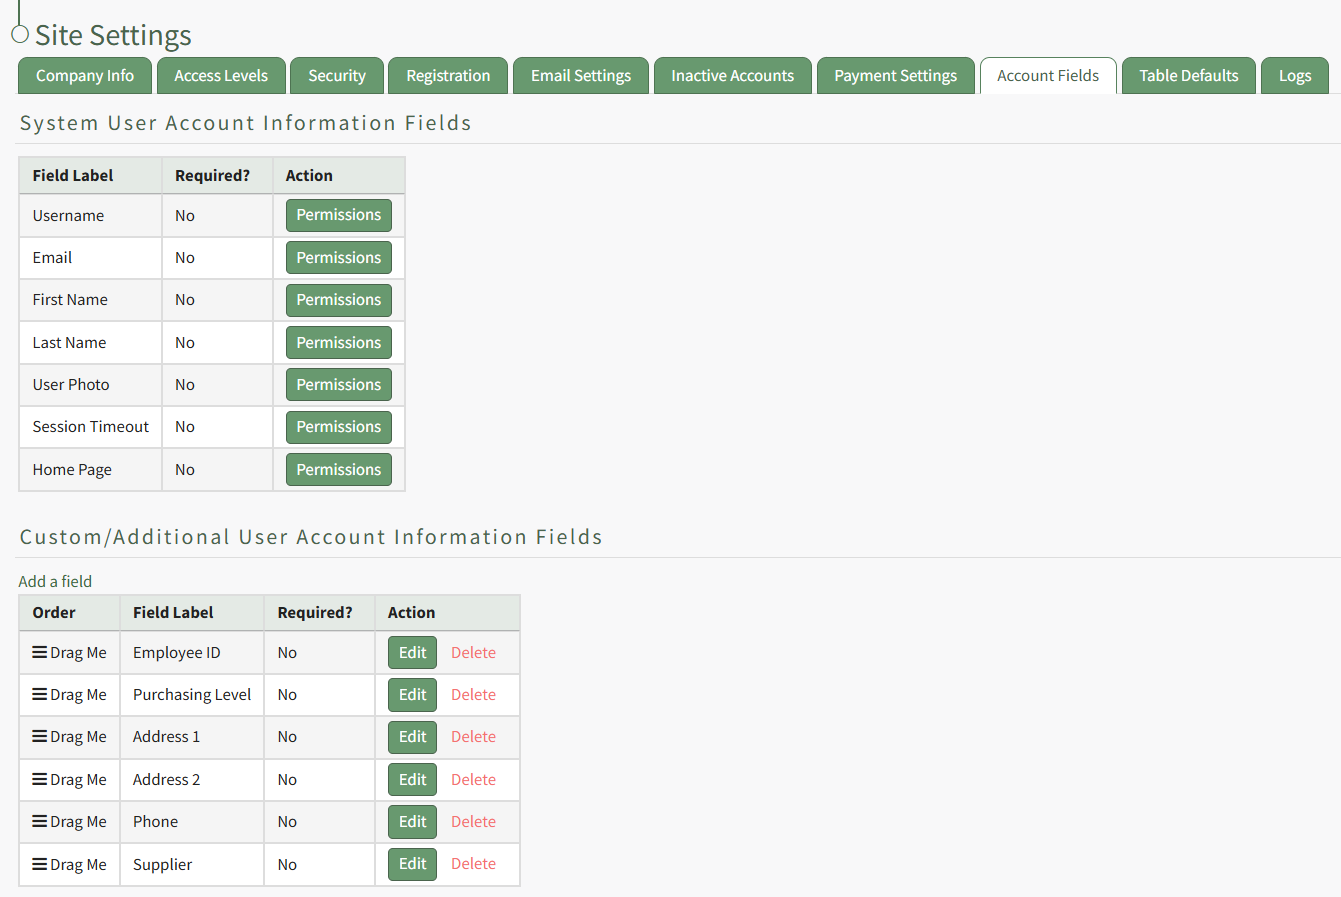
Custom/Additional User Account Information Fields
Custom/Additional User Account Information Fields can be edited or deleted because they are not essential to the KAStrack system and can be removed without issue.
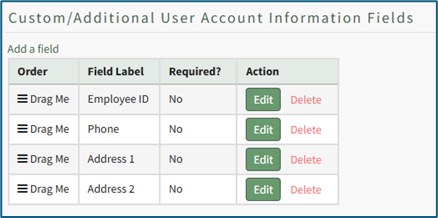
A new KAStrack subdomain installation will have additional information fields already created: Employee ID, Phone, Address 1 and Address 2. These information fields can be edited to your preference.
How To: Add a Custom/Additional User Account Information Field
To add a user account information field, open the Account Fields Tab in the Site Settings Module from the Main Menu.
Click the "Add a Field" clickable link above the Custom / Additional User Account Information Fields opening the Add Field Modal.
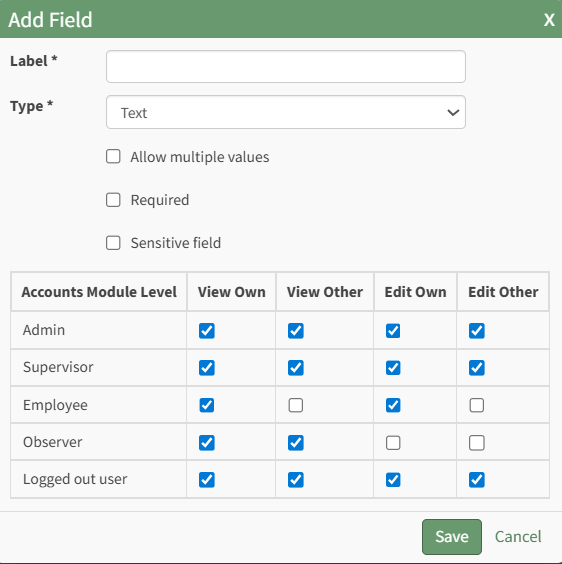
Input the label for the field.
Select the field type (text or email) from the dropdown menu.
Selecting the checkbox enables customization to "Allow multiple values," make the field "Required," or make it a "Sensitive Field."
Designating the field as a "Sensitive Field" allows an extra step in form security when integrating these fields within the Form module. The Form Designer must explicitly choose when they wish to use a sensitive field.
The Permissions Table determines who can view / edit their own and other user's fields. Selecting the checkbox gives the individual the specified permission. Deselecting the checkbox removed the permission.
Select the "Save" button and the custom field now shows in the table.
Use the Drag Me icon to drag and drop the field into your desired position of choice.
How To: Edit a Custom/Additional User Account Information Field
To edit a custom user account information field, open the Account Fields Tab in the Site Settings Module from the Main Menu.
Custom Fields show in the Additional User Account Information Fields Table. Click the Edit button in the Action column of the table opening the Edit Field Modal.
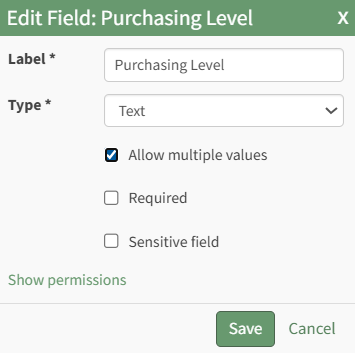
Make the desired changes and select the Save button, returning to the Account Fields Tab.
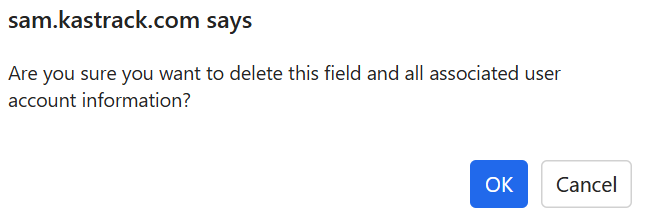
How To: Delete a Custom/Additional User Account Information Field
To delete a custom user account information field, open the Account Fields Tab in the Site Settings Module from the Main Menu.
Custom account fields show in the Additional User Account Information Table. Select the clickable "Delete" link in the actions column to the right of the field you wish to delete. This opens the Field Deletion Confirmation Modal which states, "Are you sure you want to delete this field and all associated user account information?"
No comments to display
No comments to display