Understanding Forms
Creating a New Form
When new forms are created, a form creator has options regarding basic form settings, advanced form settings, and form styling options. Reference the How To: Create a New Form for a detailed explanation of each setting.
How To: Create a New Form
To create a new form, open the Home Page in the Forms Module from the Main Menu and select the Create Form button beneath the page header.

This will open the New Form Modal.

Input the Form Title (a required field), form notes, and any open/permissive/restrictive tags to be associated with the form.
There are three additional sections to the New Form Modal that expand when clicked with additional options for customization. Modal images and explanations of each input are included below.
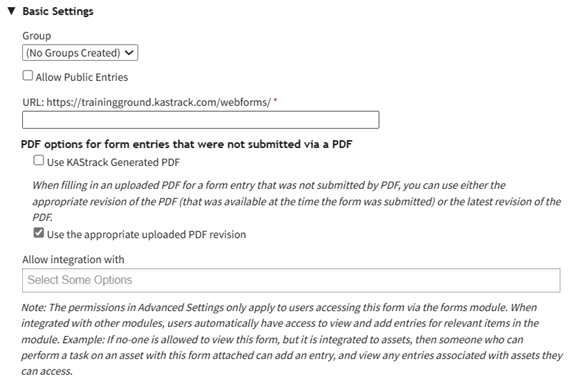
Basic Settings Section
New Form Modal: Basic Settings Section Explanation | ||
Modal Input | Explanation | |
Group | A dropdown menu will list all existing form groups. The form will automatically be placed in the group selected. | |
Allow Public Entries Checkbox | If the checkbox is selected, public entries (individuals not registered with KAStrack) will be allowed to submit form entries. | |
URL Link | A URL Link is used to share the form publically. KAStrack will autofill the URL Link with the form title, but this can be customized if desired. You cannot use spaces or symbols in the URL link. They will replaced with a hypen if used. | |
The next two checkboxes are specific to the PDF options for form entries that are not submitted via a PDF. To understand which option is better for this specific form, be sure to read about the relationship between PDFs and Forms. | ||
Use KAStrack Generated PDF | If you have a PDF entry on file but do not want the downloaded form entry to utilize the customized PDF form, select this checkbox and KAStrack will use the generic PDF format. | |
Use the Appropriate Uploaded PDF Revision | If you have a PDF entry on file and want the downloaded form entry to utilize the customized PDF form, select this checkbox and KAStrack will use the most recent version of the PDF submitted. | |
Allow Integration With | Allow integrations with is a dropdown menu that lists all modules you can use a form for. Selecting a module here will enable this form to be visible in the modules selected. Possible uses are listed below. | |
Module | Purpose | |
Assets | Attach to Task | |
Attendance | Integrate with the Attendance Log Module | |
Datbase | Reference from Database | |
Dispatch | Include in a Dispatch | |
Documents | Add to Photo | |
Forms | Reference from a Form | |
Grid | Integrate with the Grid Module | |
Kanban | Integrate with the Kanban Module | |
People | Use as activity for certification | |
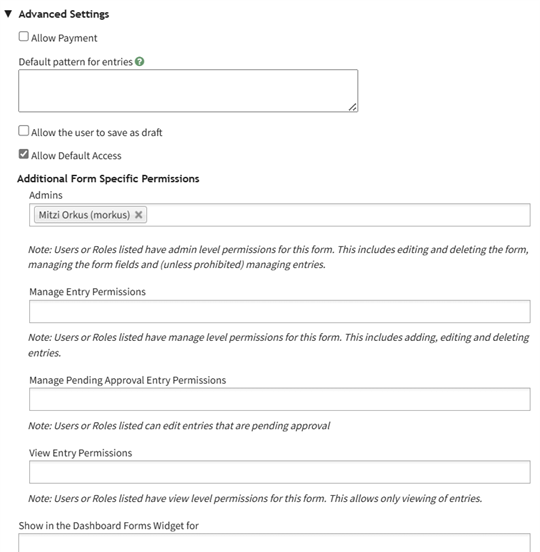
Advanced Settings Section
New Form Modal: Advanced Settings Section Explanation | ||
Modal Inputs | Explanation | |
Allow Payment Checbox (Expands when selected) | Payment Profile | Select “All Enabled Configurations” from the dropdown menu for payments to be allowed. |
Payment Description | This description is what will show on a payment receipt. | |
Default Pattern for Entries | This textbox uses mail merge fields. | |
Allow the User to Save AS Draft Checkbox (Expands when selected) | Allow Logged Out User to Save as a Draft | Selecting this checkbox will allow logged out users and public entries to save their response as a draft and come back to the form (on the same device). |
Validate Fields when Saving as Draft | Fields with validation don’t validate on a draft, so inputting fields here tells the system to validate fields when the draft is saved. | |
Save Draft Button Text | The form creator can customize the text on the Save button. | |
Auto Save | When auto-save is enabled, any edits made to a field will automatically be saved. When auto-save is disabled, the information will only be saved when the save draft button is clicked. | |
Allow Default Access Checkbox | When Selected | The form will follow module level permissions in regards to what access an individual will have. |
If allow default access is not selected, the additional form specific permissions are now required. The system will ignore module level distinctions for this form and will be guided by the form specific permissions listed below. | ||
Admins | A checkbox allows for admins to be prohibited from viewing entries. Users or roles listed here will have admin level permissions for this form. This includes editing and deleting the form, managing the form fields and (unless prohibited) managing entries. | |
Manage Entry Permissions | Users or roles listed here have manage level permissions for this form. This includes adding, editing and deleting entries. | |
Manage Pending Approval Entry Permissions | Users or roles listed here can edit entries that are pending approval. | |
Show in the Dashboard Forms Widget | Users and certification roles selected here will show this form in the Dashboard Forms Module Summary Widget. | |
Form Styling Section

New Form Modal: Form Styling Section | ||
Modal Inputs | Explanation | |
Save Button Text | Change the verbiage on the save button by inputting other text here. | |
Cancel Button Text | Change the verbiage on the cancel button by inputting other text here. | |
Submission Message | Change the verbiage on the form submission message by inputting other text here. | |
Show Green Checkmark Checkbox | Selecting the show green checkmark with submission message checkbox will show a green checkmark to the left of the submission message when a form is submitted. | |
Show the Form Title Checkbox | Select the Show the Form Title Checkbox will show the form title for a logged-out entry. This does not impact a system, modal based entry. | |
Apply Whole Form SCSS to | Logged Out Only | Select “Logged Out Only” if the styling doesn’t correspond with a popup modal or the regular form page. This would result is SCSS styling only applies to public entries. |
Logged In Only | Select “Logged In Only” if you only want to apply the SCSS formatting to the logged in, internal users. | |
Always | Selecting “Always” applies the SCSS formatting that has been established in both internal and external forms. | |
SCSS for Whole Form | This is the textbox where scripting language should be input, that allows for greater customization than what is generally available. | |
Select the Save button on the New Form Modal after customizing your form and the system will direct you to the form's Fields Tab where you can begin to input Form fields.
How To: Import Fields from a PDF Field Import
Importing fields from a PDF Field Import has multiple purposes. Not only will the form fields be generated through this process, the PDF will also be saved by the system, so that future form entries can be downloaded into this PDF, allowing for customizable outputs.
A form must have already been created with no fields added for this method to work. If a field has already been added to the form, you are no longer able to bulk import form field names from a PDF Field Import. You are now required to enter each field name individually. Regardless, you can still upload a PDF Form that the system will use for future form entry downloads.
How To: Create a Form
To create a new form, open the Home Page in the Forms Module from the Main Menu and select the Create Form button beneath the page header.
This will open the New Form Modal.
Input the Form Title (a required field), form notes, and any open/permissive/restrictive tags to be associated with the form.
There are three additional sections to the New Form Modal that expand when clicked with additional options for customization. Modal images and explanations of each input are included below.
Basic Settings Section
New Form Modal: Basic Settings Section Explanation | ||
Modal Input | Explanation | |
Group | A dropdown menu will list all existing form groups. The form will automatically be placed in the group selected. | |
Allow Public Entries Checkbox | If the checkbox is selected, public entries (individuals not registered with KAStrack) will be allowed to submit form entries. | |
URL Link | A URL Link is used to share the form publically. KAStrack will autofill the URL Link with the form title, but this can be customized if desired. You cannot use spaces or symbols in the URL link. They will replaced with a hypen if used. | |
The next two checkboxes are specific to the PDF options for form entries that are not submitted via a PDF. To understand which option is better for this specific form, be sure to read about the relationship between PDFs and Forms. | ||
Use KAStrack Generated PDF | If you have a PDF entry on file but do not want the downloaded form entry to utilize the customized PDF form, select this checkbox and KAStrack will use the generic PDF format. | |
Use the Appropriate Uploaded PDF Revision | If you have a PDF entry on file and want the downloaded form entry to utilize the customized PDF form, select this checkbox and KAStrack will use the most recent version of the PDF submitted. | |
Allow Integration With | Allow integrations with is a dropdown menu that lists all modules you can use a form for. Selecting a module here will enable this form to be visible in the modules selected. Possible uses are listed below. | |
Module | Purpose | |
Assets | Attach to Task | |
Attendance | Integrate with the Attendance Log Module | |
Datbase | Reference from Database | |
Dispatch | Include in a Dispatch | |
Documents | Add to Photo | |
Forms | Reference from a Form | |
Grid | Integrate with the Grid Module | |
Kanban | Integrate with the Kanban Module | |
People | Use as activity for certification | |
Advanced Settings Section
New Form Modal: Advanced Settings Section Explanation | ||
Modal Inputs | Explanation | |
Allow Payment Checbox (Expands when selected) | Payment Profile | Select “All Enabled Configurations” from the dropdown menu for payments to be allowed. |
Payment Description | This description is what will show on a payment receipt. | |
Default Pattern for Entries | This textbox uses mail merge fields. | |
Allow the User to Save AS Draft Checkbox (Expands when selected) | Allow Logged Out User to Save as a Draft | Selecting this checkbox will allow logged out users and public entries to save their response as a draft and come back to the form (on the same device). |
Validate Fields when Saving as Draft | Fields with validation don’t validate on a draft, so inputting fields here tells the system to validate fields when the draft is saved. | |
Save Draft Button Text | The form creator can customize the text on the Save button. | |
Auto Save | When auto-save is enabled, any edits made to a field will automatically be saved. When auto-save is disabled, the information will only be saved when the save draft button is clicked. | |
Allow Default Access Checkbox | When Selected | The form will follow module level permissions in regards to what access an individual will have. |
If allow default access is not selected, the additional form specific permissions are now required. The system will ignore module level distinctions for this form and will be guided by the form specific permissions listed below. | ||
Admins | A checkbox allows for admins to be prohibited from viewing entries. Users or roles listed here will have admin level permissions for this form. This includes editing and deleting the form, managing the form fields and (unless prohibited) managing entries. | |
Manage Entry Permissions | Users or roles listed here have manage level permissions for this form. This includes adding, editing and deleting entries. | |
Manage Pending Approval Entry Permissions | Users or roles listed here can edit entries that are pending approval. | |
Show in the Dashboard Forms Widget | Users and certification roles selected here will show this form in the Dashboard Forms Module Summary Widget. | |
Form Styling Section
New Form Modal: Form Styling Section | ||
Modal Inputs | Explanation | |
Save Button Text | Change the verbiage on the save button by inputting other text here. | |
Cancel Button Text | Change the verbiage on the cancel button by inputting other text here. | |
Submission Message | Change the verbiage on the form submission message by inputting other text here. | |
Show Green Checkmark Checkbox | Selecting the show green checkmark with submission message checkbox will show a green checkmark to the left of the submission message when a form is submitted. | |
Show the Form Title Checkbox | Select the Show the Form Title Checkbox will show the form title for a logged-out entry. This does not impact a system, modal based entry. | |
Apply Whole Form SCSS to | Logged Out Only | Select “Logged Out Only” if the styling doesn’t correspond with a popup modal or the regular form page. This would result is SCSS styling only applies to public entries. |
Logged In Only | Select “Logged In Only” if you only want to apply the SCSS formatting to the logged in, internal users. | |
Always | Selecting “Always” applies the SCSS formatting that has been established in both internal and external forms. | |
SCSS for Whole Form | This is the textbox where scripting language should be input, that allows for greater customization than what is generally available. | |
Select the Save button on the New Form Modal after customizing your form and the system will direct you to the form's Fields Tab where you can begin to input Form fields.
How To: Import Fields from a PDF Field Import
{{@400}}
How To: Import Form Fields from a CSV File
{{@402}}
How To: Upload a PDF Form
{{@408}}
How To: Add a Field to a Form
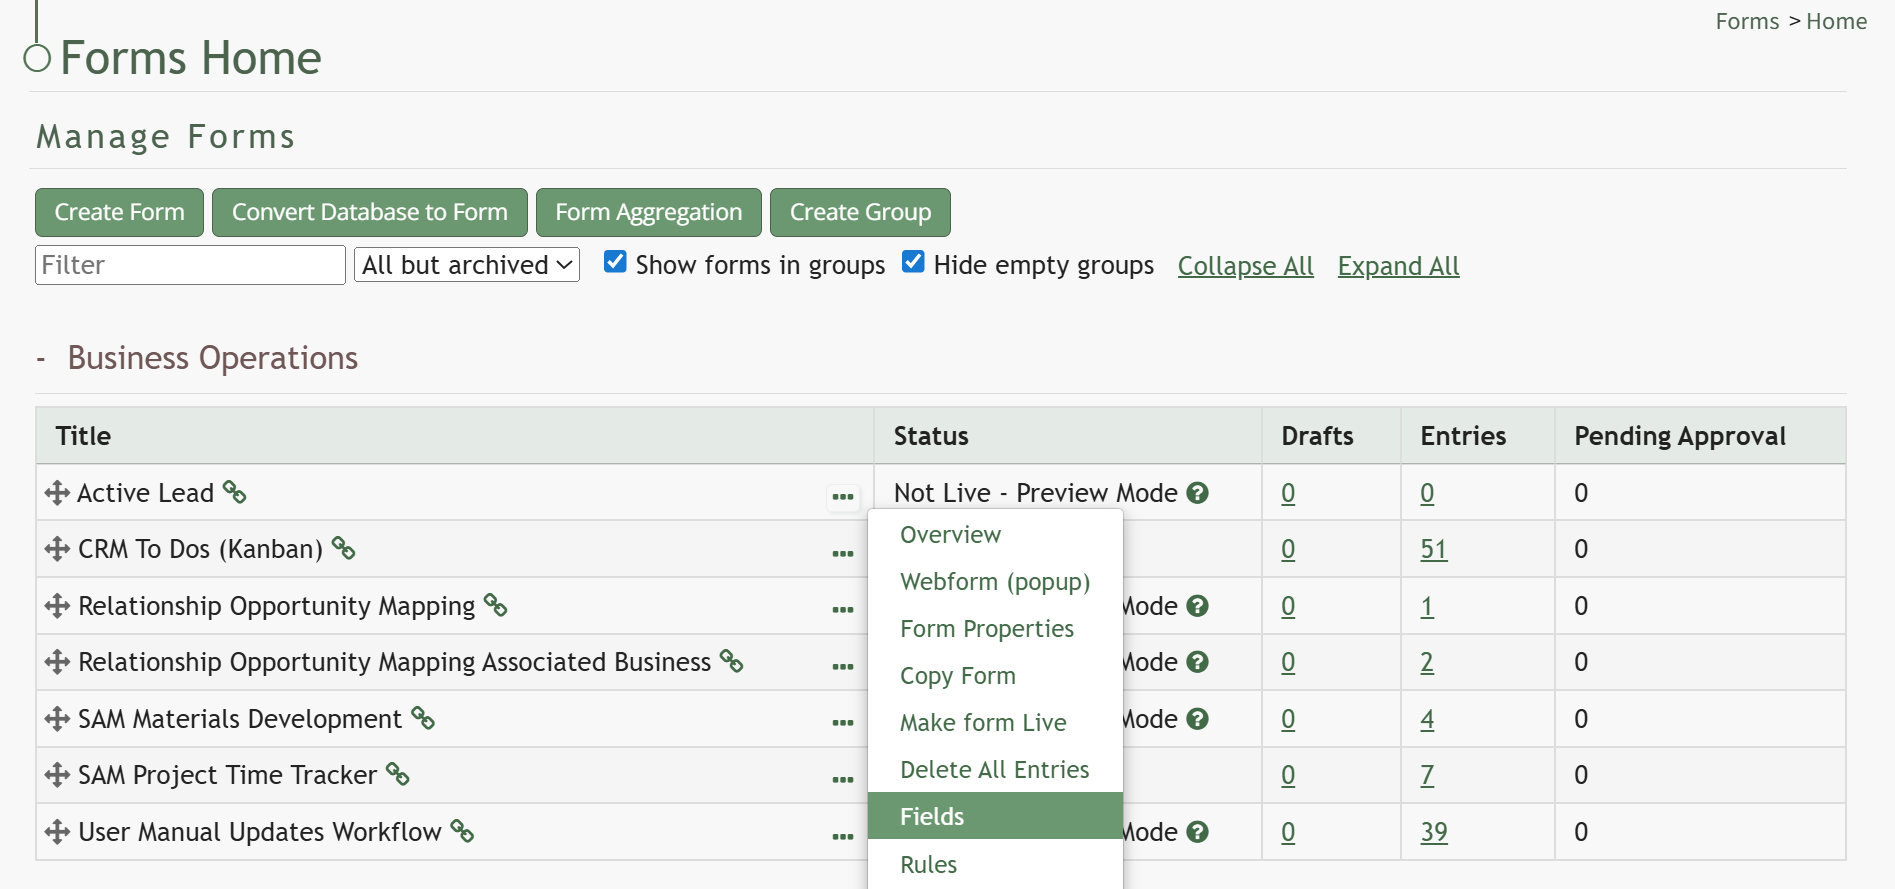
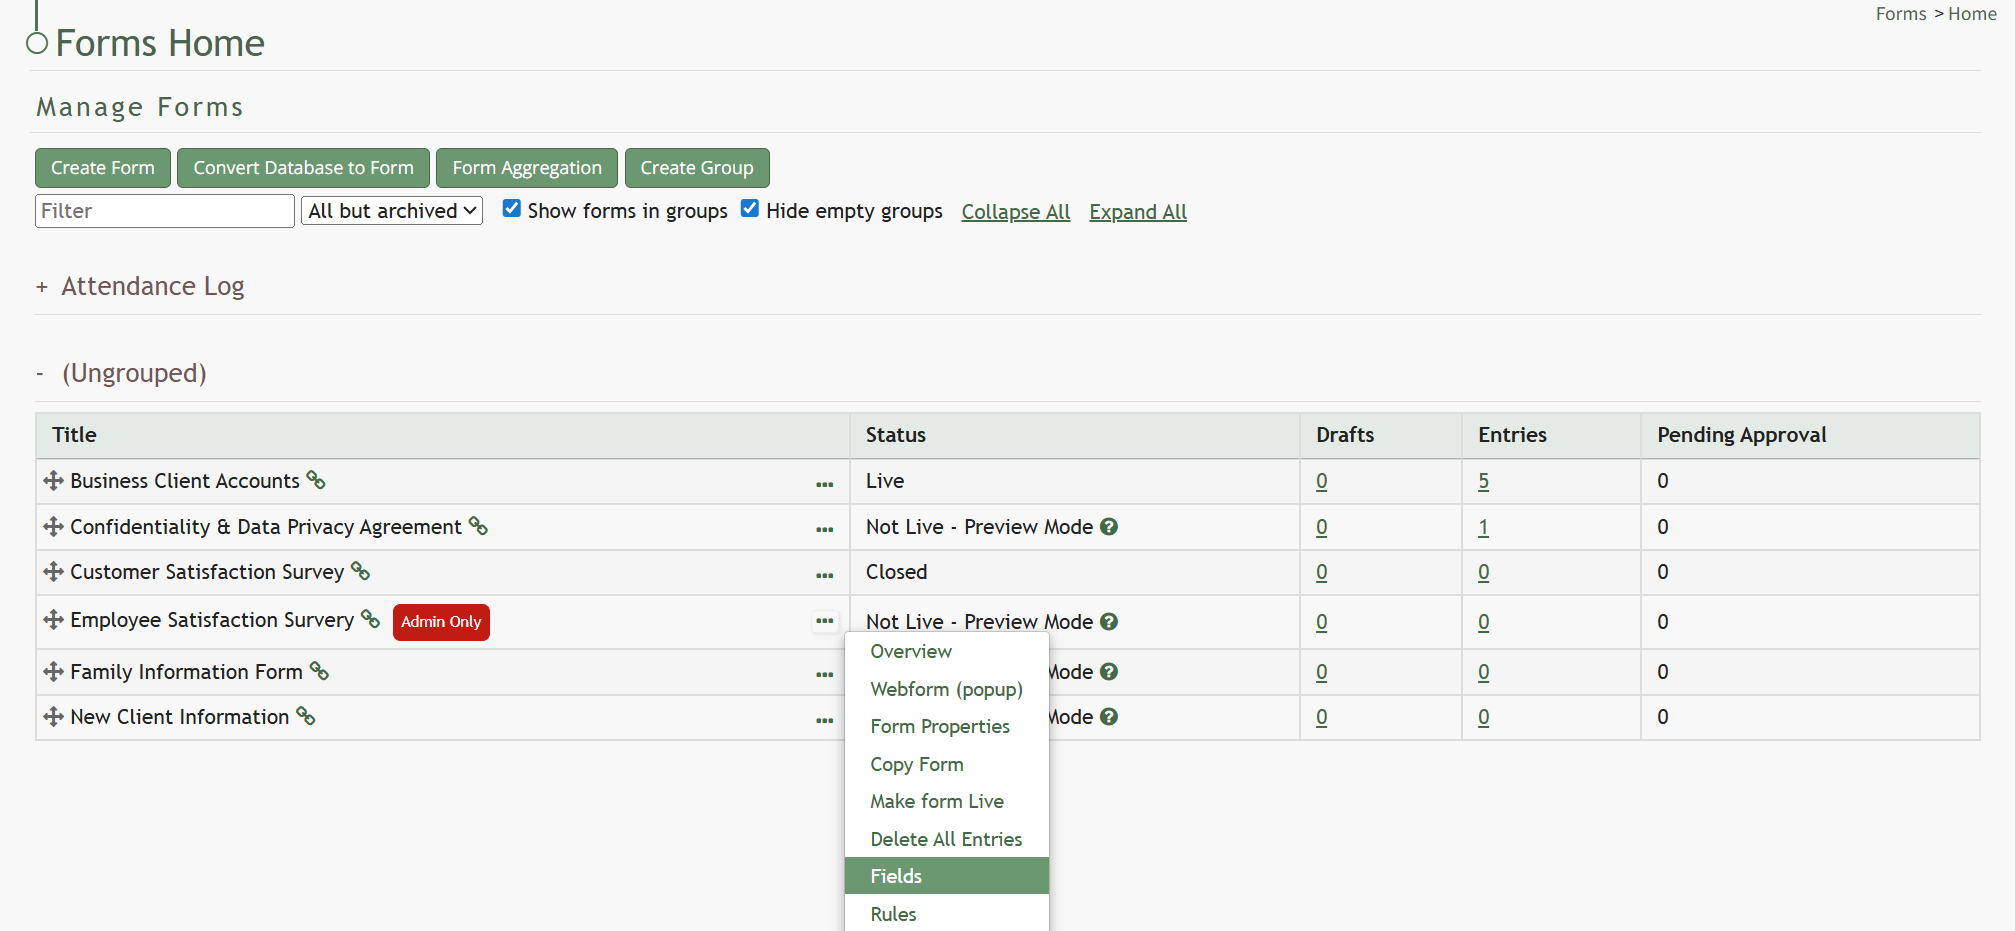
To add a field to a form, go to the Home Page of the Forms Module. . Click the three-dot icon to the right of the form title that you want to add a field to opening the Form context menu. Select “Fields”.
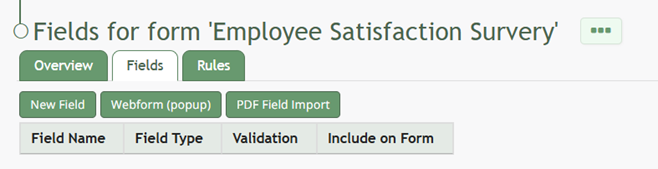
This opens the Fields Tab for the specific form of interest.
There are two ways to add an individual field to the Fields Table from here. Click the “New Field” button opening the New Form Field Modal.
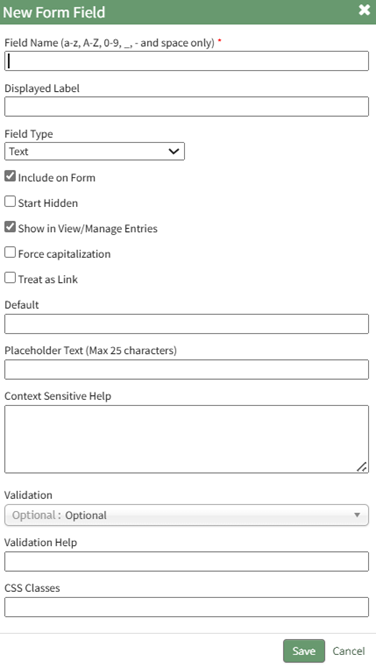
The creation of a new field will always require you to enter a field name. Include an input for the displayed label and select the field type from a dropdown menu. The inputs on the New Form Field Modal will vary based on the Field Type.
Possible field types in the Forms Module include Form Fields, Formatting Fields, Utility Fields, Account Fields, and Reference a Database Entry. For an explanation of field types and the formatting choices associated with each one, reference the Understanding Fields Section of the Forms Module in the User Manual.
A form field can only have on field type. If you need to utilize another (e.g., formatting purposes), you can set the displayed label to be the same but the field label must be unique.
Once you are finished inputting the information for the new field, select “Save” and the new database field will show in the Fields Table on the Fields Tab.
Fields can also be imported in bulk into a Form from a CSV file or PDF Field Import.
How To: Import Form Fields from a CSV File
{{@402}}
How To: Import Fields from a PDF Field Import
{{@400}}
How To: Upload a PDF Form
Uploading a PDF allows an individual to create a customized output for form entries. In order to do so, the PDF must be created on Adobe Acrobat Pro (or comparable software) and have made use of form fields.
A PDF can be created and uploaded after a form is in use, however no additional fields can be created at this time.
To upload a PDF form to be used for form entry outputs, go to the Home Page of the Forms Module. Click the three-dot icon to the right of the form title opening the context menu and select “Upload PDF”.
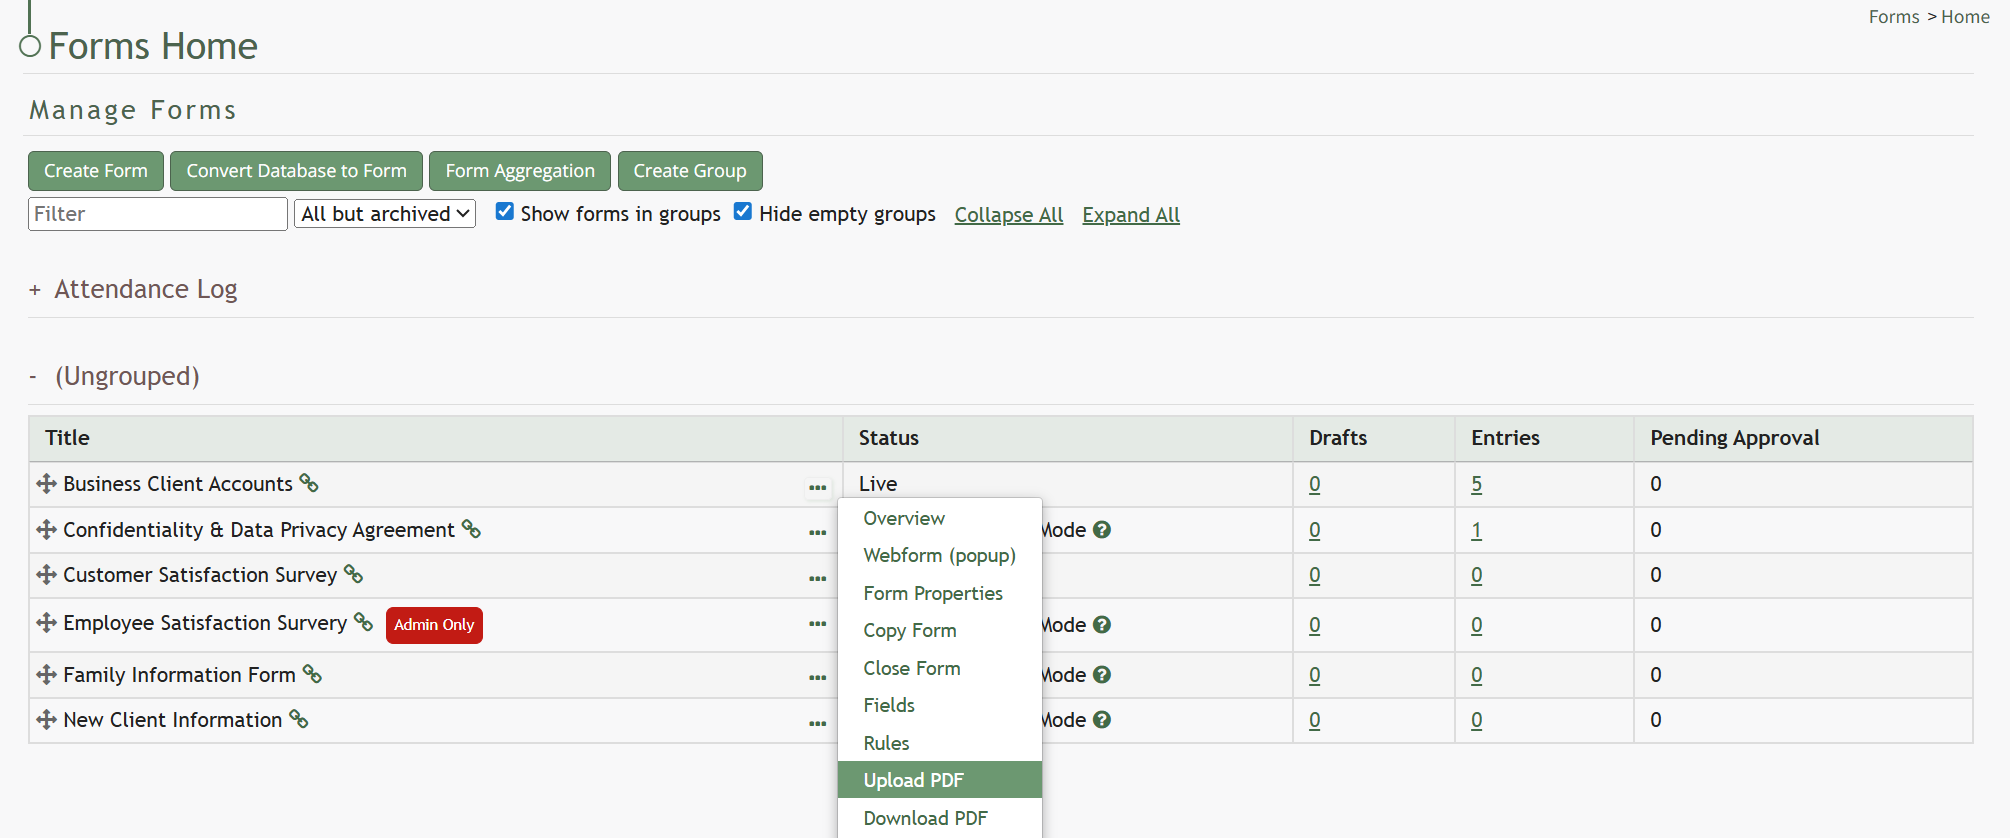
This will open the Upload PDF Form Modal.
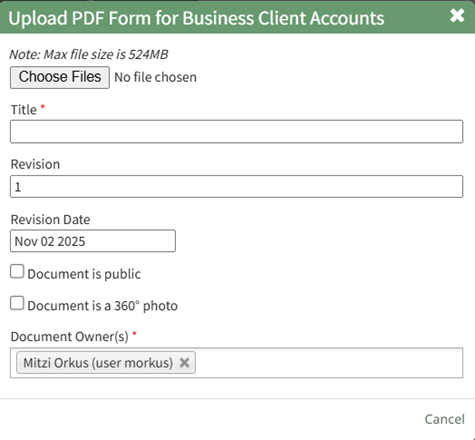
Select “Choose File” to retrieve the PDF from your personal device.
Input a title for the PDF or select the clickable “Use Filename” link to have the system use the filename as the title. The revision date will automatically show the current day, but can be altered. Select the appropriate checkbox if the document is to be public, or if it is a 360 degree photo.
You can select individuals or certification roles as the document owner(s).
Select “Save” and a confirmation modal will appear stating, “File was uploaded.”

To import field names from a PDF file, go to the Home Page of the Forms Module.
Select the three-dot icon to the right of the Form Title opening the Form’s context menu. Select “Form”.
This opens the Fields Tab for a specific form. Select the “PDF Field Import” button.
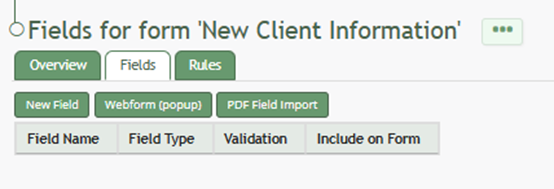
This opens the PDF Field Import Modal.
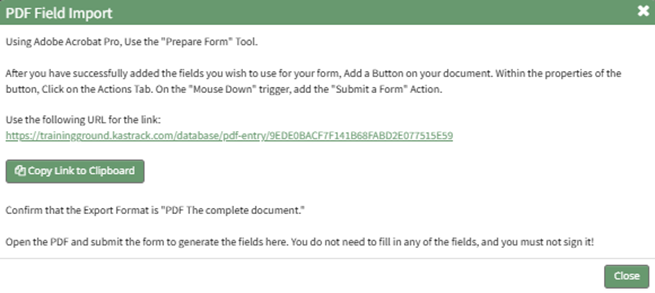
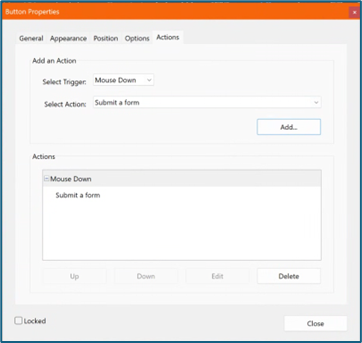
To import fields using a PDF, use the “Prepare Form” tool in Adobe Acrobat Pro. Add the fields you wish to use for your form. Add a button on your document.
Use the URL link provided on the PDF Field Import Modal in KAStrack.
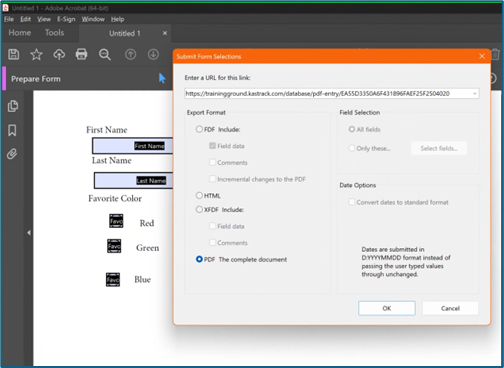
Confirm that the Export Format is “PDF The complete document”.
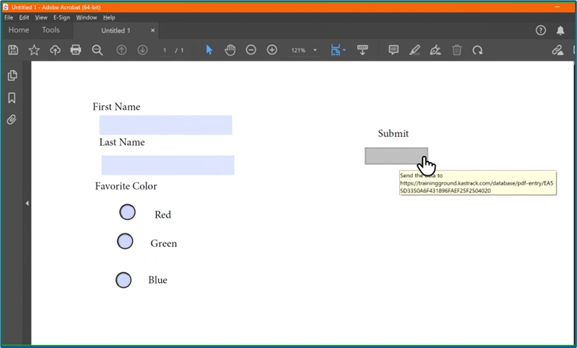
Open the PDF and submit the form to generate the fields here.
You do not need to fill in any of the fields, and you must not sign it.
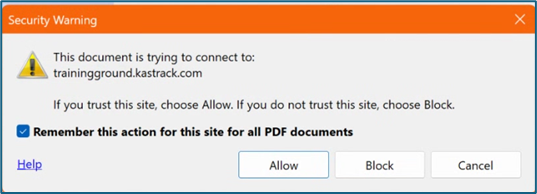
Select “Allow” and the PDF will confirm that the fields were added to the database.
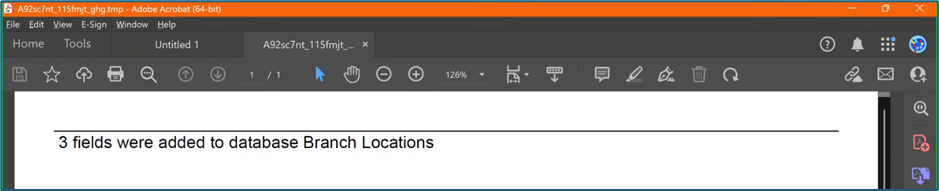
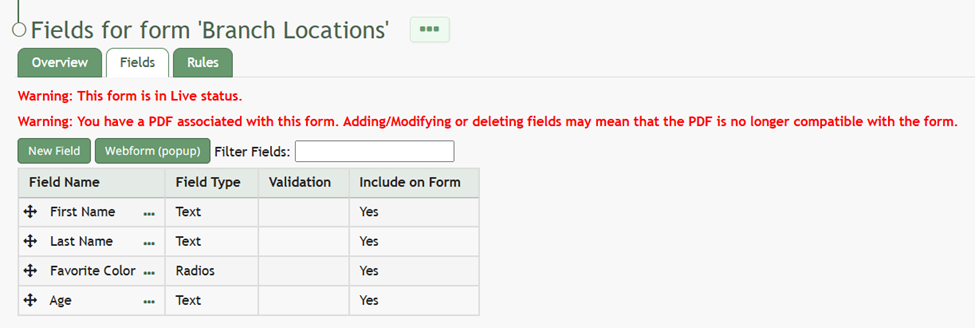
Go to the Fields Table in the database Monday, and a warning now states that a PDF is associated with the form and that adding/editing or deleting fields may result in the PDF no longer being compatible.
How To: Import Form Fields from a CSV File
To import form entries from a CSV, form fields must have already been created.
How To: Add a Field to a Form
To add a field to a form, go to the Home Page of the Forms Module. . Click the three-dot icon to the right of the form title that you want to add a field to opening the Form context menu. Select “Fields”.
This opens the Fields Tab for the specific form of interest.
There are two ways to add an individual field to the Fields Table from here. Click the “New Field” button opening the New Form Field Modal.
The creation of a new field will always require you to enter a field name. Include an input for the displayed label and select the field type from a dropdown menu. The inputs on the New Form Field Modal will vary based on the Field Type.
Possible field types in the Forms Module include Form Fields, Formatting Fields, Utility Fields, Account Fields, and Reference a Database Entry. For an explanation of field types and the formatting choices associated with each one, reference the Understanding Fields Section of the Forms Module in the User Manual.
A form field can only have on field type. If you need to utilize another (e.g., formatting purposes), you can set the displayed label to be the same but the field label must be unique.
Once you are finished inputting the information for the new field, select “Save” and the new database field will show in the Fields Table on the Fields Tab.
Fields can also be imported in bulk into a Form from a CSV file or PDF Field Import.
How To: Import Form Fields from a CSV File
{{@402}}
How To: Import Fields from a PDF Field Import
{{@400}}
How To: Import Form Fields from a CSV File
To import form entries from a CSV, form fields must have already been created.
How To: Add a Field to a Form
{{@373}}
How To: Import Form Fields from a CSV File
{{@402}}
How To: Import Fields from a PDF Field Import
{{@400}}
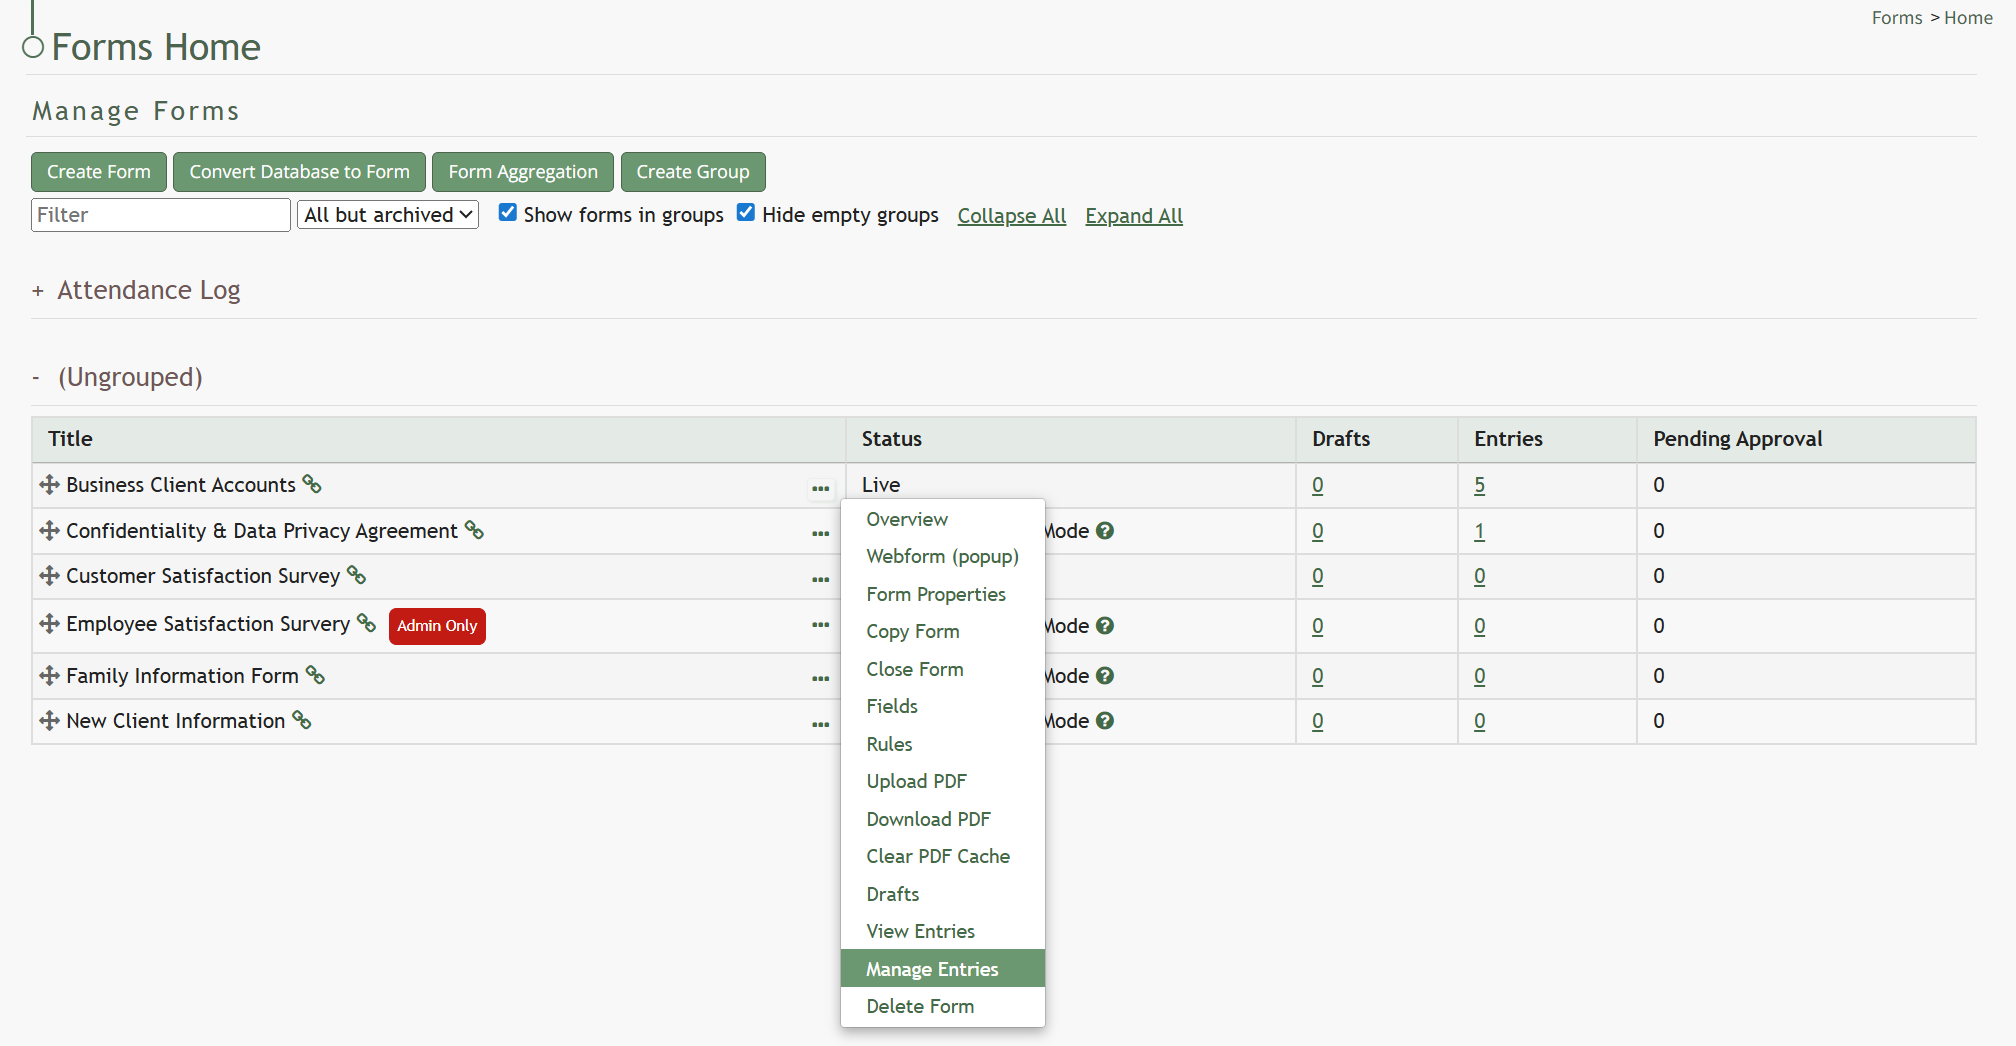
To import form entries from a CSV, go to the Home Page of the Forms Module and click the three-dot icon to the right of the form you wish to import entries into. Select “Manage Entries”.
This opens the Manage Entries for (FORM NAME) Page.

Click the “Import Entries” button beneath the page header. This opens the Upload CSV for (FORM NAME) Modal.
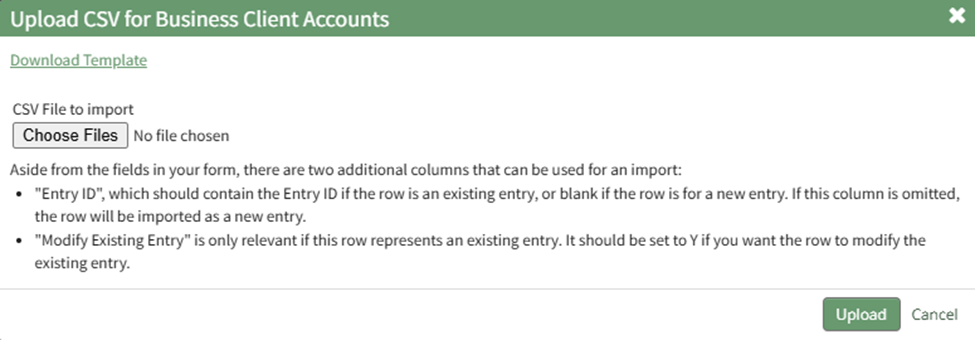
Click the “Download Template” link at the top of the modal and a CSV file will be downloaded to your personal device. Notes have been provided if you are using the downloadable template to Upload bulk CSV form entries.
Notes Regarding the Downloadable Template for Uploading CSV Files
The first row of the CSV file is for each of the form fields. If you download a CSV Template from the Upload CSV Modal, two additional column headers will show that are not form fields: Entry ID and Modify Existing Entry.
If you are importing form entries and no entries have been added to the form yet, leave these columns blank in your upload.
If form entries already exist in the database, the Entry ID column will contain the unique system generated ID for each pre-existing database entry. Leave this column blank if the row is to be imported as a new entry. The second column, Modify Existing Entry, should have a “Y” input if the existing entry is being modified and an “N” input if it has not been modified. Leave this column blank if the entry is new.

After creating your Forms Entries CSV file, save it as a CSV UTF-8 for importing. Click the “Choose File” button on the Upload CSV Modal and open the relevant file from your personal device.

Confirm that the correct CSV file now shows in the Upload CSV Modal.
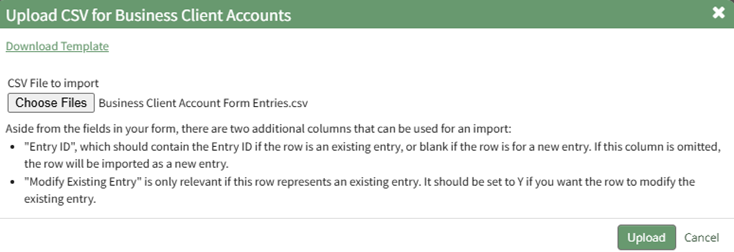
Select the “Upload” button.
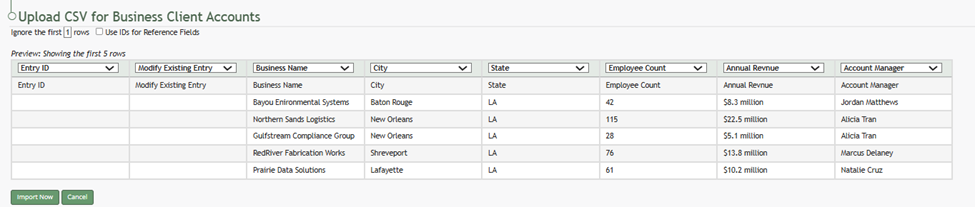
The entries imported from the CSV file will now show on the Upload CSV for (FORM NAME) Page.
The system automatically indicates to ignore the first row. Click “Import Now” if there are no errors.
A summary of the import will now show on the CSV Upload Page.
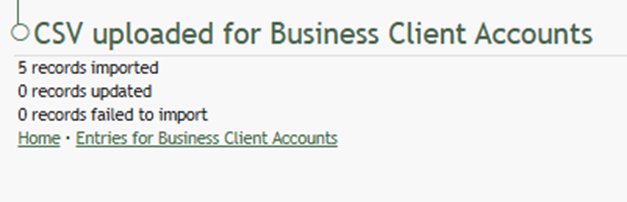
Click the “Entries for (FORM NAME)” link to see all imported entries on the Manage Entries Page.
How To: Import Fields from a PDF Field Import
Importing fields from a PDF Field Import has multiple purposes. Not only will the form fields be generated through this process, the PDF will also be saved by the system, so that future form entries can be downloaded into this PDF, allowing for customizable outputs.
A form must have already been created with no fields added for this method to work. If a field has already been added to the form, you are no longer able to bulk import form field names from a PDF Field Import. You are now required to enter each field name individually. Regardless, you can still upload a PDF Form that the system will use for future form entry downloads.
How To: Create a Form
{{@386}}
How To: Add a Field to a Form
{{@373}}
How To: Upload a PDF Form
{{@408}}
To import field names from a PDF file, go to the Home Page of the Forms Module.
Select the three-dot icon to the right of the Form Title opening the Form’s context menu. Select “Form”.
This opens the Fields Tab for a specific form. Select the “PDF Field Import” button.
This opens the PDF Field Import Modal.
To import fields using a PDF, use the “Prepare Form” tool in Adobe Acrobat Pro. Add the fields you wish to use for your form. Add a button on your document.
Use the URL link provided on the PDF Field Import Modal in KAStrack.
Confirm that the Export Format is “PDF The complete document”.
Open the PDF and submit the form to generate the fields here.
You do not need to fill in any of the fields, and you must not sign it.
Select “Allow” and the PDF will confirm that the fields were added to the database.
Go to the Fields Table in the database Monday, and a warning now states that a PDF is associated with the form and that adding/editing or deleting fields may result in the PDF no longer being compatible.
To import form entries from a CSV, go to the Home Page of the Forms Module and click the three-dot icon to the right of the form you wish to import entries into. Select “Manage Entries”.
This opens the Manage Entries for (FORM NAME) Page.
Click the “Import Entries” button beneath the page header. This opens the Upload CSV for (FORM NAME) Modal.
Click the “Download Template” link at the top of the modal and a CSV file will be downloaded to your personal device. Notes have been provided if you are using the downloadable template to Upload bulk CSV form entries.
Notes Regarding the Downloadable Template for Uploading CSV Files
The first row of the CSV file is for each of the form fields. If you download a CSV Template from the Upload CSV Modal, two additional column headers will show that are not form fields: Entry ID and Modify Existing Entry.
If you are importing form entries and no entries have been added to the form yet, leave these columns blank in your upload.
If form entries already exist in the database, the Entry ID column will contain the unique system generated ID for each pre-existing database entry. Leave this column blank if the row is to be imported as a new entry. The second column, Modify Existing Entry, should have a “Y” input if the existing entry is being modified and an “N” input if it has not been modified. Leave this column blank if the entry is new.
After creating your Forms Entries CSV file, save it as a CSV UTF-8 for importing. Click the “Choose File” button on the Upload CSV Modal and open the relevant file from your personal device.
Confirm that the correct CSV file now shows in the Upload CSV Modal.
Select the “Upload” button.
The entries imported from the CSV file will now show on the Upload CSV for (FORM NAME) Page.
The system automatically indicates to ignore the first row. Click “Import Now” if there are no errors.
A summary of the import will now show on the CSV Upload Page.
Click the “Entries for (FORM NAME)” link to see all imported entries on the Manage Entries Page.
How To: Upload a PDF Form
Uploading a PDF allows an individual to create a customized output for form entries. In order to do so, the PDF must be created on Adobe Acrobat Pro (or comparable software) and have made use of form fields.
A PDF can be created and uploaded after a form is in use, however no additional fields can be created at this time.
To upload a PDF form to be used for form entry outputs, go to the Home Page of the Forms Module. Click the three-dot icon to the right of the form title opening the context menu and select “Upload PDF”.
This will open the Upload PDF Form Modal.
Select “Choose File” to retrieve the PDF from your personal device.
Input a title for the PDF or select the clickable “Use Filename” link to have the system use the filename as the title. The revision date will automatically show the current day, but can be altered. Select the appropriate checkbox if the document is to be public, or if it is a 360 degree photo.
You can select individuals or certification roles as the document owner(s).
Select “Save” and a confirmation modal will appear stating, “File was uploaded.”
Preview Mode
When new forms are created in KAStrack, the form originates in a Not Live - Preview Mode. This allows the form to be designed, setup and configured before it is live. It is recommended that you use preview mode until you are sure that your form has been setup correctly. Entries can be made when a form is in Preview Mode, but a message will be displayed on the webform modal that states that the form is not yet live and that any submissions made can be deleted.
The form can also be designed, setup and configured after it is live, but there will no longer be the option to Delete All Entries..
Deleting Testing Entries
It is a best practice to delete all testing entries by selecting the “Delete All Entries” option from the three-dot icon to the right of a form title on the Home Page that opens the Form Table context menu. This option will only be available when a form is in preview mode. The intent is to allow easy cleanup of sample testing data prior to going live.
How To: Delete All Testing Entries
To delete all entries made while a form is in Preview Mode, go to the Home Page of the Forms Module and select the three dot icon to the right of the form title you wish to delete entries in.
A form must be in preview mode to bulk delete existing entries.
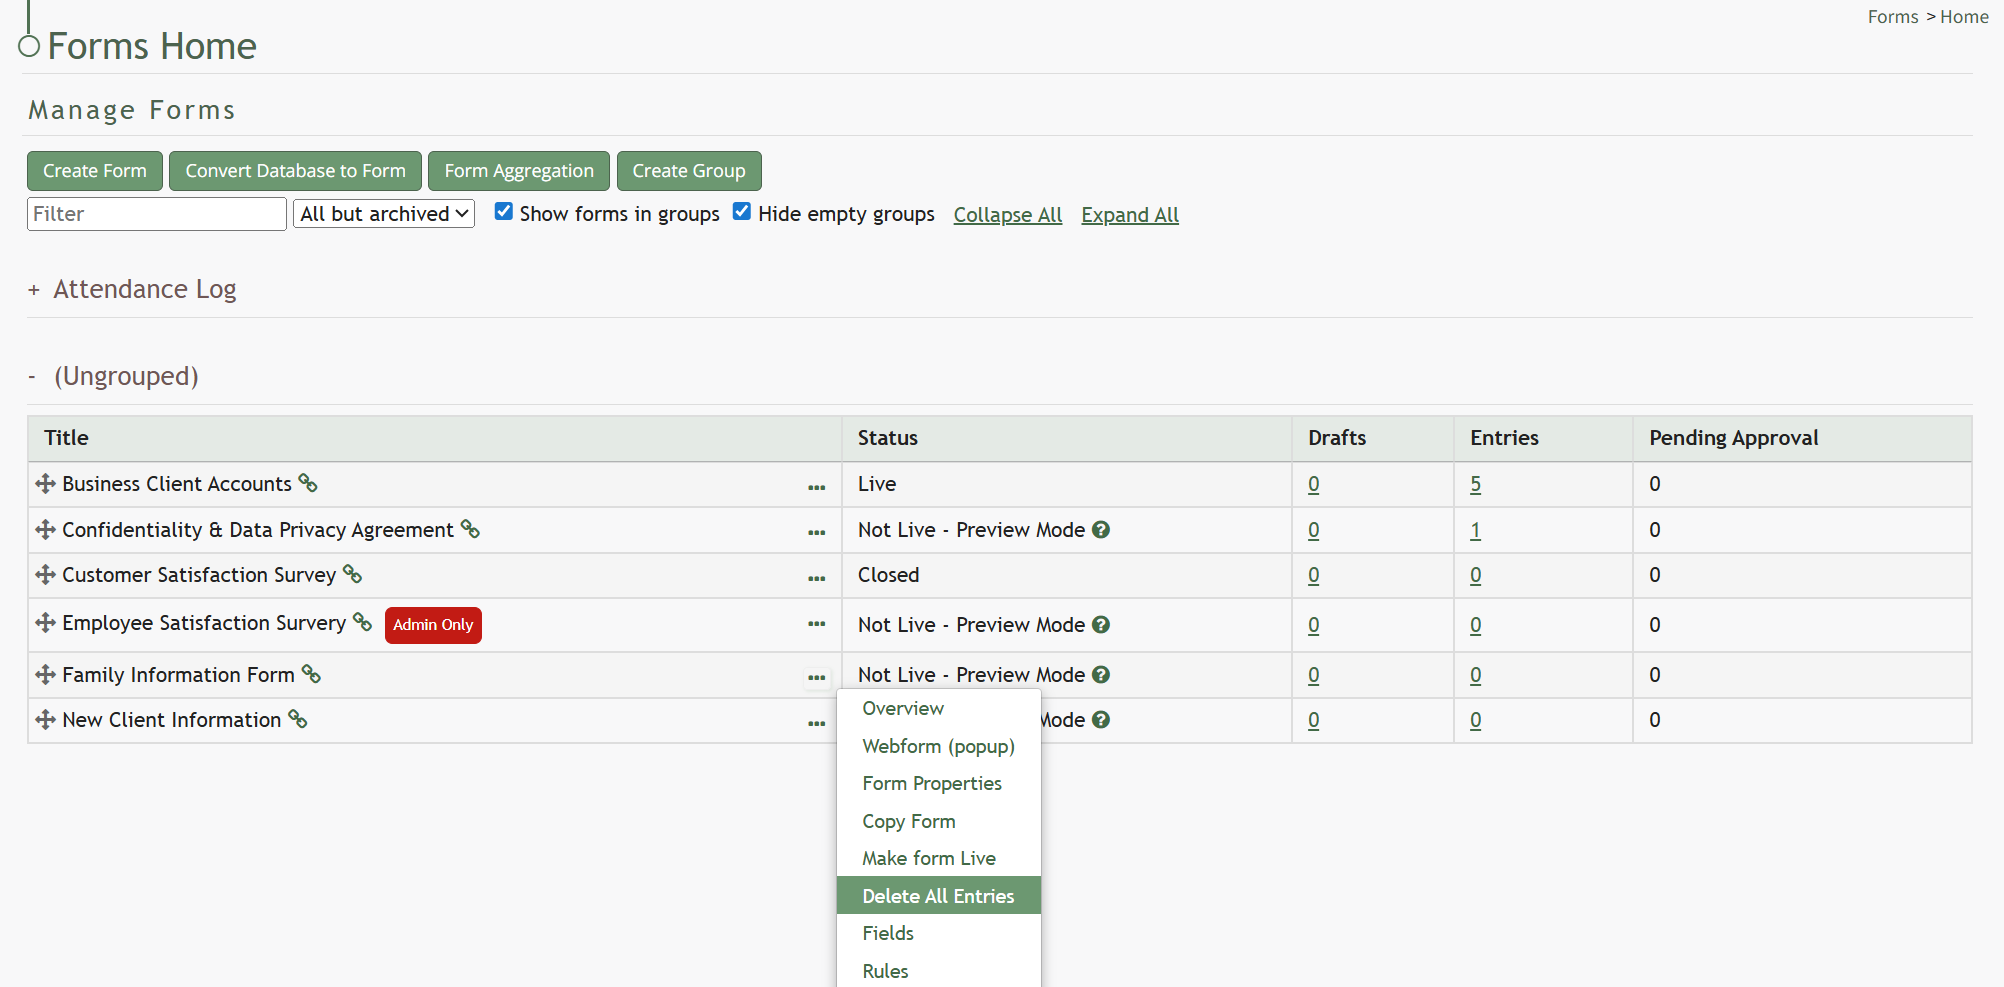
Select “Delete All Entries” from the context menu opening the Deletion Confirmation Modal.
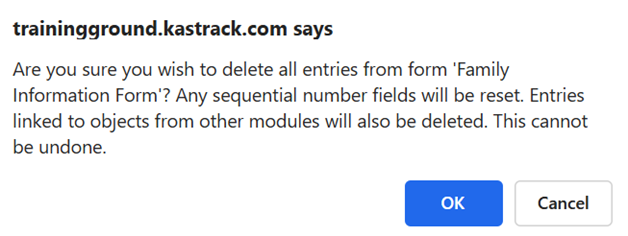
The modal states, “Are you sure you wish to delete all entries from form (FORM NAME)? Any sequential number fields will be reset. Entries linked to object from other modules will also be deleted. This cannot be undone.”
Click the “OK” button and the Delete All Entries Modal stating “All entries have been deleted” appears.
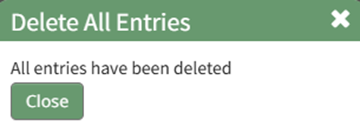
Click the “Close” button and return to the Forms Module Home Page.

The Forms Table will now show that there are 0 entries associated with the Form.
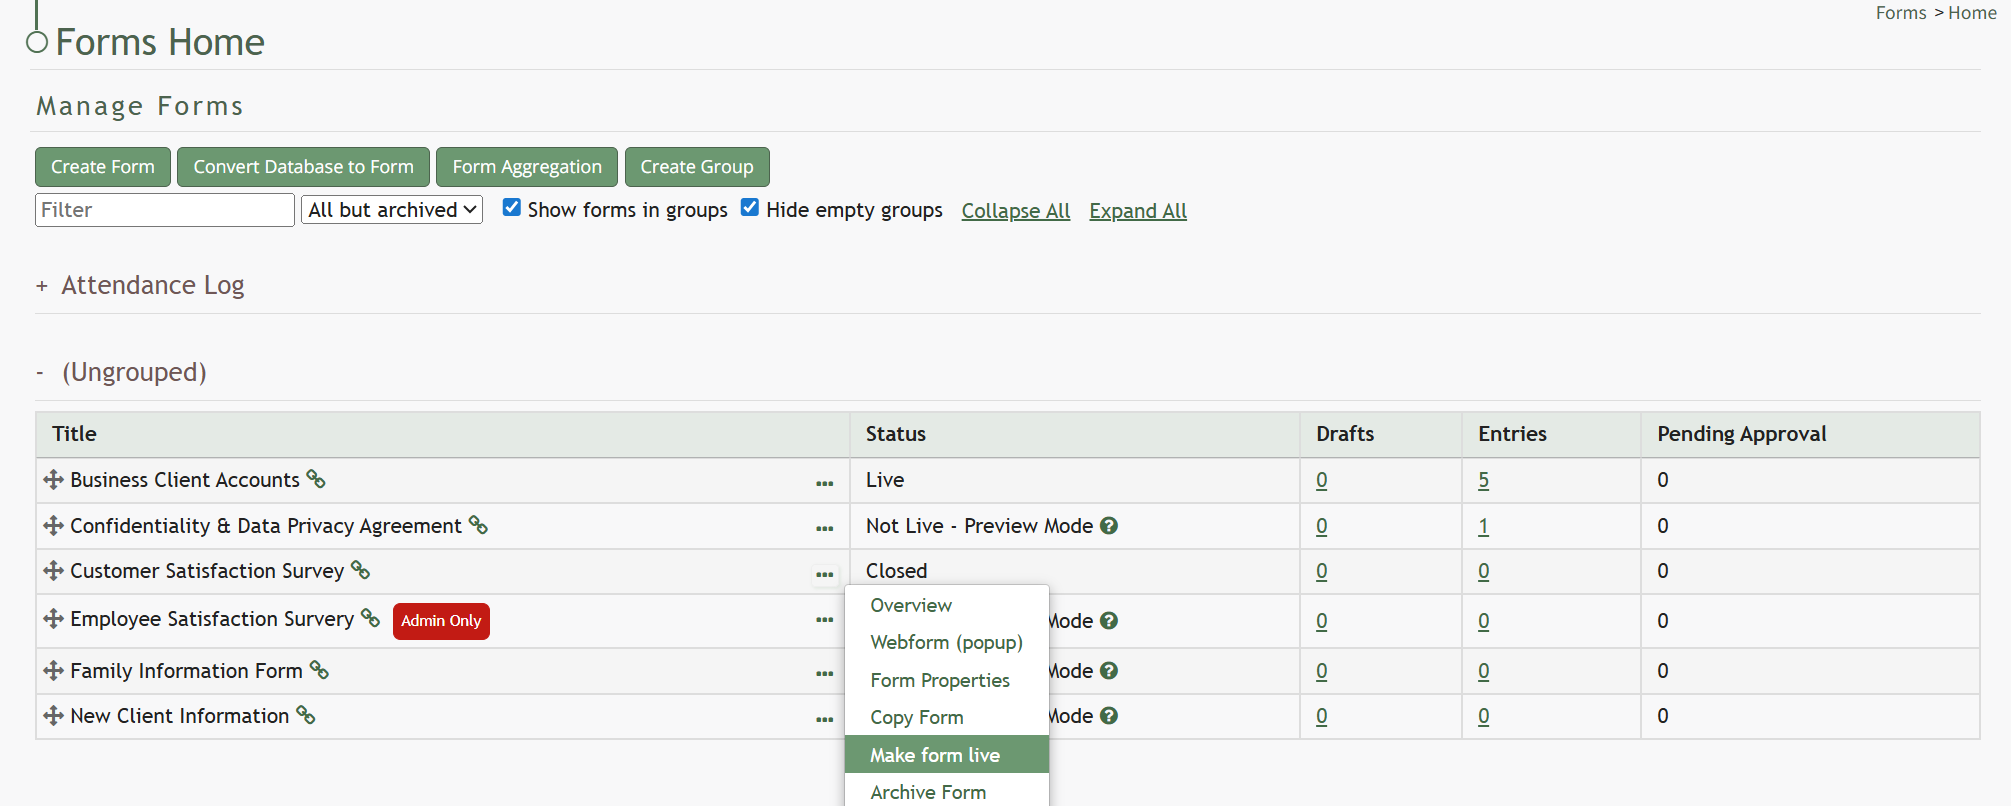
Making a Form Live
To make a form live, select “Make Form Live” from the Form Table Context menu. Once a form is live, you will not be able to return to preview mode or bulk delete entries. Once live, a warning will be displayed and must be cleared for further editing.
How To: Make a Form Live
To change a Form Status from Preview Mode to Live, , go to the Home Page of the Forms Module and select the three-dot icon to the right of the form title you wish to make Live. This opens the Forms Table Context Menu.
Confirm that you have deleted any testing entries before you convert the form to Live status.
How To: Delete All Testing Entries
To delete all entries made while a form is in Preview Mode, go to the Home Page of the Forms Module and select the three dot icon to the right of the form title you wish to delete entries in.
A form must be in preview mode to bulk delete existing entries.
Select “Delete All Entries” from the context menu opening the Deletion Confirmation Modal.
The modal states, “Are you sure you wish to delete all entries from form (FORM NAME)? Any sequential number fields will be reset. Entries linked to object from other modules will also be deleted. This cannot be undone.”
Click the “OK” button and the Delete All Entries Modal stating “All entries have been deleted” appears.
Click the “Close” button and return to the Forms Module Home Page.
The Forms Table will now show that there are 0 entries associated with the Form.
Select “Make Form Live”. This opens the Update Status Modal which states, “This form is now live.”
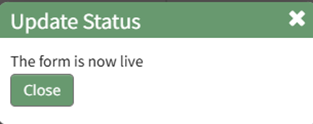
Click the “Close” button to return to the Forms Table on the Home Page. The Form Status will now show as Live.
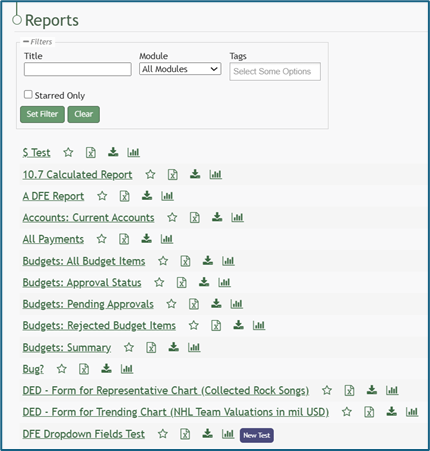
Viewing a Form's Report (in the Report Module)
When forms are submitted in KAStrack, the form entries can be viewed in the Reports Module. Each entry will be recorded with a database entry ID, approval status, the username of the individual who submitted the entry if they are a KAStrack system user, the entry date, and the most recent entry update.

A PDF of the form entry is also generated by the system and is accessible via the form specific context menu option “Download PDF” or the PDF Icon in the Form Report Table.
You can access the form report, by going to the Home Page of the Forms Module and select the three-dot icon to the right of the specific form and select “View Entries”.
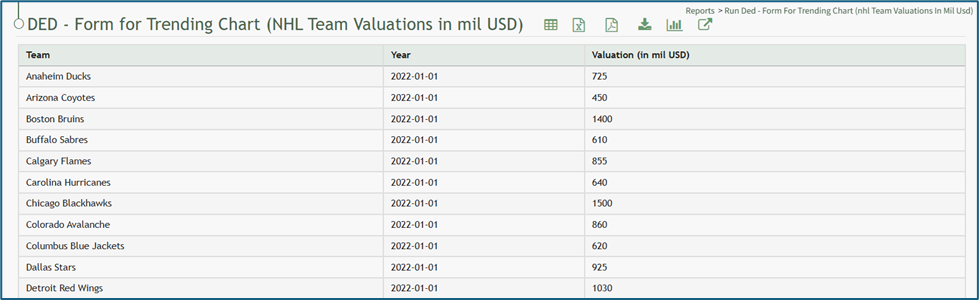
There are icons to the right of the Form Page header that act as quick links for efficient action. The icons are explained in the Form Page Icon Table below.
Form Report Icon Explanations | ||||||||||||||||||||||||||||||||||||||||
Icon | Explanation | |||||||||||||||||||||||||||||||||||||||
| The spreadsheet icon converts the table into a datatables table format (allowing for sorting/filtering by column and pagination of the table). | |||||||||||||||||||||||||||||||||||||||
| The PDF icon opens a web-based PDF of the report in the same browser tab. | |||||||||||||||||||||||||||||||||||||||
| The excel icon will download the report in an excel (.xlsx) file to your personal device. | |||||||||||||||||||||||||||||||||||||||
| The download icon opens the Download Modal which allows an individual to select from seven different formats to download the report from a dropdown menu. Possible download formats are listed to the right. How To: Download a ReportTo download a report, go to the Home Page of the Reports Module. There are two icons to the right of the Report Title that allow an individual to download a report.
Selecting the excel icon will automatically download the report to your personal device. Selecting the download icon will open the Download Modal. There are seven different download options to choose from on the dropdown menu.
Select the “Generate” button and KAStrack will download your report based on the method of your choosing. The icons to download a report can be found within a specific report and the Manage Reports Page (for individuals with an Admin access level). | Comma Separated Values (.csv) | ||||||||||||||||||||||||||||||||||||||
Tab Separated Values (.tsv) | ||||||||||||||||||||||||||||||||||||||||
Other Separated Values (.txt) | ||||||||||||||||||||||||||||||||||||||||
Open Document Format (.ods) | ||||||||||||||||||||||||||||||||||||||||
Excel 97 (.xls) | ||||||||||||||||||||||||||||||||||||||||
Excel 2007 and later (.xlsx) | ||||||||||||||||||||||||||||||||||||||||
| The chart icon opens the Chart Wizard Modal, allowing an individual to create a chart from the data generated by the report. Hot To: Create a ChartTo create a chart, go to the Home Page of the Reports Module and open the report you wish to use for the necessary chart data. How To: Run a ReportTo run a report, go to the Home Page of the Reports Module.
Click the name of the report you wish to run.
Select the chart icon to the right of the report title header. This opens the Report Module Chart Wizard Modal. The chart icon for a specific report is also accessible on the Home Page of the Reports Module.
After specifying the appropriate inputs for the chart, select “View Chart” to see a preview of the representation of the data. If no additional changes are needed, select “Save Chart”. A confirmation modal states, “The chart has been saved.”
The new chart is now visible on the Charts Page of the Reports Module. | |||||||||||||||||||||||||||||||||||||||
| The external link icon opens the External Connection Modal which offers a detailed explanation on how to transmit report data to Power BI. |
| ||||||||||||||||||||||||||||||||||||||


No comments to display
No comments to display