Forms Home Page
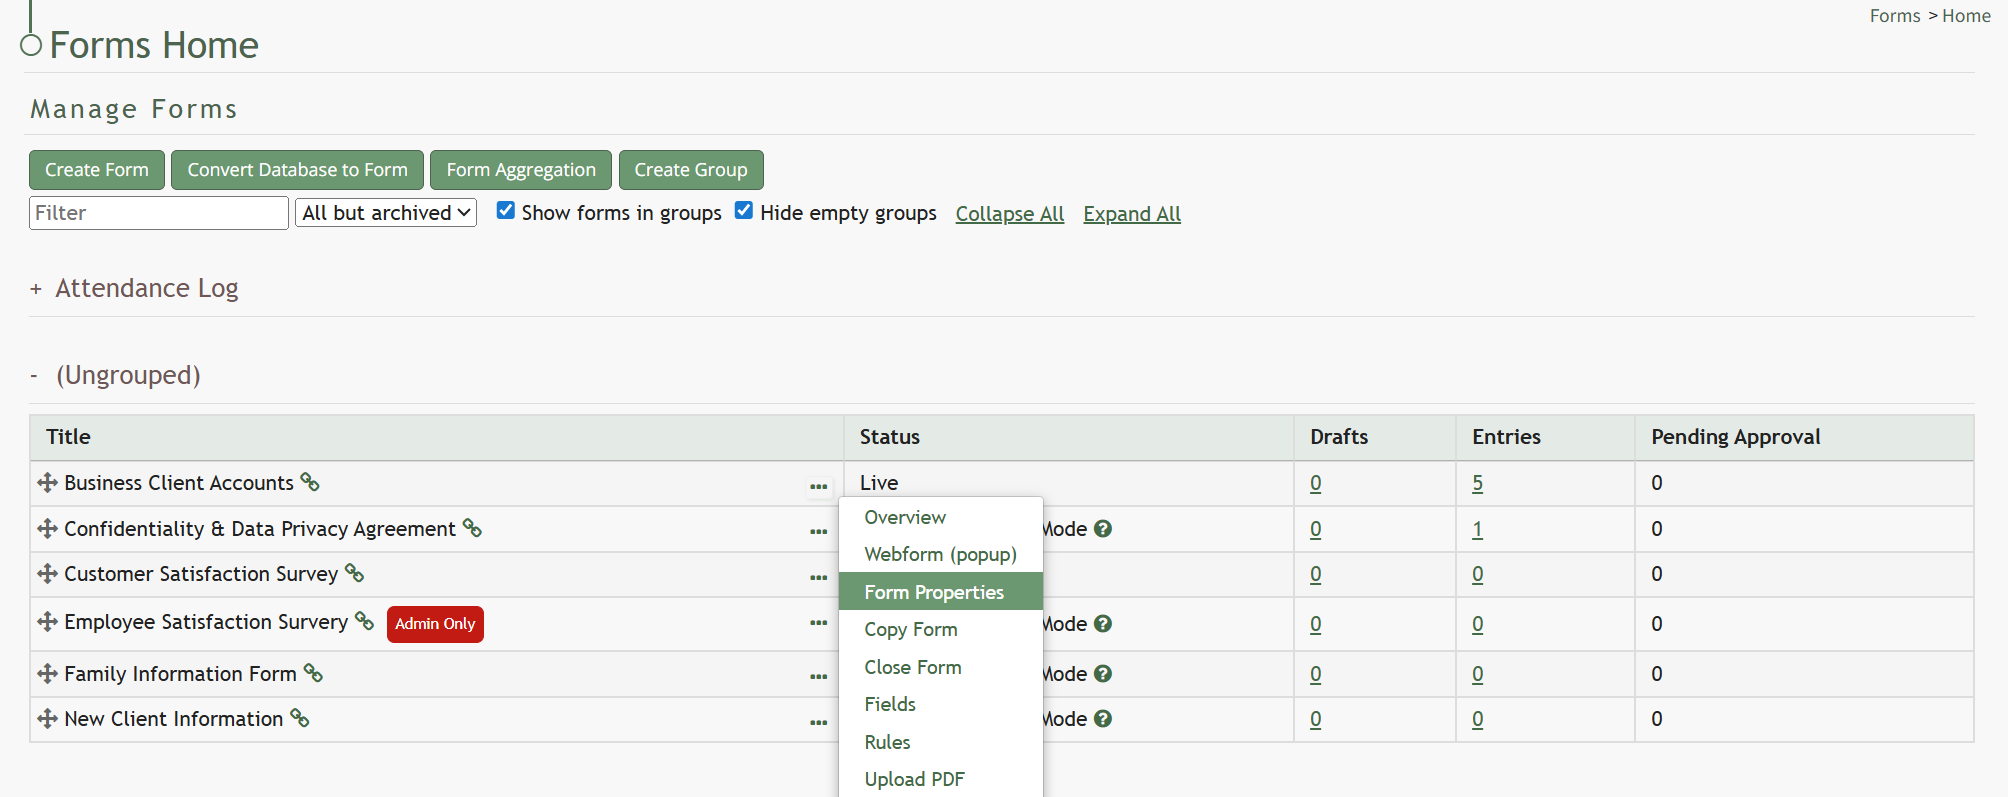
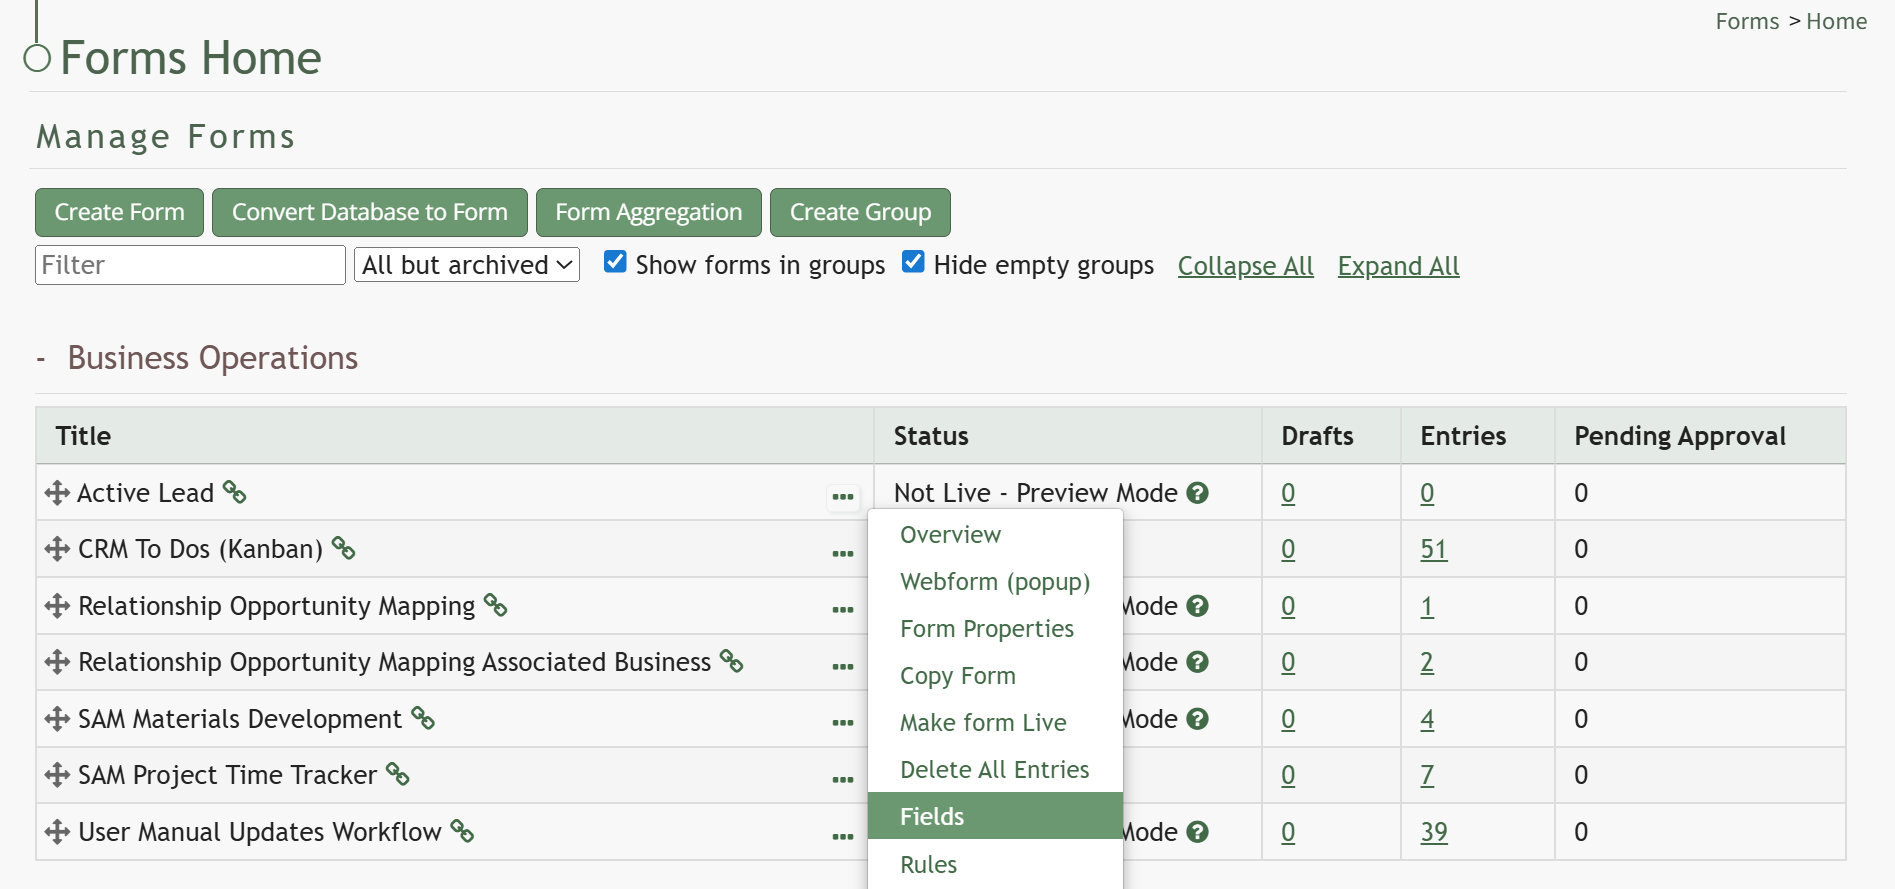
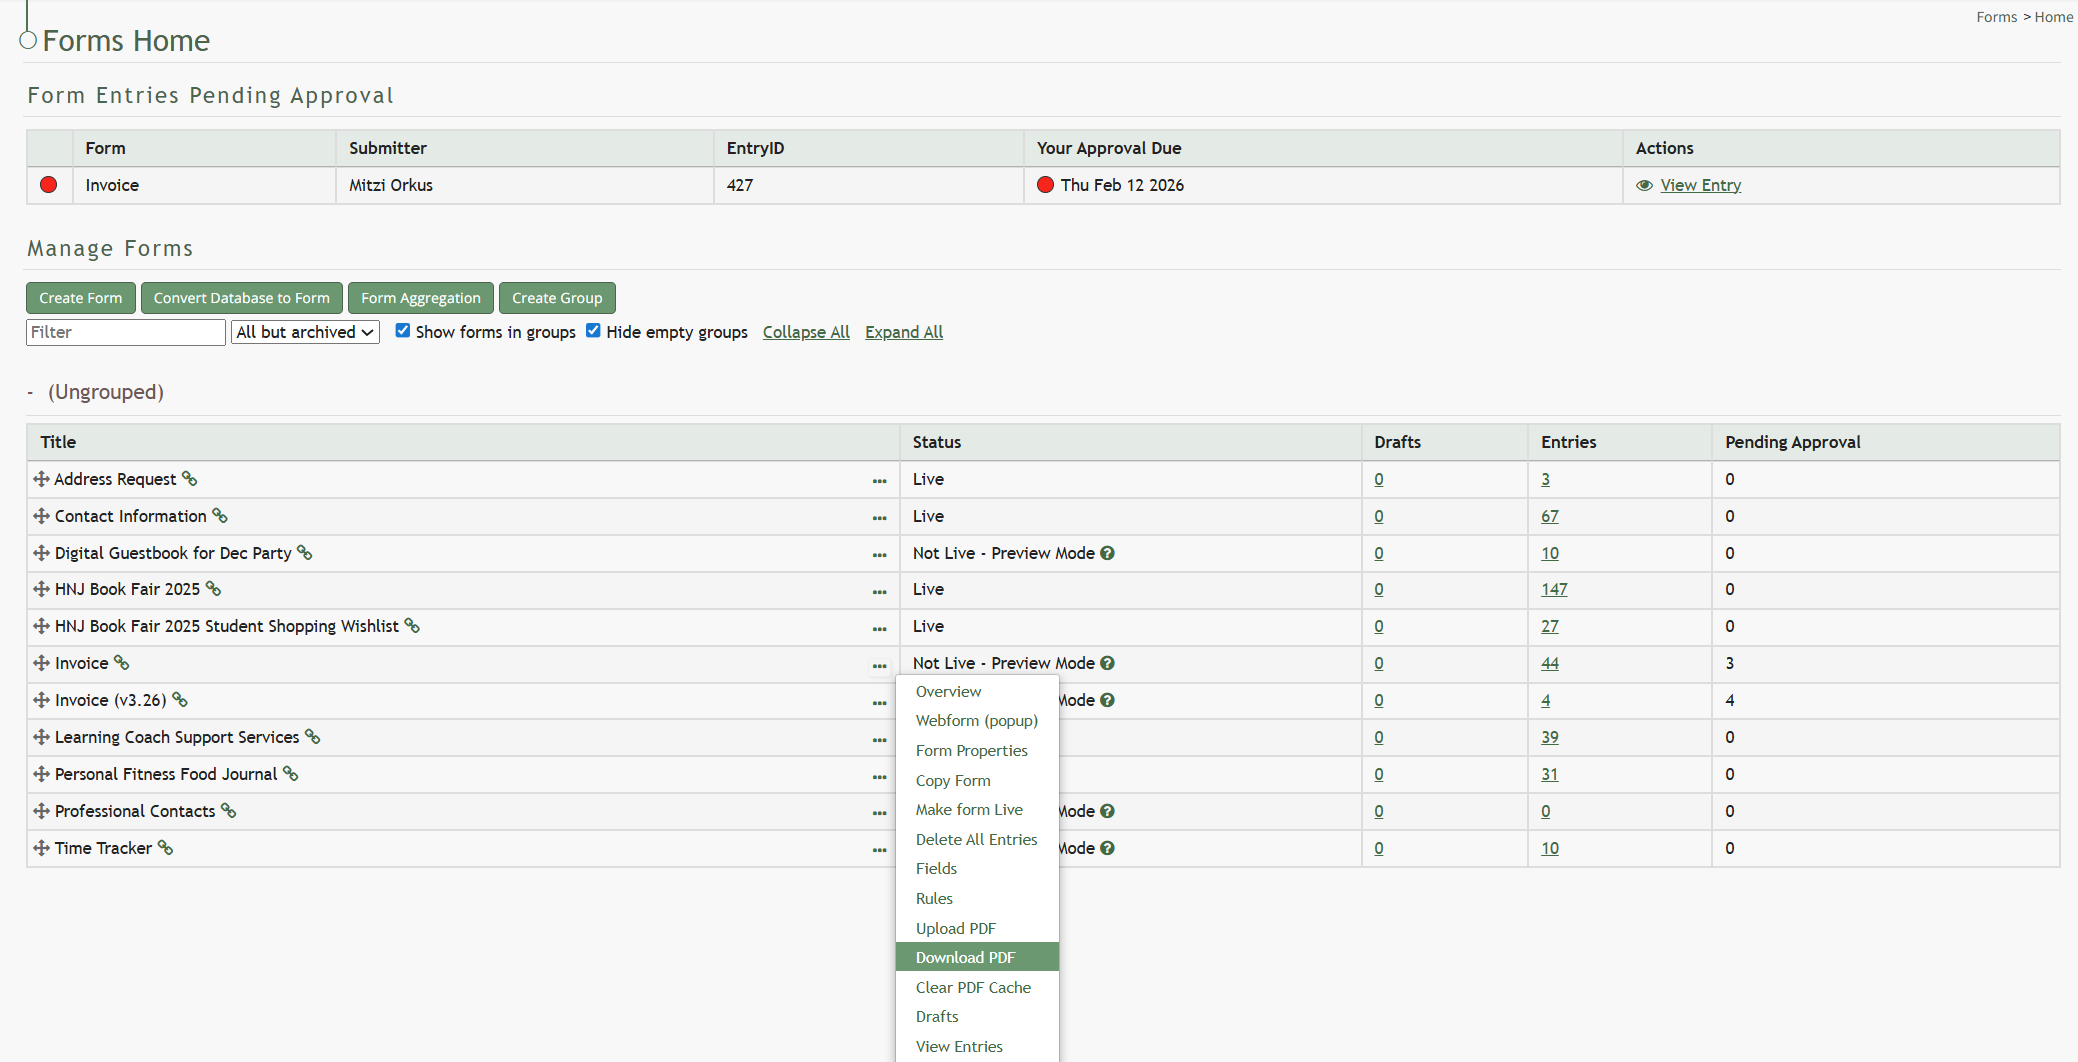
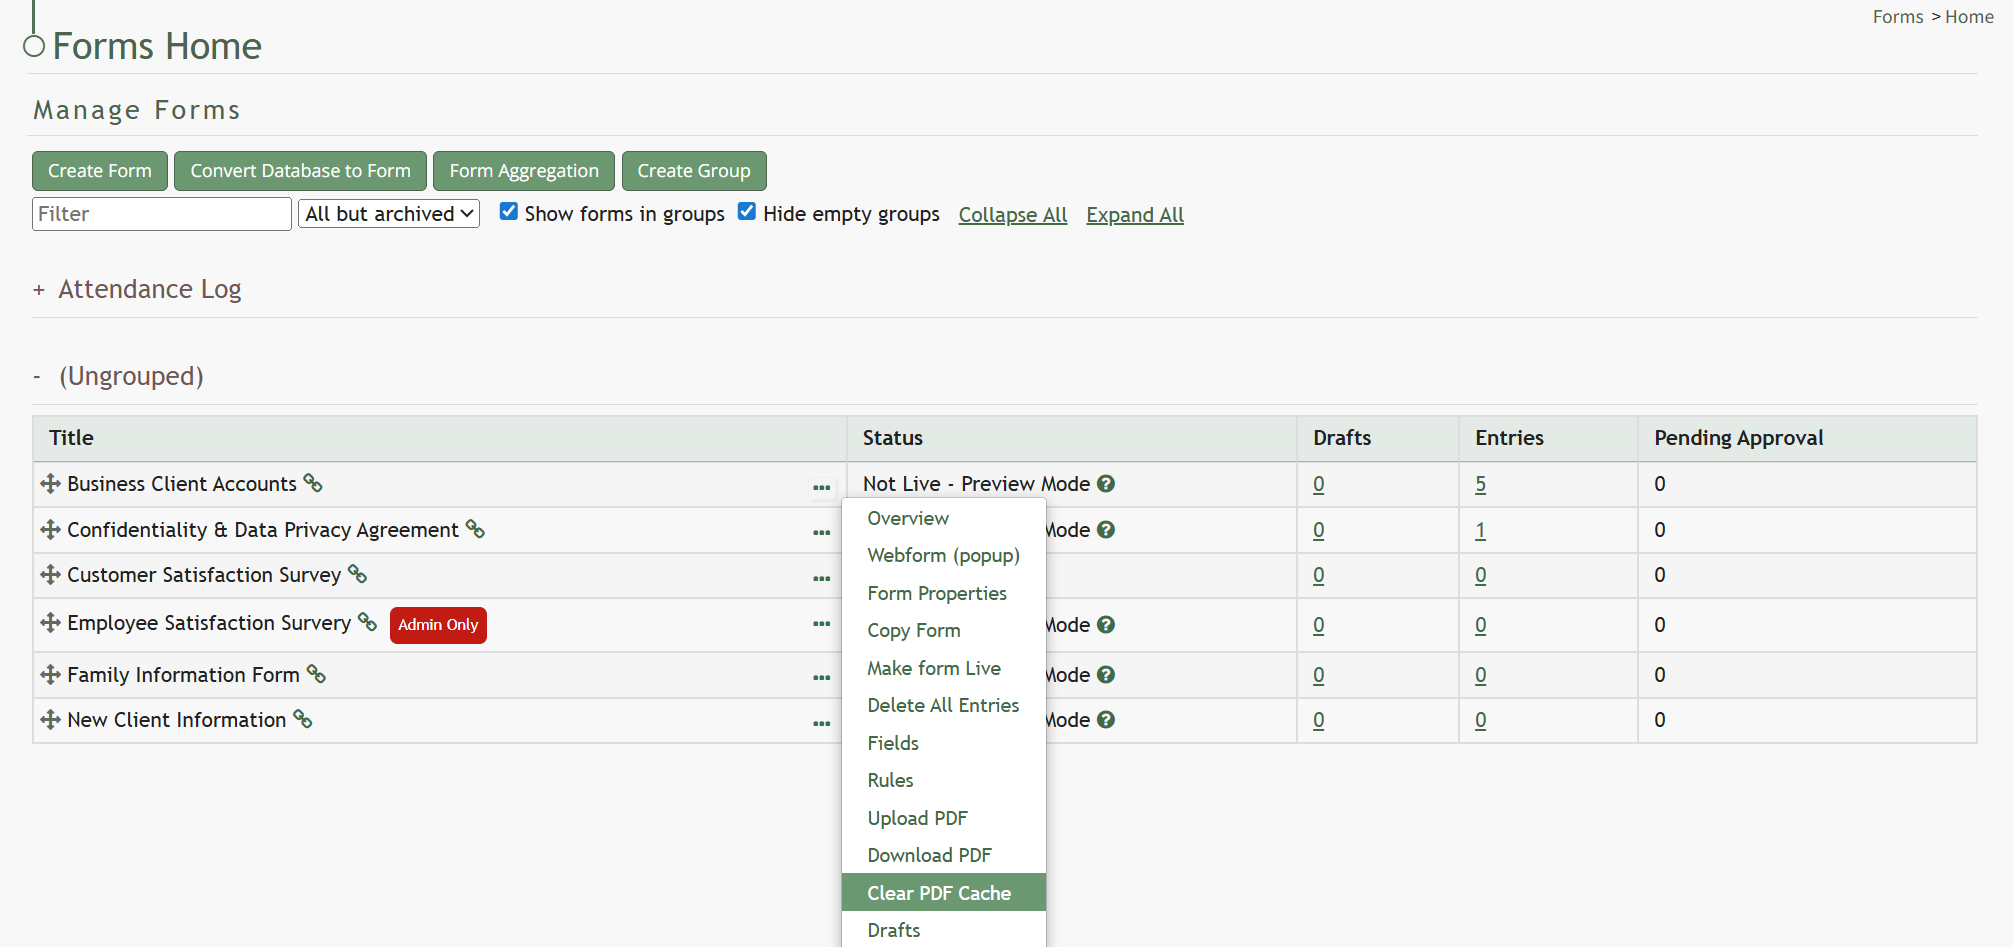
The Home Page of the Forms Module contains the Forms Table, where all existing forms built within your organization’s subdomain are stored and can be accessed.
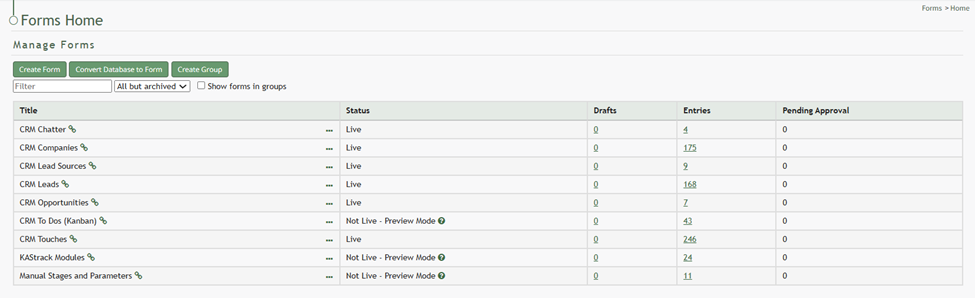
A “Show forms in groups” checkbox allows a user to customize their view of the Forms Home Page for efficient use.

When Forms are displayed in groups, quick links allow you to collapse and expand all groups as well as hide empty groups that do not currently contain Forms.
Forms can be filtered by all but archived, preview mode, live, closed, and archived.
If there are existing form entries that require your approval, they will show in a table at the top of the Forms Home Page. In order for form entry approval to be required, you must establish a Form Rule.
How To: Require Form Entry Approval
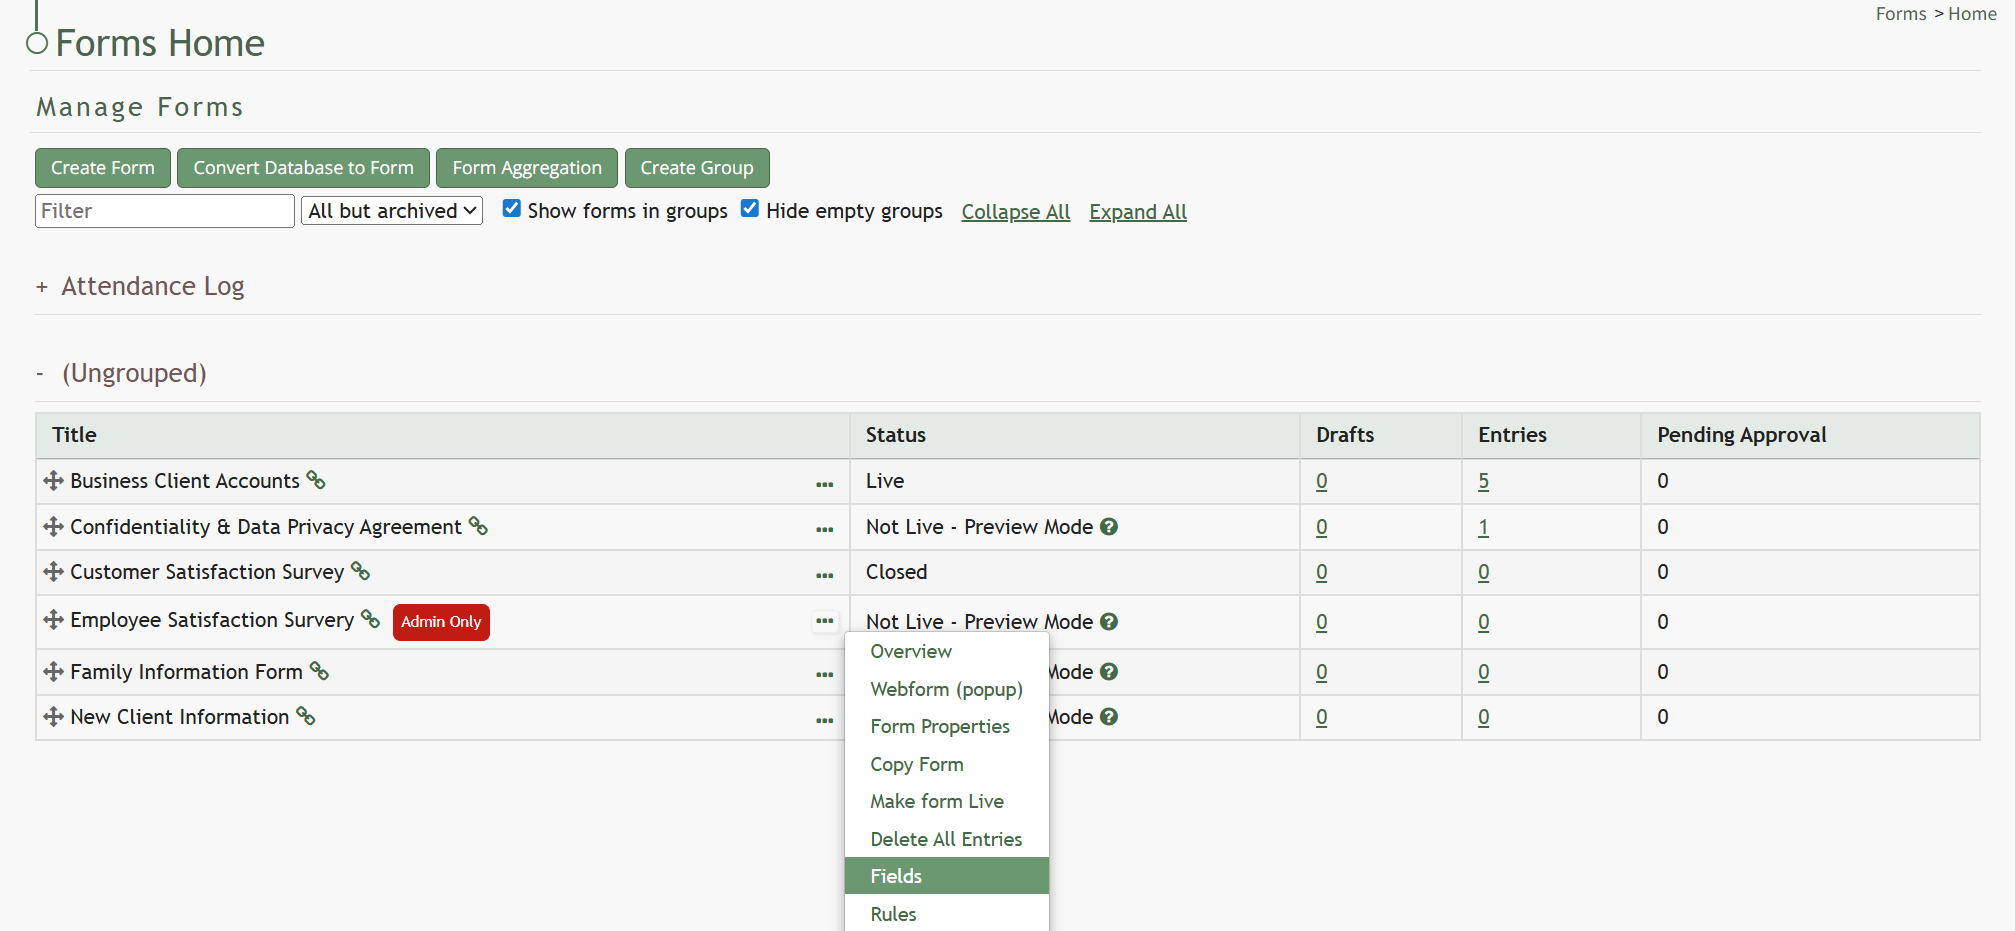
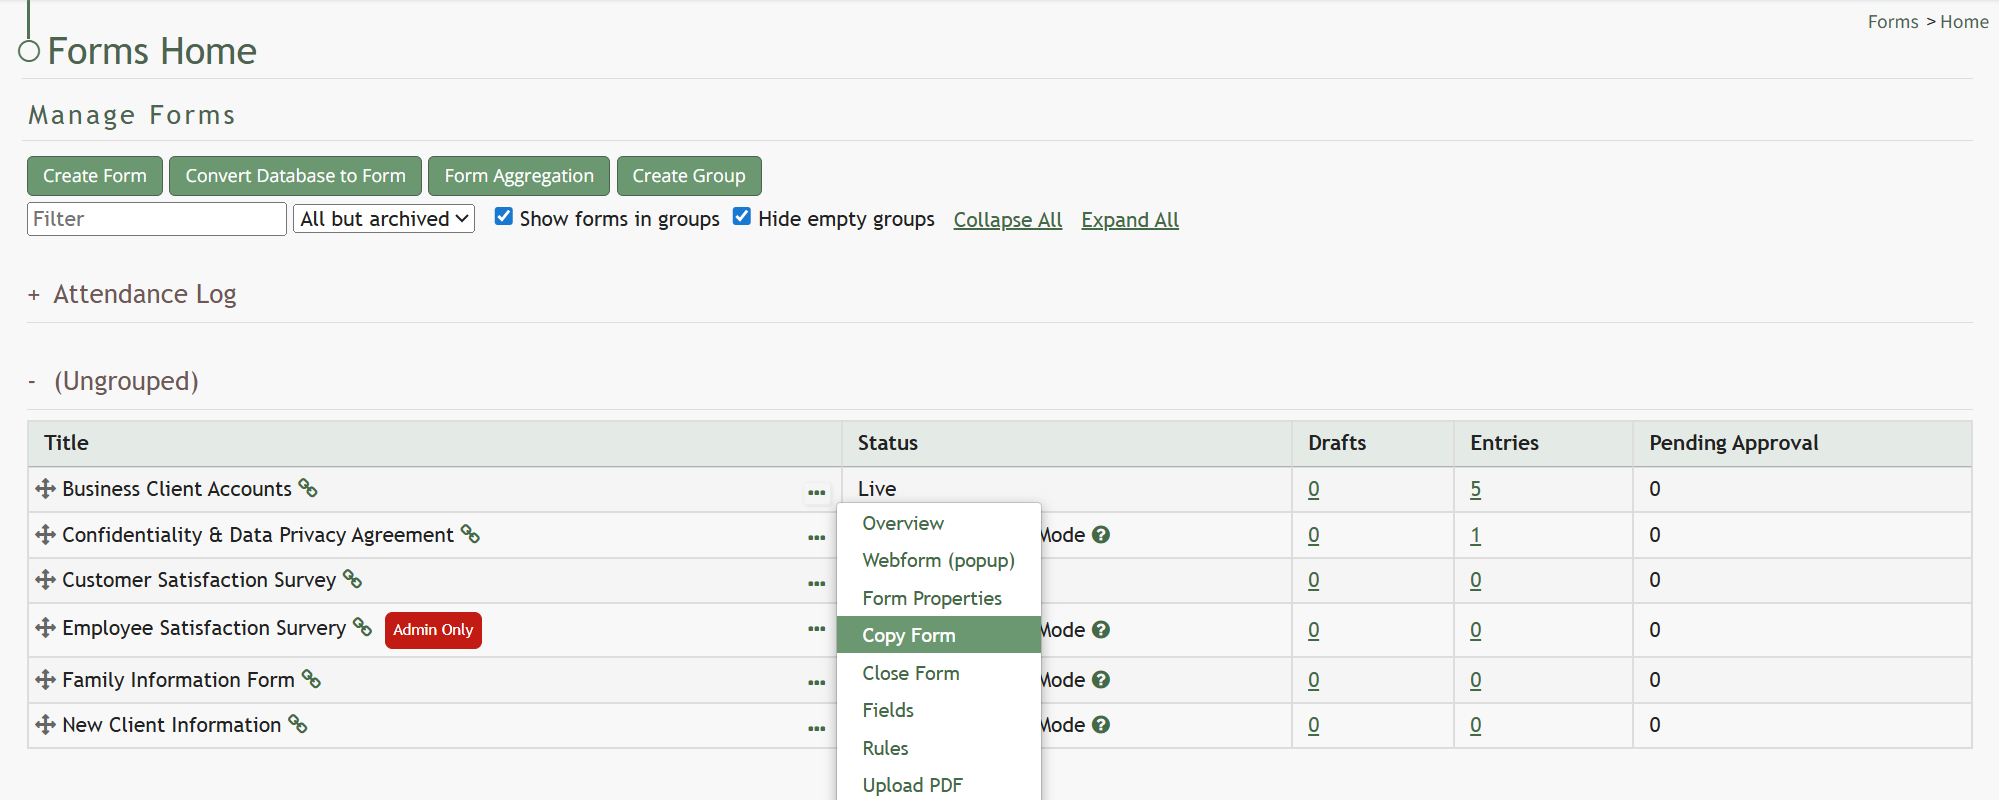
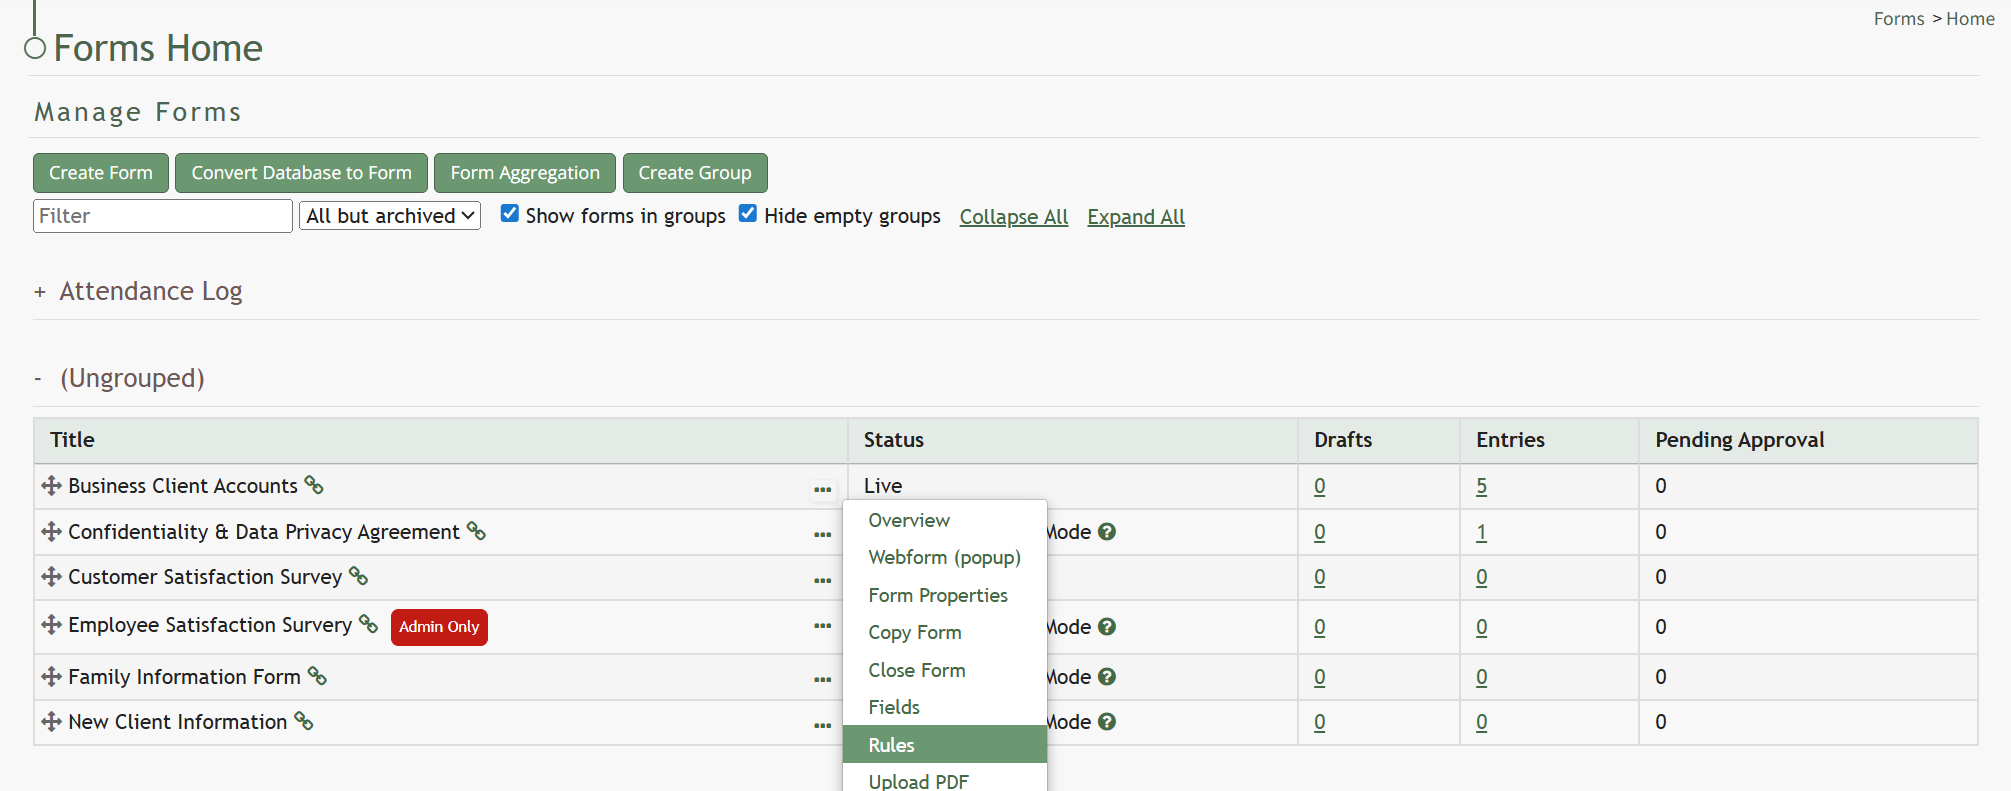
To require that form entries are approved, go to the Home Page of the Forms Module. Select the three-dot icon to the right of the specific form you want to require entry approvals for and select “Rules” from the context menu.
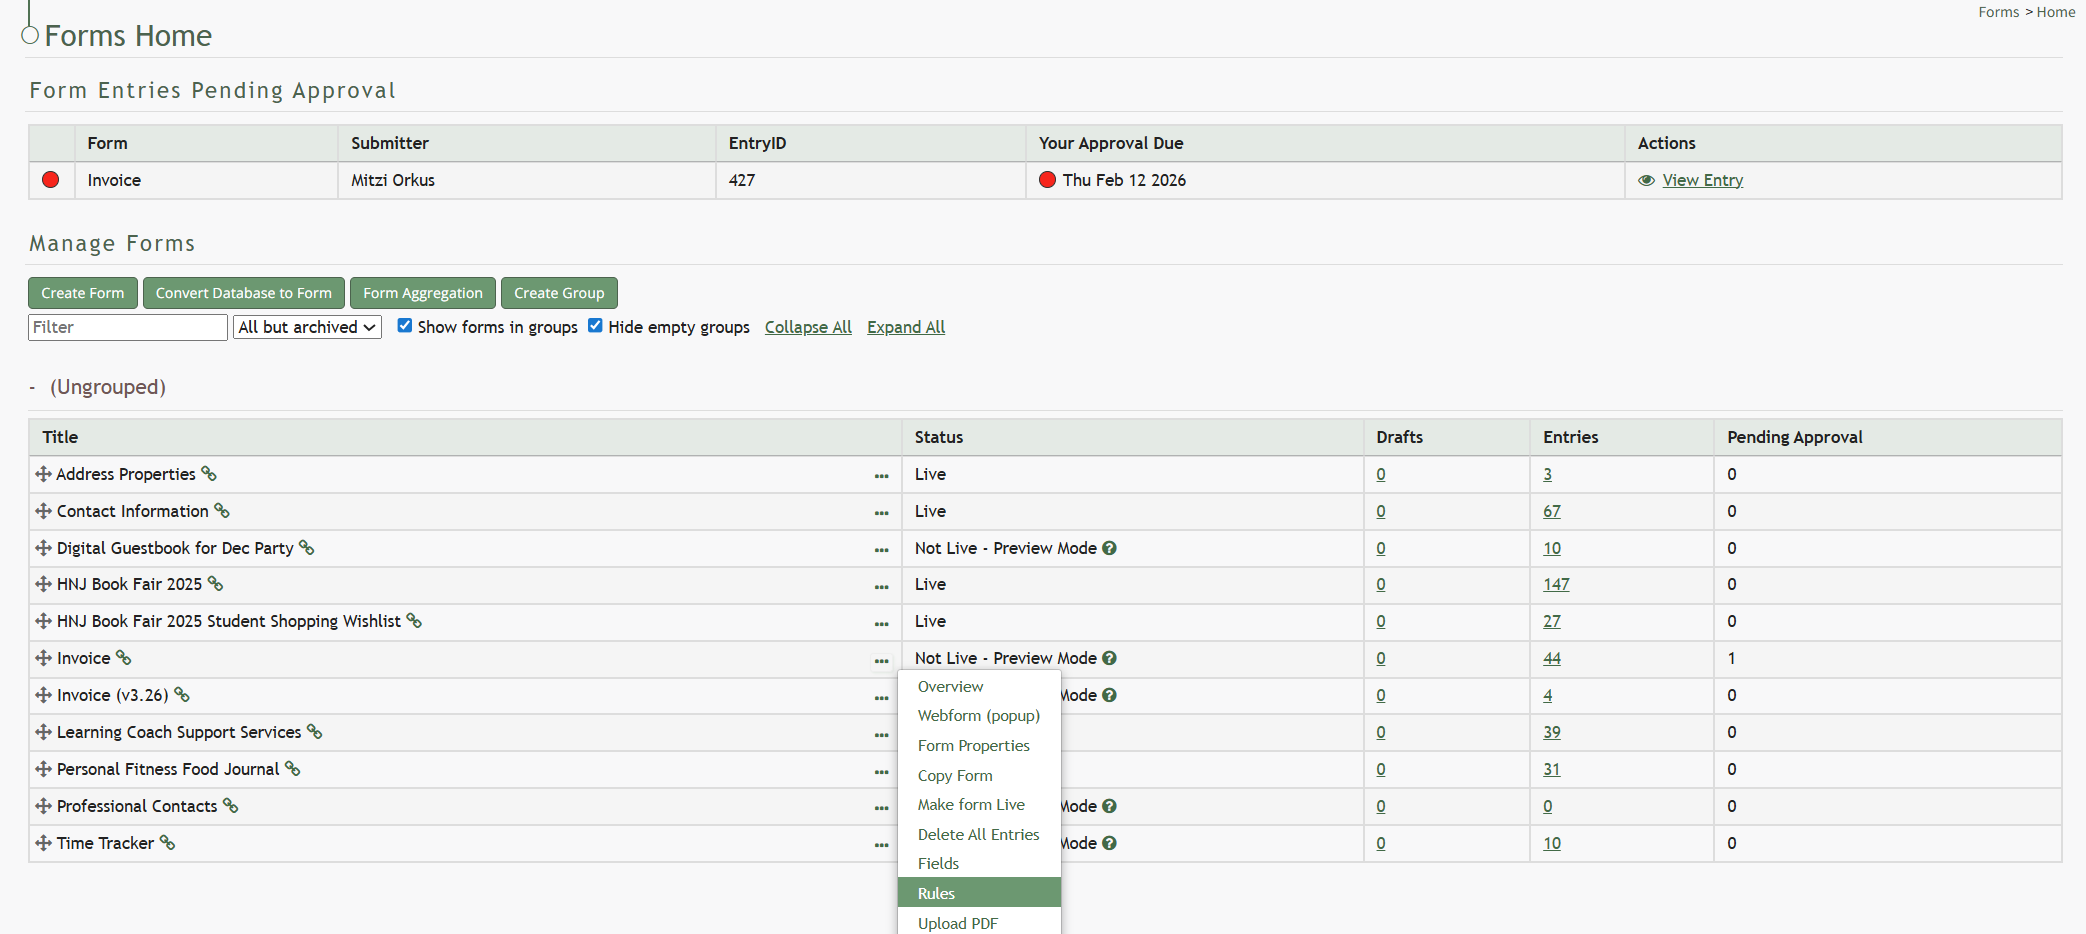
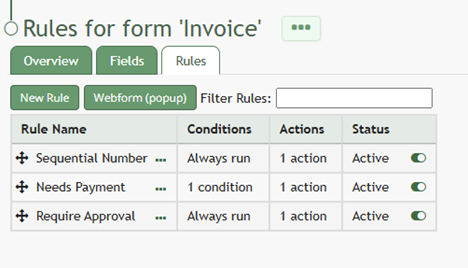
This opens the form specific Rules Tab.
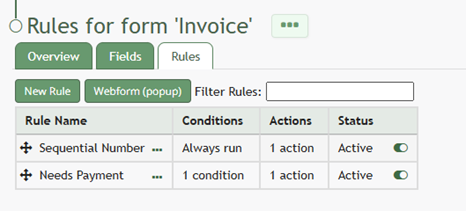
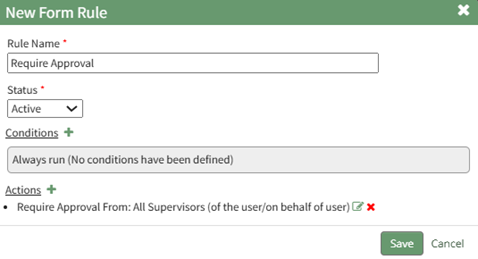
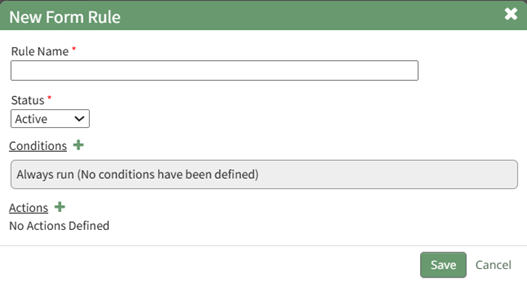
Select “New Rule” opening the New Form Rule Modal.
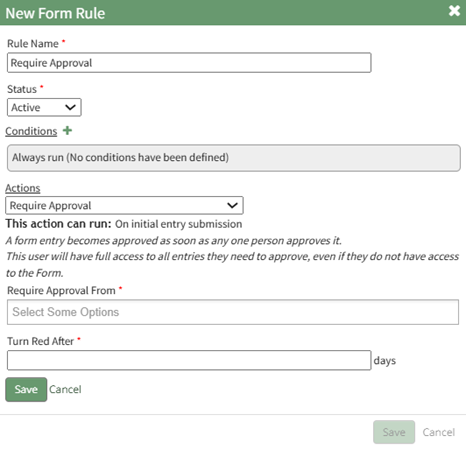
Input the name of the new rule and set the status as “Active”. The rule can be conditional, or it can always be run for the specific form.
Click the plus icon to the right of action, expanding the modal. Select the Workflow Category option “Require Approval”.
This rule will apply for the initial entry submission.
Select who can grant approval: direct supervisors, all supervisors, or specific users.
A form entry will be approved as soon as any individual who can approve it does. Only one individual needs to approve the entry pending approval.
Requiring approval from an individual will give full access too all entries the individual needs to approve, even if the individual does not have access to the form itself.
Specify the number of days after a form entry is submitted when the pending approval will turn red.
Select “Save” to save the action, which will now show in the New Form Rule Modal.
Select “Save” at the bottom of the modal and the rule to require approval for form entries will now be active and shows on the form specific Rules Tab.

How To: Approve a Form Entry Pending Approval
To approve a form entry pending approval, go to the Home Page of the Forms Module.

Select “View Entry” from the Actions column of the Form Entries Pending Approval Table opening the view form entry modal.
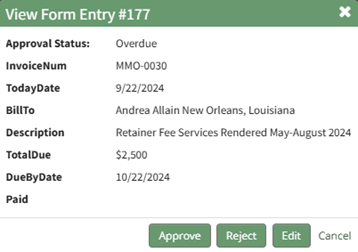
Select the “Approve” button opening a confirmation modal that states, “Are you sure you want to approve this entry?”
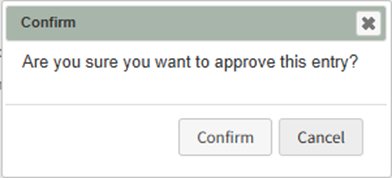
Select “Confirm” and a confirmation modal states, “Approved”.

How To: Reject a Form Entry Pending Approval
To reject a form entry pending approval, go to the Home Page of the Forms Module.

Select “View Entry” from the Actions column of the Form Entries Pending Approval Table opening the view form entry modal.

Select the “Reject” button opening a Confirmation Modal that states, “Are you sure you want to reject this entry?
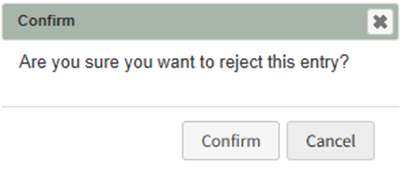
Select “Confirm” and a confirmation modal states, “Rejected”.

Forms Table Context Menu Option Explanations | ||||||||||||||||||||||||||||||||||||||||||||||||||||||||||||||||||||||||||||||||||||||||||||||||||||||||||||||||||||
Option | Explanation | |||||||||||||||||||||||||||||||||||||||||||||||||||||||||||||||||||||||||||||||||||||||||||||||||||||||||||||||||||
Overview | Selecting Overview from the context menu will open the Overview Tab related to the specific Form. The Overview Tab includes Form Stats (# of drafts, # of entries, # of pending approvals), the form status, form access (URL Link and QR Code) as well as a URL link for PDF submission info. | |||||||||||||||||||||||||||||||||||||||||||||||||||||||||||||||||||||||||||||||||||||||||||||||||||||||||||||||||||
Webform (popup) | Selecting Webform (popup) from the context menu will open a modal allowing an individual to input another form entry. If the form is not live, the modal will state so in bold under the header. Any submissions made before a form is live can be deleted. This modal will vary, as it opens the a unique form. | |||||||||||||||||||||||||||||||||||||||||||||||||||||||||||||||||||||||||||||||||||||||||||||||||||||||||||||||||||
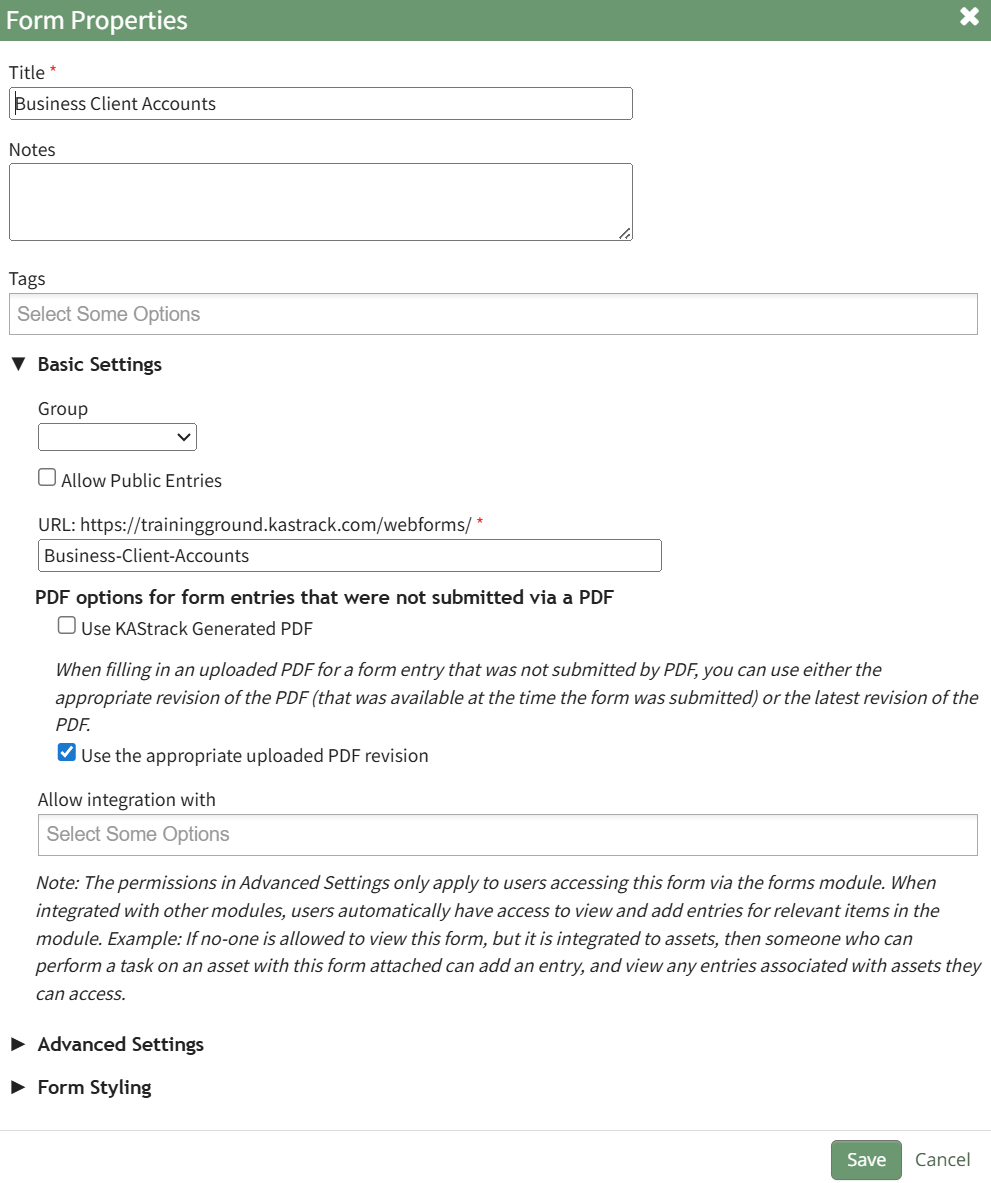
Form Properties | Selecting Form Properties from the context menu will open the Form Properties Modal, allowing an individual to make changes to the Form Title and Tags, as well as the Basic / Advanced Settings and Form Styling established when the form was created. How To: Edit a FormTo edit a form, go to the Home Page in the Forms Module. Click the three-dot icon to the right of the form you wish to edit opening the specific form’s context menu. Select “Form Properties”.
This opens the Form Properties Modal.
How To: Create a FormTo create a new form, open the Home Page in the Forms Module from the Main Menu and select the Create Form button beneath the page header.
This will open the New Form Modal.
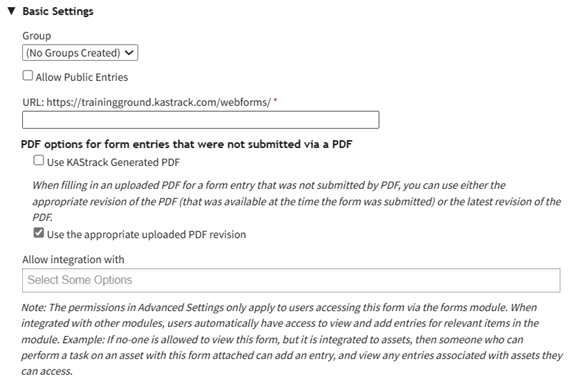
Input the Form Title (a required field), form notes, and any open/permissive/restrictive tags to be associated with the form. There are three additional sections to the New Form Modal that expand when clicked with additional options for customization. Modal images and explanations of each input are included below. Basic Settings Section
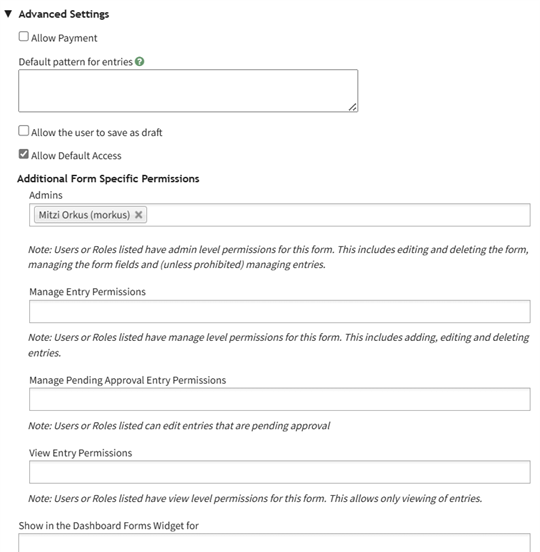
Advanced Settings Section
Form Styling Section
Select the Save button on the New Form Modal after customizing your form and the system will direct you to the form's Fields Tab where you can begin to input Form fields.
How To: Import Fields from a PDF Field ImportImporting fields from a PDF Field Import has multiple purposes. Not only will the form fields be generated through this process, the PDF will also be saved by the system, so that future form entries can be downloaded into this PDF, allowing for customizable outputs. A form must have already been created with no fields added for this method to work. If a field has already been added to the form, you are no longer able to bulk import form field names from a PDF Field Import. You are now required to enter each field name individually. Regardless, you can still upload a PDF Form that the system will use for future form entry downloads. How To: Create a Form{{@386}} How To: Add a Field to a Form{{@373}} How To: Upload a PDF Form{{@408}} To import field names from a PDF file, go to the Home Page of the Forms Module. Select the three-dot icon to the right of the Form Title opening the Form’s context menu. Select “Form”.
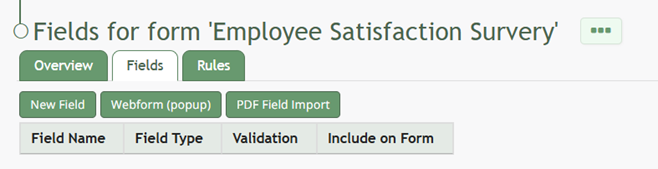
This opens the Fields Tab for a specific form. Select the “PDF Field Import” button.
This opens the PDF Field Import Modal.
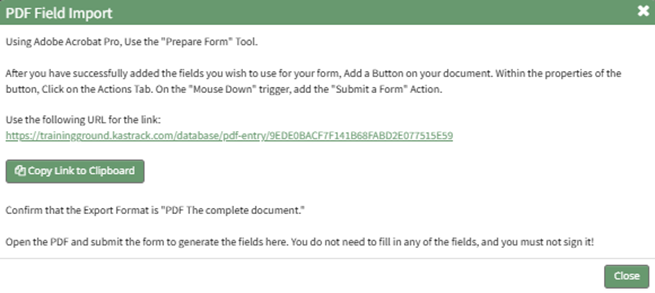
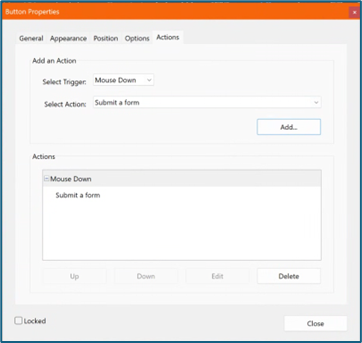
To import fields using a PDF, use the “Prepare Form” tool in Adobe Acrobat Pro. Add the fields you wish to use for your form. Add a button on your document.
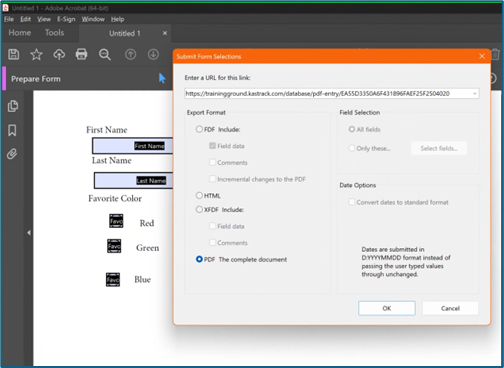
Use the URL link provided on the PDF Field Import Modal in KAStrack.
Confirm that the Export Format is “PDF The complete document”.
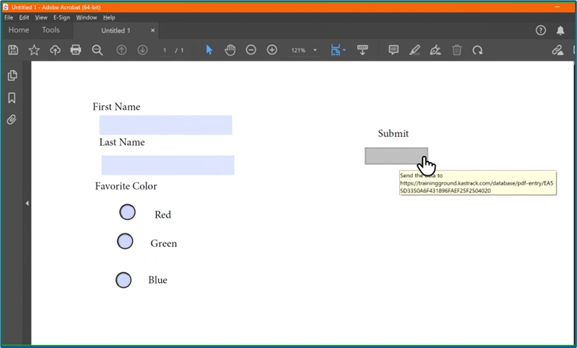
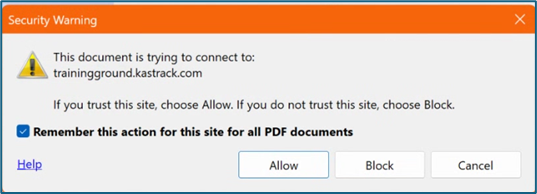
Open the PDF and submit the form to generate the fields here. You do not need to fill in any of the fields, and you must not sign it.
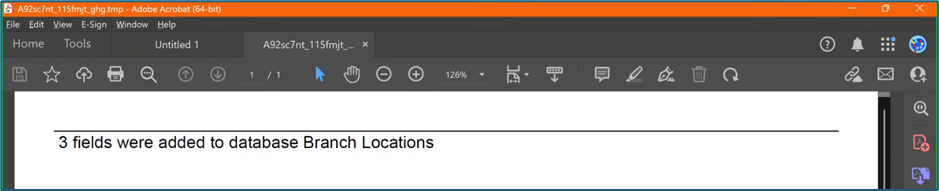
Select “Allow” and the PDF will confirm that the fields were added to the database.
Go to the Fields Table in the database Monday, and a warning now states that a PDF is associated with the form and that adding/editing or deleting fields may result in the PDF no longer being compatible. How To: Import Form Fields from a CSV FileTo import form entries from a CSV, form fields must have already been created. How To: Add a Field to a Form{{@373}} How To: Import Form Fields from a CSV File{{@402}} How To: Import Fields from a PDF Field Import{{@400}} To import form entries from a CSV, go to the Home Page of the Forms Module and click the three-dot icon to the right of the form you wish to import entries into. Select “Manage Entries”.
This opens the Manage Entries for (FORM NAME) Page.
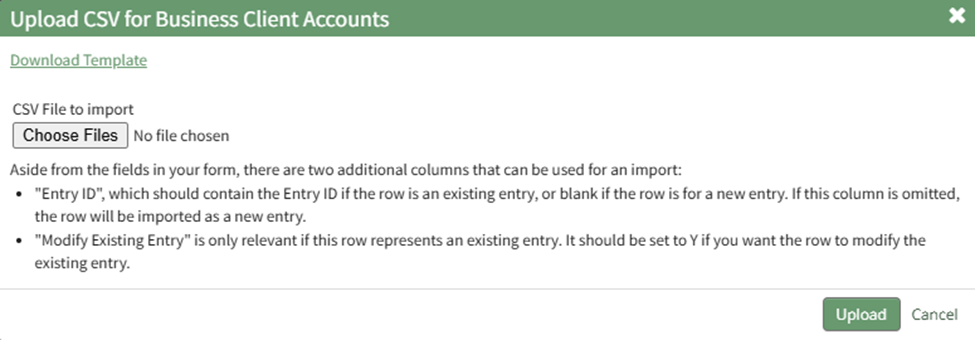
Click the “Import Entries” button beneath the page header. This opens the Upload CSV for (FORM NAME) Modal.
Click the “Download Template” link at the top of the modal and a CSV file will be downloaded to your personal device. Notes have been provided if you are using the downloadable template to Upload bulk CSV form entries. Notes Regarding the Downloadable Template for Uploading CSV FilesThe first row of the CSV file is for each of the form fields. If you download a CSV Template from the Upload CSV Modal, two additional column headers will show that are not form fields: Entry ID and Modify Existing Entry. If you are importing form entries and no entries have been added to the form yet, leave these columns blank in your upload. If form entries already exist in the database, the Entry ID column will contain the unique system generated ID for each pre-existing database entry. Leave this column blank if the row is to be imported as a new entry. The second column, Modify Existing Entry, should have a “Y” input if the existing entry is being modified and an “N” input if it has not been modified. Leave this column blank if the entry is new.
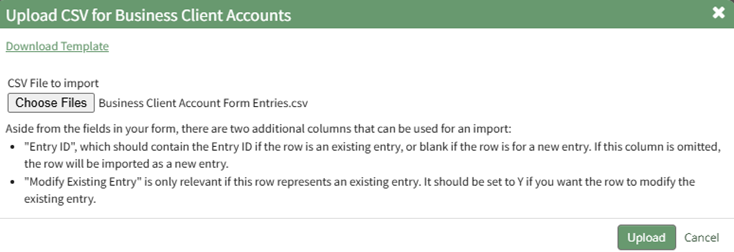
After creating your Forms Entries CSV file, save it as a CSV UTF-8 for importing. Click the “Choose File” button on the Upload CSV Modal and open the relevant file from your personal device.
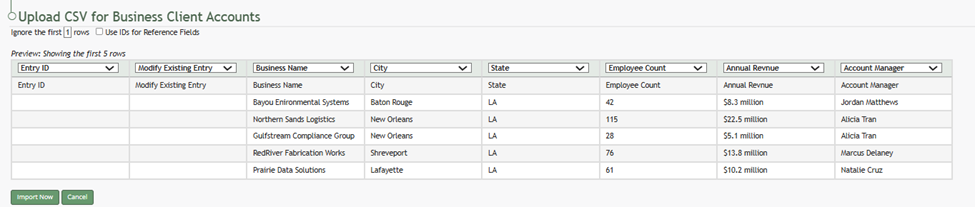
Confirm that the correct CSV file now shows in the Upload CSV Modal.
Select the “Upload” button.
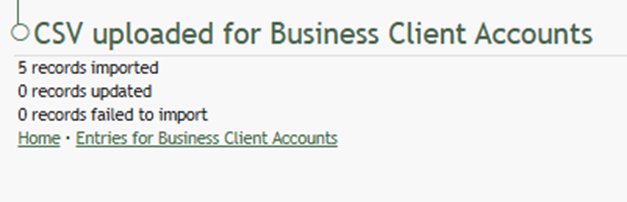
The entries imported from the CSV file will now show on the Upload CSV for (FORM NAME) Page. The system automatically indicates to ignore the first row. Click “Import Now” if there are no errors. A summary of the import will now show on the CSV Upload Page.
Click the “Entries for (FORM NAME)” link to see all imported entries on the Manage Entries Page. How To: Upload a PDF FormUploading a PDF allows an individual to create a customized output for form entries. In order to do so, the PDF must be created on Adobe Acrobat Pro (or comparable software) and have made use of form fields. A PDF can be created and uploaded after a form is in use, however no additional fields can be created at this time. To upload a PDF form to be used for form entry outputs, go to the Home Page of the Forms Module. Click the three-dot icon to the right of the form title opening the context menu and select “Upload PDF”.
This will open the Upload PDF Form Modal.
Select “Choose File” to retrieve the PDF from your personal device. Input a title for the PDF or select the clickable “Use Filename” link to have the system use the filename as the title. The revision date will automatically show the current day, but can be altered. Select the appropriate checkbox if the document is to be public, or if it is a 360 degree photo. You can select individuals or certification roles as the document owner(s). Select “Save” and a confirmation modal will appear stating, “File was uploaded.”
Confirm you wish to edit the form by clicking the “Save” button. Selecting “Cancel” will return you to the Forms Home Page. | |||||||||||||||||||||||||||||||||||||||||||||||||||||||||||||||||||||||||||||||||||||||||||||||||||||||||||||||||||
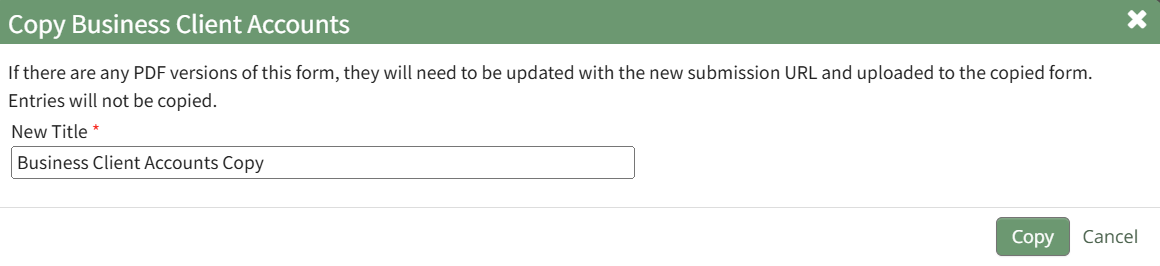
Copy Form | Selecting Copy Form from the context menu will open the Copy Form Modal, which allows an indivual to give a new title to the copied form. If there are any PDF versions of a copied form, they will need to be updated with the new submission URL and uploaded to the copied form. Entries will not be copied. How To: Copy a FormTo copy a form, go to the Home Page of the Forms Module and select the three dot icon to the right of the form title you wish to copy.
Select “Copy Form” from the context menu opening the Copy (FORM NAME) Modal.
Input the desired name for the newly copied Form and select “Copy”. The copied form will now show on the Forms Home Page. | |||||||||||||||||||||||||||||||||||||||||||||||||||||||||||||||||||||||||||||||||||||||||||||||||||||||||||||||||||
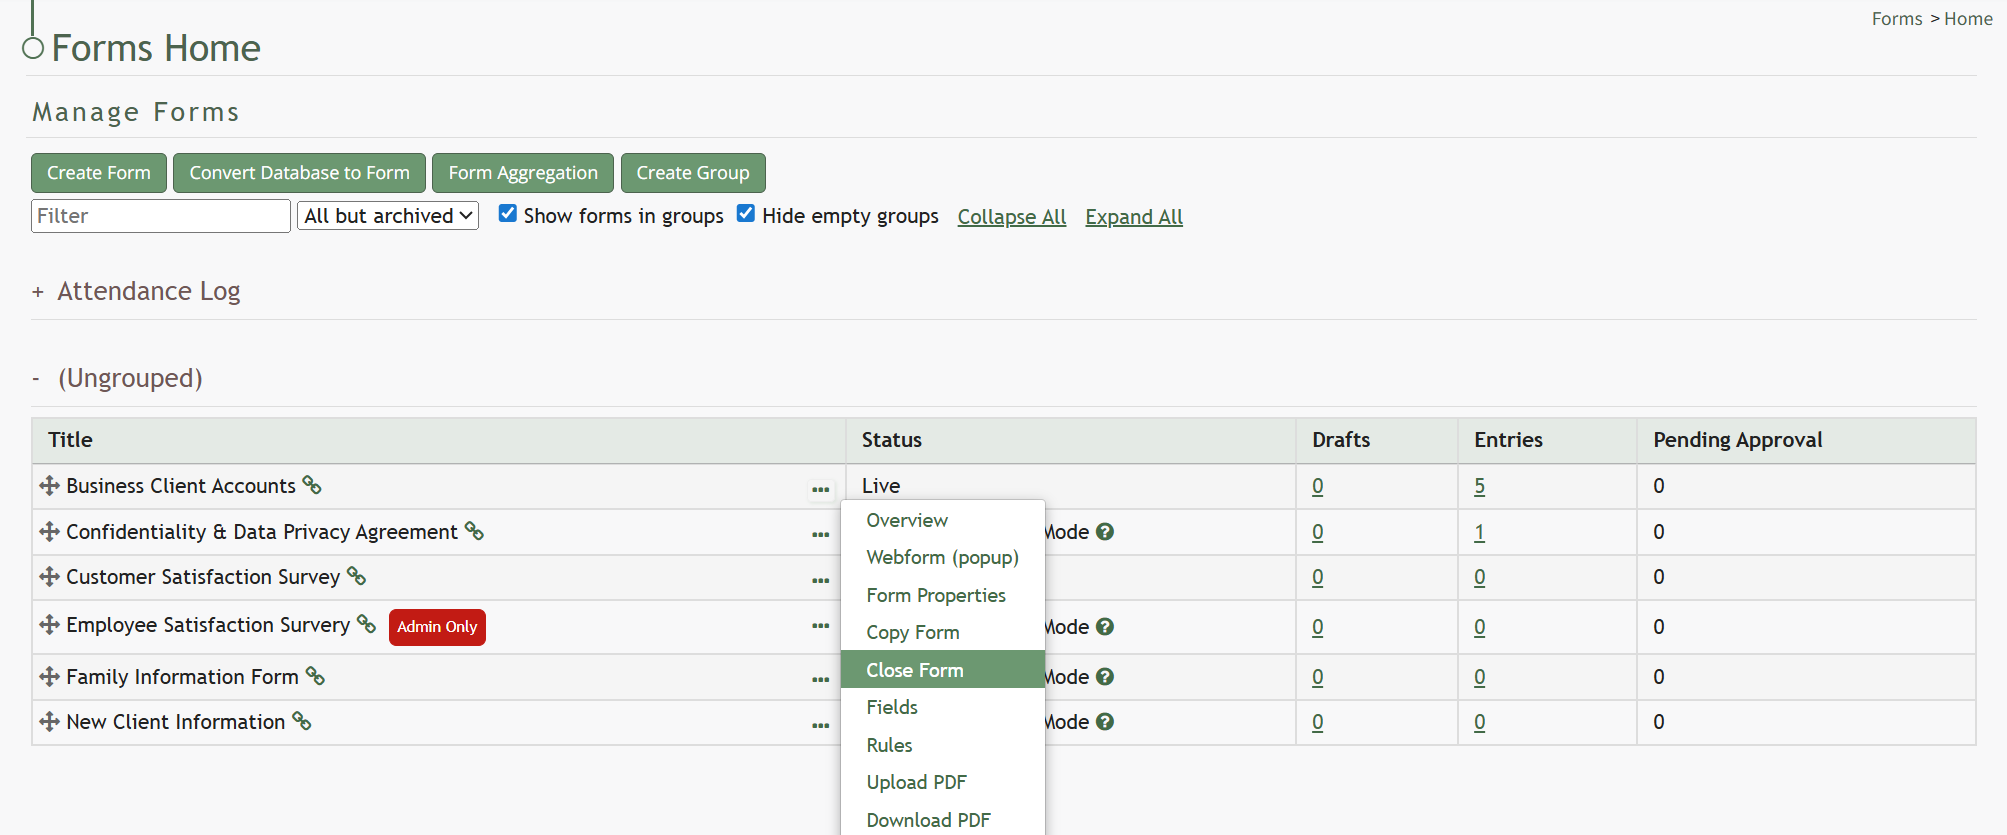
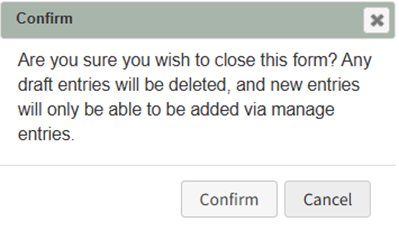
Close Form | Selecting Close Form from the context menu is an option if the form is live and will open a confirmation modal that states, “Are you sure you wish to close this form? Any draft entries will be deleted, and new entries will only be able to be added via manage entries.” How To: Close a FormTo close a live form, go to the Home Page of the Forms Module and click the three-dot icon to the right of the form that you wish to close. This opens the Form’s context menu. Select “Close Form”.
This opens the Close Form Confirmation Modal which states, “Are you sure you wish to close this form? Any draft entries will be deleted, and new entries will only be able to be added via manage entries.”
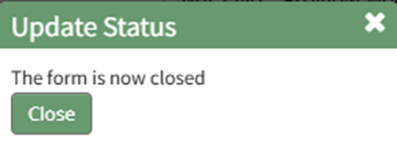
Select “Confirm” and an Update Status Modal appears stating, “The form is now closed.”
The status of the form will now show as closed in the Forms Table.
| |||||||||||||||||||||||||||||||||||||||||||||||||||||||||||||||||||||||||||||||||||||||||||||||||||||||||||||||||||
Archive Form | Selecting Archive Form from the context menu will open the Archive Form Confirmation Modal, which requires confirmation that the closed form is to be archived. How To: Archive a FormTo Archive a form, it cannot be live. You must close the form first. How To: Close a FormTo close a live form, go to the Home Page of the Forms Module and click the three-dot icon to the right of the form that you wish to close. This opens the Form’s context menu. Select “Close Form”.
This opens the Close Form Confirmation Modal which states, “Are you sure you wish to close this form? Any draft entries will be deleted, and new entries will only be able to be added via manage entries.”
Select “Confirm” and an Update Status Modal appears stating, “The form is now closed.”
The status of the form will now show as closed in the Forms Table.
To archive a closed form, go to the Home Page of the Forms Module and click the three-dot icon to the right of the form that you wish to archive. This opens the Form’s context menu. Select “Archive Form”.
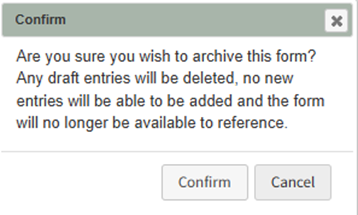
Selecting “Archive Form” will open a confirmation modal stating, “Are you sure you wish to archive this form? Any draft entries will be deleted, no new entries will be added and the form will no longer be available to reference.”
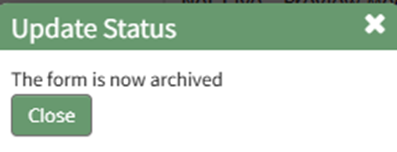
Select “Confirm” and an Update Status Modal will appear.
Click the “Close” botton and return for the Forms Home Page. The form will no longer be visible on the Home Page. | |||||||||||||||||||||||||||||||||||||||||||||||||||||||||||||||||||||||||||||||||||||||||||||||||||||||||||||||||||
Fields | Selecting Fields from the context menu will open the Fields Tab for a specific form, where all existing fields are listed and where new fields can be added and managed. If a form is live, a checkbox will have to be selected in order for fields to be edited. How To: Add a Field to a FormTo add a field to a form, go to the Home Page of the Forms Module. . Click the three-dot icon to the right of the form title that you want to add a field to opening the Form context menu. Select “Fields”.
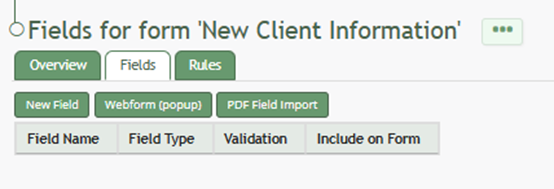
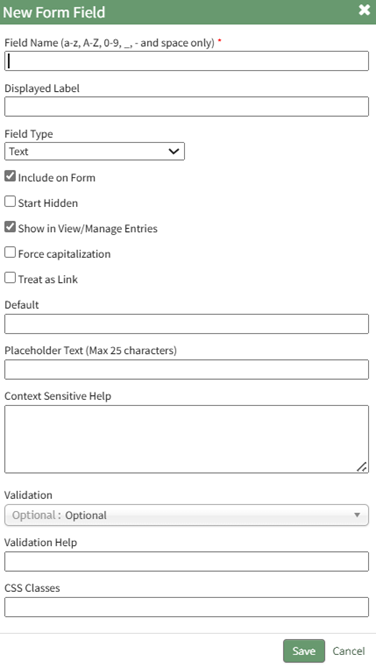
This opens the Fields Tab for the specific form of interest. There are two ways to add an individual field to the Fields Table from here. Click the “New Field” button opening the New Form Field Modal.
The creation of a new field will always require you to enter a field name. Include an input for the displayed label and select the field type from a dropdown menu. The inputs on the New Form Field Modal will vary based on the Field Type. Possible field types in the Forms Module include Form Fields, Formatting Fields, Utility Fields, Account Fields, and Reference a Database Entry. For an explanation of field types and the formatting choices associated with each one, reference the Understanding Fields Section of the Forms Module in the User Manual. A form field can only have on field type. If you need to utilize another (e.g., formatting purposes), you can set the displayed label to be the same but the field label must be unique. Once you are finished inputting the information for the new field, select “Save” and the new database field will show in the Fields Table on the Fields Tab.
Fields can also be imported in bulk into a Form from a CSV file or PDF Field Import. How To: Import Form Fields from a CSV FileTo import form entries from a CSV, form fields must have already been created. How To: Add a Field to a FormTo add a field to a form, go to the Home Page of the Forms Module. . Click the three-dot icon to the right of the form title that you want to add a field to opening the Form context menu. Select “Fields”.
This opens the Fields Tab for the specific form of interest. There are two ways to add an individual field to the Fields Table from here. Click the “New Field” button opening the New Form Field Modal.
The creation of a new field will always require you to enter a field name. Include an input for the displayed label and select the field type from a dropdown menu. The inputs on the New Form Field Modal will vary based on the Field Type. Possible field types in the Forms Module include Form Fields, Formatting Fields, Utility Fields, Account Fields, and Reference a Database Entry. For an explanation of field types and the formatting choices associated with each one, reference the Understanding Fields Section of the Forms Module in the User Manual. A form field can only have on field type. If you need to utilize another (e.g., formatting purposes), you can set the displayed label to be the same but the field label must be unique. Once you are finished inputting the information for the new field, select “Save” and the new database field will show in the Fields Table on the Fields Tab.
Fields can also be imported in bulk into a Form from a CSV file or PDF Field Import. How To: Import Form Fields from a CSV File{{@402}} How To: Import Fields from a PDF Field Import{{@400}} How To: Import Form Fields from a CSV FileTo import form entries from a CSV, form fields must have already been created. How To: Add a Field to a Form{{@373}} How To: Import Form Fields from a CSV File{{@402}} How To: Import Fields from a PDF Field Import{{@400}} To import form entries from a CSV, go to the Home Page of the Forms Module and click the three-dot icon to the right of the form you wish to import entries into. Select “Manage Entries”.
This opens the Manage Entries for (FORM NAME) Page.
Click the “Import Entries” button beneath the page header. This opens the Upload CSV for (FORM NAME) Modal.
Click the “Download Template” link at the top of the modal and a CSV file will be downloaded to your personal device. Notes have been provided if you are using the downloadable template to Upload bulk CSV form entries. Notes Regarding the Downloadable Template for Uploading CSV FilesThe first row of the CSV file is for each of the form fields. If you download a CSV Template from the Upload CSV Modal, two additional column headers will show that are not form fields: Entry ID and Modify Existing Entry. If you are importing form entries and no entries have been added to the form yet, leave these columns blank in your upload. If form entries already exist in the database, the Entry ID column will contain the unique system generated ID for each pre-existing database entry. Leave this column blank if the row is to be imported as a new entry. The second column, Modify Existing Entry, should have a “Y” input if the existing entry is being modified and an “N” input if it has not been modified. Leave this column blank if the entry is new.
After creating your Forms Entries CSV file, save it as a CSV UTF-8 for importing. Click the “Choose File” button on the Upload CSV Modal and open the relevant file from your personal device.
Confirm that the correct CSV file now shows in the Upload CSV Modal.
Select the “Upload” button.
The entries imported from the CSV file will now show on the Upload CSV for (FORM NAME) Page. The system automatically indicates to ignore the first row. Click “Import Now” if there are no errors. A summary of the import will now show on the CSV Upload Page.
Click the “Entries for (FORM NAME)” link to see all imported entries on the Manage Entries Page. How To: Import Fields from a PDF Field ImportImporting fields from a PDF Field Import has multiple purposes. Not only will the form fields be generated through this process, the PDF will also be saved by the system, so that future form entries can be downloaded into this PDF, allowing for customizable outputs. A form must have already been created with no fields added for this method to work. If a field has already been added to the form, you are no longer able to bulk import form field names from a PDF Field Import. You are now required to enter each field name individually. Regardless, you can still upload a PDF Form that the system will use for future form entry downloads. How To: Create a Form{{@386}} How To: Add a Field to a Form{{@373}} How To: Upload a PDF Form{{@408}} To import field names from a PDF file, go to the Home Page of the Forms Module. Select the three-dot icon to the right of the Form Title opening the Form’s context menu. Select “Form”.
This opens the Fields Tab for a specific form. Select the “PDF Field Import” button.
This opens the PDF Field Import Modal.
To import fields using a PDF, use the “Prepare Form” tool in Adobe Acrobat Pro. Add the fields you wish to use for your form. Add a button on your document.
Use the URL link provided on the PDF Field Import Modal in KAStrack.
Confirm that the Export Format is “PDF The complete document”.
Open the PDF and submit the form to generate the fields here. You do not need to fill in any of the fields, and you must not sign it.
Select “Allow” and the PDF will confirm that the fields were added to the database.
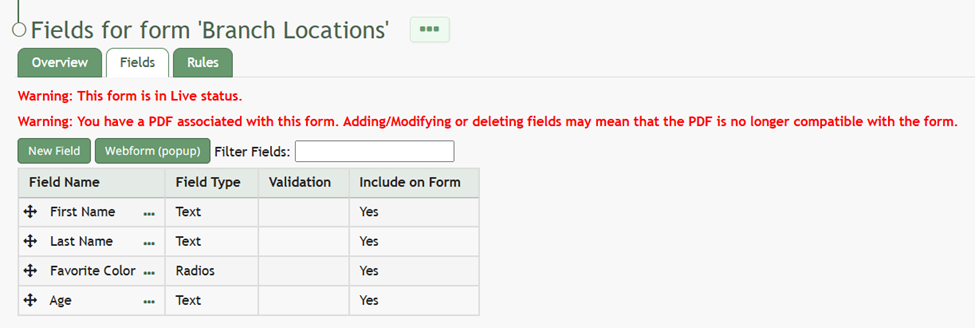
Go to the Fields Table in the database Monday, and a warning now states that a PDF is associated with the form and that adding/editing or deleting fields may result in the PDF no longer being compatible. To import form entries from a CSV, go to the Home Page of the Forms Module and click the three-dot icon to the right of the form you wish to import entries into. Select “Manage Entries”.
This opens the Manage Entries for (FORM NAME) Page.
Click the “Import Entries” button beneath the page header. This opens the Upload CSV for (FORM NAME) Modal.
Click the “Download Template” link at the top of the modal and a CSV file will be downloaded to your personal device. Notes have been provided if you are using the downloadable template to Upload bulk CSV form entries. Notes Regarding the Downloadable Template for Uploading CSV FilesThe first row of the CSV file is for each of the form fields. If you download a CSV Template from the Upload CSV Modal, two additional column headers will show that are not form fields: Entry ID and Modify Existing Entry. If you are importing form entries and no entries have been added to the form yet, leave these columns blank in your upload. If form entries already exist in the database, the Entry ID column will contain the unique system generated ID for each pre-existing database entry. Leave this column blank if the row is to be imported as a new entry. The second column, Modify Existing Entry, should have a “Y” input if the existing entry is being modified and an “N” input if it has not been modified. Leave this column blank if the entry is new.
After creating your Forms Entries CSV file, save it as a CSV UTF-8 for importing. Click the “Choose File” button on the Upload CSV Modal and open the relevant file from your personal device.
Confirm that the correct CSV file now shows in the Upload CSV Modal.
Select the “Upload” button.
The entries imported from the CSV file will now show on the Upload CSV for (FORM NAME) Page. The system automatically indicates to ignore the first row. Click “Import Now” if there are no errors. A summary of the import will now show on the CSV Upload Page.
Click the “Entries for (FORM NAME)” link to see all imported entries on the Manage Entries Page. How To: Import Fields from a PDF Field ImportImporting fields from a PDF Field Import has multiple purposes. Not only will the form fields be generated through this process, the PDF will also be saved by the system, so that future form entries can be downloaded into this PDF, allowing for customizable outputs. A form must have already been created with no fields added for this method to work. If a field has already been added to the form, you are no longer able to bulk import form field names from a PDF Field Import. You are now required to enter each field name individually. Regardless, you can still upload a PDF Form that the system will use for future form entry downloads. How To: Create a FormTo create a new form, open the Home Page in the Forms Module from the Main Menu and select the Create Form button beneath the page header.
This will open the New Form Modal.
Input the Form Title (a required field), form notes, and any open/permissive/restrictive tags to be associated with the form. There are three additional sections to the New Form Modal that expand when clicked with additional options for customization. Modal images and explanations of each input are included below. Basic Settings Section
Advanced Settings Section
Form Styling Section
Select the Save button on the New Form Modal after customizing your form and the system will direct you to the form's Fields Tab where you can begin to input Form fields.
How To: Import Fields from a PDF Field Import{{@400}} How To: Import Form Fields from a CSV File{{@402}} How To: Upload a PDF Form{{@408}} How To: Add a Field to a FormTo add a field to a form, go to the Home Page of the Forms Module. . Click the three-dot icon to the right of the form title that you want to add a field to opening the Form context menu. Select “Fields”.
This opens the Fields Tab for the specific form of interest. There are two ways to add an individual field to the Fields Table from here. Click the “New Field” button opening the New Form Field Modal.
The creation of a new field will always require you to enter a field name. Include an input for the displayed label and select the field type from a dropdown menu. The inputs on the New Form Field Modal will vary based on the Field Type. Possible field types in the Forms Module include Form Fields, Formatting Fields, Utility Fields, Account Fields, and Reference a Database Entry. For an explanation of field types and the formatting choices associated with each one, reference the Understanding Fields Section of the Forms Module in the User Manual. A form field can only have on field type. If you need to utilize another (e.g., formatting purposes), you can set the displayed label to be the same but the field label must be unique. Once you are finished inputting the information for the new field, select “Save” and the new database field will show in the Fields Table on the Fields Tab.
Fields can also be imported in bulk into a Form from a CSV file or PDF Field Import. How To: Import Form Fields from a CSV File{{@402}} How To: Import Fields from a PDF Field Import{{@400}} How To: Upload a PDF FormUploading a PDF allows an individual to create a customized output for form entries. In order to do so, the PDF must be created on Adobe Acrobat Pro (or comparable software) and have made use of form fields. A PDF can be created and uploaded after a form is in use, however no additional fields can be created at this time. To upload a PDF form to be used for form entry outputs, go to the Home Page of the Forms Module. Click the three-dot icon to the right of the form title opening the context menu and select “Upload PDF”.
This will open the Upload PDF Form Modal.
Select “Choose File” to retrieve the PDF from your personal device. Input a title for the PDF or select the clickable “Use Filename” link to have the system use the filename as the title. The revision date will automatically show the current day, but can be altered. Select the appropriate checkbox if the document is to be public, or if it is a 360 degree photo. You can select individuals or certification roles as the document owner(s). Select “Save” and a confirmation modal will appear stating, “File was uploaded.”
To import field names from a PDF file, go to the Home Page of the Forms Module. Select the three-dot icon to the right of the Form Title opening the Form’s context menu. Select “Form”.
This opens the Fields Tab for a specific form. Select the “PDF Field Import” button.
This opens the PDF Field Import Modal.
To import fields using a PDF, use the “Prepare Form” tool in Adobe Acrobat Pro. Add the fields you wish to use for your form. Add a button on your document.
Use the URL link provided on the PDF Field Import Modal in KAStrack.
Confirm that the Export Format is “PDF The complete document”.
Open the PDF and submit the form to generate the fields here. You do not need to fill in any of the fields, and you must not sign it.
Select “Allow” and the PDF will confirm that the fields were added to the database.
Go to the Fields Table in the database Monday, and a warning now states that a PDF is associated with the form and that adding/editing or deleting fields may result in the PDF no longer being compatible. | |||||||||||||||||||||||||||||||||||||||||||||||||||||||||||||||||||||||||||||||||||||||||||||||||||||||||||||||||||
Rules | Selecting Rules from the context menu will open the Rules Tab for a specific form, where existing field rules are listed and where new rules can be added and managed. If a form is live, a checkbox will have to be selected in order for field rules to be edited. How To: Create a New Form Field RuleTo add a form field rule, go to the Home Page of the Forms Module. Click the three dot icon to the right of the form title that you want to create a rule for opening the Form context menu. Select “Rules”.
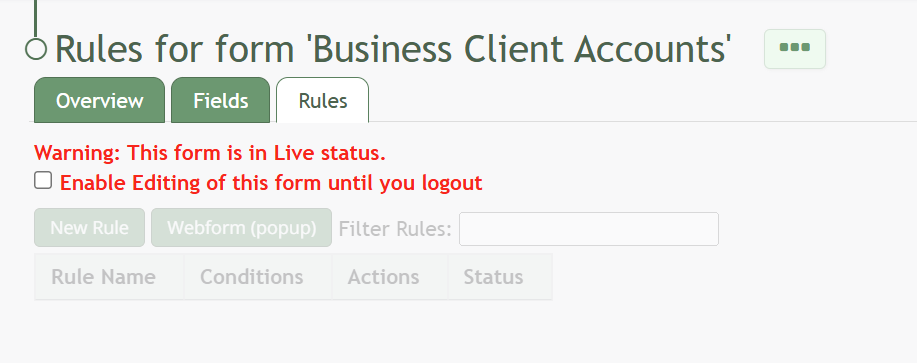
This opens the Rules Tab containing the Rule Table. If your form is already live, you will be asked to enable editing before you can add a new rule to your form.
After enabling editing (if required), select the “New Rule” button opening the New Form Rule Modal.
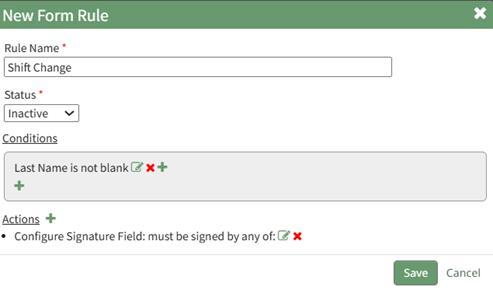
Input the Rule Name and Rule Status (both required fields). Click the plus icon to the right of Conditions to add a condition to the rule, expanding the section for the input of the trigger, what must be true, and what happens if it is true.
Once the condition has been entered, select “Save” to return to the New Form Rule Modal.
The condition created will show in the modal. As many conditions as desired can be entered, as well as none at all. Click the plus sign to the right of Actions to add an action to the rule, expanding the section for the configuration of the action to be taken when the conditions are met. Once the rule has been entered, select “Save” to return to the New Form Rule Modal. The action will now show in the modal.
Select “Save”. A popup will confirm that the rule was saved stating, “Rule was saved.”
The rule will now show in the Rules Table. | |||||||||||||||||||||||||||||||||||||||||||||||||||||||||||||||||||||||||||||||||||||||||||||||||||||||||||||||||||
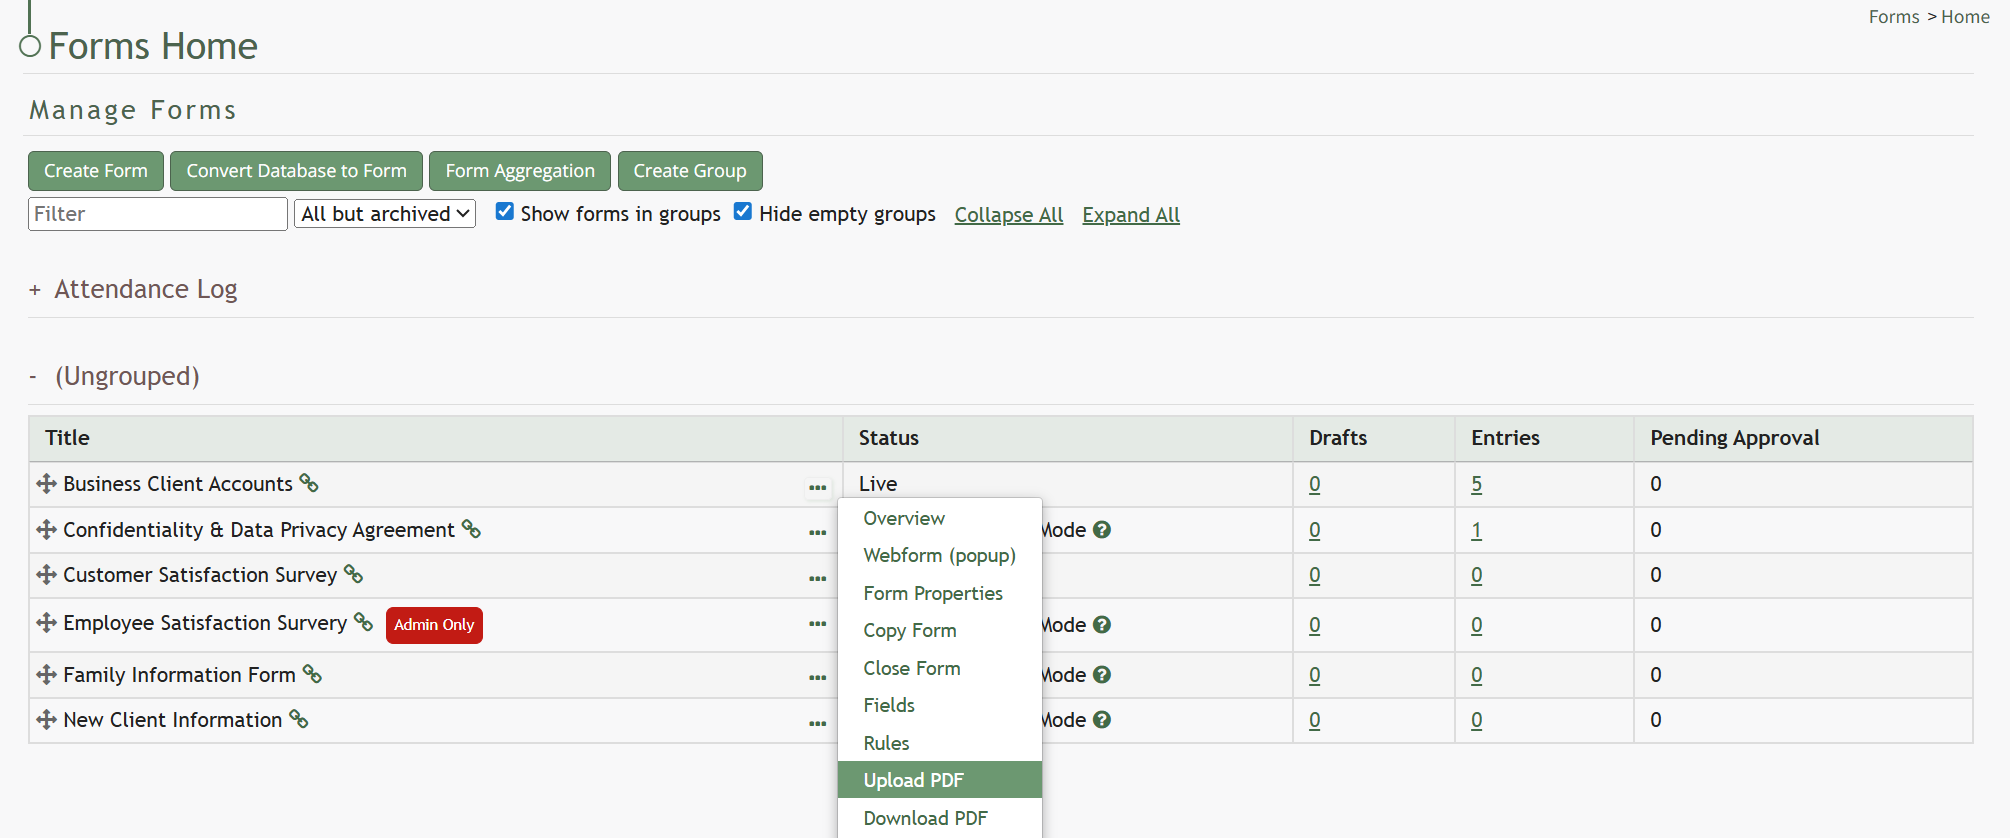
Upload PDF | Selecting Upload PDF from the context menu will open the Upload PDF Form Modal. How To: Upload a PDF Form after Fields are CreatedUploading a PDF allows an individual to create a customized output for form entries. In order to do so, the PDF must be created on Adobe Acrobat Pro (or comparable software) and have made use of form fields. A PDF can be created and uploaded after a form is in use, however no additional fields can be created at this time. To upload a PDF form to be used for form entry outputs, go to the Home Page of the Forms Module. Click the three-dot icon to the right of the form title opening the context menu and select “Upload PDF”.
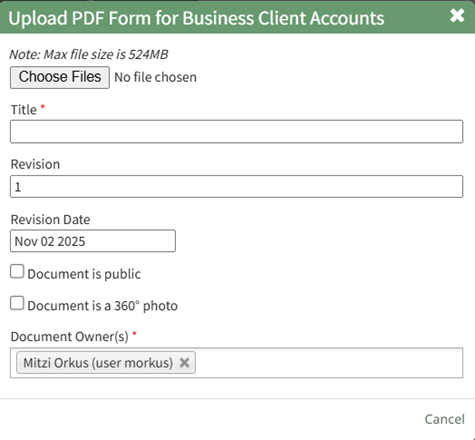
This will open the Upload PDF Form Modal.
Select “Choose File” to retrieve the PDF from your personal device. Input a title for the PDF or select the clickable “Use Filename” link to have the system use the filename as the title. The revision date will automatically show the current day, but can be altered. Select the appropriate checkbox if the document is to be public, or if it is a 360 degree photo. You can select individuals or certification roles as the document owner(s). Select “Save” and a confirmation modal will appear stating, “File was uploaded.”
| |||||||||||||||||||||||||||||||||||||||||||||||||||||||||||||||||||||||||||||||||||||||||||||||||||||||||||||||||||
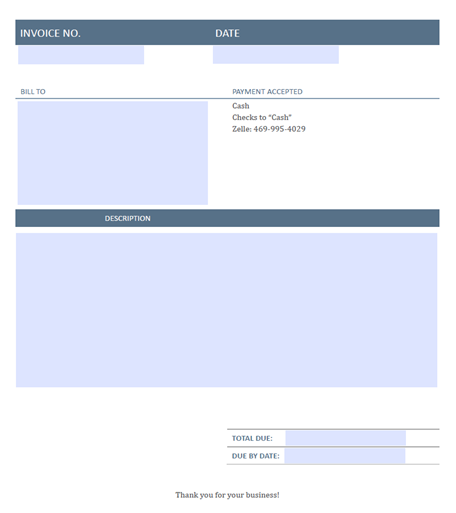
Download PDF | Selecting Download PDF from the context menu will download the PDF that have been associated with the form. How To: Download a PDF FormWhile this option will show on the context menu, you can only download a PDF if a PDF has been associated with the specific form selected. To download a specific form PDF, go to the Home Page of the Forms Module and click the three-dot icon to the right of the Form Title opening the Form Table context menu.
Select “Download PDF” and the form pdf will automatically be downloaded to your personal device.
The download will show all form fields without any entry information being input. | |||||||||||||||||||||||||||||||||||||||||||||||||||||||||||||||||||||||||||||||||||||||||||||||||||||||||||||||||||
Clear PDF Cache | Selecting Clear PDF Cache from the context menu will clear the PDF cache and force the system to recreate the form PDF (forcing the system to recreate the PDF with the current data). How To: Clear a PDF CacheTo clear the PDF cache, go to the Home Page of the Forms Module. Click the three-dot icon to the right of the form title opening the Forms Table context menu. Select “Clear PDF Cache”.
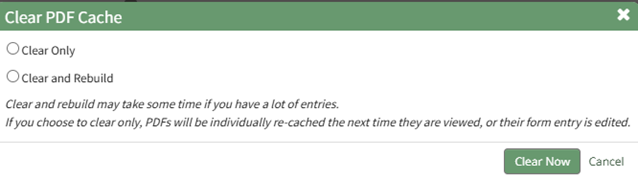
This opens the Clear PDF Cache Modal.
Select between two options: “Clear Only” or “Clear and Rebuild”. If you choose to clear and rebuild, the process can take time to complete if you have a lot of entries. Select “Clear Now” and a confirmation modal will appear stating, “The cache has been cleared.”
| |||||||||||||||||||||||||||||||||||||||||||||||||||||||||||||||||||||||||||||||||||||||||||||||||||||||||||||||||||
Drafts | Selecting Drafts from the context menu will open the Form Drafts Page showing the form draft history. | |||||||||||||||||||||||||||||||||||||||||||||||||||||||||||||||||||||||||||||||||||||||||||||||||||||||||||||||||||
View Entries | Selecting View Entries from the context menu will open the Form Entries Page displaying all entry responses to date. | |||||||||||||||||||||||||||||||||||||||||||||||||||||||||||||||||||||||||||||||||||||||||||||||||||||||||||||||||||
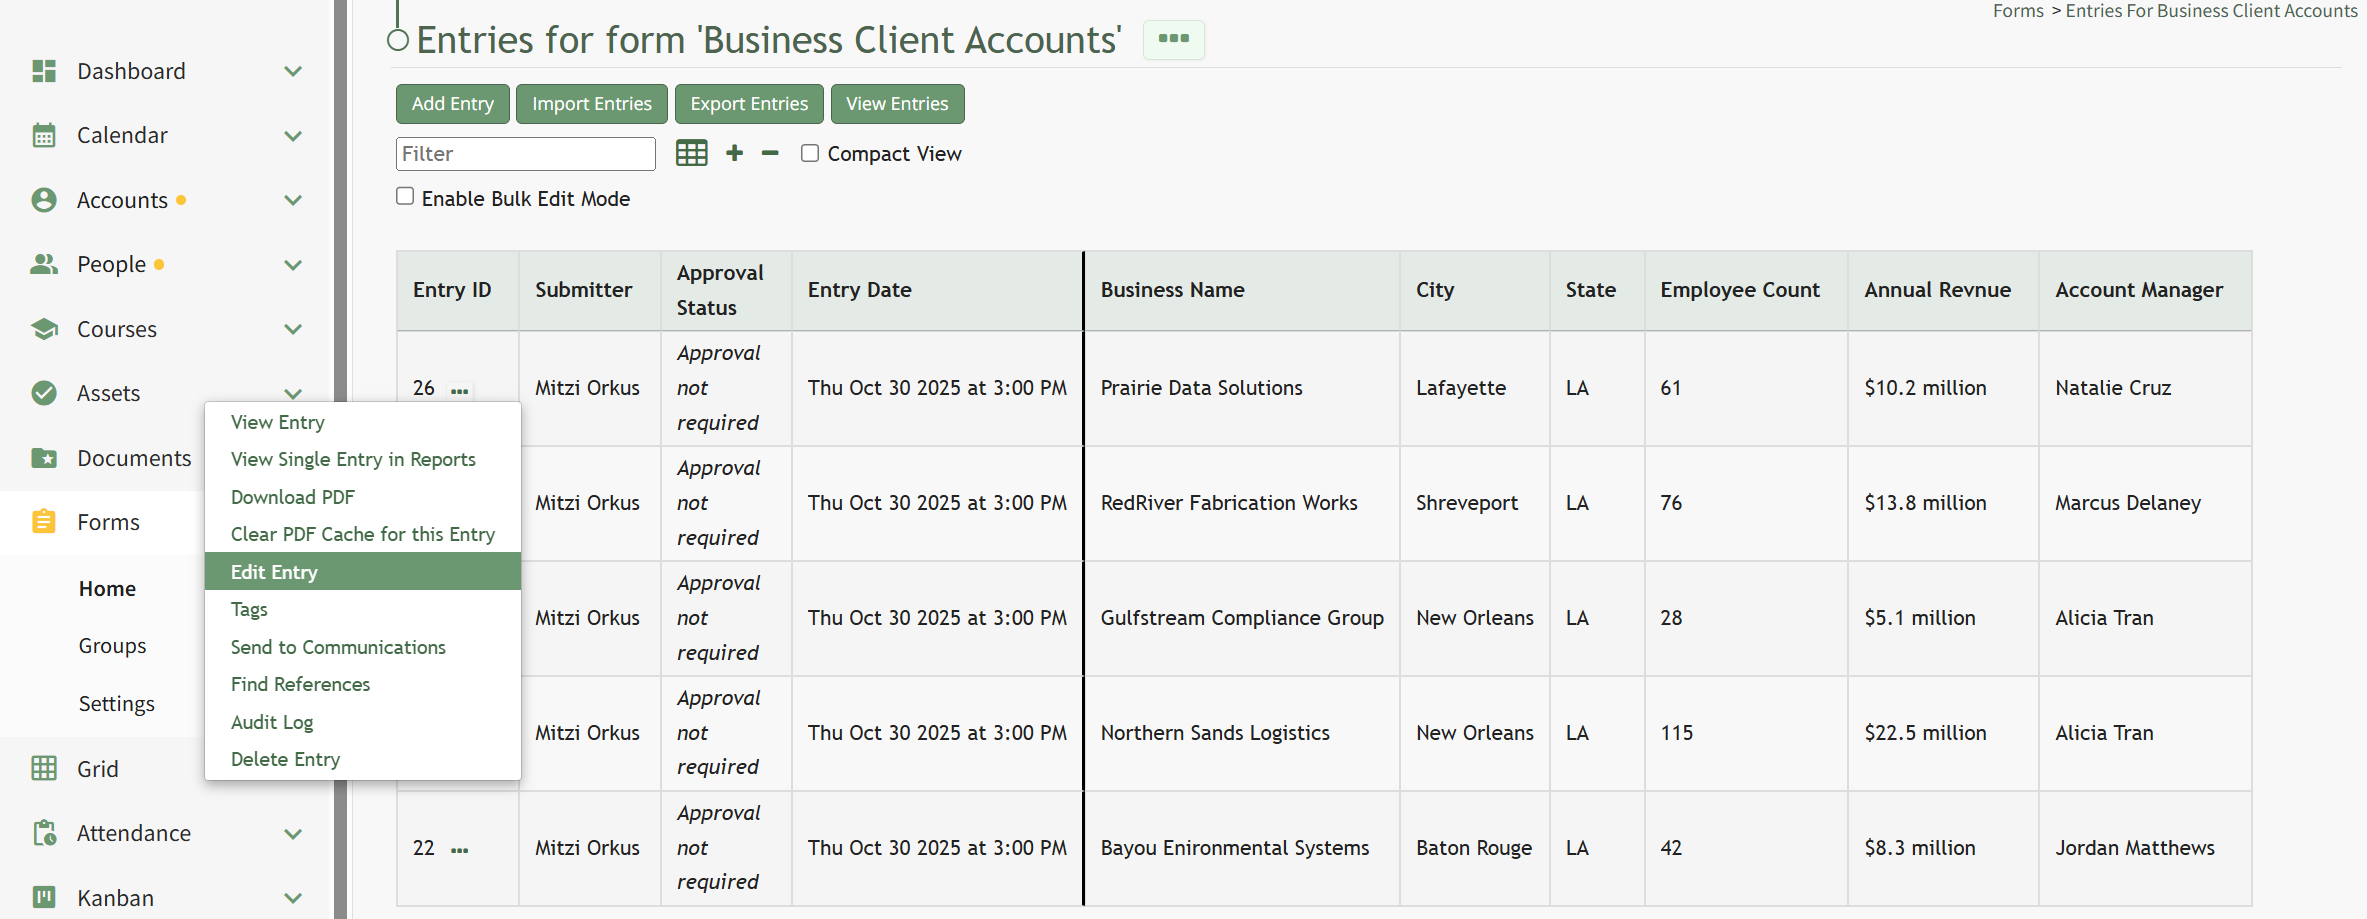
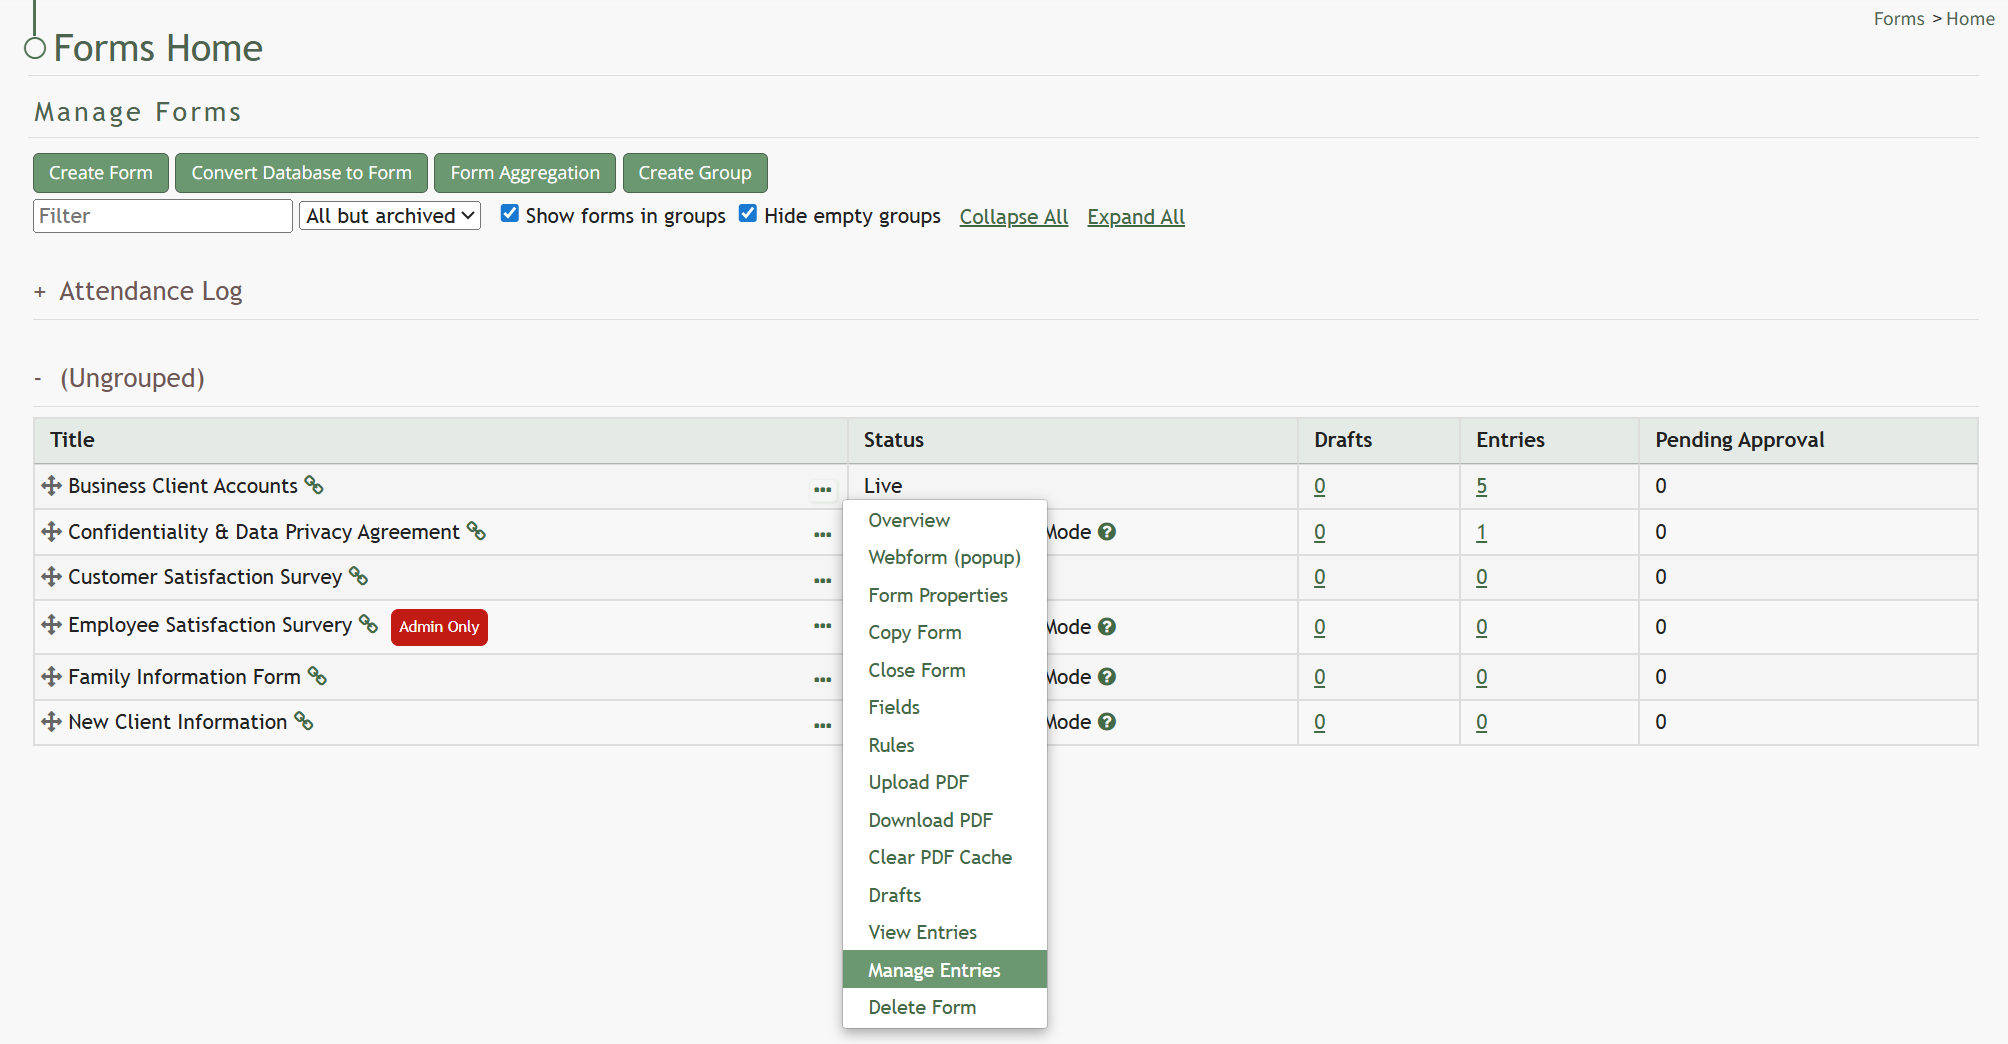
Manage Entries | Selecting Manage Entries from the context menu will open the Manage Form Entries Page which displays the Form Entries Table. Entries can be added, imported, and exported from this page. Bulk edits can also be enabled for efficiency. How To: Edit a Form EntryTo edit a form entry, go to the Home Page of the Forms Module and click the three-dot icon to the right of the form that you wish to edit an entry in. This opens the Form’s context menu. Select “Manage Entries” from the context menu opening the Entries for (FORM NAME) Page.
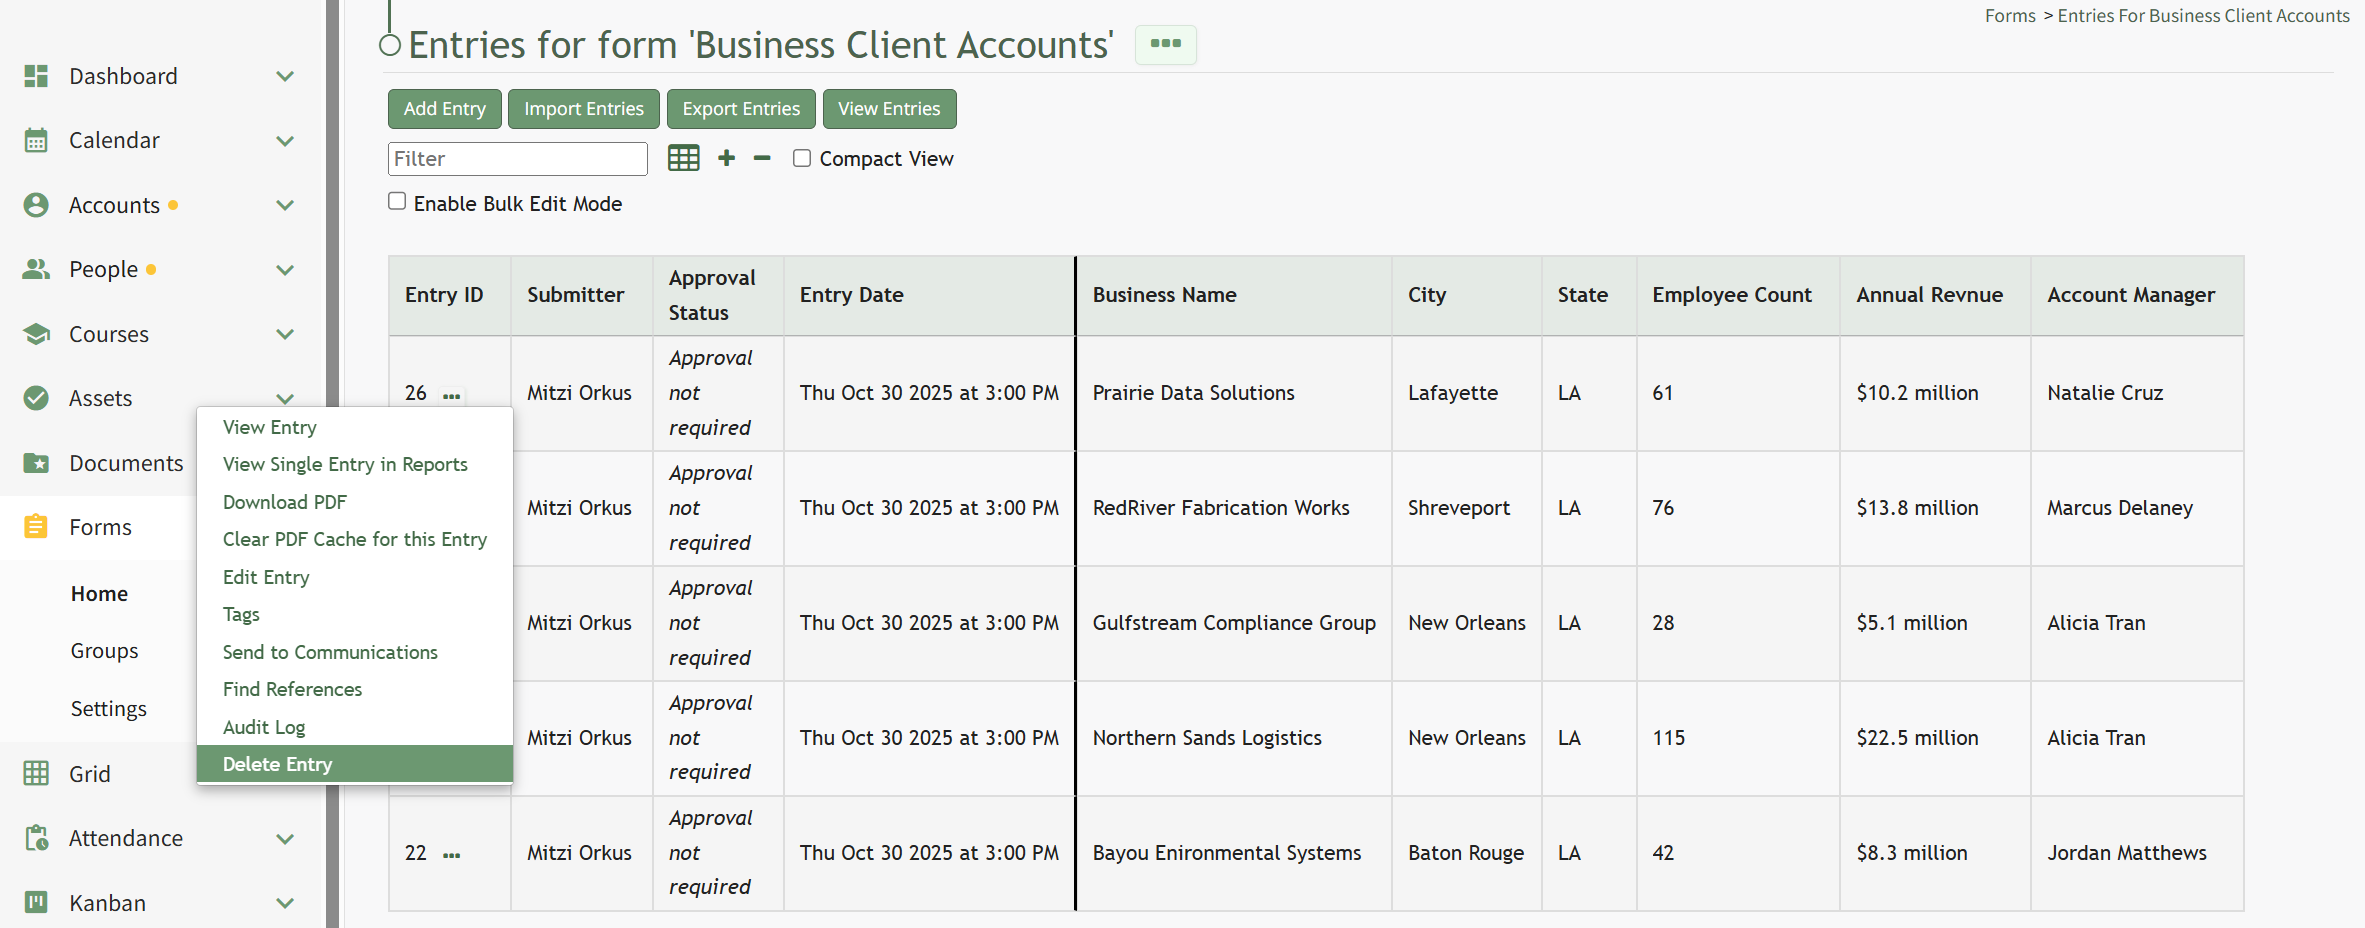
To the right of every Entry ID is a three-dot icon. Click the three-dot icon for the entry you wish to edit opening the Forms Entry Context Menu. Select “Edit Entry”.
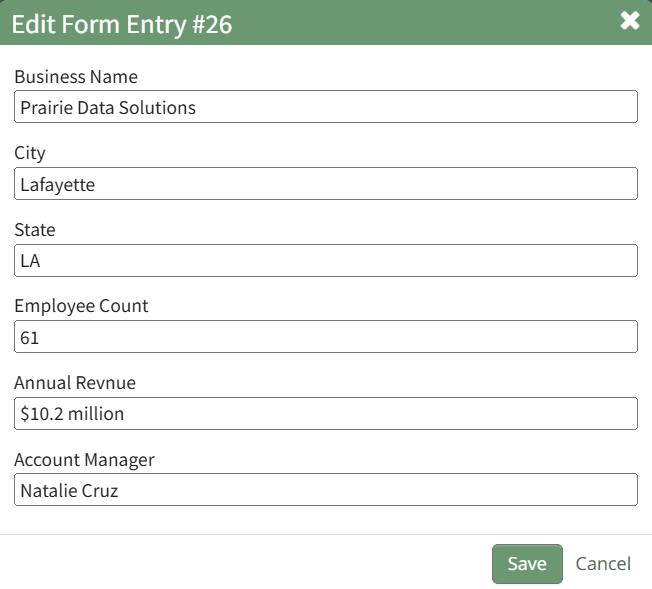
Selecting “Edit Entry” from the Forms Entry Table opens the Edit Form Entry Modal.
Make changes as desired to edit the entry and select the “Save” button. Your edits will now show in the Forms Entry Table. How To: Delete a Form EntryTo delete a form entry, go to the Home Page of the Forms Module and click the three-dot icon to the right of the form that you wish to delete an entry in. This opens the Form’s context menu. Select “Manage Entries” from the context menu opening the Entries for (FORM NAME) Page.
To the right of every Entry ID is a three-dot icon. Click the three-dot icon to the right of the entry you wish to delete opening the Forms Entry context menu. Select “Delete Entry”.
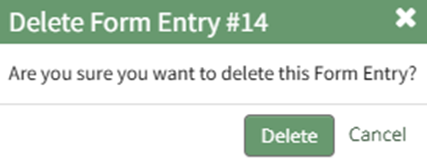
This opens the Delete Form Entry Confirmation Modal that states, “Are you sure you want to delete this Form Entry?”
Select “Delete” to confirm deletion of the form entry. A confirmation modal stating, “This form entry has been deleted,” appears.
The form entry no longer shows on the Manage Entries Page. | |||||||||||||||||||||||||||||||||||||||||||||||||||||||||||||||||||||||||||||||||||||||||||||||||||||||||||||||||||
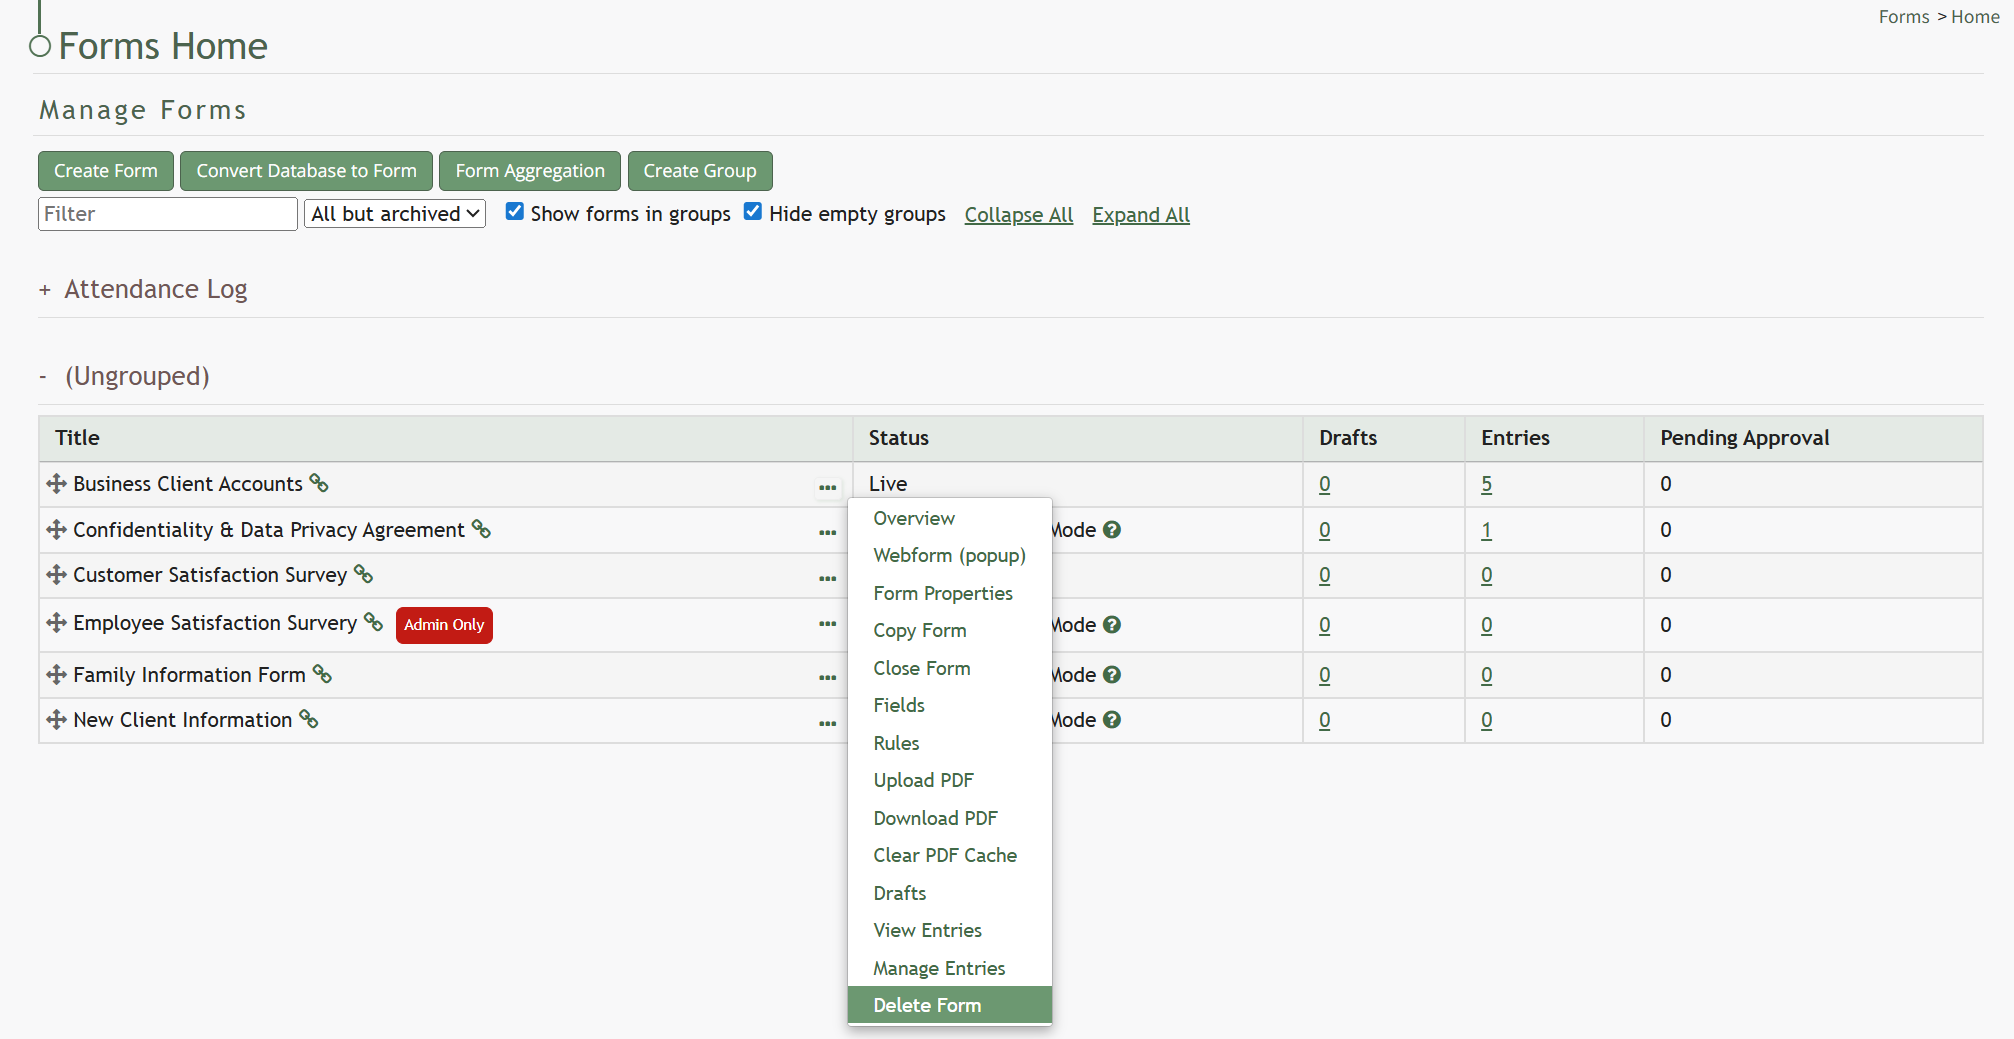
Delete Form | Selecting Delete Form from the context menu will open a confirmation modal that allows you to confirm deletion of the selected form. How To: Delete a FormTo delete a form, go to the Home Page of the Forms Module. Click the three dot (…) icon to the right of the form you want to delete to open the Form’s context menu.
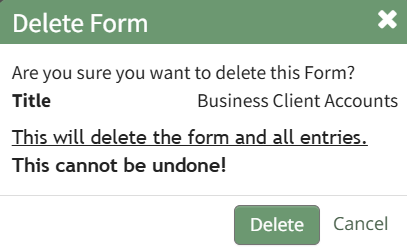
Select “Delete Form” opening the Delete Form Confirmation Modal which displays the Form Title and states, “Are you sure you want to delete this Form? This will delete the form and all entries. This cannot be undone!”
Select “Delete” to confirm you wish to delete the form and a confirmation modal will appear stating “This Form has been deleted.” | |||||||||||||||||||||||||||||||||||||||||||||||||||||||||||||||||||||||||||||||||||||||||||||||||||||||||||||||||||
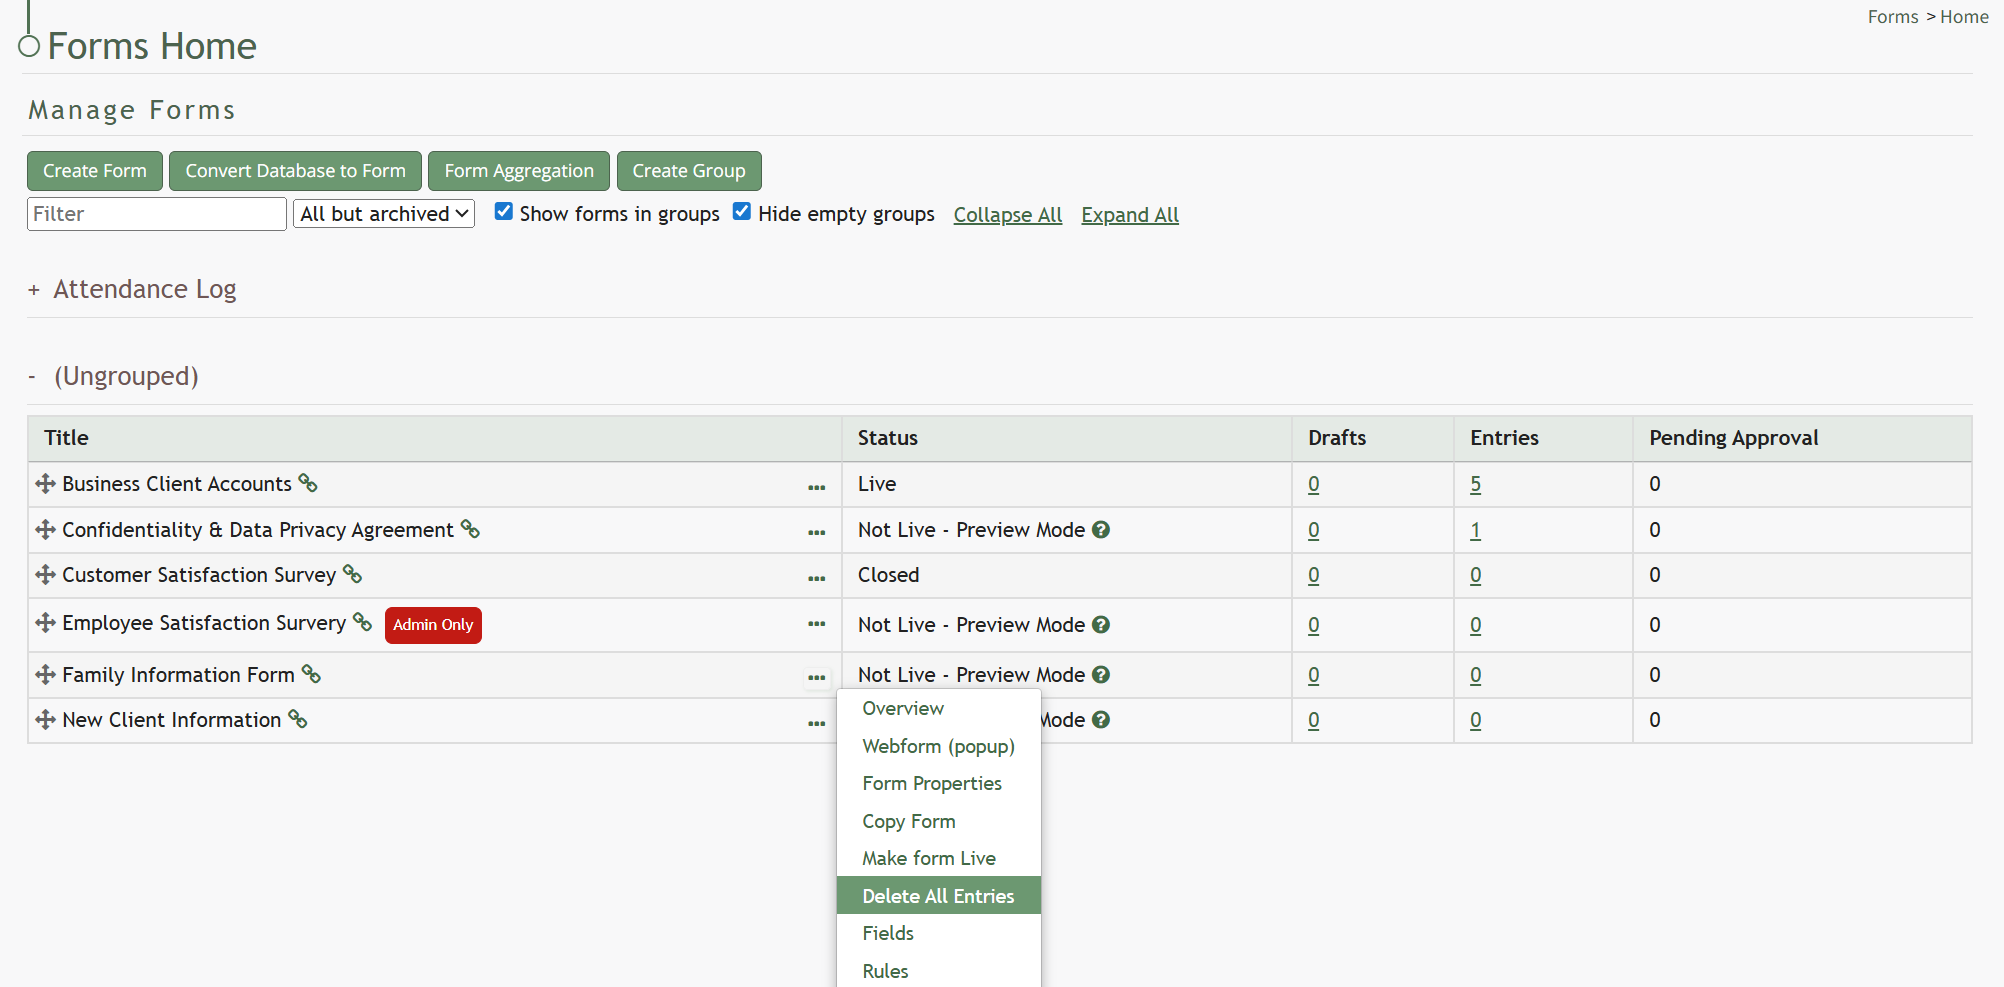
Make Form Live | Selecting Make Form Live is only an option on the context menu when a form is still in preview mode. When selected, the system will automatically change the form from Preview Mode to Live Status. An Update Status Modal will appear, confirming that the form is now live. Once a form is live, bulk entries can no longer be deleted. How To: Make a Form LiveTo change a Form Status from Preview Mode to Live, , go to the Home Page of the Forms Module and select the three-dot icon to the right of the form title you wish to make Live. This opens the Forms Table Context Menu. Confirm that you have deleted any testing entries before you convert the form to Live status. How To: Delete All Testing EntriesTo delete all entries made while a form is in Preview Mode, go to the Home Page of the Forms Module and select the three dot icon to the right of the form title you wish to delete entries in. A form must be in preview mode to bulk delete existing entries.
Select “Delete All Entries” from the context menu opening the Deletion Confirmation Modal.
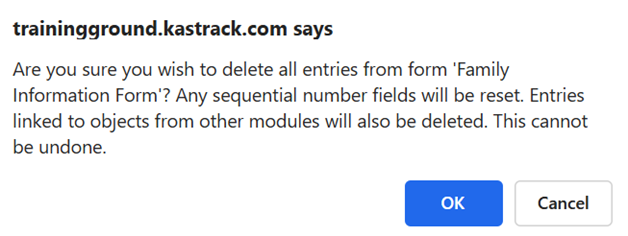
The modal states, “Are you sure you wish to delete all entries from form (FORM NAME)? Any sequential number fields will be reset. Entries linked to object from other modules will also be deleted. This cannot be undone.” Click the “OK” button and the Delete All Entries Modal stating “All entries have been deleted” appears.
Click the “Close” button and return to the Forms Module Home Page.
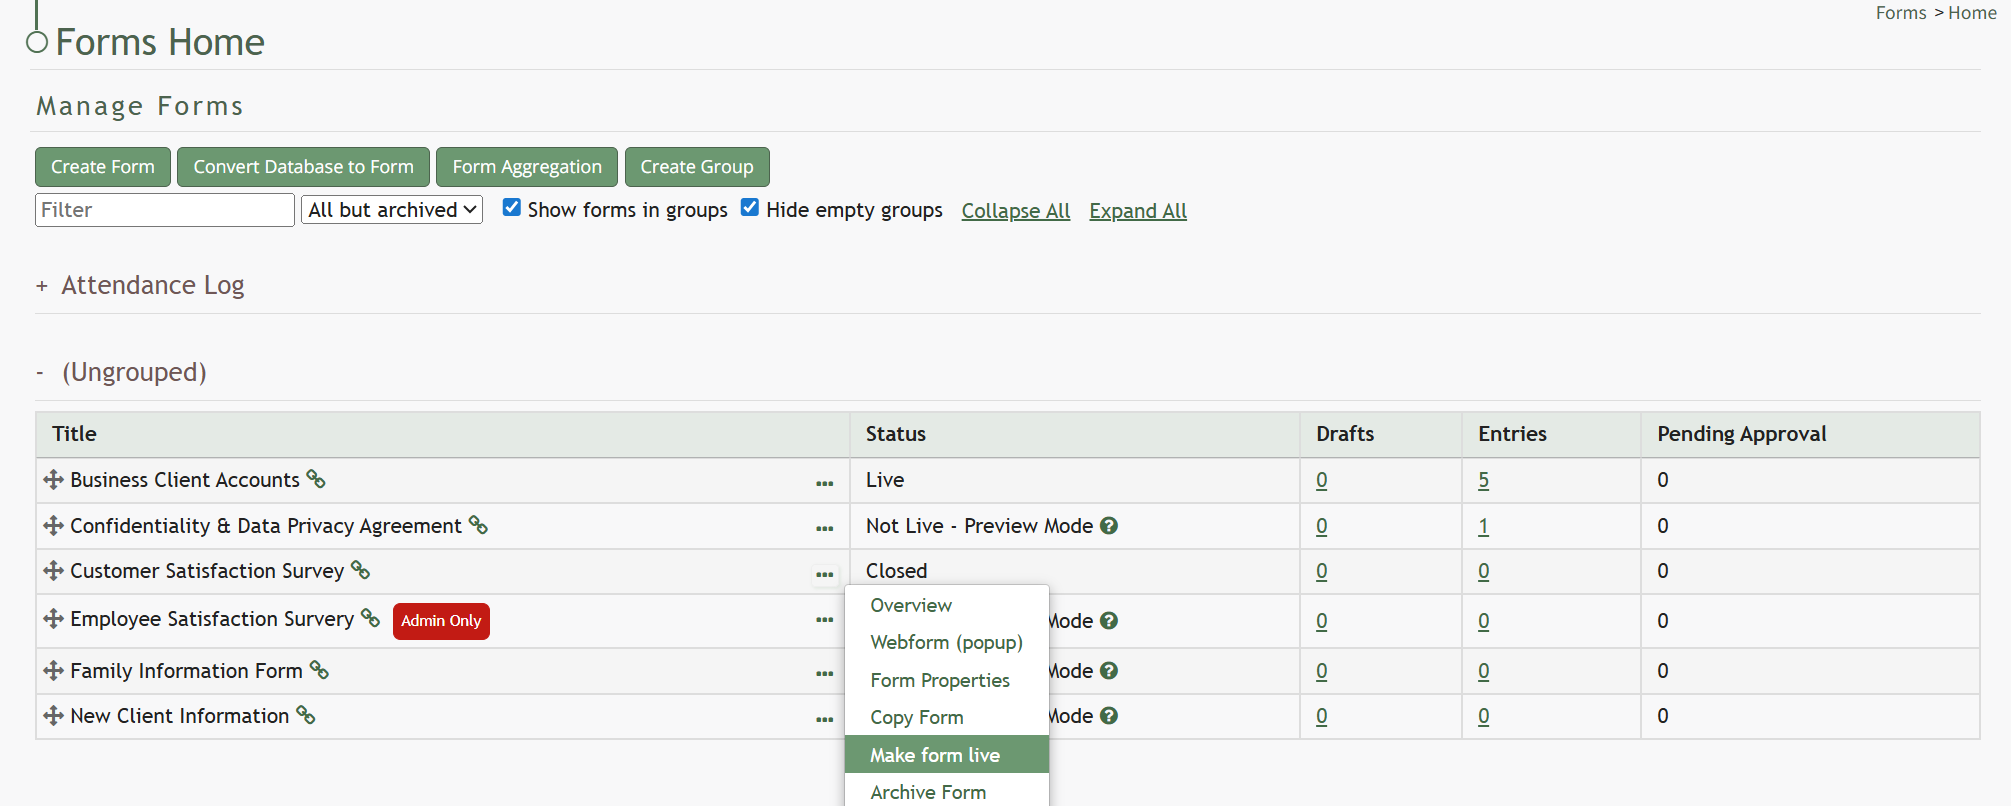
The Forms Table will now show that there are 0 entries associated with the Form.
Select “Make Form Live”. This opens the Update Status Modal which states, “This form is now live.”
Click the “Close” button to return to the Forms Table on the Home Page. The Form Status will now show as Live. | |||||||||||||||||||||||||||||||||||||||||||||||||||||||||||||||||||||||||||||||||||||||||||||||||||||||||||||||||||
Delete all Entries | Selecting Delete all Entries is only an option on the context menu when a form is still in preview mode. When selected, a deletion confirmation modal will appear. How To: Delete All Testing EntriesTo delete all entries made while a form is in Preview Mode, go to the Home Page of the Forms Module and select the three dot icon to the right of the form title you wish to delete entries in. A form must be in preview mode to bulk delete existing entries.
Select “Delete All Entries” from the context menu opening the Deletion Confirmation Modal.
The modal states, “Are you sure you wish to delete all entries from form (FORM NAME)? Any sequential number fields will be reset. Entries linked to object from other modules will also be deleted. This cannot be undone.” Click the “OK” button and the Delete All Entries Modal stating “All entries have been deleted” appears.
Click the “Close” button and return to the Forms Module Home Page.
The Forms Table will now show that there are 0 entries associated with the Form. | |||||||||||||||||||||||||||||||||||||||||||||||||||||||||||||||||||||||||||||||||||||||||||||||||||||||||||||||||||


No comments to display
No comments to display