An Asset's Components Page
Each asset created in KAStrack will have its own Components Page and Manage Components Page that displays the hierarchal structure of an asset and its components.
Users with appropriate module level permissions will also have access to a Manage Components Page with more options for asset management. The context menu options visible to users will vary based on their individual module level permissions.
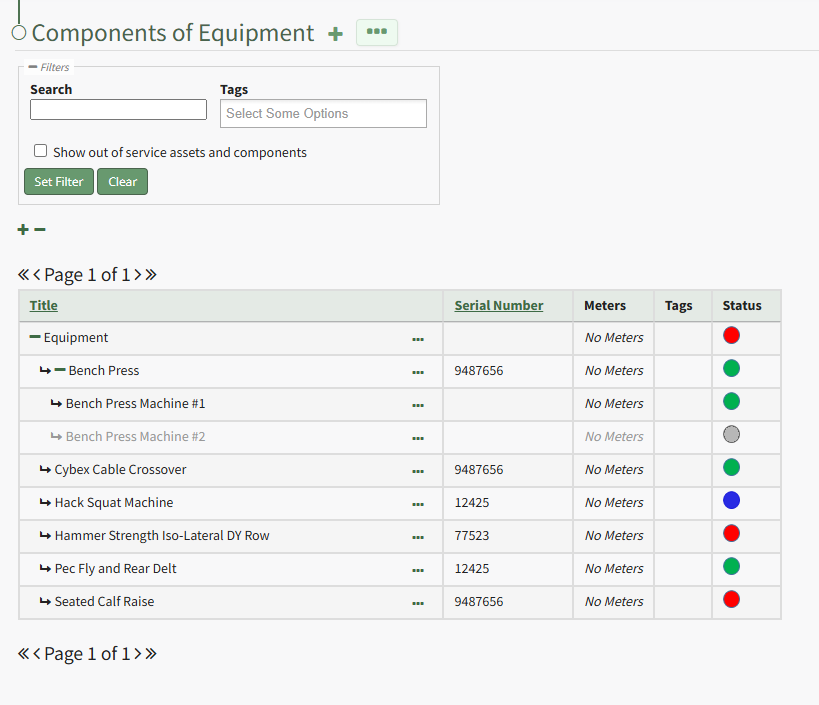
Clicking the plus sign icon to the right of the page header opens the New Component Modal, allowing you to add a new component beneath a parent asset.
How To: Add Components to a Parent Asset
WIKI LINK HOW TO ADD NEW COMPONENTS TO A PARENT ASSET{{@475}}
The three-dot icon to the right of the header opens the Components Page Context Menu with options for asset/component management. The Components Page Context Menu options are explained in the table below.
Components Page Context Menu Option Explanations | |
Option | Explanation |
Create Component | Selecting “Create Component” from the context menu opens the New Component Modal. The plus sign icon to the right of the page header opens the same modal. How To: Add Components to a Parent Asset
|
Export | Selecting "Export" from the context menu opens the Export Asset Modal that allows you to select all assets/components or specific asset types. There is a checkbox that when selected, will include all asset type fields in the export. How To: Export Asset Information
|
Import | Selecting “Import” on the context menu opens the Import Components Modal that allows you to upload a .csv file for bulk importation of asset information. How To: Import Asset Information
|
The Asset Component Table displays the asset/component title, serial number, associated meters and tags, as well as the asset status. To the right of the asset/component title in the table is a three-dot icon that opens the Component Context Menu.
Components Context Menu Option Explanations | |
Option | Explanation |
Complete Task | Selecting “Complete Task” on the context menu opens the Complete Task Modal, allowing a user to record necessary details and mark the task as complete.
How |
Record Fault | Selecting “Record Fault” on the context menu opens the Record Fault Modal, allowing a user to record any necessary details about a fault. How To: Record a Fault
|
Update Meter Reading | Selecting “Update Meter Reading” on the context menu opens the Update Meter Reading Modal, allowing a user to record details regarding a meter reading.
How |
Task Schedule | Selecting "Task Schedule" on the context menu opens an asset's Task Schedule, where new tasks can be added and existing tasks can be managed.
How |
Run Report | Selecting “Run Report” from the context menu open the Assets Report Modal, allowing the user to select between five customizable Asset Reports. How |
History | Selecting “History” from the context menu opens the Asset History Page with historical entries for the components/subcomponents that were selected. The Asset History Page contains four historical logs - tasks completed, tasks deferred, as well meter and fault logs.
How |
Files | Selecting “Files” from the context menu will open the Files Modal and display any files attached to the asset or component.
Only users with appropriate permissions will be able to access files associated with an asset or task. How To: Upload a Task File{{@493}} How To: View File's Associated with an Asset/Component{{@777}} How To: View a File Attached to a Task{{@494}} |
Edit | Selecting "Edit" on the context menu opens the Edit Component Modal, which is used to alter asset details.
How |
Manage Assignments | Selecting "Manage Assignments" on the context menu opens the Asset Assignments Modal which allows individual users and certification roles to be assigned to an asset.
How |
Add Component | Selecting "Add Component" on the context menu opens the New Component Modal, which allows new components to be added to an asset.
How |
Manage Components | Selecting “Manage Components” from the context menu will open the Manage Asset Components Page where assets and their components can be managed. Only users with appropriate permissions will have access to this page. |
Duplicate | Selecting "Duplicate" on the context menu opens the Copy Asset Modal that allows you to rename the asset before copying.
How |
Move | Selecting "Move" on the context menu opens the Move Asset Modal, allowing you to move an asset/component under another asset/component.
How |
View | Selecting “View” from the context menu opens an Asset Summary Modal with a summary of the asset/component information. The read-only modal displays details, any associated meters, subcomponents, assignments, and tasks associated with an asset.
How |
PDF Sheet | Selecting "PDF Sheet" on the context menu opens a PDF Copy of an Asset Data Sheet in a new widow.
How |
QR Code | Selecting "QR Code" on the context menu opens the Asset QR Code modal, which displays the QR Code associated with the Asset that when scanned will link a user to asset details.
How |
Manage Meters | Selecting "Manage Meters" on the context menu opens the Asset Meter Modal which lists all meters associated with the asset and allows for new meters to be created.
How |
Cost / Time Summary | Selecting "Cost / Time Summary" on the context menu opens the Cost and Time Summary Modal.
How |
Archive | Selecting "Archive" on the context menu opens the Archive Confirmation Modal which states, "Are you sure you want to archive this asset? This will also archive any components."
How To: Archive an Asset or Component{{@498}} |