Import Database Entries from a CSV
To import database entries from a CSV, database fields must already have been created.
How To: Add a Database Field
{{@321}}
How To: Import Fields from a CSV File Into a Database
{{@339}}
How To: Import Fields from a PDF Field Import
{{@340}}
To import database entries from a CSV, go to the Home Page of the Database Module and click the three dot menu to the right of the database you wish to import entries into.
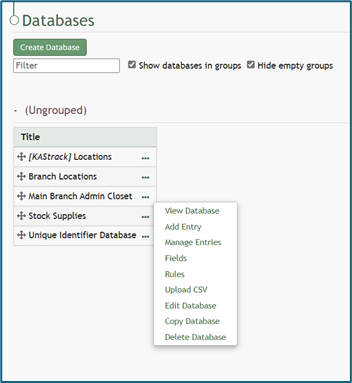
Select “Upload CSV” opening the Upload CSV for (DatabaseName) Modal.
You can also import entries by selecting “Manage Entries” from the context menu and slectingselecting the “Import Entries” button underneath the Database Entries Page header, which opens the same Upload CSV Modal.
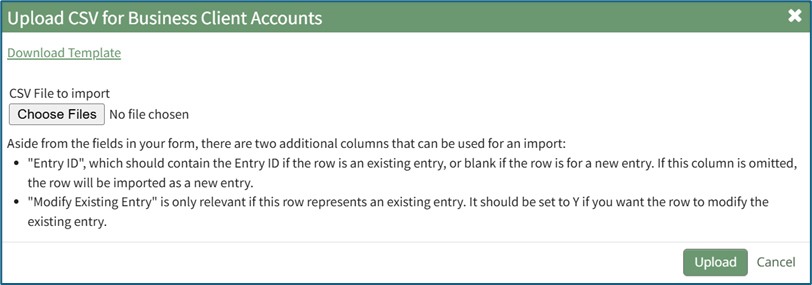
Click the “Download Template” link at the top of the modal and a CSV file will be downloaded to your personal device. See Notes on the Download Template before uploading your CSV file to ensure it is done correctly. WIKI
Notes NOTESRegarding REGARDINGthe THEDownloadable DOWNLOADABLETemplate TEMPLATEfor FOR UPLOADINGUploading CSV FILESFiles
The first row of the CSV file is for each of the database fields. If you download a CSV Template from the Upload CSV Modal, two additional column headers will show that are not database fields: Entry ID and Modify Existing Entry.
If you are importing database entries and no entries have been added to the database yet, leave these columns blank in your upload.
If database entries already exist in the database, the Entry ID column will contain the unique system generated ID for each pre-existing database entry. Leave this column blank if the row is to be imported as a new entry. The second column, Modify Existing Entry, should have a “Y” input if the existing entry is being modified and an “N” input if it has not been modified. Leave it blank if the entry is new.

After creating your Database Fields CSV File, save it as a CSV UTF-8 for importing.
Click the “Choose File” button and open the relevant file from your personal device.

Confirm that the correct CSV file now shows in the Upload CSV Modal.
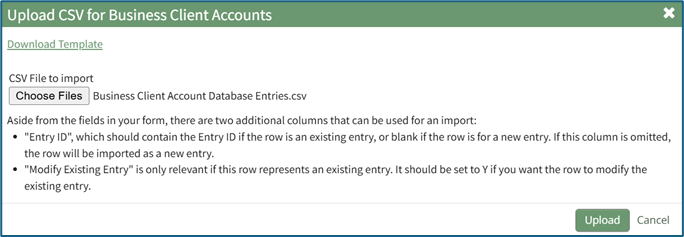
Select the “Upload” button.
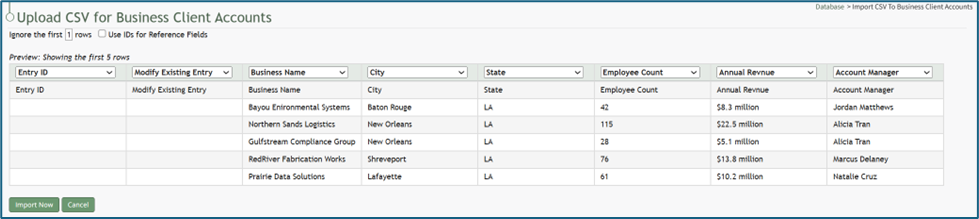
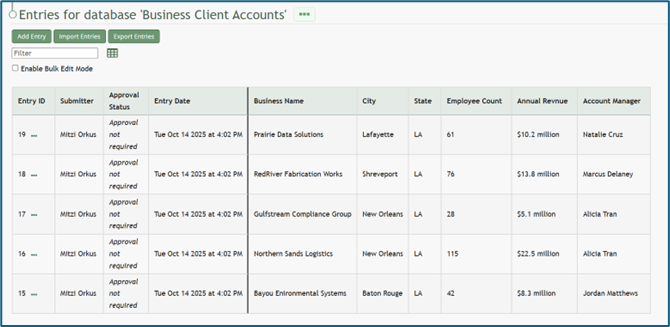
The entries imported from the CSV file will now show on the Upload CSV for (DatabaseName) Page.
The system automatically indicates to ignore the first row. Click “Import Now” if there are no errors.
A summary of the import will now show on the CSV Upload Page.
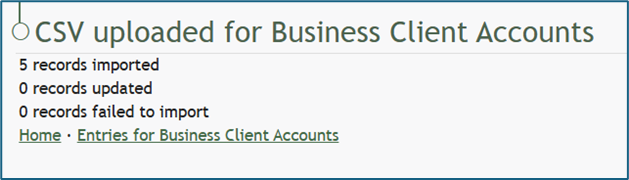
Click the “Entries for (DatabaseName)” link to see all imported entries in the Manage Entry Table.