Create an Inventory from Scratch
Before you can create a new Inventory from scratch, prepare any necessary underlying databases in the Database Module that are needed for integration with the new inventory.
Databases Integrating with the Inventory Module | ||
Database | Field Requirements | Notes |
Locations Database | None | A database must be selected as a locations inventory. Multiple databases can be utilized if desired. There are no fields that must be specifically included for functionality. |
Stock Database | Location | All inventories are required to integrate with a stock database. An explanation of each required field has been provided below. ** Part Type is only a required field if you have both a stock and a unique database. |
Inventory Item (Title) | ||
Quantity | ||
Part Type** | ||
Unique Item Database | Inventory Item (Title) | Integrating with a unique item database is optional. An explanation of each required field has been provided below. |
Unique Item Identifier | ||
How To: Create a Database
{{@329}}
How To: Add a Database Field
{{@321}}
When your databases are complete, go to the Home Page of the Inventory Module.
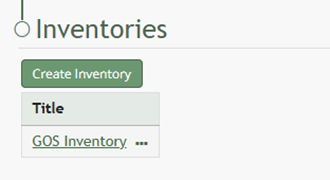
Select the “Create Inventory” button opening the New Inventory Modal.
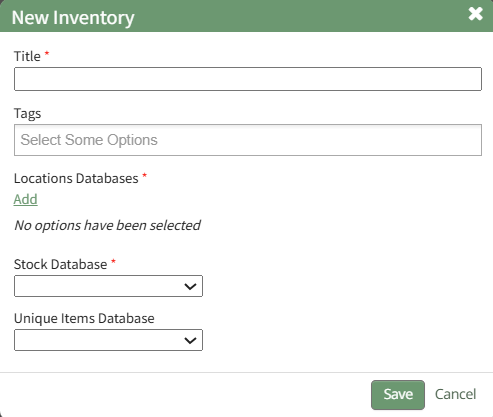
Input the name for the new inventory and any desired tags.
Inventory setup requires you to add the underlying databases: a locations database, a stock database, and a (optional) unique items database.

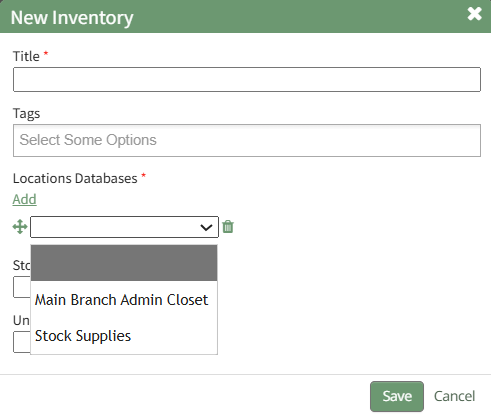
Click the “Add” link which opens a dropdown menu that shows all databases that have been integrating with the inventory module. If the database needed is not visible, confirm that permissions have been granted for integration.
How To: Integrate a Database with the Inventory Module
{{@465}}
Select the database to be used as your locations database from the dropdown menu.
Select a database from the dropdown menu as the Stock Database and the section expands with additional fields.
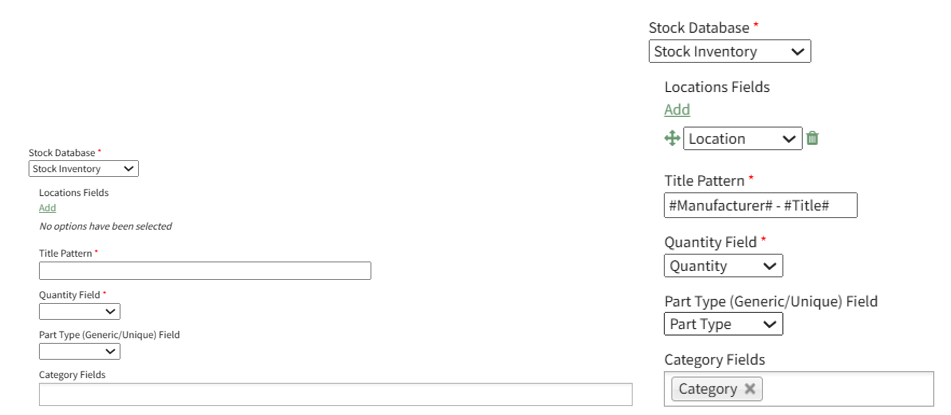
Click “Add” opening a dropdown menu. This dropdown menu will show all of the fields included in the locations database.
This is different from the system generated [KAStrack] Locations database that comes with every KAStrack install. The [KAStrack] Locations database can be used as a locations setup database, but you are not required to work within this one.
Multiple field names can be selected, and the directional arrow icon can be used to alter the order the location fields will show in.
The inventory item Title Pattern is comprised of one or more field names The field names showing are the fields created in the underlying stock database selected via dropdown menu. Type a hashtag and all possible fields that can be used in the title pattern will show.
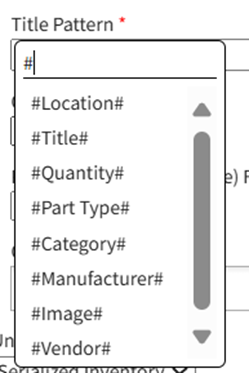
Click the field name to select it. Text, such as a dash or colon, can be used in between field names for clarity. (e.g. #Manufacturer# : #Item# - #Size# ) This is the entry information that will show in the column designated for the item identifier.
Select the field name from dropdown menu that should be used to show the quantity in the inventory. Possible field names for quantity are being pulled from the database selected as the stock database in setup.
If a unique item database will be used by the inventory, select the field input into the underlying stock database that is used to determine whether an inventory item is a generic stock item or a unique item. The field selected for Part Type must have two values – Generic or Unique. Any items marked as Generic will be treated as generic items. Any items marked as unique will be treated as unique items.
Items with a different value (other than generic or unique) will be treated as an unknown, and the quantity values for those items may not be able to be adjusted.
Every inventory will show a column with a Categories header. You are not required to enter information in this field, but are welcome to utilize it to include additional information in your. If you do select fields for the Category column, the entry for those fields will be show in the order selected with commas in between.
You will only be able to choose fields with set values (e.g. dropdown menus, radios, and form/database references).
If your inventory contains unique or serialized items, select a database from the dropdown menu that will serve as the underlying unique items database. The section will expand with additional fields.
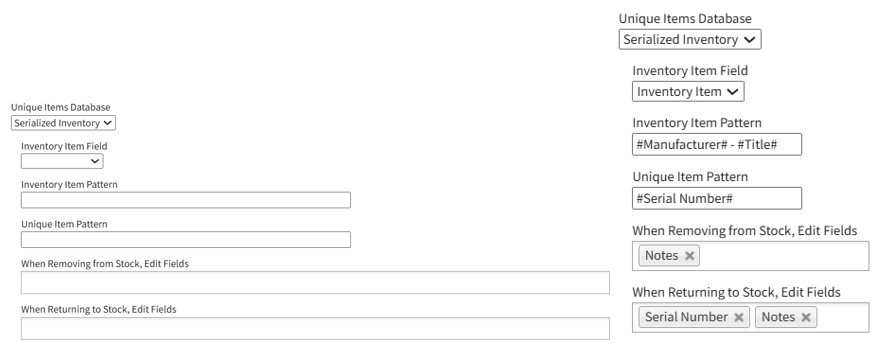
Use the dropdown menu to select which field from the unique item setup database will contain the inventory item entries.
The Inventory Item Pattern is comprised of one or more field names from the database assigned as the unique item item setup database. Type a hashtag and all possible fields that can be used in the inventory item pattern will show.
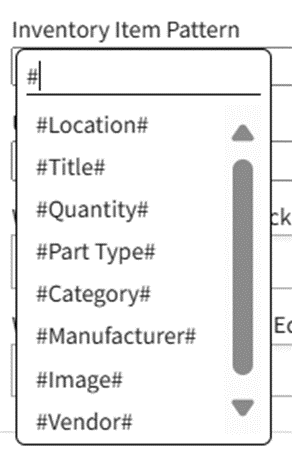
Click the field name to select it. Text, such as a dash or colon, can be used in between field names for clarity. (e.g. #Manufacturer# : #Item# - #Size# ) This is the information that will serve as the stock inventory item identifier in the database.
The Unique Item Pattern is comprised of one or more field names from the unique item setup database. Type a hastag and all possible fields that can be used in the Unique Item Pattern will show.
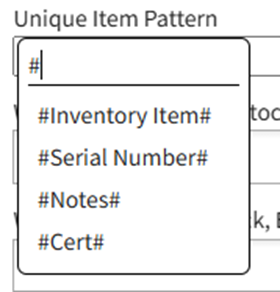
Click the field name to select it. Text, such as a dash or colon, can be used in between field names for clarity. (e.g.#Inventory Item# : #Serial Number#). This is the entry that will serve as the unique identifier in the database.
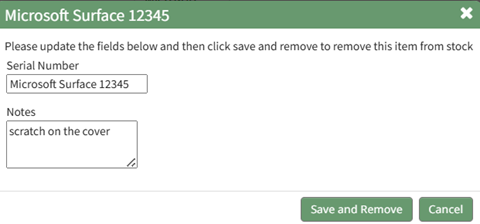
The fields input into “When Removing from Stock, Edit Fields” are the database fields that a user can update when removing a unique item from stock.
The fields input into “When Returning to Stock, Edit Fields” are the database fields that a user can update when returning a unique item to stock.
Select the “Save” button and the new inventory will now show in the Inventory Table on the Inventory Module Home Page.