Database Home Page
The Home Page contains the Database Table, where all existing databases built within your system are stored. Checkboxes allow for databases to be shown in their designated groups in the Database Table and allows for empty groups to be hidden in the Database Table.
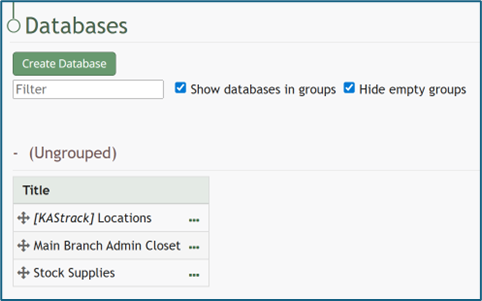
New databases can be created by selecting the “Create Database” button.
Each database in the Database Table has a three-dot icon to the right. Selecting this icon opens the database context menu. An explanation of each option on the context menu is included in the table below.
The visibility of context menu options is dependent on the access level assigned to an individual.
Database Table Context Menu Option Explanation | |
Option | Explanation |
View Database | Selecting “View Database” opens the View Database Modal, which states the Database Title, Creation Date and Time, Description, and a link for the PDF URL. |
Add Entry | Selecting “Add Entry” on the context menu opens a New Database Entry Modal. The modal that appears for a new database entry has already been customized for that specific database and will vary significantly based on its purpose and design. WIKI LINK HOW TO: ADD A DATABASE ENTRY |
Manage Entries | Selecting “Manage Entries” on the context menu opens the Entries for Database (DatabaseName) Page and the Database Entries Table. Entries can be added, imported, and exported on this page. Bulk edits can also be enabled for efficiency.WIKI LINK HOW TO: ADD A DATABASE ENTRY WIKI LINK HOW TO: IMPORT DATABASE ENTRIES WIKI LINK HOW TO: EXPORT DATABASE ENTRIES |
Field | Selecting “Fields” on the context menu opens the Fields for database (DatabaseName) Page on the Fields Tab which shows the Fields Table. New fields can be added to the database from this tab. WIKI LINK HOW TO: ADD A DATABASE FIELD |
Rules | Selecting “Rules” on the context menu opens the Rules for database (DatabaseName) Page on the Rules Tab which shows the Rules Table. New rules can be added to the database from this tab. WIKI LINK HOW TO: ADD A DATABASE RULE |
Upload CSV | Selecting “Upload CSV” on the context menu opens the Upload CSV for (DatabaseName) Modal. This can be used to upload database fields or database entries. If a field has already been added to a database, you are no longer able to bulk import database field names from a CSV file. You are now required to enter each field name individually. WIKI LINK HOW TO: ADD A DATABASE FIELD WIKI LINK HOW TO: IMPORT FIELDS FROM A CSV INTO A DATABASE |
Edit Database | Selecting “Edit Database” on the context menu open the Edit Database Modal, allowing an individual to edit the specific permissions established when the database was created. WIKI LINK: HOW TO EDIT A DATABASE |
Copy Database | Selecting “Copy Database” on the context menu opens the Copy (DatabaseName) Modal. WIKI LINK HOW TO: COPY A DATABASE |
Delete Database | Selecting “Delete Database” from the context menu opens the Delete Database Confirmation Modal. WIKI LINK HOW TO: DELETE A DATABASE |
Notes Regarding the Downloadable Template for Uploading CSV Files
The first row of the CSV file is for each of the database fields. If you download a CSV Template from the Upload CSV Modal, two additional column headers will show that are not database fields: Entry ID and Modify Existing Entry.
If you are importing database entries and no entries have been added to the database yet, leave these columns blank in your upload.
If database entries already exist in the database, the Entry ID column will contain the unique system generated ID for each pre-existing database entry. Leave this column blank if the row is to be imported as a new entry. The second column, Modify Existing Entry, should have a “Y” input if the existing entry is being modified and an “N” input if it has not been modified. Leave it blank if the entry is new.