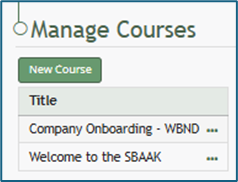
Home Page: Manage Courses Page
The Courses Module homepage is the Manage Courses Page and is only visible to users with course-management permissions.
Systems users that do not have access to the Manage Courses homepage still have the capability to take courses in KAStrack.

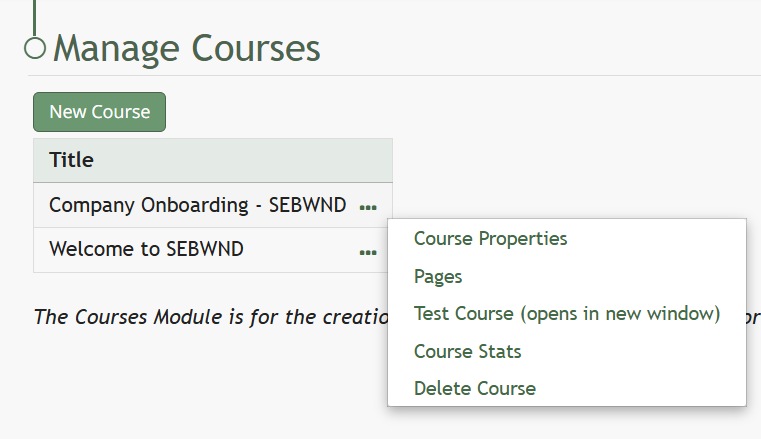
The Manage Courses Page houses the Course Title Table, which lists all courses alphabetically. The New Course button below the header is used to create a new course. Courses can be managed and edited by clicking on the three-dot icon to the right of the course title.
How To: Create a New Course
Select “Home” under the Courses heading on the Main Menu, which takes the user to the Manage Courses Page. Courses will be listed alphabetically by title in the table.
Select the green “New Course” button underneath the header to create a new course, opening the New Course modal.

Input the desired course title.
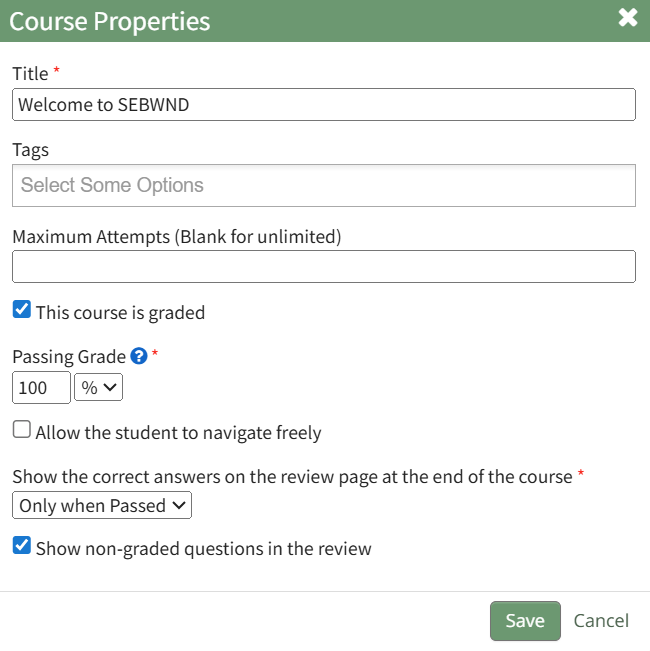
Input the maximum number of times a user can take the course. Leave this blank to allow for unlimited attempts.
If this course is being graded, indicate the value that will be considered passing here. A passing grade can be calculated as a percentage (%) or number (#) of correctly answered questions. Each question/question group has its own passing grade and can be set to be part of the total passing grade. (Ex: 70% or 7/10)
If the course is not being graded, input 0 for the passing grade.
Select the “Allow the student to navigate freely” checkbox to give permission to navigate the course freely (allowing users to skip ahead in the course). If this box is not selected, users will be forced to progress to the next page, but may still return to the previous pages
The course creator can customize review options for the users. Select “Only When Passed,” “Always,” or “Never” from the drop-down list to indicate your preference.
Selecting the “Show non-graded questions in the review” checkbox will include any non-graded questions in the post test review.
Click “Save” at the bottom of the modal to create the new course. The new course is now added to the table on the Course homepage.
How To: Access A Course's Details Page
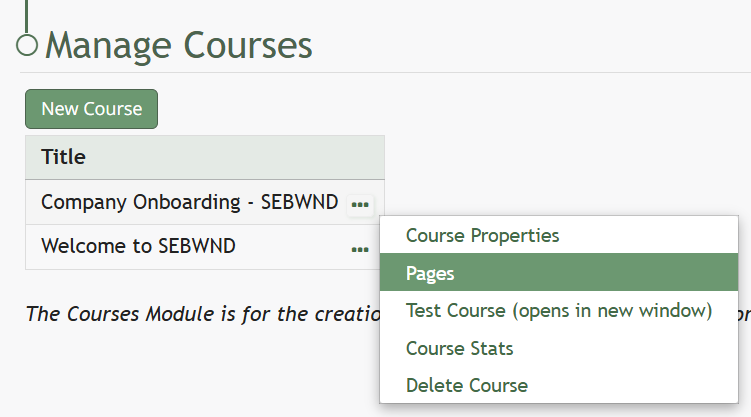
Course Context Menu Item Explanations
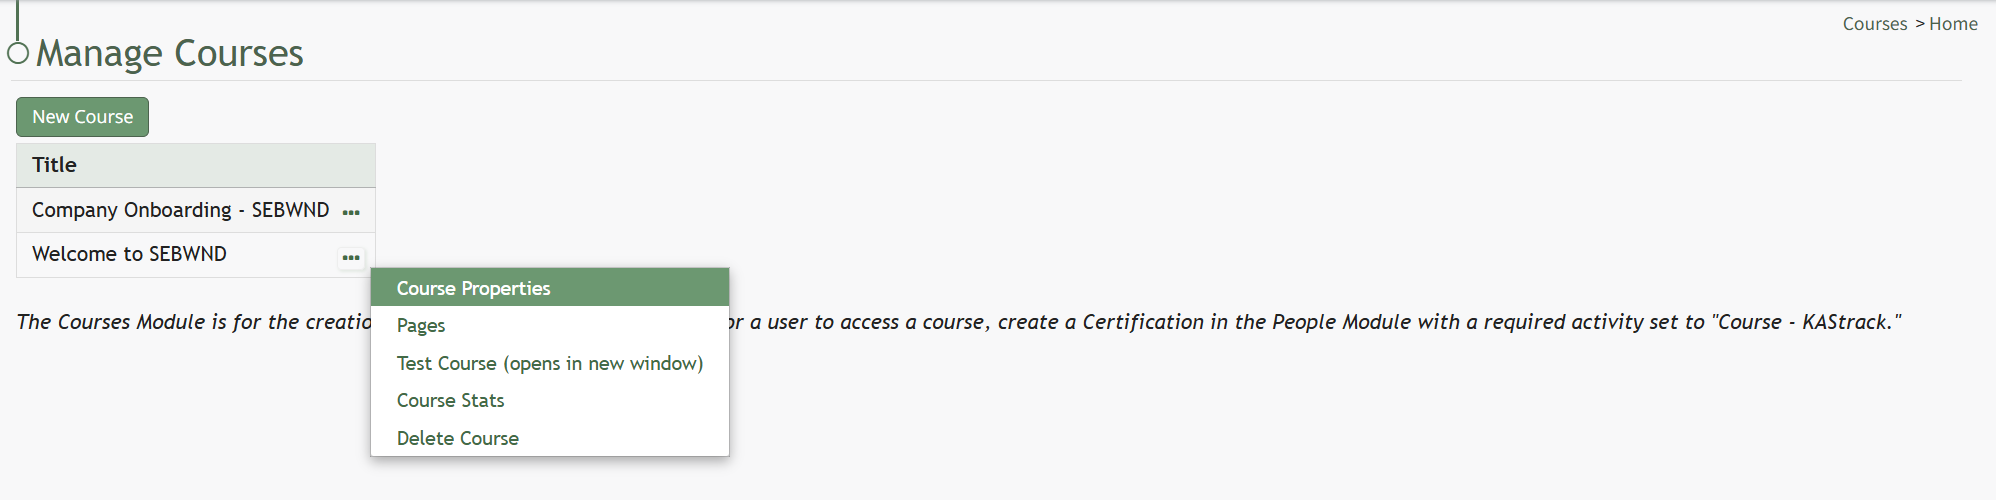
The three dot icon to the right of a course title opens the Course Context Menu with links for quick actions. An explanation of each option on the course context menu is included below.
Course Context Menu Option Explanations | |||||||||||||||||||||||||||||||||
Options | Explanation | ||||||||||||||||||||||||||||||||
Course Properties | Selecting Course Properties from the context menu opens the Course Properties Modal, allowing the user to edit the original parameters that were selected when the course was created. The course name, tags, number of attempts, and settings for the course can be edited from the Course Properties Modal. How To: Edit Course PropertiesTo edit a course, open the Courses Module Home Page from the Main Menu and select the three dot (…) icon to the right of the course you wish to edit opening the course context menu.
Selecting “Course Properties” allows the user to edit the original parameters that were selected when the course was created.
This selection re-opens the same options as in the “New Course” modal to change the course name, tags, settings for grading, and post course review. How To: Create a New CourseSelect “Home” under the Courses heading on the Main Menu, which takes the user to the Manage Courses Page. Courses will be listed alphabetically by title in the table.
Select the green “New Course” button underneath the header to create a new course, opening the New Course modal.
Input the desired course title. Input the maximum number of times a user can take the course. Leave this blank to allow for unlimited attempts. If this course is being graded, indicate the value that will be considered passing here. A passing grade can be calculated as a percentage (%) or number (#) of correctly answered questions. Each question/question group has its own passing grade and can be set to be part of the total passing grade. (Ex: 70% or 7/10) If the course is not being graded, input 0 for the passing grade. Select the “Allow the student to navigate freely” checkbox to give permission to navigate the course freely (allowing users to skip ahead in the course). If this box is not selected, users will be forced to progress to the next page, but may still return to the previous pages The course creator can customize review options for the users. Select “Only When Passed,” “Always,” or “Never” from the drop-down list to indicate your preference. Click “Save” at the bottom of the modal to create the new course. The new course is now added to the table on the Course homepage. | ||||||||||||||||||||||||||||||||
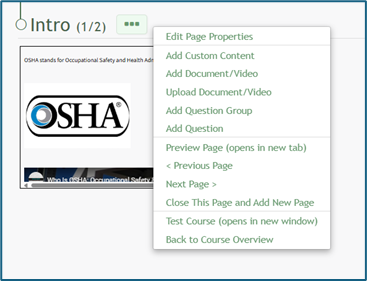
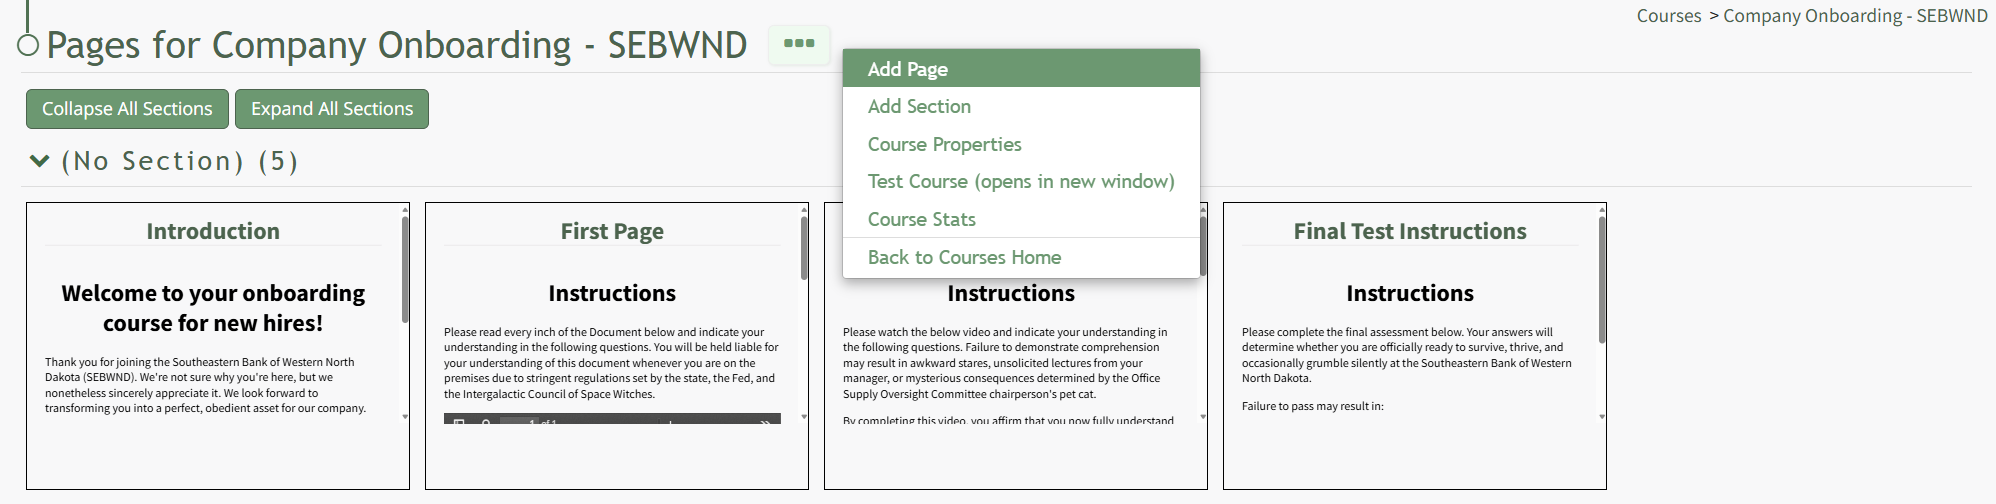
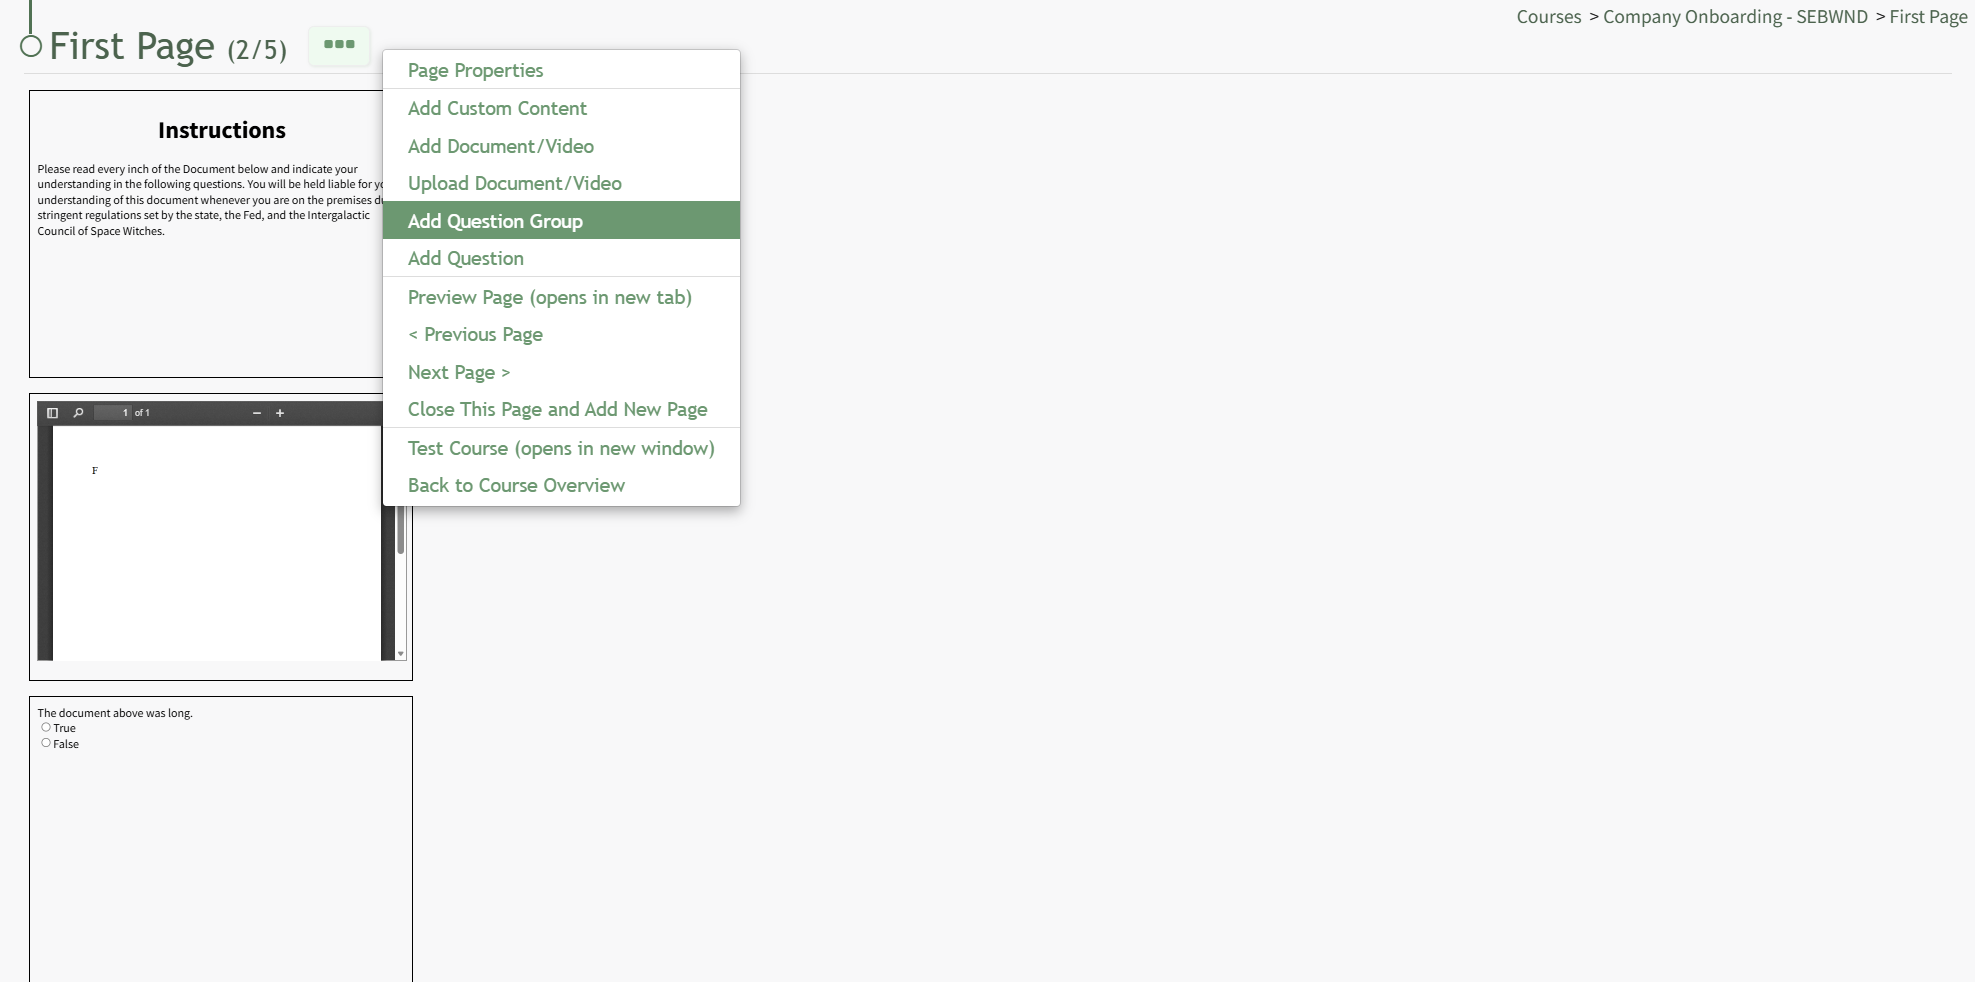
Pages | Selecting the Pages option from the context menu opens the Course Details Page. The pages that have been created for the course are grouped in sections on the Course Details Page. How To: Edit Existing PagesOn the Course Overview Page, all pages of the course are displayed with previews of their page elements.
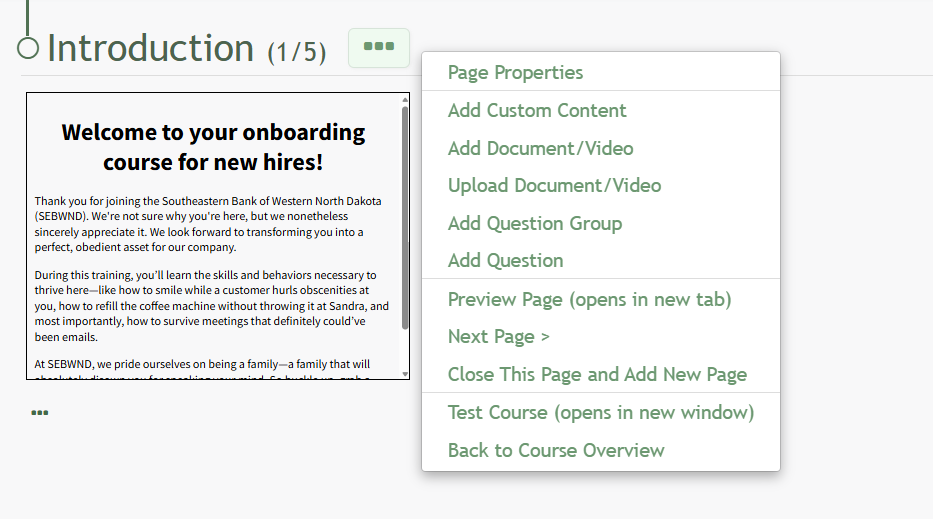
Click and drag the handle in the top left to move the page, click the trashcan on the top right to delete the page, or click the page and pencil icon to edit. To edit a slide after it is created, simply click on the slide, and the “Edit Custom Content” page will re-open to permit this.
“Preview Page (opens in new tab)” allows the user to visually see how a specific page in the course will reappear. “< Previous Page” and “Next Page >” allows the user to navigate between the pages of the course. Click “Close This Page and Add New Page” will activate the “New Page” modal. How To: Add Pages in a CourseTo add pages to a course, open the Courses Module Home Page from the Main Menu. Click the three-dot icon to the right of the course you wish to add pages to opening the Course Context Menu and select “Pages”.
This opens the Course Overview Page Pages for Course Name Page. Selecting the three dot (…) icon to the right of the page header open a context menu. Selecting “Add Page” open the New Page modal.
Add a Title for the new page and select the desired navigation options.
If the course properties allow the user to navigate the course freely, in place of the checkbox options you will see “This course allows the user to navigate freely, so there are no per-page navigation options.” Select the “Save” button.
Selecting the three dot (…) icon displays a context menu that can be used to design the course.
| ||||||||||||||||||||||||||||||||
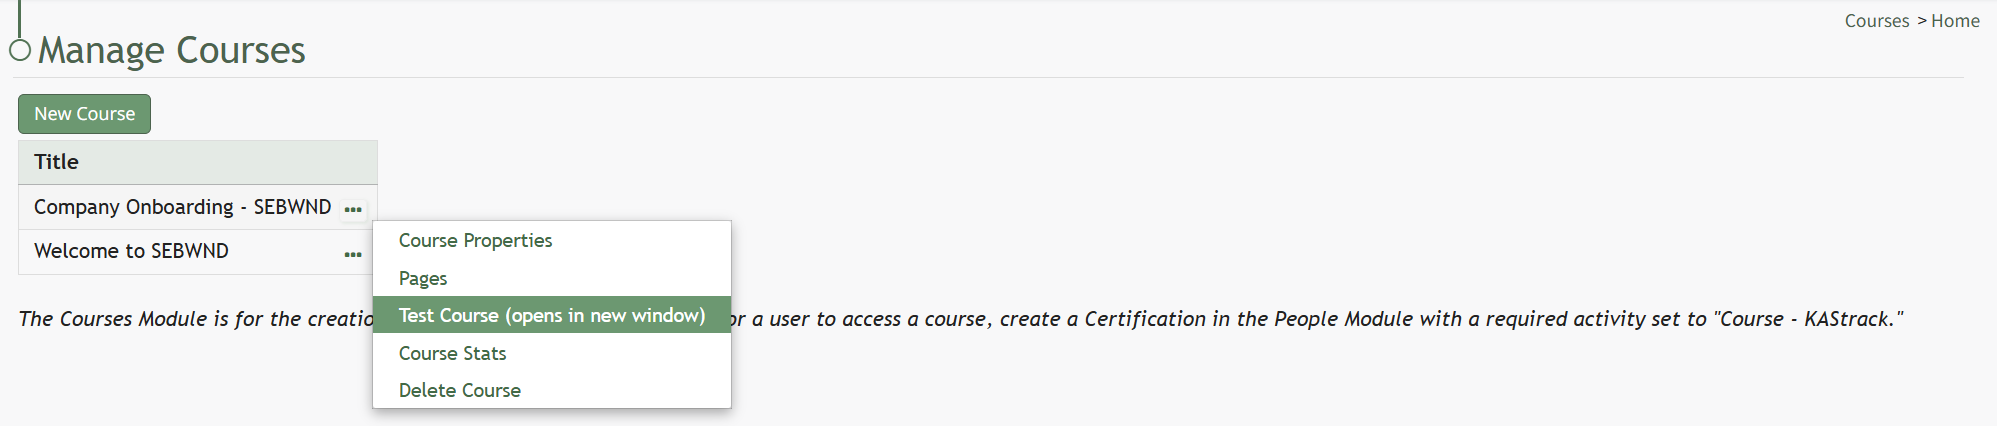
Test Course | Selecting the Test Course option from the context menu opens a trial run of the course with quiz questions. Testing the course will not impact course stats. How To: Take a Course in Test ModeTo take a course in test mode, select the three dot (…) icon to the right of the course title opening the course context menu and select "Test Course".
Select “Test Course (opens in new window)” to work through the course.
This will open the course in a new window, displaying the course from the user perspective. When taking the course in Test Mode, results will not be recorded and will not impact course stats. | ||||||||||||||||||||||||||||||||
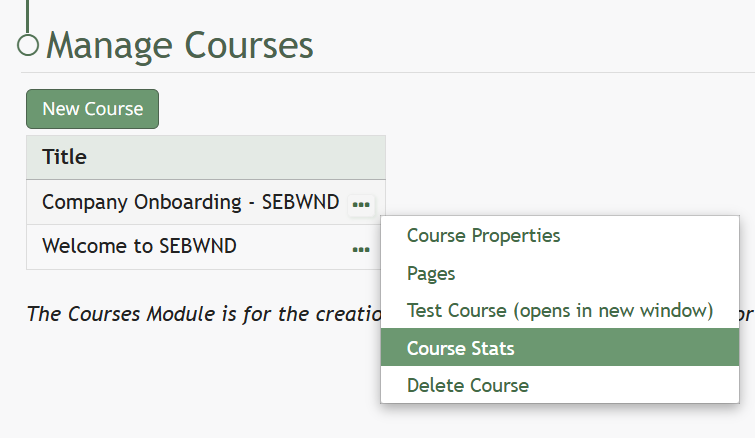
Course Stats | Selecting the Course Stats option on the context menu opens the Course Stat Page which displays records of test taking attempts and access to an individual’s answers to course questions. How To: Access Course StatsTo access the stats associated with a specific course, open the Courses Module Home Page from the Main Menu. Existing courses are listed alphabetically in the table underneath the “New Course” button according to title.
To view a courses stats, select the three dot (…) icon to the right of the title and make a selection from the context menu.
“Course Stats” opens a page titled Stats for Name of Course that displays the records of every user’s test taking attempts. | ||||||||||||||||||||||||||||||||
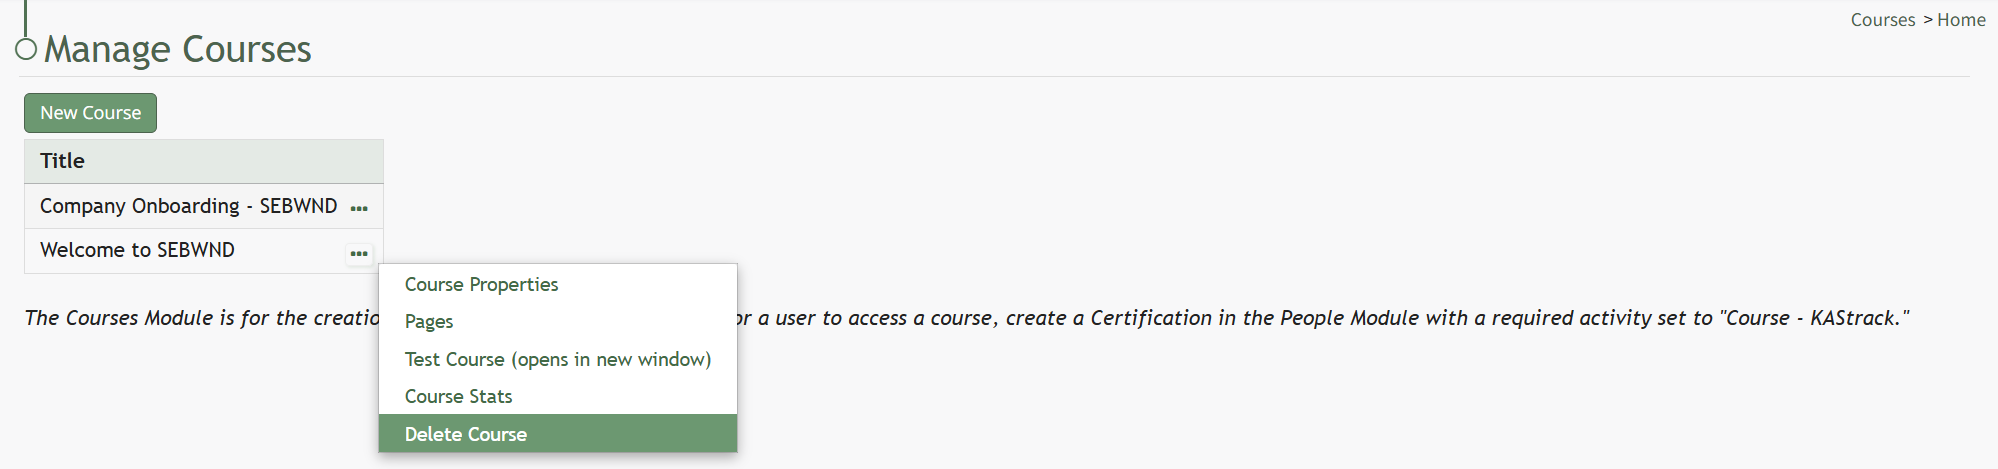
Delete Course | Selecting the Delete Course option on the context menu will open a deletion confirmation modal. The modal displays a warning that will notify the user that deleting the course will “remove all pages and history of people taking the course.” Confirmation of deletion is required. If the course is a required activity for a certification, it will not be deleted unless certification course requirement is removed from the certificate. How To: Delete a Course
Existing courses are listed alphabetically in the table underneath the “New Course” button according to title. To manage a pre-existing course, select the three dot (…) icon to the right of the title and make a selection from the context menu.
If “Delete Course” is selected, the Delete Course modal requires the user to confirm that they wish to delete the course.
Deleting a course deletes the pages of the course and the course stats associated with it. If the course is a required activity for a certification, it will not be deleted unless certification course requirement is removed from the certificate. | ||||||||||||||||||||||||||||||||


In KAStrack, certifications with a required activity are used to assign courses to users. To require a user to complete a course, you must create a Certification in the People module with Required Activity set to "Course - KAStrack".
How To: Set Up a Course as a Certification
In order for a user to access a course, the course must be set as a required activity in a certification after the course is created in the People Module. This certification must then be assigned to the user.

To do so, select the Certifications page in the People Module. Click the plus-sign (+) button to the right of the Certification header which opens the Add Certification page.

There are five data categories that allow a user to customize preferences: General, Tracking Settings, Activities, Privacy, and Advanced Settings. Detailed information about each can be found in the People Module.

Set up a course as a certification, select “Course – KAStrack” as the Required Activity for the certification from the dropdown menu.
Any courses that have been created in KAStrack show on the Choose a Course dropdown menu. Select the course you want to assign.