Attendance Log: Admittance Desk Page
The Admittance Desk Page should be enabled when your organization wants an individual to be responsible for individuals signing in/out, as opposed to a self-sign in process. The page can be accessed by selecting the “Admittance Desk” button on an attendance log’s Information Page. Individual users can be searched for, and signed in/out through this page.

Admittance Desk Page Button Explanation | |
Button | Explanation |
Attendance Log | Selecting the Attendance Log button opens the Attendance Log’s Information Page. WIKI LINK ATTENDANCE LOG INFO PAGE |
Signed in Users | Selecting the Signed In Users button opens the attendance log’s Currently Signed In Page. WIKI LINK CURRENTLY SIGNED IN PAGE |
Sign In QR for Unregistered Users | Selecting the Sign In QR for Unregistered Users opens a Modal that displays a QR Code that can be used by individuals that are not registered KAStrack users. |
Add to Role | The Add to Role button is displayed when a system user is not green for an associated certification role. Selecting Add To Role will open a Certifications button that if clicked will take the admittance desk to the My Certifications Tab for that specific user, where outstanding certification role issues can be addressed. |
Sign In OR | The Name column of the Admittance Desk Table will show a button, “Sign In” if the user is not signed in to the attendance log and “Mark as Signed Out” if the user is signed in to the attendance log. Click this button to sign in/out individuals. |
The fields that show on the Admittance Desk Page can be customized by your organization. Any requirements for the associated certification role will be visible, as well and any additional account fields selected.
How To: Edit the Admittance Desk Page
To edit the Admittance Desk Page for an Attendance Log, open the attendance log you wish to edit by going to the Home Page of the Attendance Module and clicking the three-dot icon to the right of the attendance log title, opening the context menu.
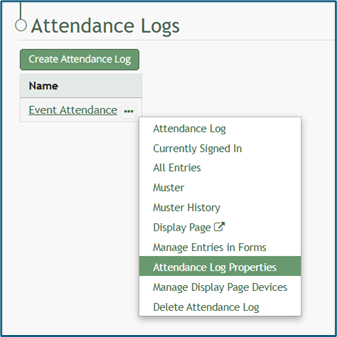
Select “Attendance Log Properties” from the context menu, opening the Attendance Log Properties Modal.
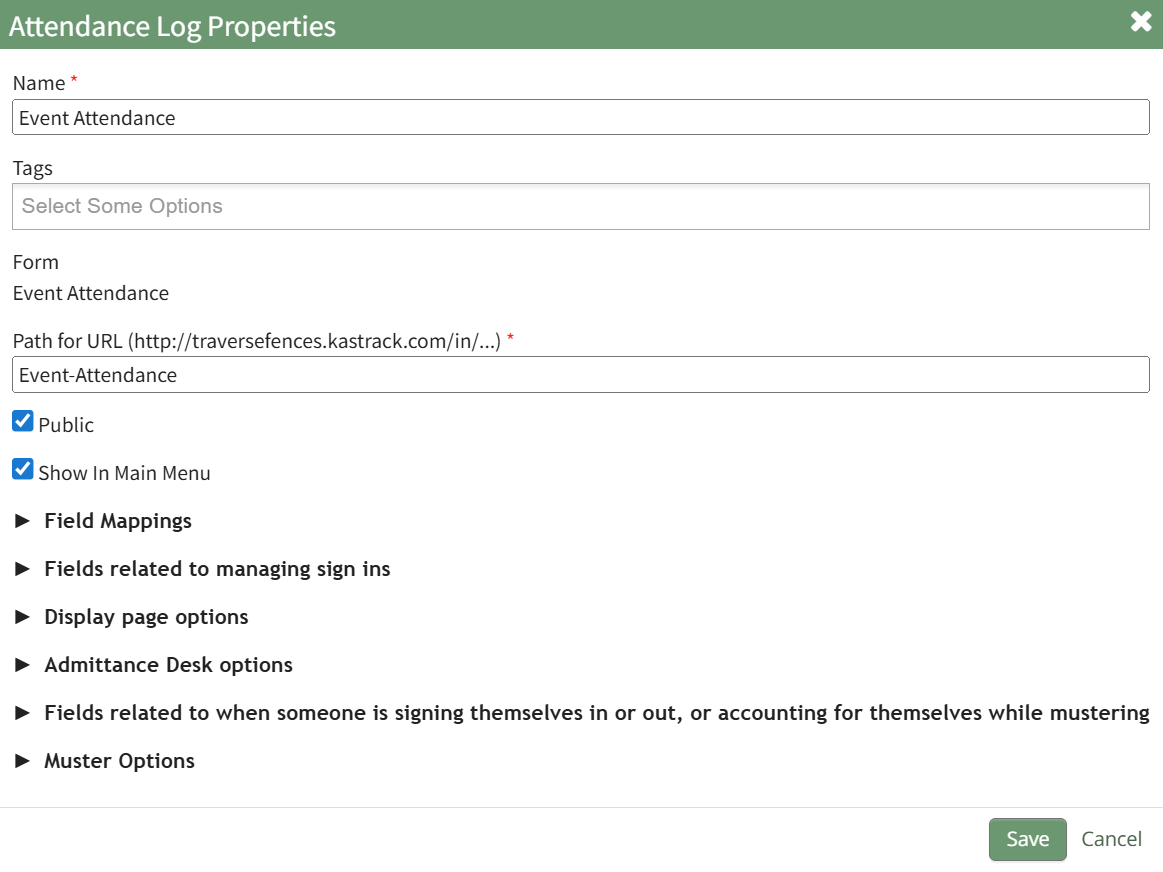
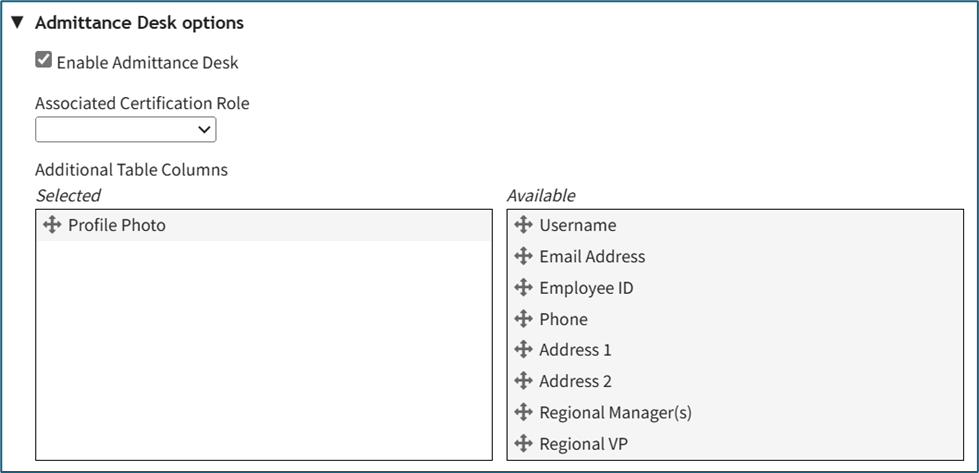
Click the arrow to the left of “Admittance Desk Options” to expand the section.
Here, a certification role can be associated with the attendance log or changed. This feature is useful is there are requirements for individuals to access a facility or event. Refer to the People Module for an understanding of certification roles.
How To: Create, Define, and Assign Users to a New Certification Role
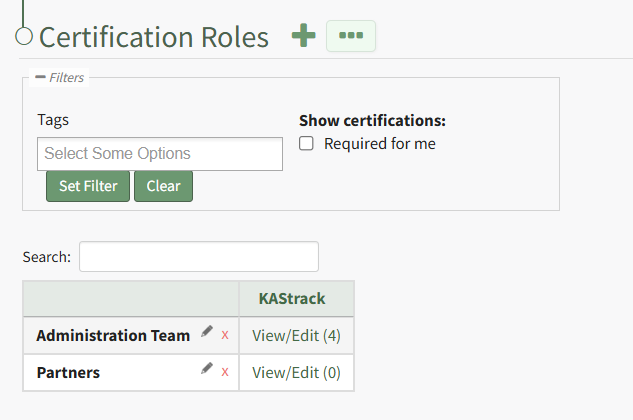
To create and define a new certification role, select Roles in the People Module on the Main Menu opening the Certification Roles Page.
Click the plus sign icon to the right of the Certification Roles header to open the Add Role Name Modal.
Clicking the three-dot icon to the right of the header and selecting Add Role Name from the Certification Roles Page Context Menu will initiate the same action as selecting the plus sign icon.
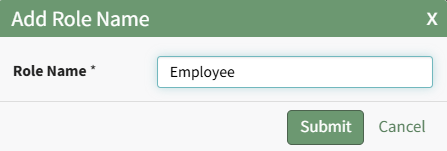
Input the new role's name and click the Submit button. The newly created role is now visible on the Certification Roles Table in alphabetical order.
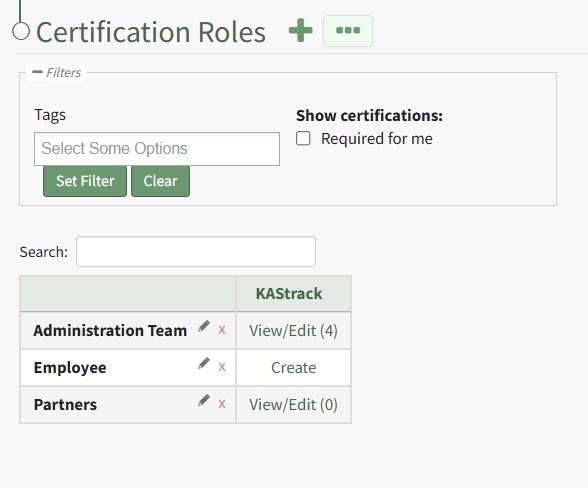
Select the clickable link to "Create" opening the Define Role Page.
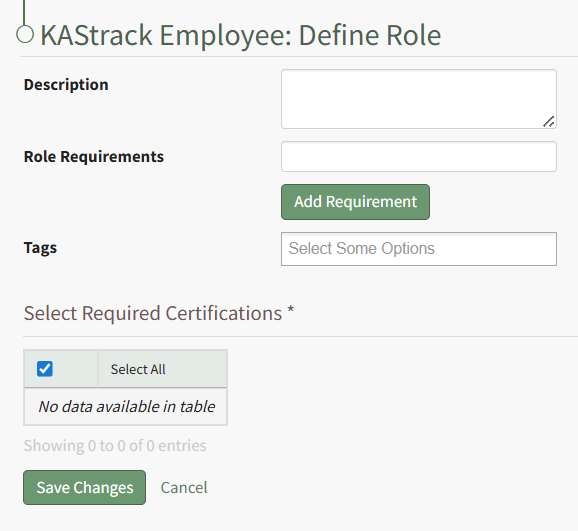
Input the role description and any relevant role requirements. Role requirements are specific to your organization. Multuple requirements can be included.
Any existing certifications will be listed in the table in the Select Required Certifications Table and can be selected via checkbox.
Certification roles are not required to have a certification associated with them.
Select "Save Changes" and certification role's Edit Users Page opens.

Identify the users that should be assigned to the certification role by selecting the checkbox to the left of the user's name.
Selecting the checkbox on the top row of the table will select/deselect all checkboxes in the table.
Click the Save Changes button below the table and the assigned users will now show in the newly created certification role.
How To: Add a Custom/Additional User Account Information Field
To add a user account information field, open the Account Fields Tab in the Site Settings Module from the Main Menu.
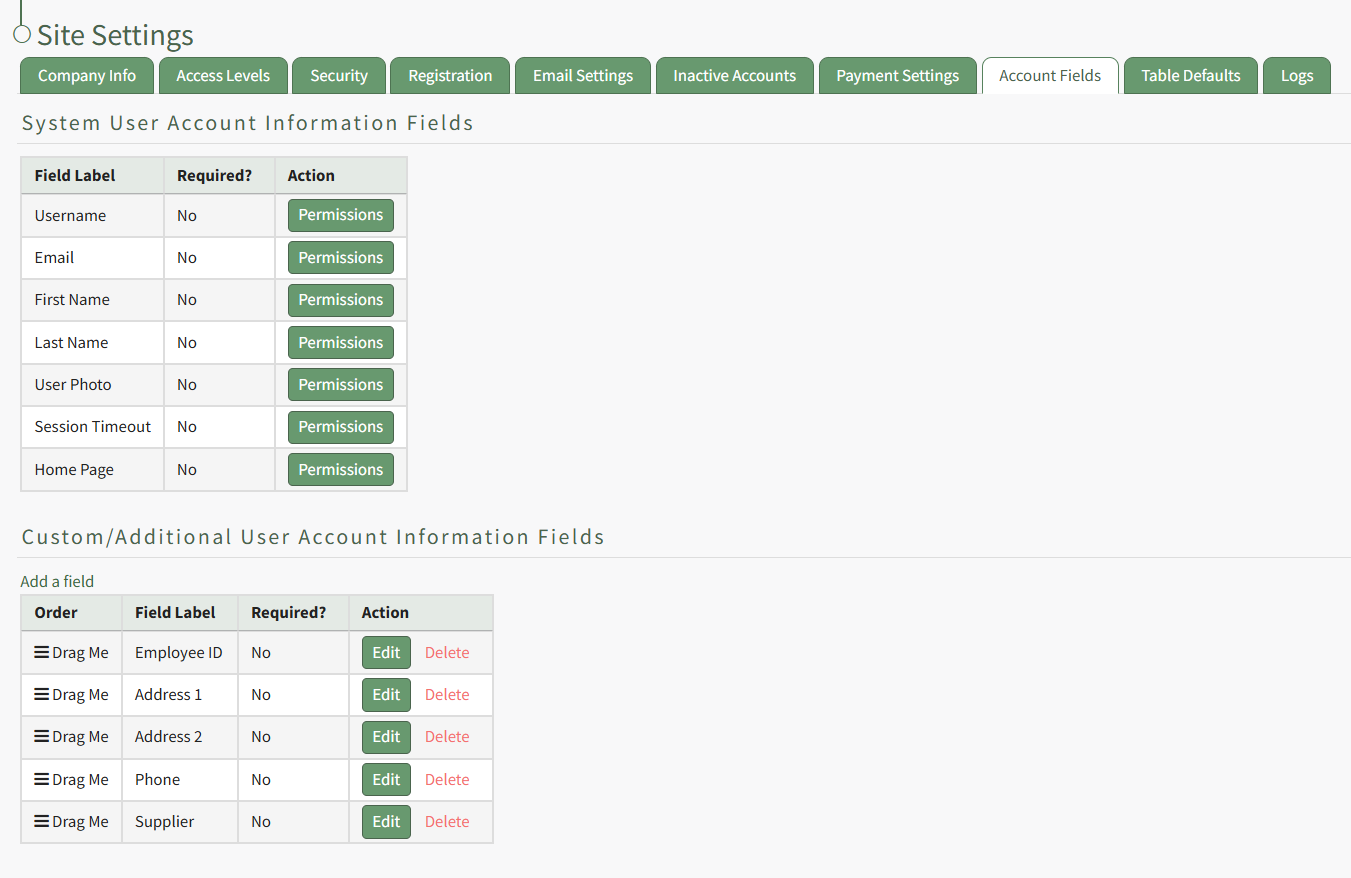
Click the "Add a Field" clickable link above the Custom / Additional User Account Information Fields opening the Add Field Modal.
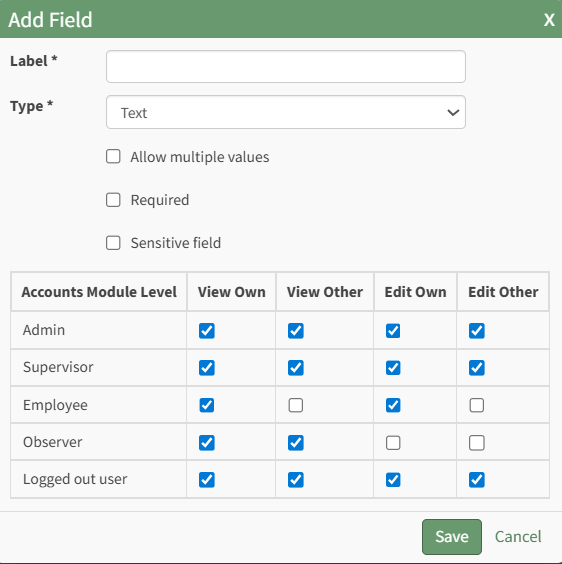
Input the label for the field.
Select the field type (text or email) from the dropdown menu.
Selecting the checkbox enables customization to "Allow multiple values," make the field "Required," or make it a "Sensitive Field."
Designating the field as a "Sensitive Field" allows an extra step in form security when integrating these fields within the Form module. The Form Designer must explicitly choose when they wish to use a sensitive field.
The Permissions Table determines who can view / edit their own and other user's fields. Selecting the checkbox gives the individual the specified permission. Deselecting the checkbox removed the permission.
Select the "Save" button and the custom field now shows in the table.
Use the Drag Me icon to drag and drop the field into your desired position of choice.