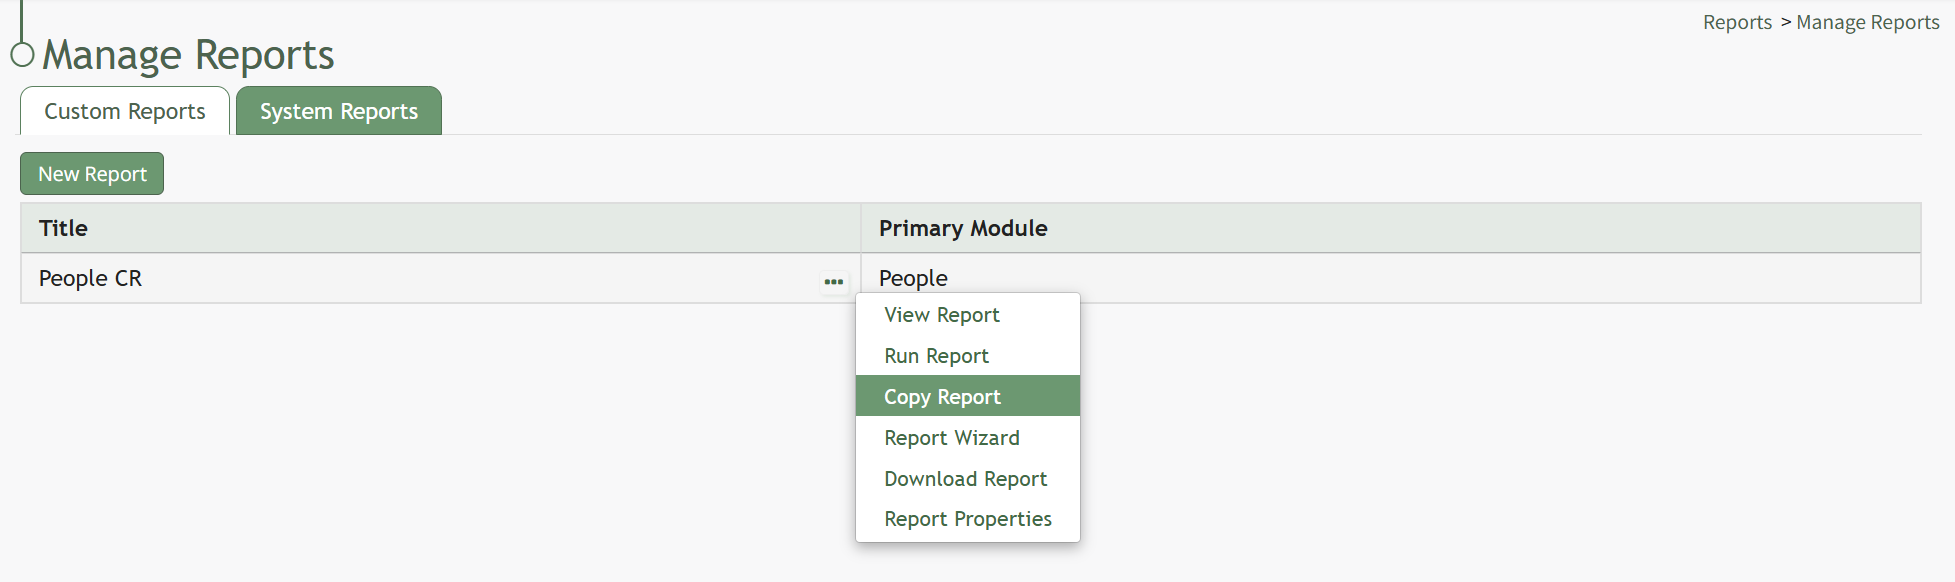
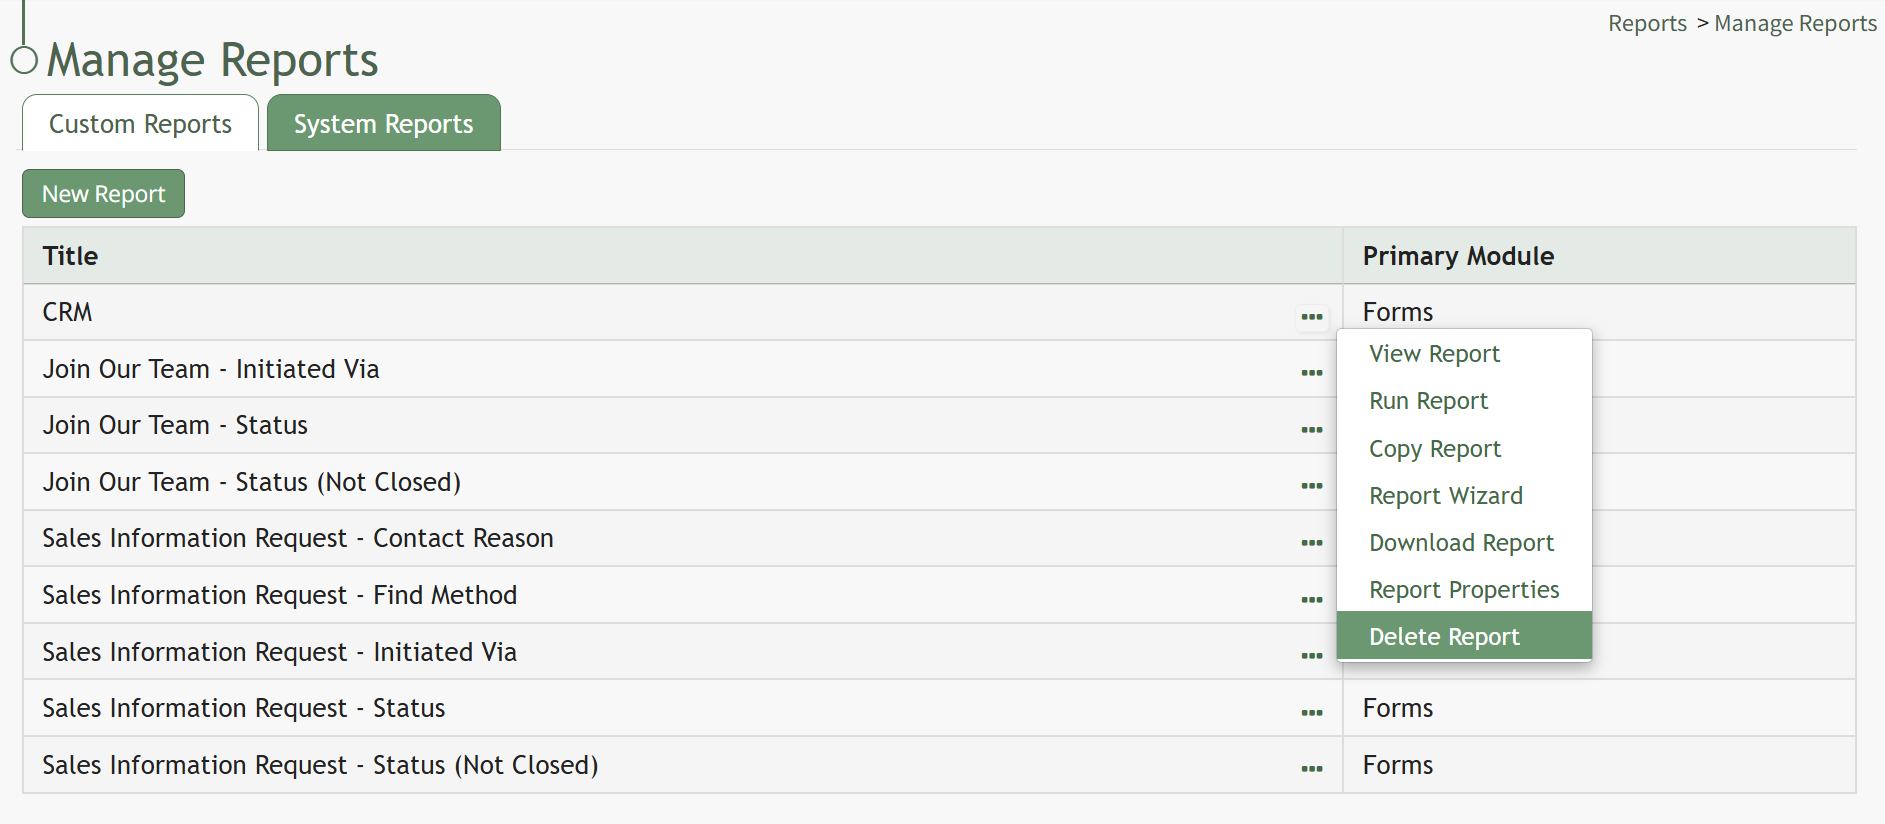
Manage Reports Page: Custom Reports Tab
The Manage Reports Page is where individuals with a Reports Module Admin or Manager Module Level can create and manage reports. The Manage Reports Page is comprised of two tabs: Custom Reports and System Reports. The selected tab will be white, not green.
The Custom Reports Tab houses the Custom Reports Table showing any available custom reports created by users.

The Custom Report Table has a context menu accessible from the three-dot icon to the right of the custom report name.
Custom Report Content Menu Explanations | ||||||||||||||||||||||||||||||||
Option | Comments | |||||||||||||||||||||||||||||||
View Report | Selecting “View Report” from the context menu opens the View Report Modal which states the Report Title, the Primary Module, the creation date and time, and shares the Link Path if the report is public. | |||||||||||||||||||||||||||||||
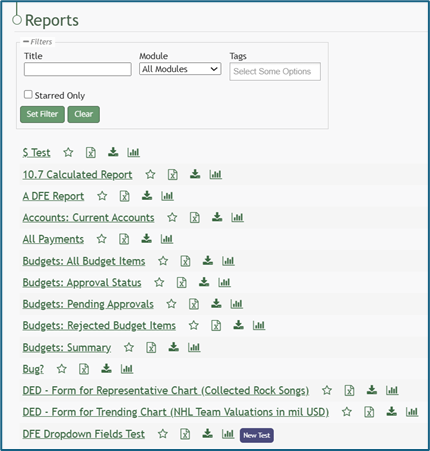
Run Report | Selecting “Run Report” from the context menu runs the selected report and opens the report page showing all the data within. How To: Run a ReportTo run a report, go to the Home Page of the Reports Module.
Click the name of the report you wish to run.
| |||||||||||||||||||||||||||||||
Copy Report | Selecting “Copy Report” from the context menu opens the Copy Report Modal which allows you to rename and create the copied report. How To: Copy a ReportSystem Reports cannot be copied. To copy a report, go to the Custom Reports Tab of the Manage Reports Page in the Reports Module. Select the three-dot icon to the right of the Report Title opening the context menu.
Select “Copy Report” opening the Copy Report Modal.
Input the new title to be associated with the copied report and select the “Copy” button.
The copied report will now be shown in the Custom Reports Table. | |||||||||||||||||||||||||||||||
Report Wizard | Selecting “Report Wizard” from the context menu opens the Report Wizard Page, which is used to customize a report after it has been created. | |||||||||||||||||||||||||||||||
Download Report | Selecting “Download Report” from the context menu opens the Download Report Modal which offers seven options on a dropdown menu for download formatting. How To: Download a ReportTo download a report, go to the Home Page of the Reports Module. There are two icons to the right of the Report Title that allow an individual to download a report.
Selecting the excel icon will automatically download the report to your personal device. Selecting the download icon will open the Download Modal. There are seven different download options to choose from on the dropdown menu.
Select the “Generate” button and KAStrack will download your report based on the method of your choosing. The icons to download a report can be found within a specific report and the Manage Reports Page (for individuals with an Admin access level). | |||||||||||||||||||||||||||||||
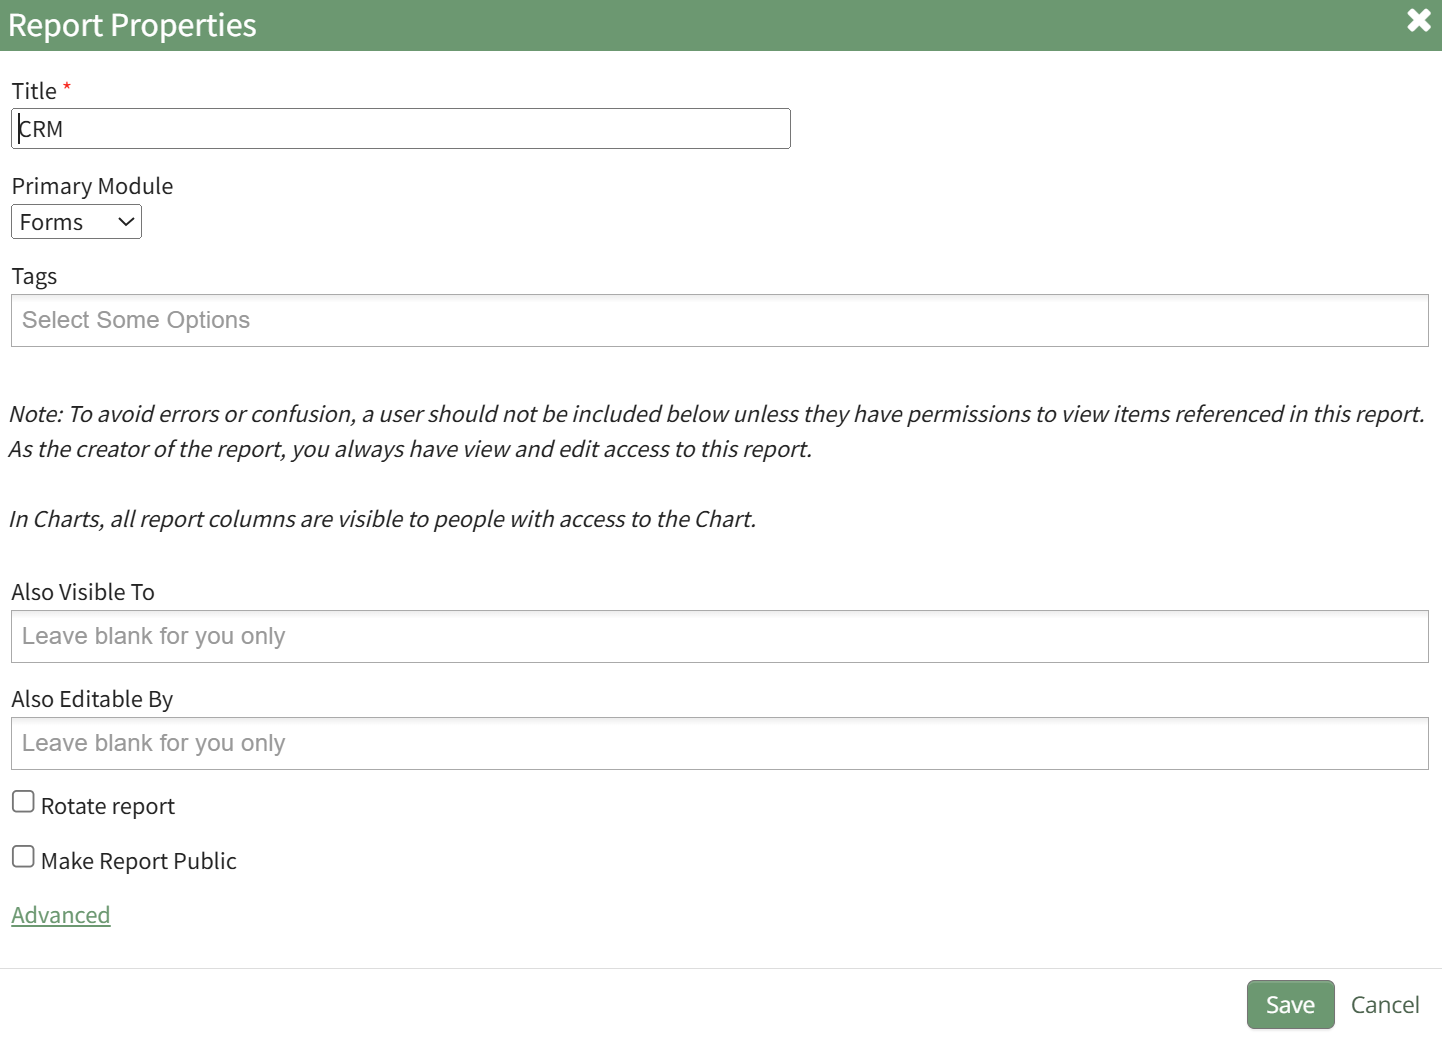
Report Properties | Selecting “Report Properties” from the context menu opens the Report Properties Modal, allowing an individual to alter their choices made on the New Report Modal. How To: Edit a ReportSystem Reports cannot be edited. To edit a report, go to the Custom Reports Tab of the Manage Reports Page in the Reports Module. Select the three-dot icon to the right of the Report Title opening the context menu.
Select “Report Properties” opening the Report Properties Modal.
Refer to the New Report Modal Comments Table for an explanation of Edit Report Modal inputs.
Select the “Save” button after making your desired changes and you’ll return to the Custom Reports Table. | |||||||||||||||||||||||||||||||
Delete Report | Selecting “Delete Report” from the context menu opens the Delete Report Confirmation Modal that lists the title of the report to be deleted with the question, “Are you sure you want to delete this report?” How To: Delete a ReportSystem Reports cannot be deleted. To delete a report, go to the Custom Reports Tab of the Manage Reports Page in the Reports Module. Select the three-dot icon to the right of the Report Title opening the context menu.
Select “Delete Report” opening the Delete Report Confirmation Modal.
The modal will state the name of the report and the question, “Are you sure you want to delete this report?” Select the “Delete” button. A confirmation modal will state, “This report has been deleted,” before returning to the Custom Reports Table.
| |||||||||||||||||||||||||||||||