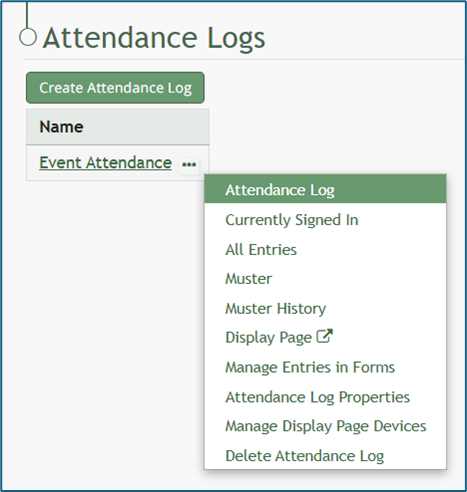
If you select “Muster” from the context menu, you will not be able to run a muster mode drill. This option directs you to a muster mode emergency.
[](https://kaswiki.kastrack.com/uploads/images/gallery/2026-01/tV7image.png) This opens the attendance log’s Information Page. [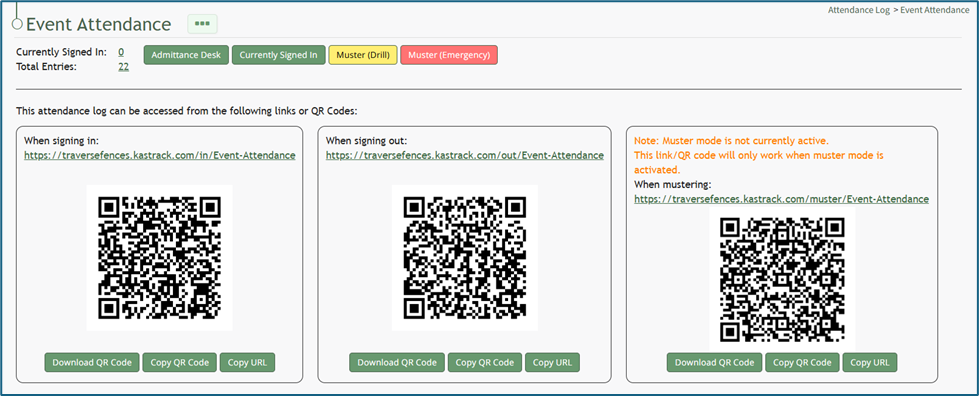](https://kaswiki.kastrack.com/uploads/images/gallery/2026-01/qtbimage.png) Select the yellow “Muster (Drill)” button at the top of the page. This opens the Muster Page, but muster mode is not yet activated. [](https://kaswiki.kastrack.com/uploads/images/gallery/2026-01/8NMimage.png) Input the appropriate notes for activating muster mode. The textbox for notes already indicates that this is a drill. Once including additional reasoning, select the yellow “Start Drill” button. The page being displayed changes, and the summary information at the top of the Muster Page indicates that Muster Mode has been initiated.If this is not an emergency, select the clickable “Do Not Activate” link and you will be returned to the Information Page where you can select to enter Muster Mode in a Drill.
Once Emergency Muster has been activated, the page will change. The muster summary at the top of the page communicates that muster mode has been initiated.Time is not included in the Custom Date Format field.
[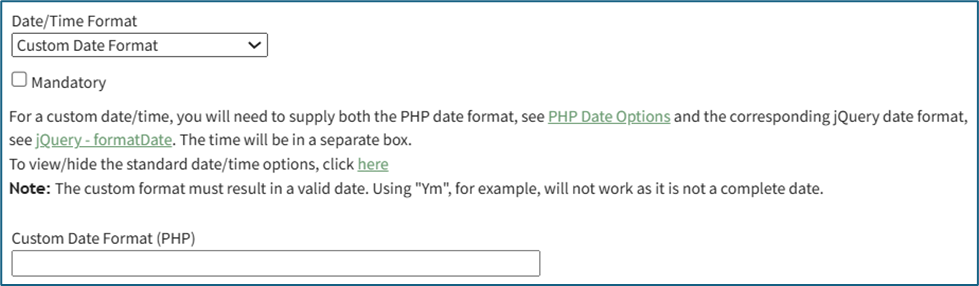](https://kaswiki.kastrack.com/uploads/images/gallery/2026-01/08jimage.png) To create a custom date format, the software needs to know how to both read and display the date. PHP (the server side) processes the date after it’s submitted. jQuery (the browser side) displays/formats the date in the date picker the user sees. Both systems have their own “language” for writing date formats, so you are required to provide a version both sides understand. PHP uses letters to represent parts of the date, explained in the table below.| **PHP Language Explanation** | ||
| **What It Represents** | **PHP Letter** | **Example** |
| Day (with leading 0) | d | 02 |
| Month (with leading 0) | m | 02 |
| Year (4 digits) | y | 2025 |
| **jQuery Language Explanation** | ||
| **What It Represents** | **jQuery Letter** | **Example** |
| Day (with leading 0) | dd | 02 |
| Month (with leading 0) | mm | 02 |
| Year (4 digits) | yy | 2025 |
An entry that was submitted directly in the Attendance Module cannot be deleted in the Manage Entries Page of the Forms Module. If you attempt to do so, a Delete Form Entry Modal will direct you to delete the entry directly from the Attendance Log**.** [](https://kaswiki.kastrack.com/uploads/images/gallery/2026-01/Ym5image.png)
To delete an individual attendance log entry, open the attendance log you wish to delete the entry in by going to the Home Page of the Attendance Module and clicking the three-dot icon to the right of the attendance log’s name, opening the context menu. [](https://kaswiki.kastrack.com/uploads/images/gallery/2026-01/1Vdimage.png) Select “All Entries”, opening the attendance log’s All Entries Page. [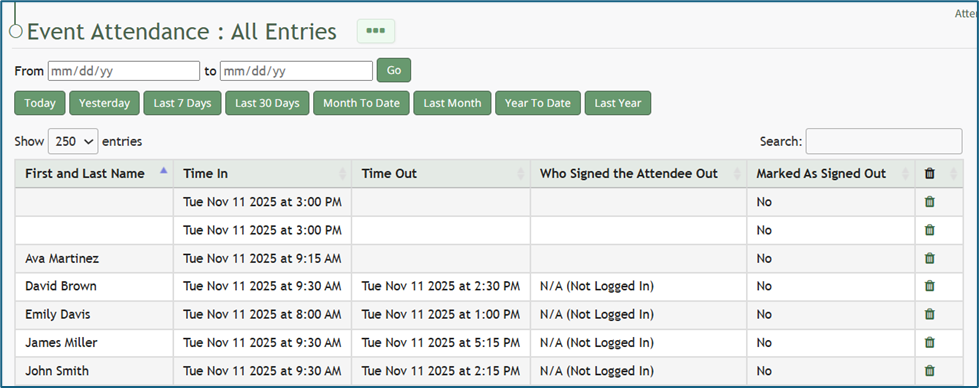](https://kaswiki.kastrack.com/uploads/images/gallery/2026-01/MNYimage.png) To delete an individual entry, select the trash can icon for the correct row in the far-right column of the All Entries Table. This opens a deletion confirmation modal which states, “Are you sure you wish to delete this entry?” [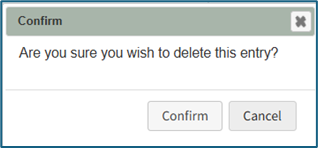](https://kaswiki.kastrack.com/uploads/images/gallery/2026-01/tlfimage.png) Select “Confirm” and the individual entry will be deleted from the attendance log. # Download / Copy an Attendance Log QR Code To download or copy an attendance log’s Sign In, Sign Out or Muster QR Code, go to the Home Page of the Attendance Module. Click the attendance log’s name or click the three-dot icon to the right of the attendance log you wish to download or copy the QR Code for, opening the context module. [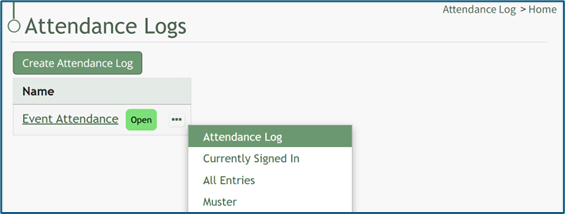](https://kaswiki.kastrack.com/uploads/images/gallery/2026-01/cmaimage.png) Select “Attendance Log”, opening the attendance log’s Information Page. [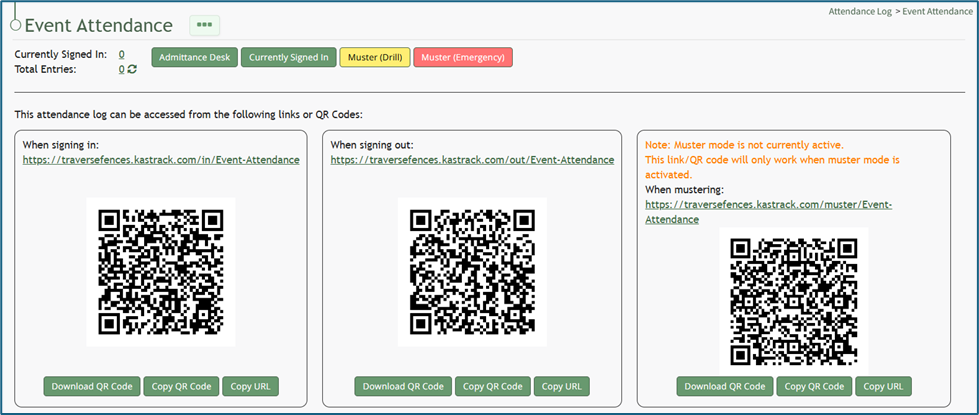](https://kaswiki.kastrack.com/uploads/images/gallery/2026-01/vnwimage.png) Within the Signing In, Signing Out, and Mustering sections of the Information Page, there are buttons to Download QR Code or Copy QR Code. To use the Mustering QR Code, muster mode should be activated first. [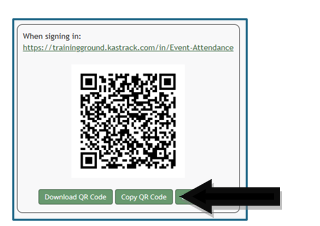](https://kaswiki.kastrack.com/uploads/images/gallery/2026-01/NWbimage.png) Click the desired button and the QR Code will be downloaded/copied to your device. # Edit the Admittance Desk Page To edit the Admittance Desk Page for an Attendance Log, open the attendance log you wish to edit by going to the Home Page of the Attendance Module and clicking the three-dot icon to the right of the attendance log title, opening the context menu. [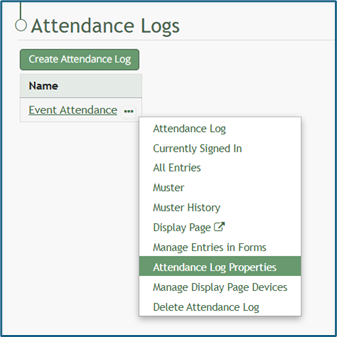](https://kaswiki.kastrack.com/uploads/images/gallery/2026-01/eOWimage.png) Select “Attendance Log Properties” from the context menu, opening the Attendance Log Properties Modal. [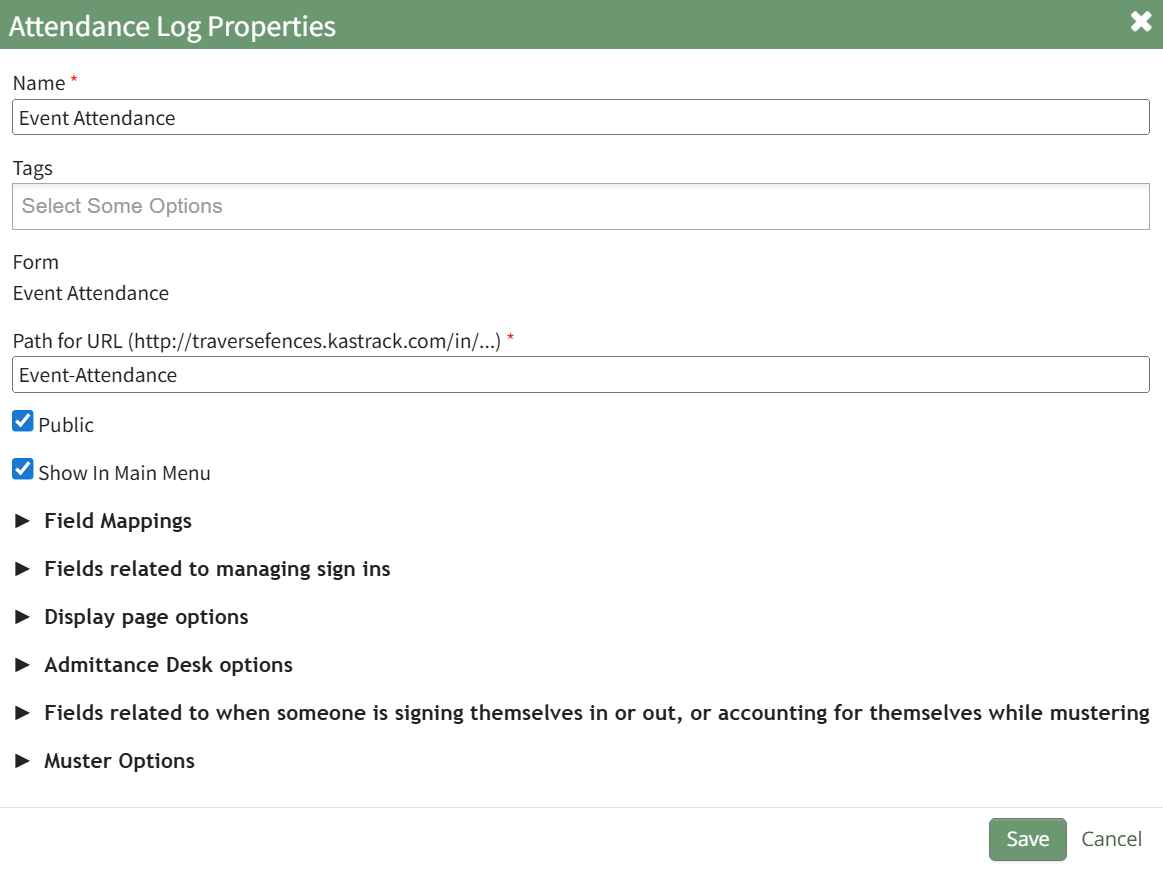](https://kaswiki.kastrack.com/uploads/images/gallery/2026-06/f49image.png) Click the arrow to the left of “Admittance Desk Options” to expand the section. Here, a certification role can be associated with the attendance log or changed. This feature is useful is there are requirements for individuals to access a facility or event. Refer to the People Module for an understanding of certification roles.| **Display Page Option Section Explanations** | |||
| **Field** | **Comments** | ||
| Title for the Display Page | You can give the display page a title different that is different from the name of the attendance log. The Display Page Title will show in the top left-hand corner of the Display Page. | ||
| Text for the Display Page | The text for the Display Page is seen immediately beneath the page header. You can customize this text or leave it blank. | ||
| Field(s) to Include on the Display Page | Select the fields you want to be visible on the Display Page. All fields included on the Attendance Log Form will show as Display Page field options. | ||
| Font Size (em) | Font size is automatically set a 1em. Input the desired font size.
An em is a unit in the field of typography, equal to the currently specified point size that corresponds to the body height of the typeface. | ||
| Field Widths (pixels) | Leave this blank for auto widths, or specify one width per column, separated by spaces. Use ‘auto’ to use auto width for a column. (For example, if there are three columns then ‘auto 100 100’ will set the column width for the last two columns to 100px, and auto-size the first column). | ||
| On the Display Page, Show... | There are two selections provided via drop-down menu for who shows on the display page: “People who are currently signed in” OR “People Who Have Signed In Today” | ||
| Scroll Rate (seconds) | The scroll rate is automatically set to 30 seconds. If your screen only shows 25 entries at a time, scroll rate dictates how long the screen will show those 25 entries before scrolling to the next 25 entries. | ||
| Include the Sign In QR Code Checkbox | Selecting this checkbox will result in the Sign In QR Code being displayed on the Display Page. | ||
| Include the Sign Out QR Code Checkbox | Selecting this checkbox will result in the Sign Out QR Code being displayed on the Display Page. | ||
| Use Muster Display When Mustering | Selecting this checkbox will result in the Mustering Display Page being shown as opposed to the regular Display Page when in Muster mode. When selected, it expands to show additional fields. | ||
| **Fields** | **Comments** | ||
| Muster Mode | There are two options for this drop-down menu. The first option is “Show not accounted for people and stats”, which will show information about individuals who have not accounted for themselves or have not been marked as accounted for. The second option is “Only show QR Code”, which will display the muster mode QR Code instead. | ||
| Fields to Include on the display page when mustering | Select the fields you would like to be visible on the Mustering Display Page. All fields included on the attendance log form will show as options. | ||
| Include the muster QR code | Selecting this checkbox will show the Muster QR Code on the Muster Display Page. | ||
| Show Accounted For List | Selecting this checkbox results in the Accounted For List showing on the Muster Display Page. It expands when selected with additional options. | ||
| **Fields** | **Comments** | ||
| Pattern for the Accounted for List | You can use the pattern field to reference your form fields in the Accounted For List. Input the fields you would like displayed in order. Example: #FieldName1# #FieldName2# | ||
| Accounted for List Font Size (em) | The font size for the accounted for list is set at 1em but can be altered. | ||
| Accounted for List Pagination Speed (seconds) | The pagination speed of the accounted for list is set at 30 seconds but can be altered. | ||
| Sort By Field | Select which field you would like the Muster Display Page to use for sorting. | ||
| QR Code Size (pixels) | The QR Code size is set for 200 pixels but can be altered. | ||
If you enable the Admittance Desk directly from an attendance log’s Information Page by using the 3-dot icon on the page, you will need to refresh the page to see the button.
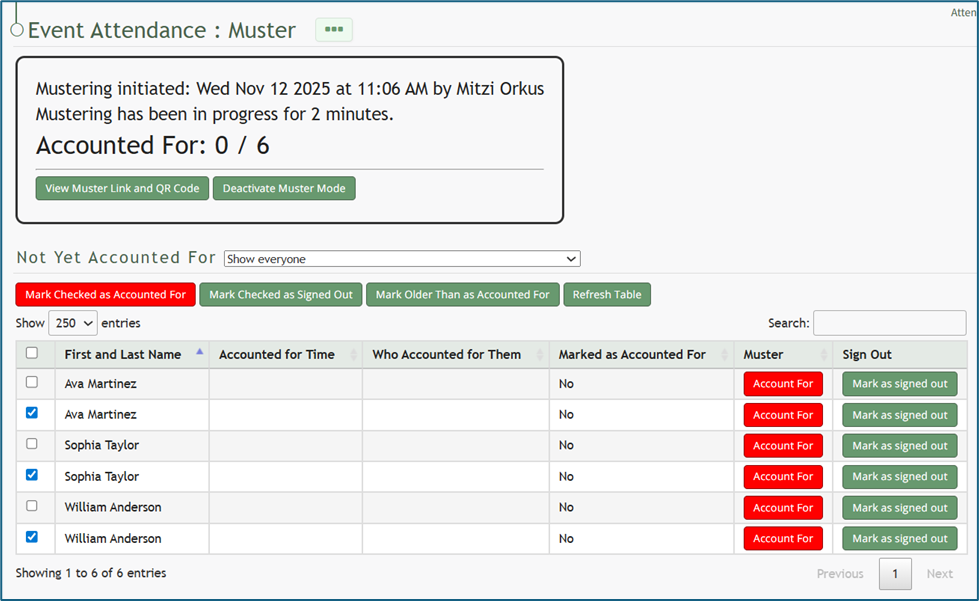
# Enable the Display Page To enable the Display Page for an attendance log, open the attendance log you wish to enable the Display Page feature in by going to the Home Page of the Attendance Module and clicking the three-dot icon to the right of the attendance log’s name, opening the context menu. [](https://kaswiki.kastrack.com/uploads/images/gallery/2026-01/By0image.png) Select “Attendance Log Properties” from the context menu, opening the Attendance Log Properties Modal. [](https://kaswiki.kastrack.com/uploads/images/gallery/2026-06/Rhrimage.png) Click the arrow to expand the Display Page Options section. [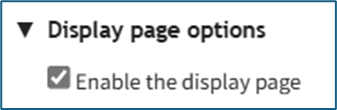](https://kaswiki.kastrack.com/uploads/images/gallery/2026-01/GZYimage.png) Select the “Enable the Display Page” checkbox and select “Save” at the bottom of the Attendance Log Properties Modal. The Display Page is now enabled for Attendance Log. # Generate a Time On Site Summary Report To generate a time on site summary report, open the Attendance Module Home Page from the Main Menu. Click the three-dot icon to the right of the attendence log you wish to generate a time on site summary report for opening the attendance log context menu. [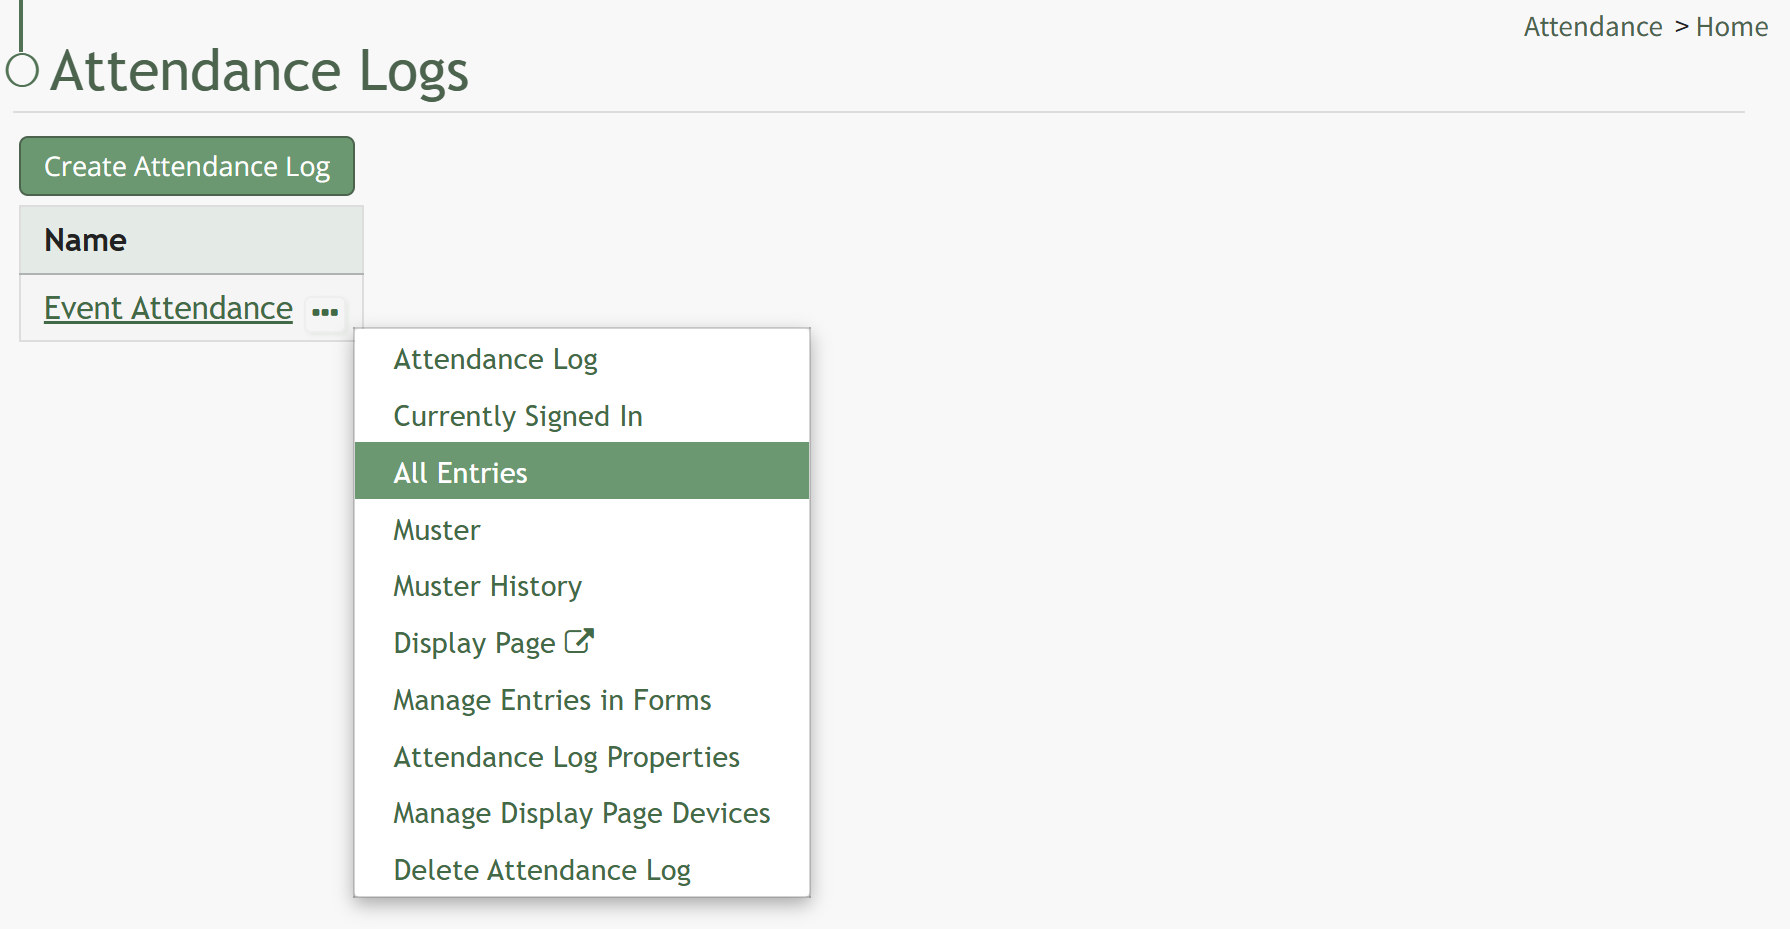](https://kaswiki.kastrack.com/uploads/images/gallery/2026-06/wapimage.png) Select All Entries on the context menu to open the All Entries Page. [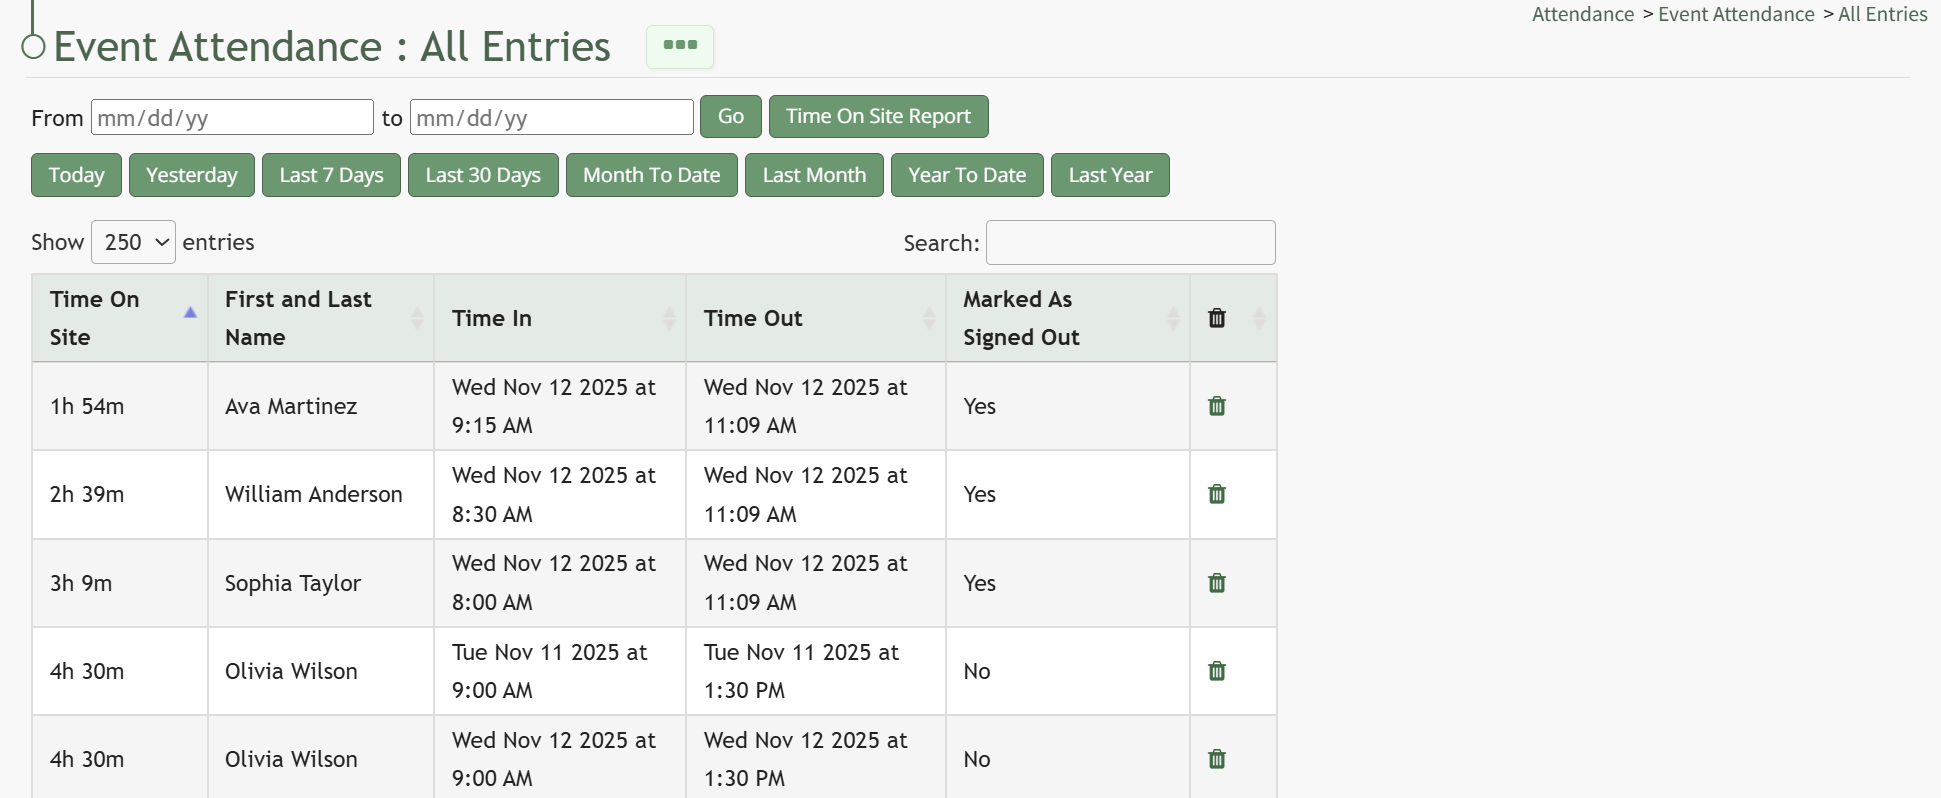](https://kaswiki.kastrack.com/uploads/images/gallery/2026-06/PRIimage.png) Click the Time On Site Report button opening the Time on Site Summary Report Modal. [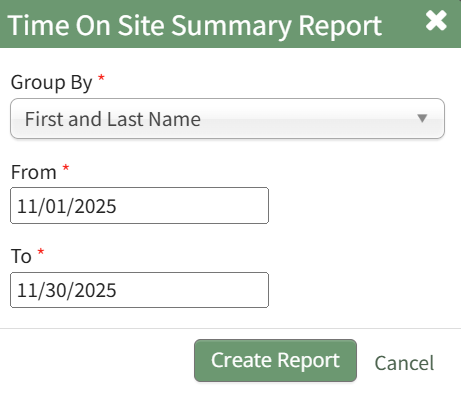](https://kaswiki.kastrack.com/uploads/images/gallery/2026-06/wEkimage.png) Select how you would like the time on site information to be grouped from the dropdown menu. Input a start date (From) and an end date (To) that you would like the time on site calculated for. (All fields on the modal are mandatory.) Click the Create Report button, and a summary of time on site is generated within the Attendance Module. [](https://kaswiki.kastrack.com/uploads/images/gallery/2026-06/Q7Qimage.png) # Make Entries Prior to a Date/Time as Signed Out To mark specific entries prior to a date/time as signed out, go to the Home Page and select the three-dot icon to the right of the attendance log you wish to sign out entries for. This opens the context menu. Select “Currently Signed In”. [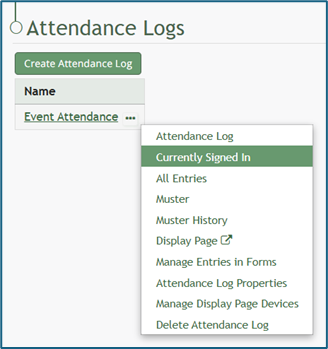](https://kaswiki.kastrack.com/uploads/images/gallery/2026-01/zEZimage.png) This opens the Currently Signed In Page. [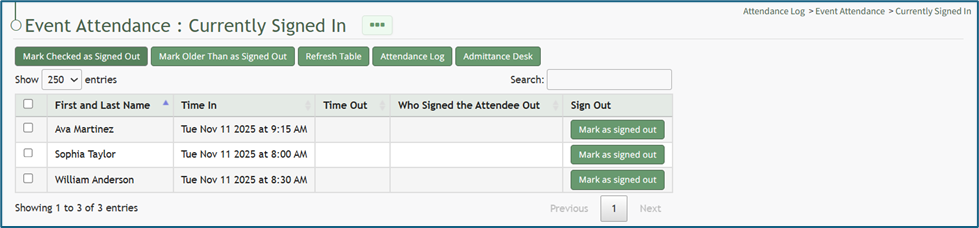](https://kaswiki.kastrack.com/uploads/images/gallery/2026-01/RzOimage.png) Select the “Mark Older Than as Signed Out” button, opening the Mark Older Than Modal. Click within the date box and a calendar appears for ease in selecting the appropriate date. [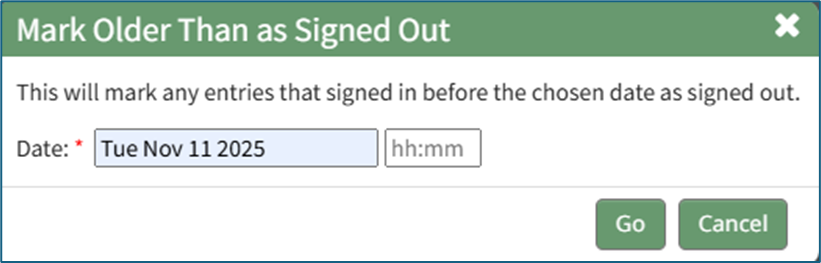](https://kaswiki.kastrack.com/uploads/images/gallery/2026-01/Sihimage.png) Click “Go” and a Confirmation Modal indicates the number of entries that were impacted by the action. [](https://kaswiki.kastrack.com/uploads/images/gallery/2026-01/aRDimage.png) The Currently Signed In Table now reflects the changes that were made. [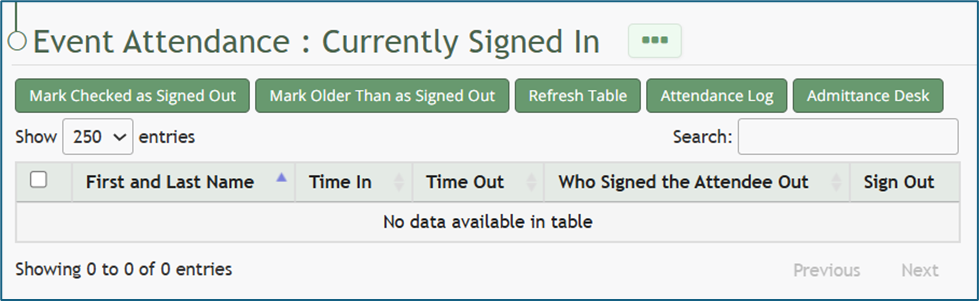](https://kaswiki.kastrack.com/uploads/images/gallery/2026-01/C8yimage.png) # Mark Individuals Signed In Prior to A Certain Date/Time as Accounted For While in Muster Mode Once muster mode has been activated, individuals who signed in prior to a specific date and time can be marked as accounted for. [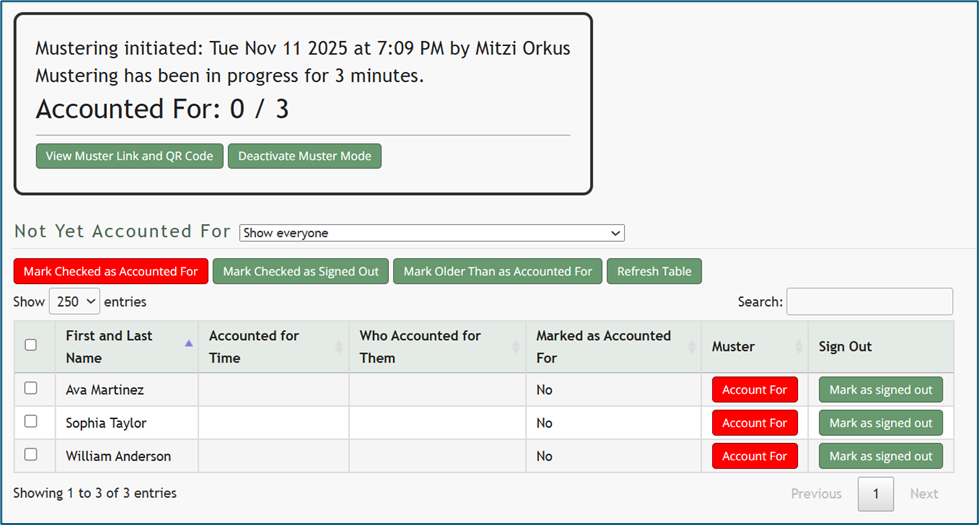](https://kaswiki.kastrack.com/uploads/images/gallery/2026-01/9zHimage.png) To do so, click the “Mark Older Than as Accounted For” button opening the Mark Older Than as Accounted For Modal. [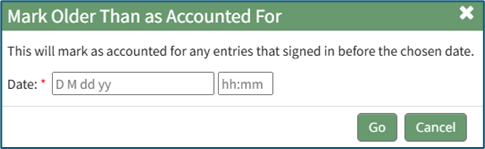](https://kaswiki.kastrack.com/uploads/images/gallery/2026-01/W1Jimage.png) Input the desired date and time. Anyone who signed in before this date/time will be marked as accounted for in the muster table. A calendar is provided for ease in accurately setting the desired date. Click “Go” at the bottom of the modal and a confirmation modal will appear, communicating how many entries were accounted for by the action. [](https://kaswiki.kastrack.com/uploads/images/gallery/2026-01/nuuimage.png) # Refresh the Currently Signed In Table To refresh the Currently Signed In Table and reload the data currently shown in the table, open the attendance log you wish to refresh the table for by going to the Home Page of the Attendance Module and clicking the three-dot icon to the right of the attendance log’s name, opening the context menu. [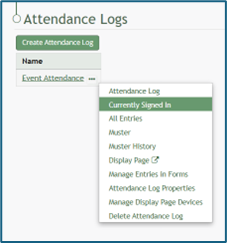](https://kaswiki.kastrack.com/uploads/images/gallery/2026-01/DxUimage.png) Select “Currently Signed In” opening the Currently Signed In Page. [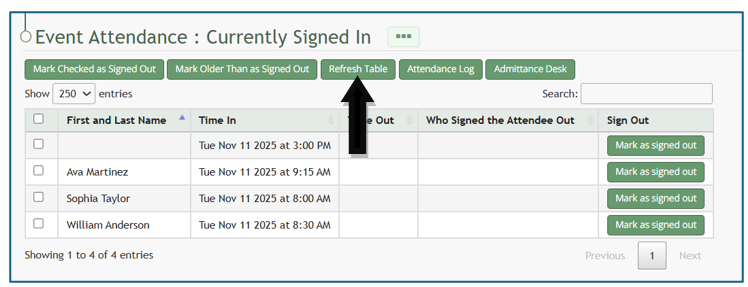](https://kaswiki.kastrack.com/uploads/images/gallery/2026-01/dUDimage.png) Click the “Refresh Table” button beneath the page header, and the latest records will replace the information currently shown on the table. [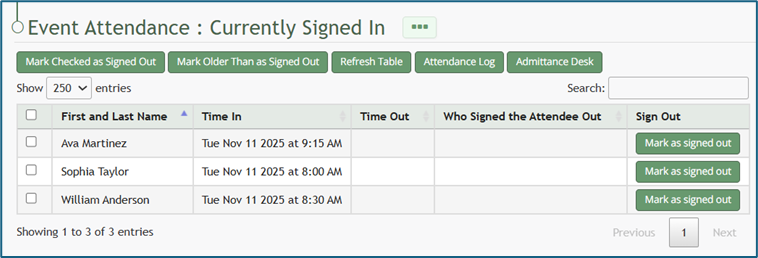](https://kaswiki.kastrack.com/uploads/images/gallery/2026-01/ZdUimage.png) # Refresh the Muster Table while in Muster Mode Refreshing the Muster table while in muster mode is a beneficial feature, particularly if individuals are using the QR Code or URL Link to account for themselves. To refresh the table, select the “Refresh Table” button. [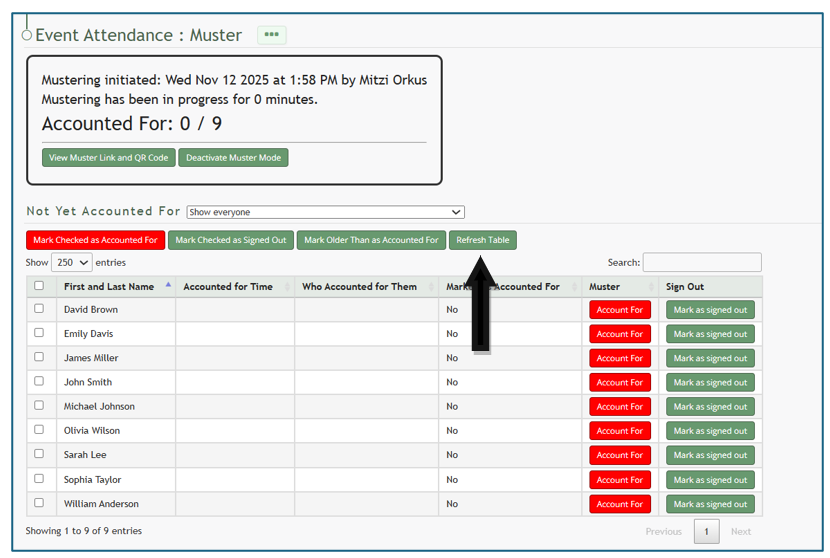](https://kaswiki.kastrack.com/uploads/images/gallery/2026-01/zqQimage.png) The muster table will automatically refresh, and the updated summary will show the accounted for individuals. [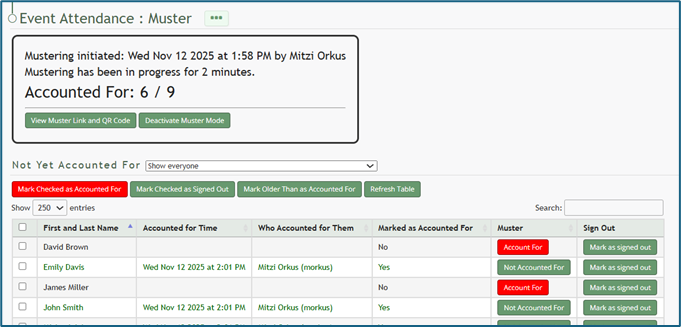](https://kaswiki.kastrack.com/uploads/images/gallery/2026-01/RRLimage.png) # Show an Attendance Log on the Main Menu To show an attendance log on the main menu, open the attendance log and go to the Attendance Module Home Page. All available attendance logs will be visible in the table with a three-dot icon to the right of the attendance log’s name. Click the three-dot icon to open the context menu. Select “Attendance Log Properties.” [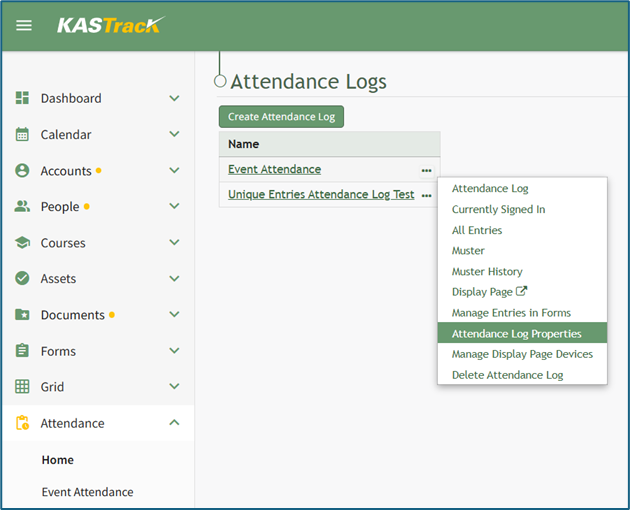](https://kaswiki.kastrack.com/uploads/images/gallery/2026-01/cHsimage.png) This opens the Attendance Log Properties Modal. Select the “Show In Main Menu” checkbox. [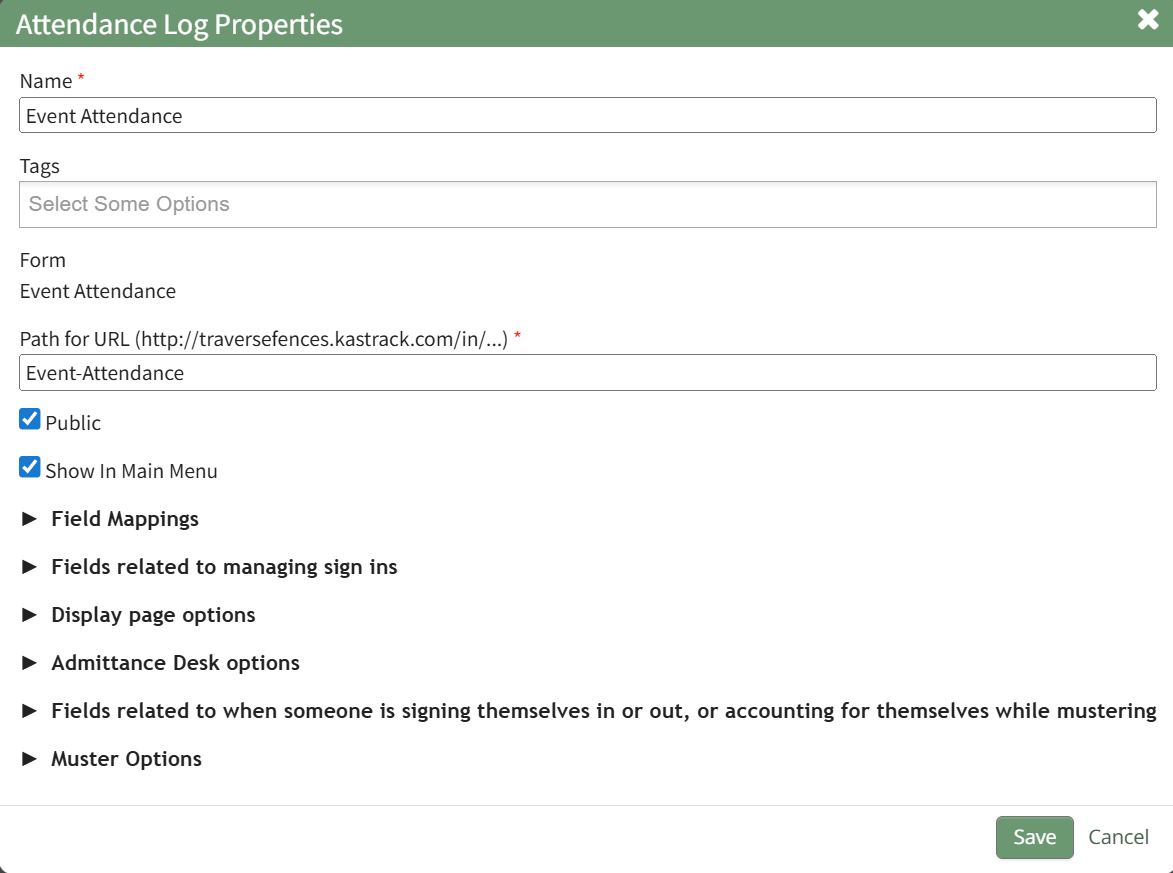](https://kaswiki.kastrack.com/uploads/images/gallery/2026-06/pAOimage.png) Click “Save” at the bottom of the Attendance Log Properties Modal. To see the attendance log as its own page in the Main Menu, refresh the page or log out and sign back in to KAStrack. The attendance log will now show as its own page in the Main Menu. [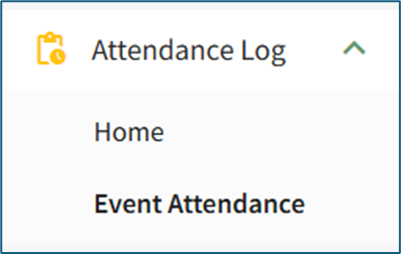](https://kaswiki.kastrack.com/uploads/images/gallery/2026-01/5syimage.png) # Sign Out an Individual To sign out an individual from the attendance log, open the attendance log you wish to sign individuals out of by going to the Home Page of the Attendance Module and clicking the three-dot icon to the right of the attendance log’s name, opening the context menu. [](https://kaswiki.kastrack.com/uploads/images/gallery/2026-01/lrWimage.png) Select “Currently Signed In” opening the Currently Signed In Page. [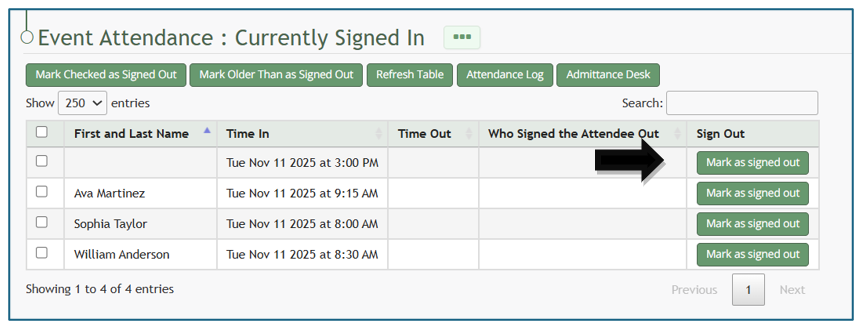](https://kaswiki.kastrack.com/uploads/images/gallery/2026-01/PnJimage.png) Click the “Mark as Signed Out” button in the row of the entry you wish to be signed out. [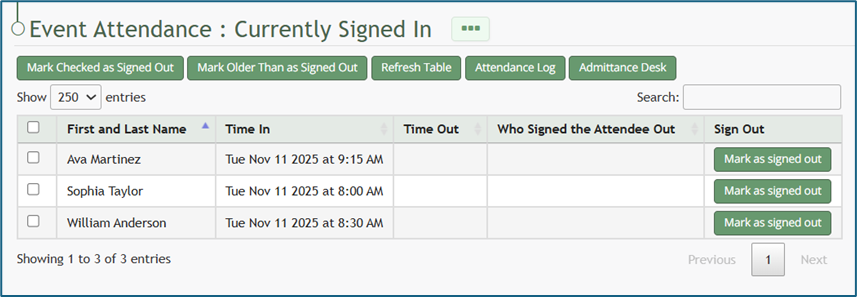](https://kaswiki.kastrack.com/uploads/images/gallery/2026-01/UKZimage.png) The entry will no longer show on the Currently Signed In Page. # Sign Out Individuals when In Muster Mode Once muster mode has been activated, individuals can be signed out rather than accounted for if needed. To do so, select the checkboxes to the left of the individuals you wish to sign out.Selecting the checkbox in the top row will select all entries.
[](https://kaswiki.kastrack.com/uploads/images/gallery/2026-01/WAQimage.png) Click the “Marked Checked Out as Signed Out” button above the table. [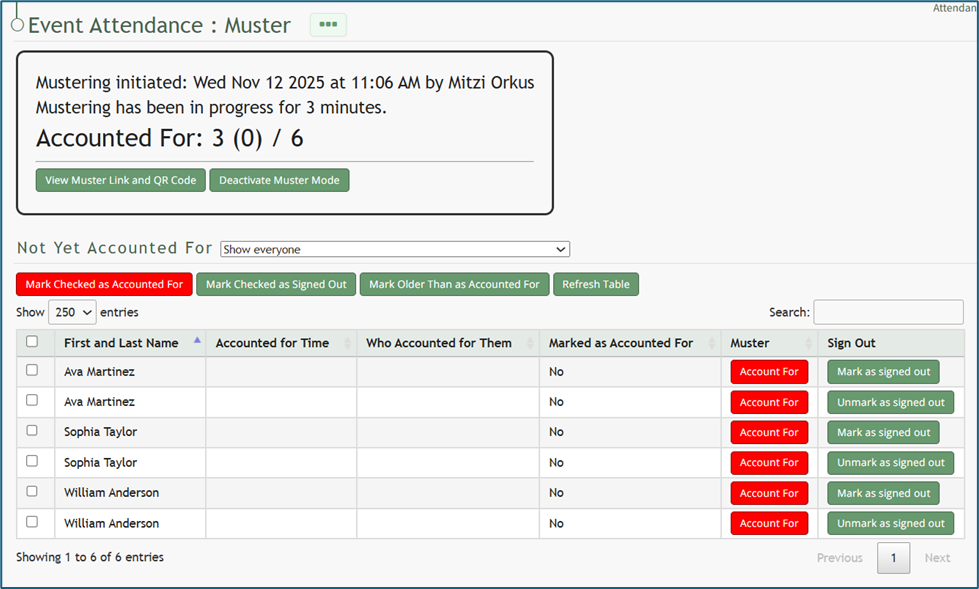](https://kaswiki.kastrack.com/uploads/images/gallery/2026-01/rpFimage.png) The summary box at the top of the muster page now shows those individuals that were signed out as (indirectly) accounted for. If an individual was signed out in error, you can select the “Unmark as Signed Out” button to correct the issue. # Sign Out Other Individuals (In Bulk) To sign out multiple other individuals at one time, open the attendance log you wish to sign individuals out of by going to the Home Page of the Attendance Module and clicking the three-dot icon to the right of the attendance log’s name, opening the context menu. [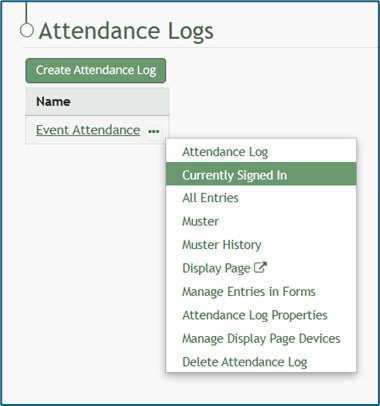](https://kaswiki.kastrack.com/uploads/images/gallery/2026-01/ceJimage.png) Select “Currently Signed In” opening the Currently Signed In Page. [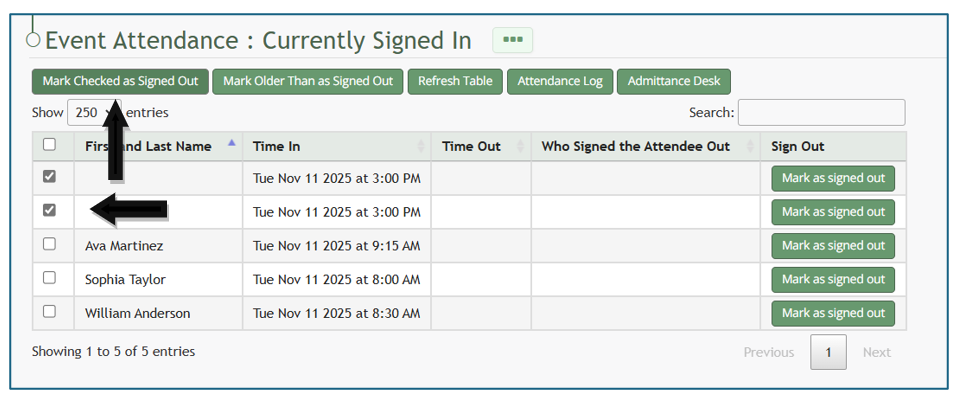](https://kaswiki.kastrack.com/uploads/images/gallery/2026-01/Pogimage.png) First, select checkboxes on the left-hand column to select the individuals that you wish to sign out.Selecting the checkbox in the top row will select all entries.
After selecting individuals to be signed out, click the “Marked Checked as Signed Out” button. The individuals selected will no longer show on the Currently Signed In Page.