Documents Module
- Documents: Introduction
- Documents Module Summary
- Customizable Document Properties
- Folder and File Context Menu Explanations
- Public Files and Folders, and the Logged Out Documents Experience
- Documents: Module Pages
- A File's Details Page
- Documents Home Page
- Review Page: Actions Tab
- Review Page: Notifications Tab
- Review Page: Updates Tab
- Settings Page
- Documents: Supplemental Resources
Documents: Introduction
Documents Module Summary
The Documents Module is a repository where all company files can be uploaded, stored, and managed. This module can track a company’s workforce acknowledgement of documents for workforce assurance and automate acknowledgment management for revised document updates. Additionally, the documents module automates annual suitability reviews and management of change.
The following file types can be previewed directly within the module without needing to download them first: .jpg, .jpeg, .webp, .gif, .bmp, .svg, .png, .mp4, .webm, .ogg, and .pdf.
For .url files, KAStrack will display the hyperlink instead of a preview. The viewer is feature rich for PDFs.
All filetypes can be uploaded to KAStrack, but the ones listed above may be viewed without being downloaded.
Files associated with and uploaded within the following Modules are not automatically saved in the Documents Module, but they can be manually uploaded in both: Assets, Courses, Dispatch, Forms, and People. Files uploaded into the Grid Module will automatically be housed in Documents.

The table below provides a summary of each page in the Documents Module.
Documents Module Main Menu Page Summaries | |
Page | Explanation |
Home | The Home Page is the repository for all files and contains Folder/File List. |
Review | The Review Page is comprised of three tabs: Review, Notifications, and Updates. The user can select between the three tabs below the Review Page header to manage file approvals, acknowledgements, and continued suitability, as well as monitor any pertinent file updates and notifications. |
Settings | The Settings Page allows the user to customize and designate permissions for the Documents Module. |
The Documents Action Status Legend shown in the table below communicates the status of outstanding to dos in the module.
Documents Module Action Status Legend | |
Icon | Explanation |
| A red action status in the Documents Module indicates that a continued suitability review is overdue or that a document is waiting to be published. |
| A yellow action status in the Documents Module indicates there is a pending document approval. |
| The blue action status in the Documents Module indicates that a document acknowledgement/approval is required, a document is reviewed but not yet approved, or a notification of a new document revision. |
If there are multiple statuses relating to the same document, overdue (red) takes precendence over warnings (yellow) which takes precedence over being due (blue).
Customizable Document Properties
Each file uploaded in the Documents Module has customizable properties that are designated when a new file is uploaded. An explanation of those properties are explained in the Basic Details and Advanced Options Tabs below.
Basic Details
Under the Basic Details Tab, the user can input a title, description of the file, revision number and revision date. They can also designate any document owners (the uploader is initially included as an Owner by default) and tags.

If the incorrect file was selected, the user can click “Select a different file” from the top right corner of the modal to exchange it with the correct file.
Document owner(s) can be selected from a dropdown list of users.
Document owners have the ability to approve documents, which is relevant for companies who are required to attest an annual/periodic review for regulatory agencies or other governing bodies. Document owners are also notified any time a new comment is made on a file and are responsible for affirming continued suitability of the file if enabled under Advanced Options.
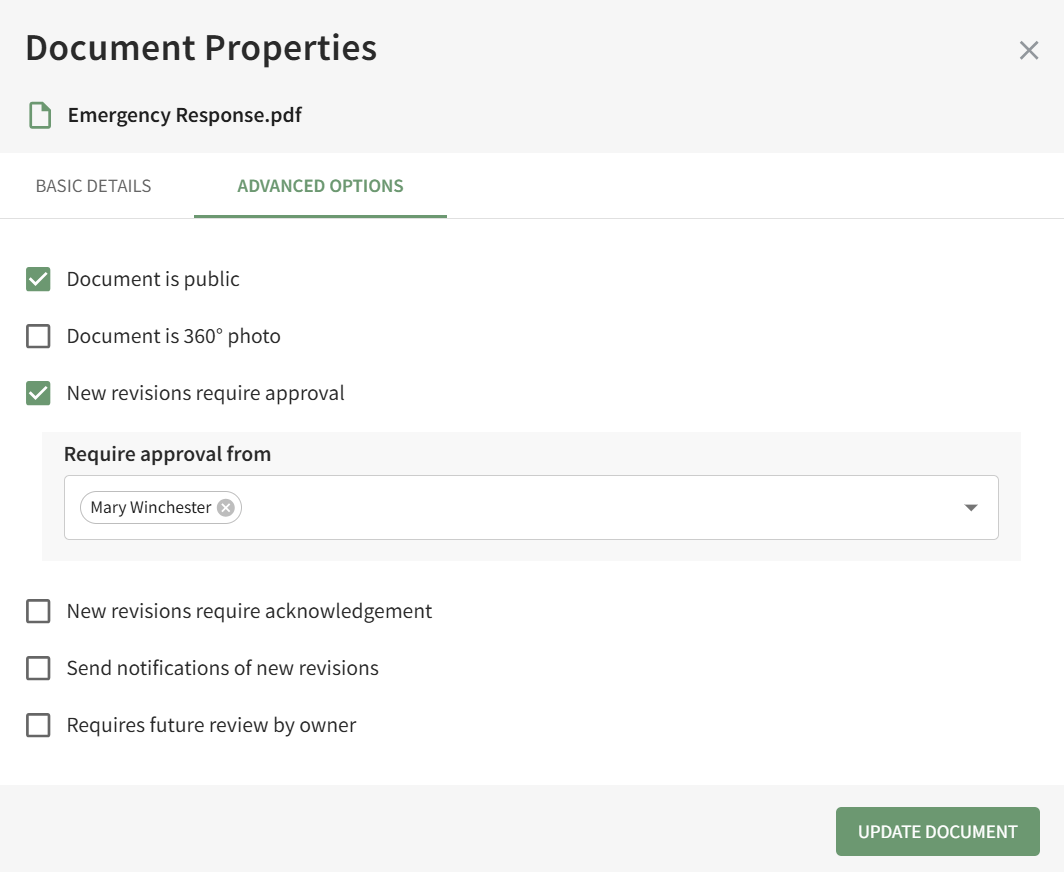
Advanced Options
Selecting the Advanced Options Tab allows the user to apply enhanced settings to the file. An explanation of each Advanced Options checkbox is included in the table below.

Document Advanced Options Explanations | |
Checkbox | Explanation |
Document is Public | Selecting the “Document is public” checkbox allows individuals who are not users in the KAStrack system to view files. Users in KAStrack will need appropriate permissions to view the file regardless. How To: Designate a File is PublicTo designate a document/file as Public in the Documents Module, open the Documents Home Page from the Main Menu and navigate the repository to the file you want to designate as public.
Click the vertical three-dot icon to the right of the file you wish to make public, opening the file's context menu.
Select Properties opening the Basic Details Tab of the Document Properties modal. Open the Advanced Options Tab.
Select the checkbox to designate the "Document is Public" and click the Update Document button. A pop-up confirms that the document is now public.
The file's icon is now blue, indicating that the document is public. |
Document is 360° Photo | Selecting the “Document is a 360° photo” checkbox communicates to KAStrack that the file is intended for 360° viewing to ensure it shows correctly. |
New Revisions Require Approval | Selecting the “New revisions require approval” checkbox opens a dropdown menu. Approval requirements for the file can be designed by Access Level, Certification Role, or specific individuals in the system. An additional checkbox can be selected if this revision requires approval.
Users view the files that require approval on the Documents Module Review Page. |
New Revisions Require Acknowledgement | Selecting the “New revisions require acknowledgement” checkbox allows acknowledgement requirement customization.
The “This revision requires acknowledgement” checkbox will notify the Access Levels, Certification Roles, or individuals selected of the new document. If “Acknowledgement is required for login” is selected, a user will not be able to access anything in KAStrack until the user acknowledges the revised document. A textbox allows the user to include a customized acknowledgement message that will be included in the automated message sent out to users by KAStrack. Users view the files that require acknowledgement on the Documents Module Review Page, or just after signing in, when “Acknowledgement is required for login” is enabled. |
Send Notifications of New Revisions | Selecting the “Send notifications of new revisions” checkbox allows a user to customize (by Access Level, Certification Role, or individual) who receives an email notification that a new file revision has been updated in KAStrack. An additional checkbox can be selected if a notification is to be sent for this revision.
Users view the files they have received notification of on the Documents Module Review Page. |
Requires Future Review by Owner | Selecting the “Requires future review by owner” checkbox allows the user to schedule the next review date and set a reminder for the review deadline.
Users review files for continued suitability on the Documents Module Review Page. |


Folder and File Context Menu Explanations
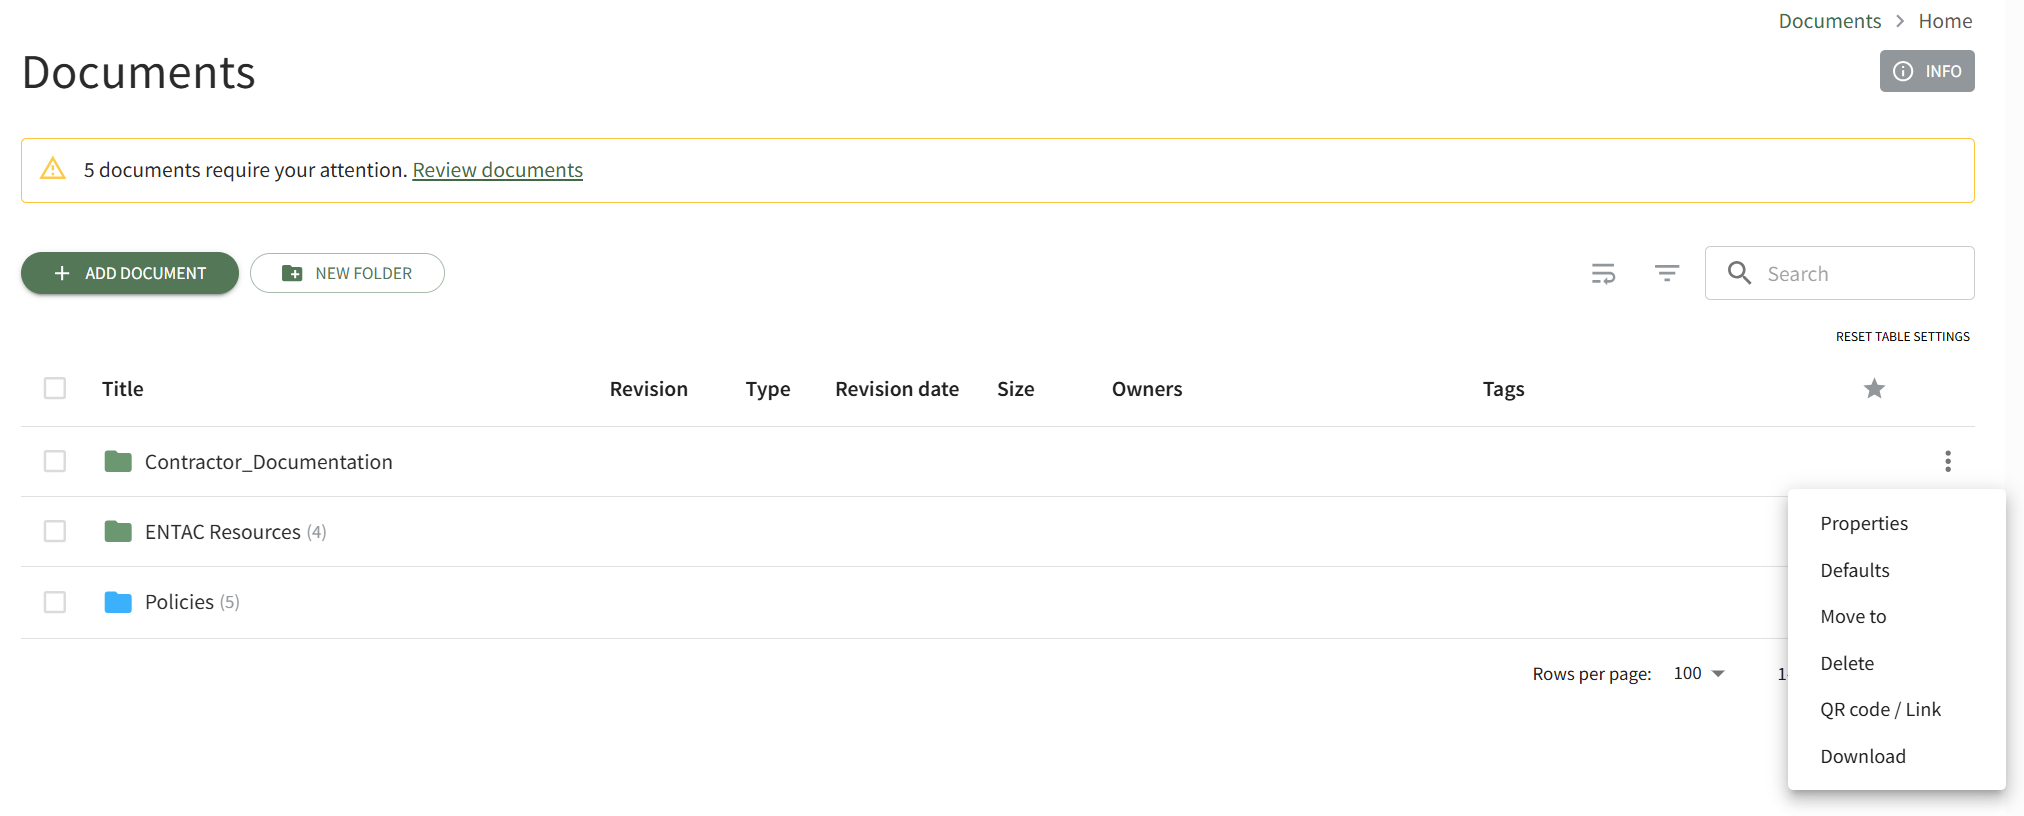
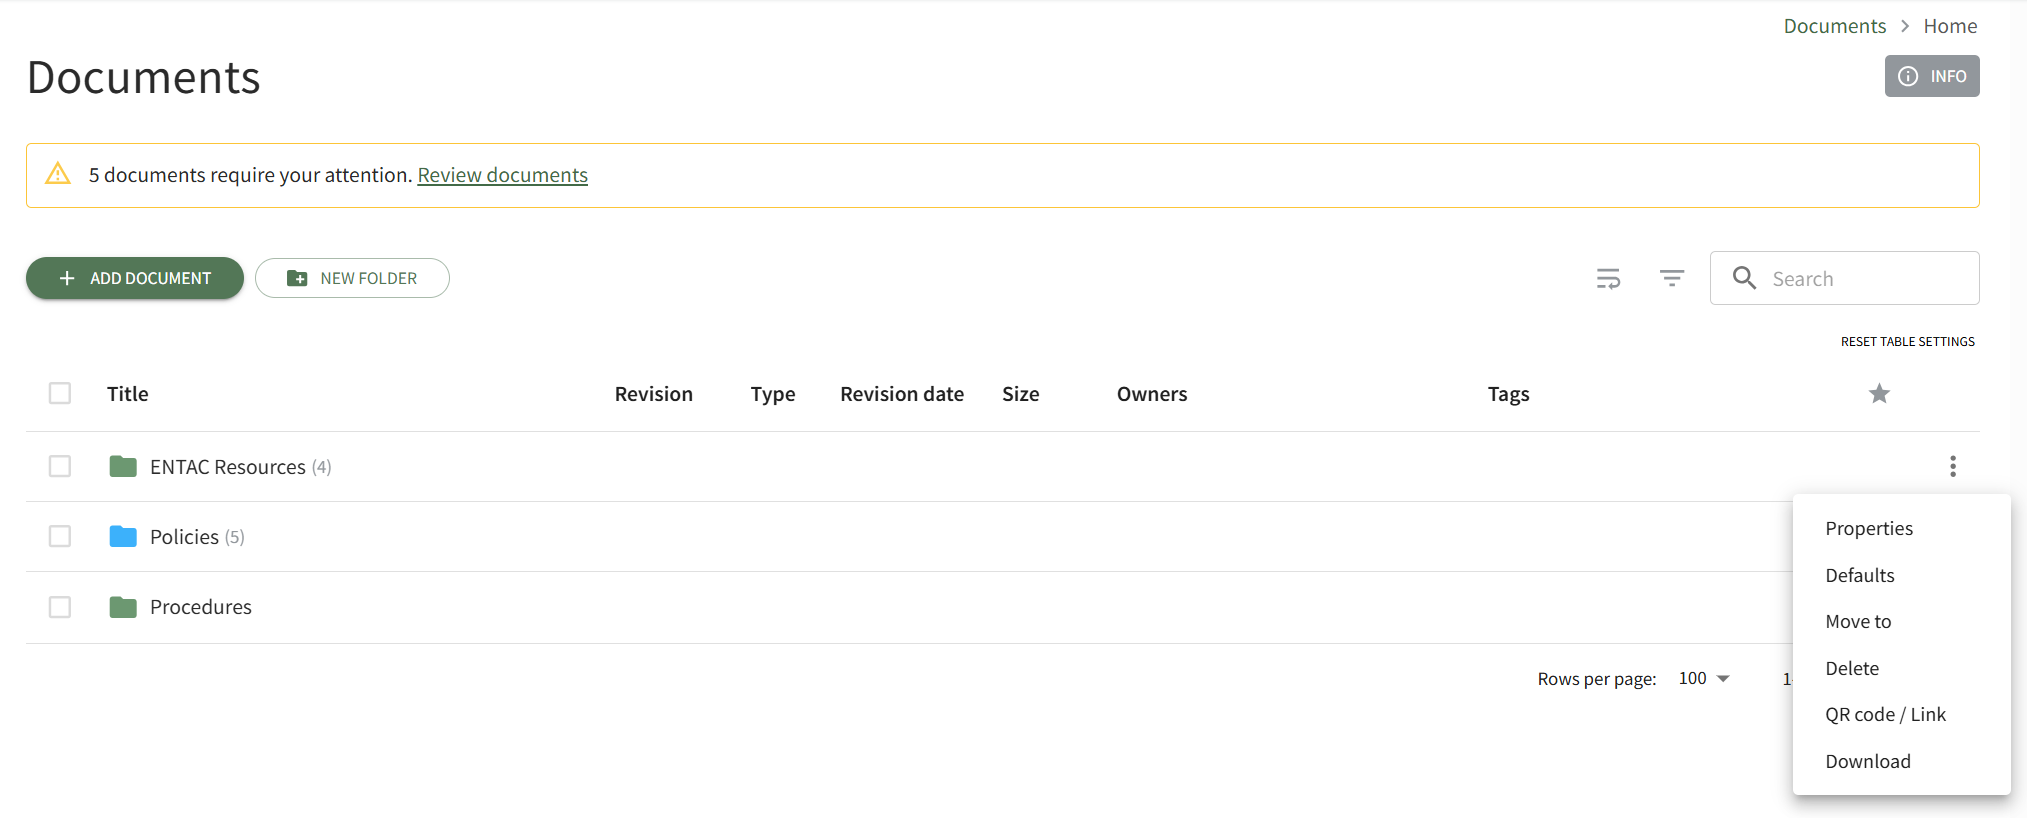
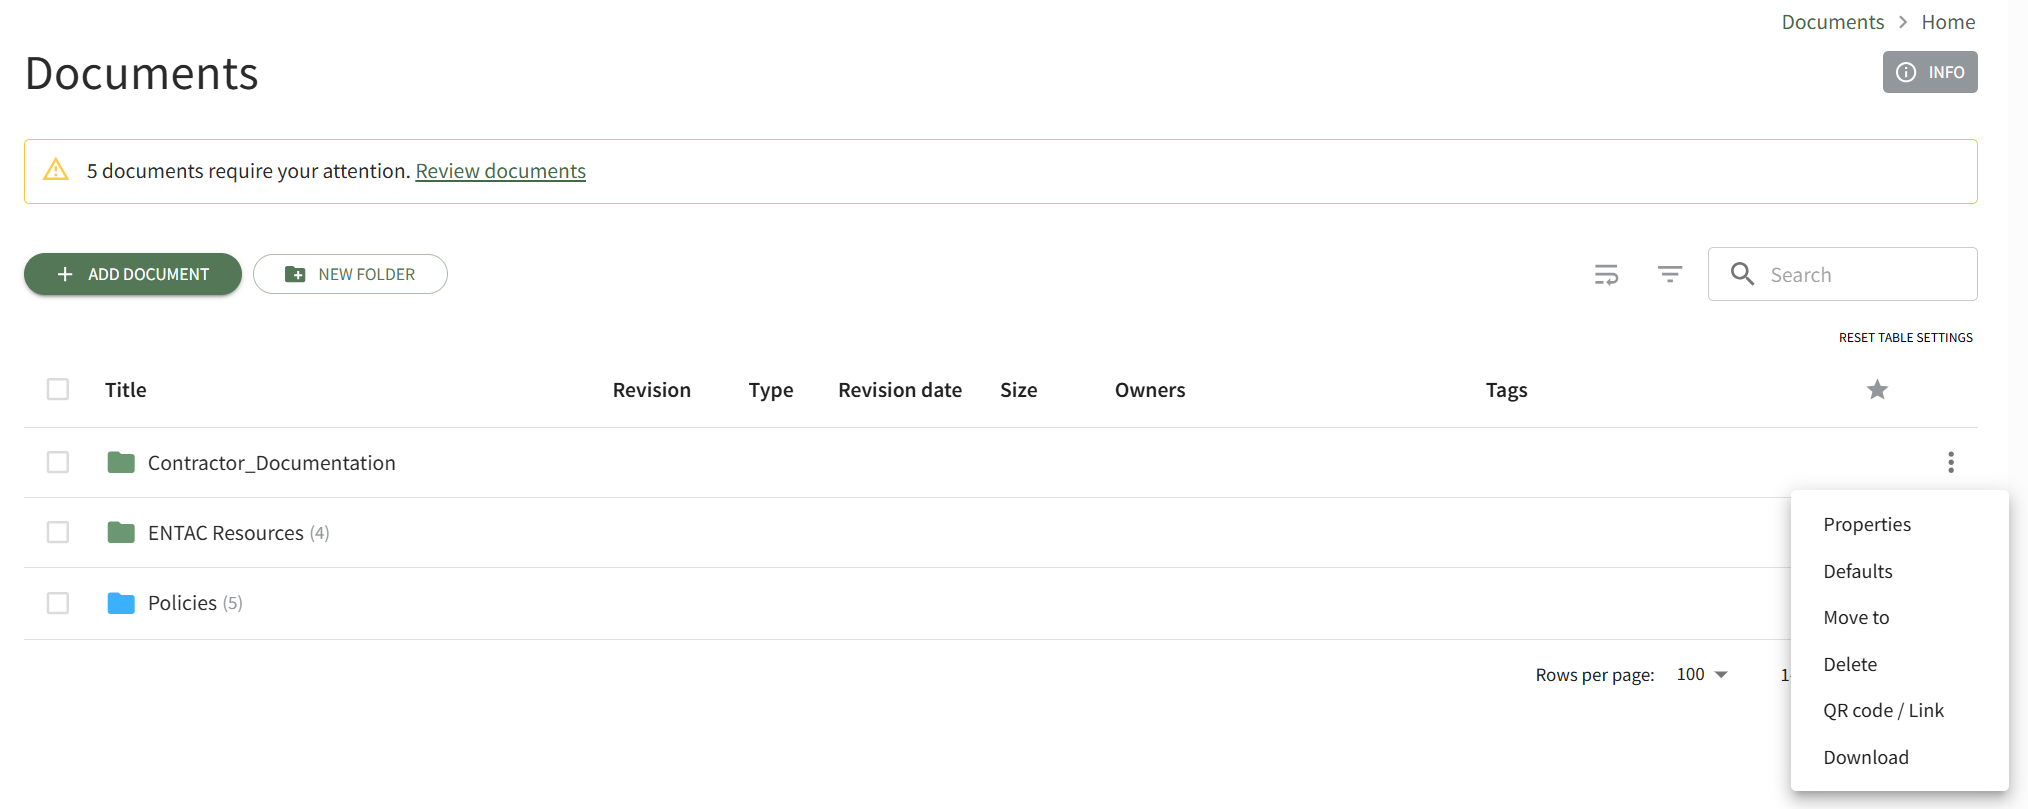
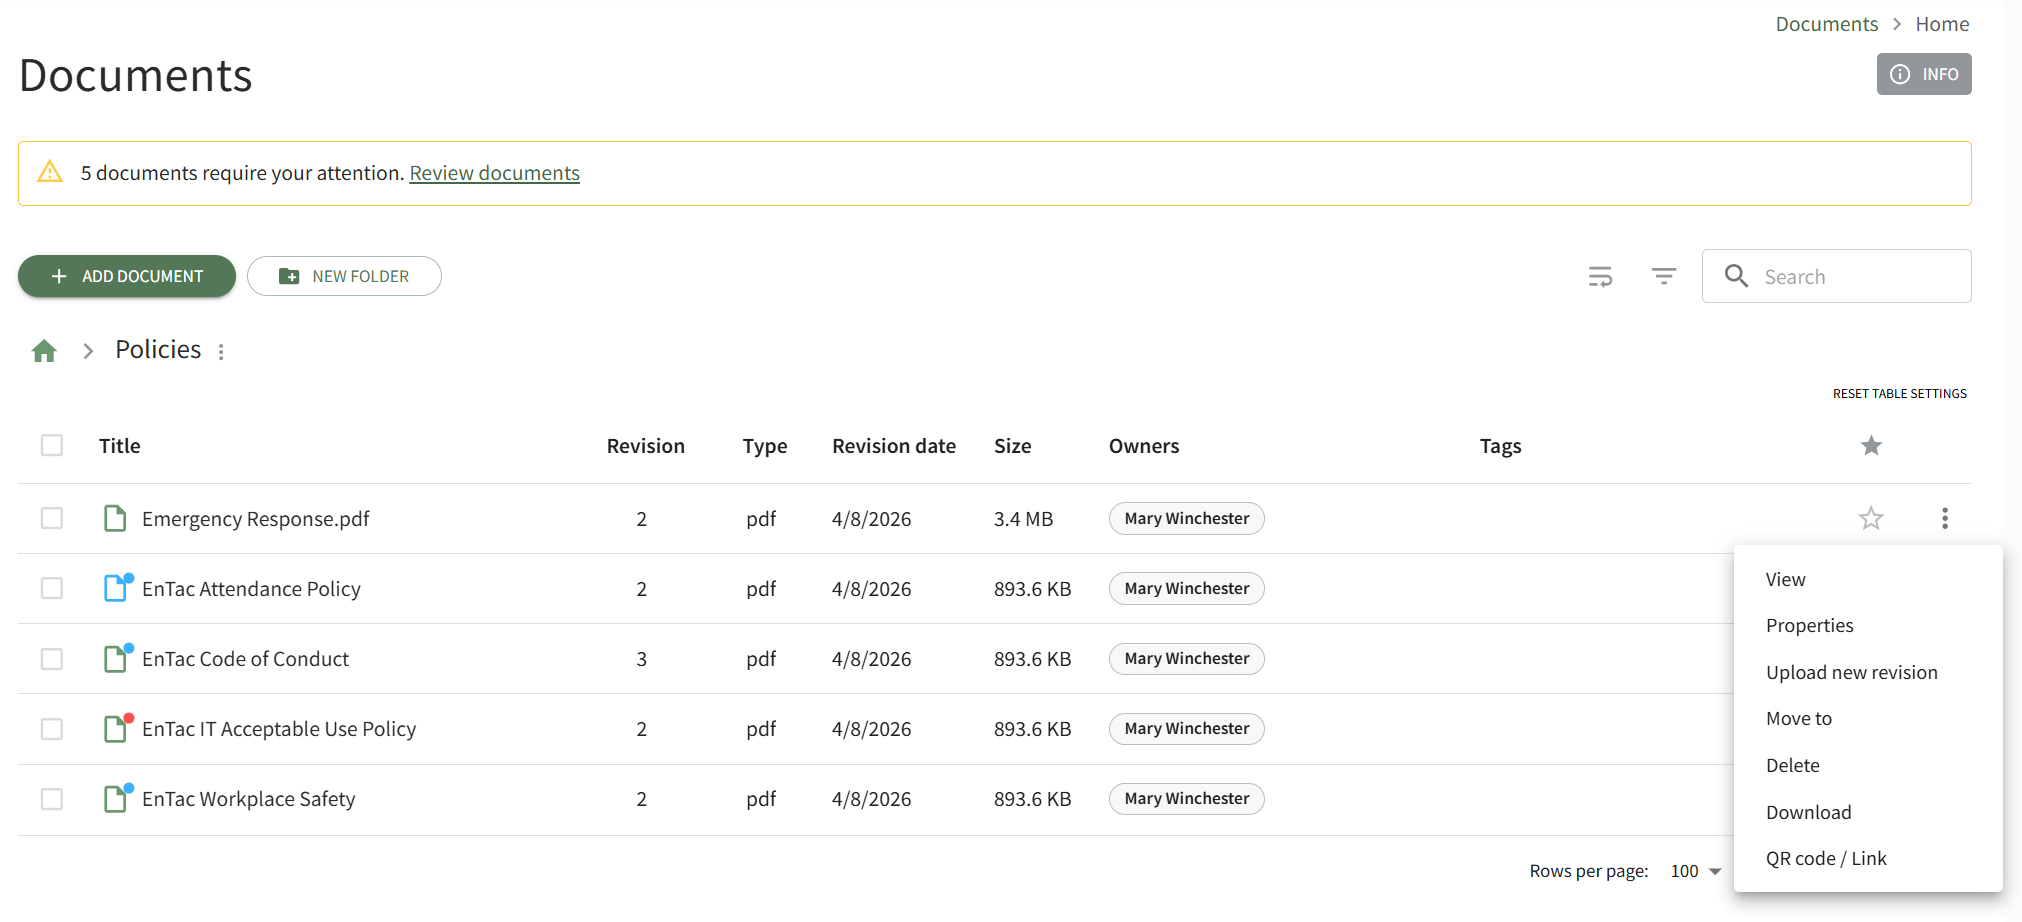
Each folder and file within the Documents Module will have a context menu associated with it (accessed via the verticle three dot icon) that links to actions. The options available on a specified folder's context menu are explained in the table below.
Folder Context Menu Option Explanations | |
Option | Explanation |
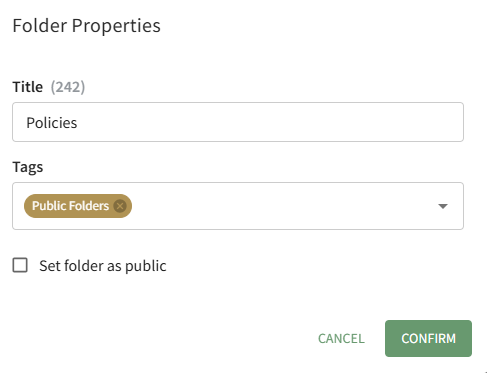
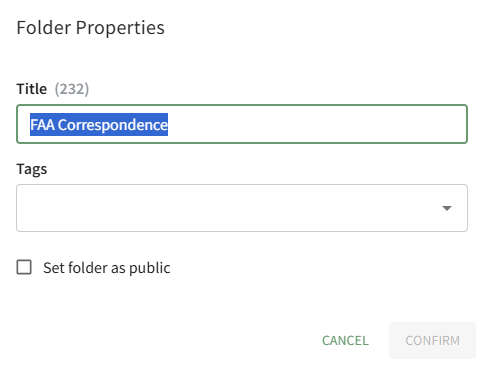
Properties | Selecting Properties from the context menu opens the Folder Properties Modal, allowing the user to update the folder title, tags, and establish if the folder should be set as pubic. |
Defaults | “Defaults” is a dropdown menu option for Folders only. Clicking “Defaults” will open the Defaults for New Documents Modal, which allows the user to make customized settings for bulk uploads. The user enters a title pre-fix instead of a title for bulk uploads. |
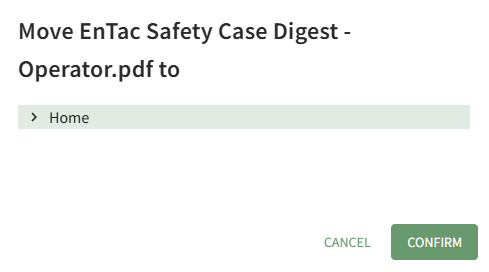
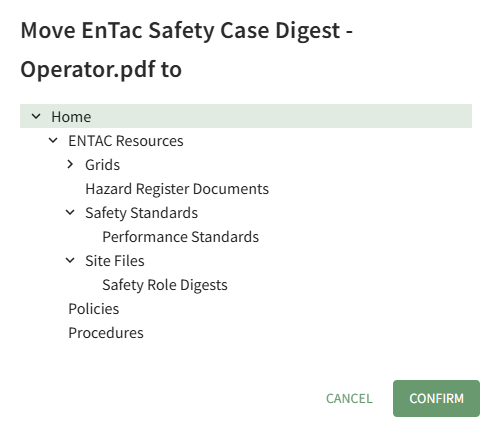
Move To | Selecting Move To from the context menu opens a modal that allows the user to move a folder from its current location to another. How To: Move a File/FolderTo move a file/folder in the Documents Module, open the Documents Home Page from the Main Menu and navigate the repository to the file/folder you want to move.
Click the vertical three-dot icon to the right of the file you wish to move, opening the file's context menu. Select Move To, opening the Move To Modal.
The right arrow indicates a collapsed folder. Click it to expand and see all the subfolders contained within it. The down arrow indicates an expanded folder. Click it to collapse the parent folder and remove all subfolders from view.
Select the folder you wish to move the file/folder to, then press the Confirm button. A pop-up confirms that the file was relocated. |
Delete | Selecting Delete from the context menu opens a Delete Folder modal that will ask the user to confirm that they want to delete the folder, including all the files, folders, and subfolders stored in the parent folder. How To: Delete a FolderTo delete a folder in the Documents Module, open the Documents Home Page from the Main Menu and navigate the repository to the folder you wish to delete. Click the vertical three-dot icon to the right of the folder opening the folder's context menu. Select the Delete option.
This opens the Deletion Confirmation Modal.
The modal states, "Are you sure you want to delete FOLDER NAME? Deleting this folder will delete all files, folders, and subfolders within it." Click the Delete button. The folder and its contents have now been deleted from the Documents Module. |
QR Code / Link | Selecting “QR Code / Link” from the context menu opens the Direct Access Modal for individual folders.
The user can use either the URL or QR Code to share access to the folders selected. Access will be given to internal users who have permission to view the folder. Access will be given to external users if the folder is public. How To: Access A Folder's QR Code / LinkTo access a QR Code/Link for a folder in the Documents Module, open the Document Module Home Page from the Main Menu and navigate your repository to access the desired folder. Access will only be given to users who have permission to view the folder unless the folder has been indicated as public. Click the vertical three-dot icon to the far right of the folder, opening the folder's context menu. Select the QR Code/Link option.
This opens the folder's Direct Access Modal.
From this modal, you can copy the URL Link and/or copy the QR code. Clicking the Create Shortlink button will generate a shortened URL link for file and display it on the modal. |
Download | Selecting Download on the context menu opens the Download Modal, allowing the user to download all of the files located in the folder selected and the subfolders held within.
Selecting The download is not accessible to those without permission to access it. Restrictive tags can also be used to limit access and cannot be bypassed by a user. How To: Download a FolderTo download the files contained in a folder in the Documents Module, open the Documents Home Page from the Main Menu and navigate your respository to the desired folder. Select the vertical three-dot icon to the far right of the folder opening the context menu and select the Download option.
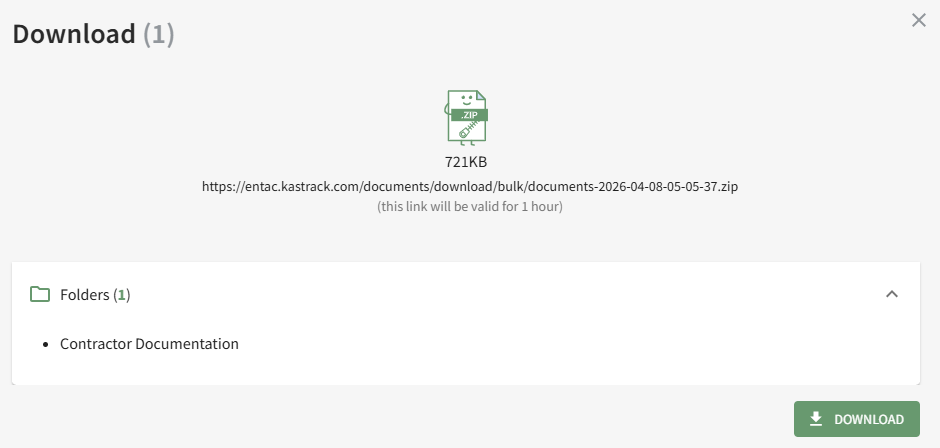
This opens the Download Modal.
Click the Download button and zip file will be downloaded to your personal device. |


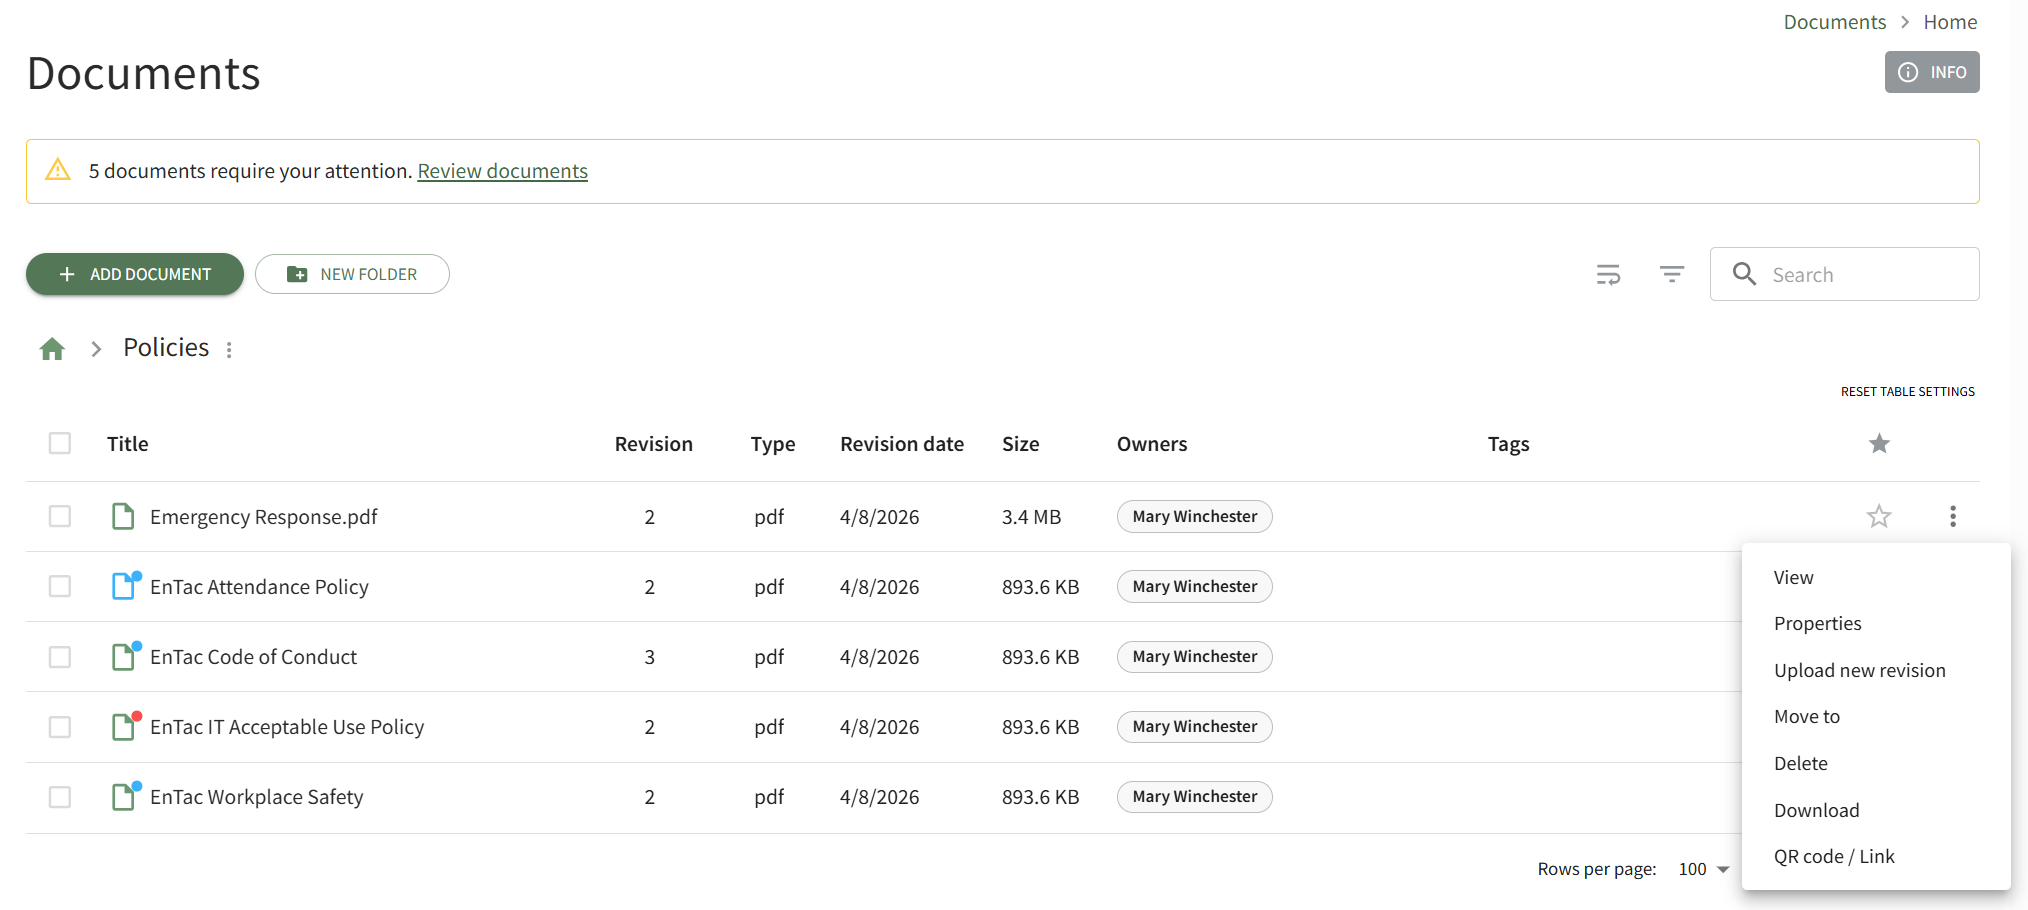
The options available on a specified file's context menu are explained in the table below.
File Context Menu Option Explanations | |||||||||||||||||
Option | Explanation | ||||||||||||||||
View | Selecting View from a file's context menu opens the document's Details Page. Understanding a file's Details PageEach file added to the Documents Module will have its own Details Page. The header of the file's Details Page displays the file title and the file's location in the documents module.
A file's Details Page is comprised of five tabs: Preview, Actions, Details, Comments, and History. Each tab is explained in detail in the section below. The vertical three-dot icon opens the Details Page Context menu with options for quick actions. Preview TabA file's Details Page opens to the Preview Tab by default.
If the file type is supported by the document viewer, users will able to view, download or print the file directly from the preview tab. Actions TabThere are four types of actions involving a document that can be displayed on the Actions Tab: Approvals, Publish, Acknowledgement, and Continued Suitability. A detailed explanation of each action can be found in the User Manual on the Documents Module Review Page: Actions Tab.
All outstanding actions associated with a document will show on the Actions Tab (to users with appropriate permissions). Details TabThe Details Tab displays the file's information (size, description, tags, revision and publishing details) and displays the Document Owners, Approvers, or Acknowledgers.
Users with permissions can send email alert reminders for acknowledgement from the Details Tab. Comments TabThe Comments Tab on the Details Page allows users with access to the document to add, edit and delete comments relevant to the document revision.
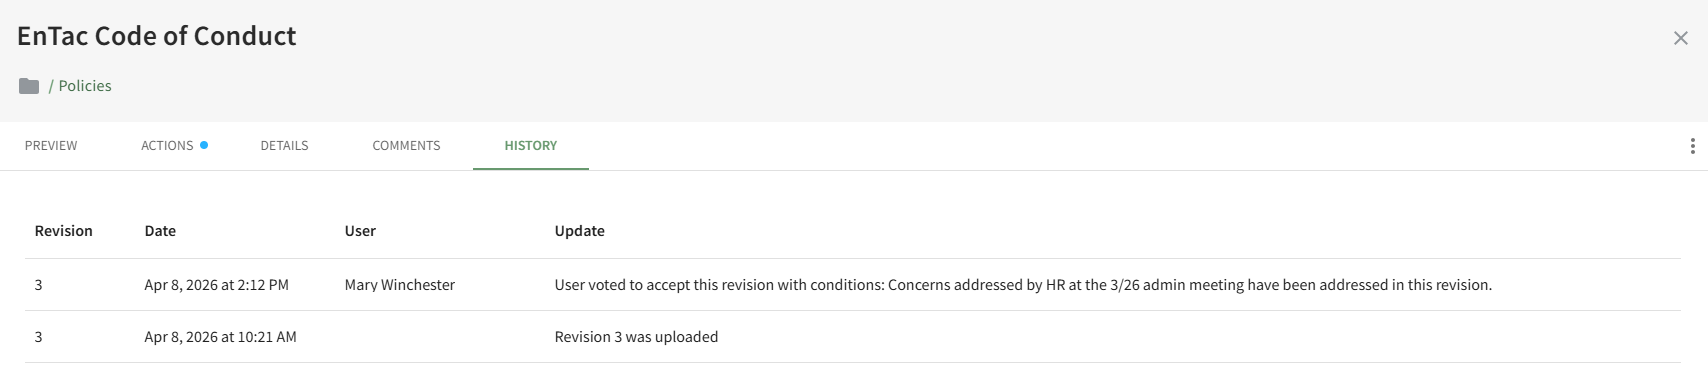
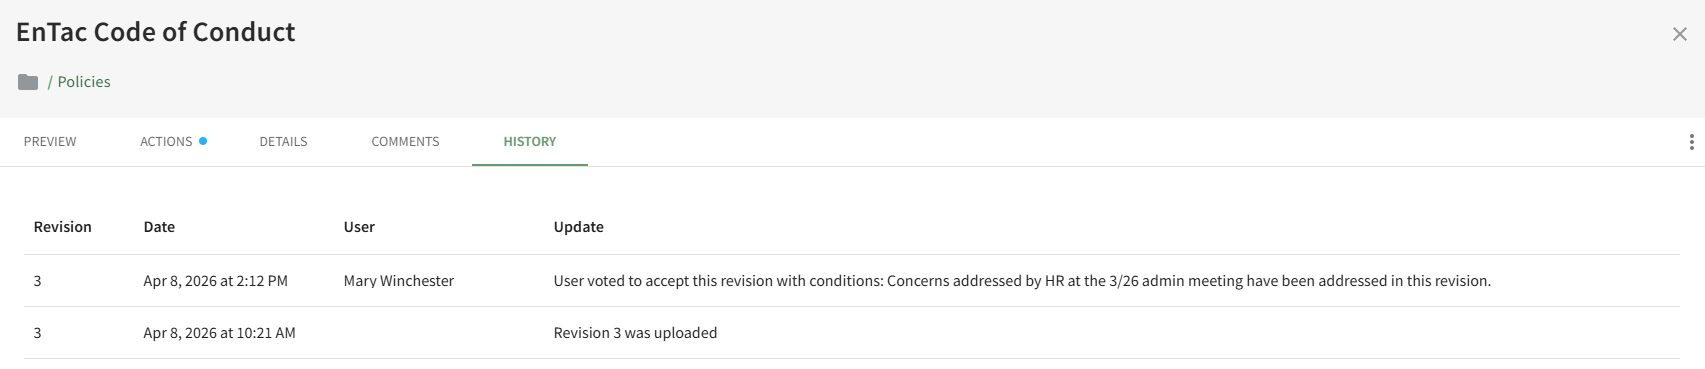
History TabThe History Tab on the Details Page displays any historical actions pertaining to the current and previous versions of a document.
The file revision number, date and time of action, user, and summary update of the action are included. | ||||||||||||||||
Properties | Selecting Properties from a file's context menu opens the File Properties Modal, allowing the user to update the document parameters that were established when the new document was added. Understanding Customizable Document PropertiesEach file uploaded in the Documents Module has customizable properties that are designated when a new file is uploaded. An explanation of those properties are explained in the Basic Details and Advanced Options Tabs below. Basic DetailsUnder the Basic Details Tab, the user can input a title, description of the file, revision number and revision date. They can also designate any document owners (the uploader is initially included as an Owner by default) and tags.
If the incorrect file was selected, the user can click “Select a different file” from the top right corner of the modal to exchange it with the correct file. Document owner(s) can be selected from a dropdown list of users. Document owners have the ability to approve documents, which is relevant for companies who are required to attest an annual/periodic review for regulatory agencies or other governing bodies. Document owners are also notified any time a new comment is made on a file and are responsible for affirming continued suitability of the file if enabled under Advanced Options. Advanced OptionsSelecting the Advanced Options Tab allows the user to apply enhanced settings to the file. An explanation of each Advanced Options checkbox is included in the table below.
| ||||||||||||||||
Upload New Revision | Selecting Upload New Revision from a file's context menu is used to upload a new revision of an existing file. You can also drag and drop a file from your computer onto the name of an existing file to upload a new revision. How To: Upload a Revised Version of an Existing FileTo upload a revised version of an existing file in the Documents Module, open the Documents Home Page from the Main Menu and navigate the repository until you find the file you want to have an updated revision. Click the vertical three-dot icon to right of the file opening the file's context menu and select Upload New Revision.
This opens the New Revision Upload Modal.
Either drag and drop your file into the modal or select a file from your device and select Continue.
The modal now displays the Basic Details Tab and the Advanced Options Tab. Change the revision number and edit relevant information as needed. Select the Upload Revision button and a pop-up confirms that the file version was updated. | ||||||||||||||||
Move To | Selecting Move To from a file's context menu opens a modal that allows the user to move a file from its current folder to another. How To: Move a File/FolderTo move a file/folder in the Documents Module, open the Documents Home Page from the Main Menu and navigate the repository to the file/folder you want to move.
Click the vertical three-dot icon to the right of the file you wish to move, opening the file's context menu. Select Move To, opening the Move To Modal.
The right arrow indicates a collapsed folder. Click it to expand and see all the subfolders contained within it. The down arrow indicates an expanded folder. Click it to collapse the parent folder and remove all subfolders from view.
Select the folder you wish to move the file/folder to, then press the Confirm button. A pop-up confirms that the file was relocated. | ||||||||||||||||
Delete | Selecting Delete from a file's context menu will open a Delete Document Modal that will ask the user to confirm that they want to delete the file before it is permanently deleted. Once a user selects “Delete” from the Delete Document Modal, the files have been removed. When a file that originates in the Documents Module is later linked to another module, it needs to be disassociated before the file can be deleted. If this is the case, the deletion warning will identify where the file needs to be unlinked before deletion can occur. | ||||||||||||||||
Download | Selecting “Download” from a file's context menu automatically downloads an individual file to your device. For the file to be shared with an external individual, the file must be designated as public. The download is not accessible to those without permission to access it. Restrictive tags can also be used to limit access and cannot be bypassed by a user. | ||||||||||||||||
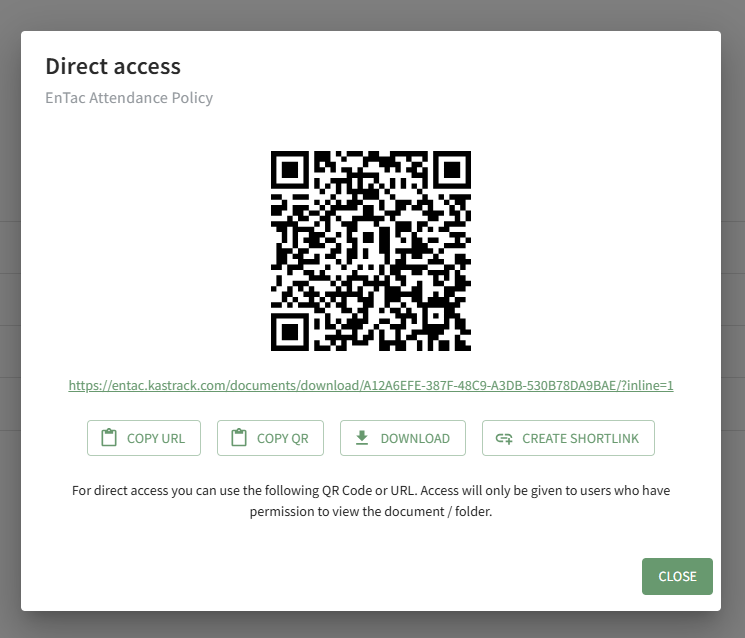
QR Code / Link | Selecting “QR Code / Link” from a file's context menu opens the Direct Access Modal for individual files.
The user can use either the URL or QR Code to share access to the files selected. Access will be given to internal users who have permission to view the folder. Access will be given to external users if the folder is public. How To: Access A File's QR Code / URL LinkTo access a QR Code/Link for a file in the Documents Module, open the Document Module Home Page from the Main Menu and navigate your folders to access the desired file. Access will only be given to users who have permission to view the file unless the document has been indicated as public. Click the vertical three-dot icon to the far right of the file, opening the file's context menu. Select the QR Code/Link option.
This opens the Direct Access Modal.
From this modal, you can copy the URL Link and/or copy the QR code. Clicking the Download button will automatically download the file to the user's personal device. Clicking the Create Shortlink button will generate a shortened URL link for file and display it on the modal. | ||||||||||||||||

Public Files and Folders, and the Logged Out Documents Experience
When a file or folder in the Documents Module is marked as Public, its icon on the Documents Home Page will turn blue, indicating that the Document / Folder is publicly accessible for individuals that are not logged in or do not use KAStrack to View / Download the file(s) via a URL Link or QR Code.
When using a URL Link to access a public document, the document can be viewed in your web browser and/or downloaded to your personal device.
How To: Designate a File is Public
To designate a document/file as Public in the Documents Module, open the Documents Home Page from the Main Menu and navigate the repository to the file you want to designate as public.
Click the vertical three-dot icon to the right of the file you wish to make public, opening the file's context menu.
Select Properties opening the Basic Details Tab of the Document Properties modal. Open the Advanced Options Tab.
Select the checkbox to designate the "Document is Public" and click the Update Document button. A pop-up confirms that the document is now public.

The file's icon is now blue, indicating that the document is public.
How To: Access A File's QR Code / URL Link
To access a QR Code/Link for a file in the Documents Module, open the Document Module Home Page from the Main Menu and navigate your folders to access the desired file.
Access will only be given to users who have permission to view the file unless the document has been indicated as public.
Click the vertical three-dot icon to the far right of the file, opening the file's context menu. Select the QR Code/Link option.

This opens the Direct Access Modal.
From this modal, you can copy the URL Link and/or copy the QR code.
Clicking the Download button will automatically download the file to the user's personal device.
Clicking the Create Shortlink button will generate a shortened URL link for file and display it on the modal.
When using a URL Link to access a public folder, the individual will see a simplified view of the Documents Home Page, showing only the publicly available documents within the folder, as well as any other public folders (and their public contents) within this folder.
How To: Designate a Folder is Public
To make an existing folder a public folder in the Documents Module, open the Documents Home Page from the Main Menu and navigate the repository to the folder you want to designate as public.
Click the vertical three-dot icon to the right of the folder you wish to make public, opening the folder's context menu. Select Properties opening the Folder Properties modal.
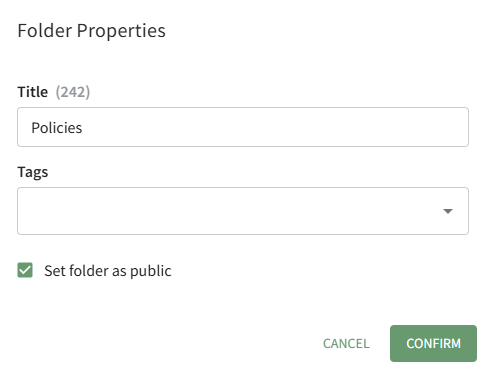
Click the "Set Folder as Public" checkbox and select the Confirm button.
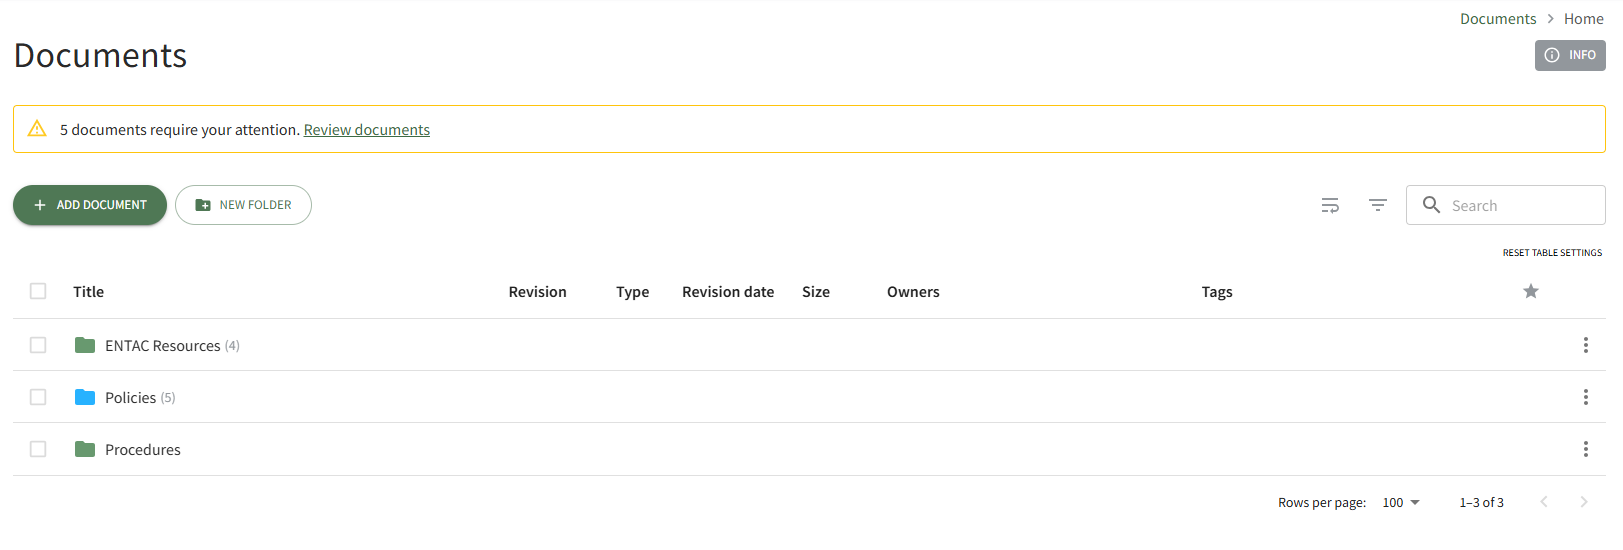
The folder icon is now blue, indicating that the folder is accessible to individuals that are not logged in to the system as KAStrack users.
How To: Access A Folder's QR Code / Link
To access a QR Code/Link for a folder in the Documents Module, open the Document Module Home Page from the Main Menu and navigate your repository to access the desired folder.
Access will only be given to users who have permission to view the folder unless the folder has been indicated as public.
Click the vertical three-dot icon to the far right of the folder, opening the folder's context menu. Select the QR Code/Link option.
This opens the folder's Direct Access Modal.

From this modal, you can copy the URL Link and/or copy the QR code.
Clicking the Create Shortlink button will generate a shortened URL link for file and display it on the modal.
The URL Link for a public folder only allows access to that Folder's contents and any public folder within its public contents - you cannot go up the folder hierarchy while logged out, the starting folder is the highest level of access you get.
Making a folder public does not automatically make its contents public - documents that you wish to have publicly accessible will each need to be marked public.
Public documents/folders containing a permissive/restrictive tag will not be accessible publicly, leading to a Not Authorized screen with an option to log in and view the document/folder (assuming the account you're logging into has access to the tag in question).
Documents: Module Pages
A File's Details Page
Each file added to the Documents Module will have its own Details Page. The header of the file's Details Page displays the file title and the file's location in the documents module.

A file's Details Page is comprised of five tabs: Preview, Actions, Details, Comments, and History. Each tab is explained in detail in the section below. The vertical three-dot icon opens the Details Page Context menu with options for quick actions.
Preview Tab
A file's Details Page opens to the Preview Tab by default.
If the file type is supported by the document viewer, users will able to view, download or print the file directly from the preview tab.
Actions Tab
There are four types of actions involving a document that can be displayed on the Actions Tab: Approvals, Publish, Acknowledgement, and Continued Suitability. A detailed explanation of each action can be found in the User Manual on the Documents Module Review Page: Actions Tab.
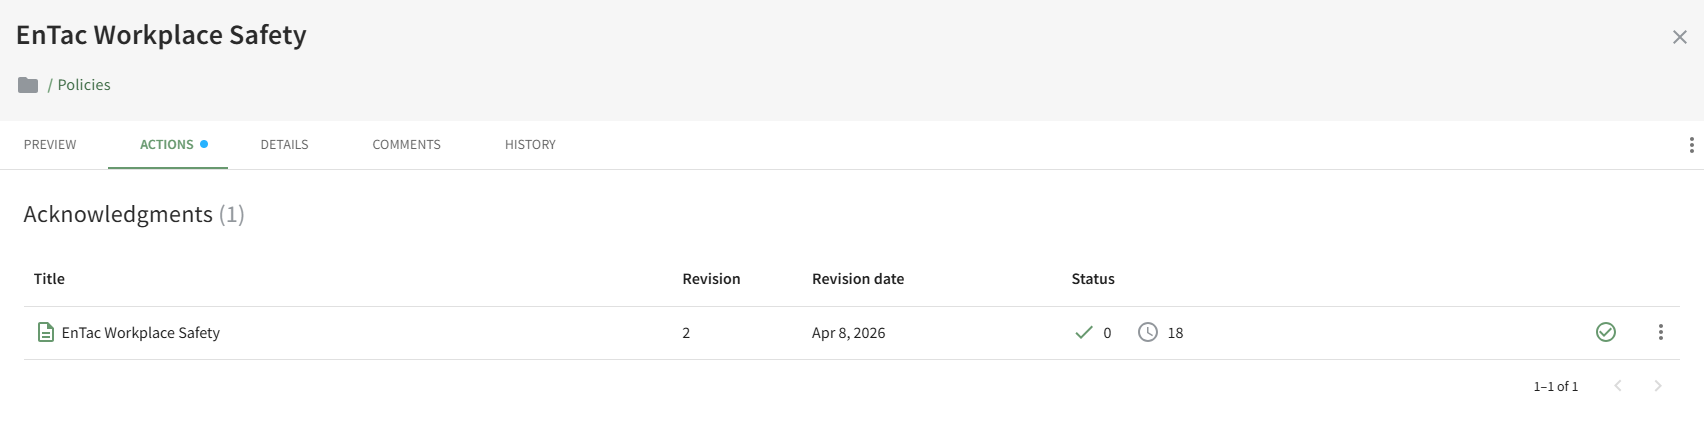
All outstanding actions associated with a document will show on the Actions Tab (to users with appropriate permissions).
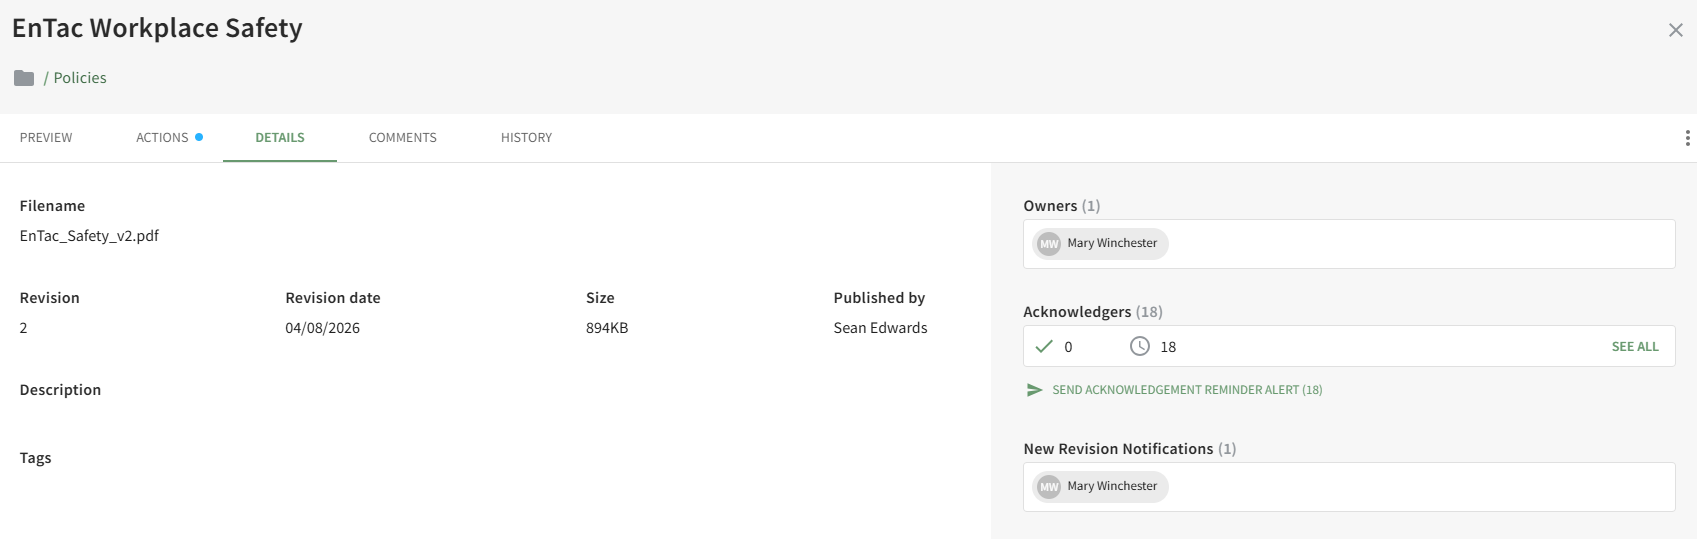
Details Tab
The Details Tab displays the file's information (size, description, tags, revision and publishing details) and displays the Document Owners, Approvers, or Acknowledgers.
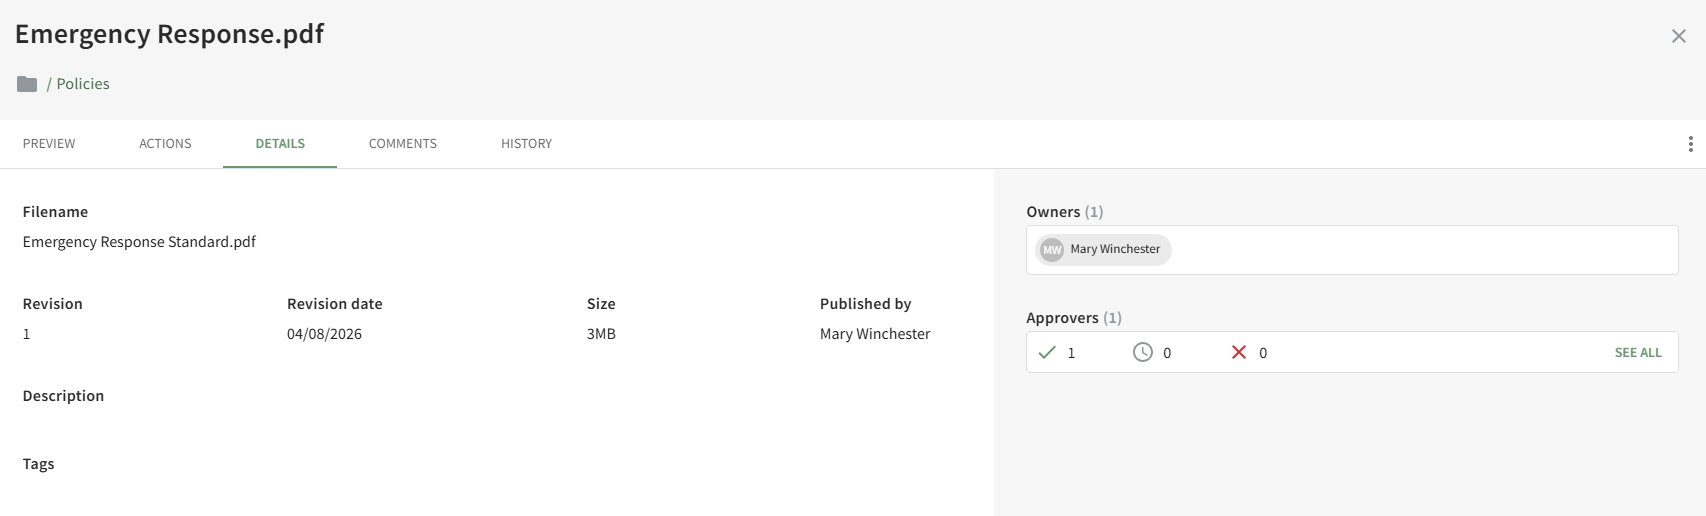
Users with permissions can send email alert reminders for acknowledgement from the Details Tab.
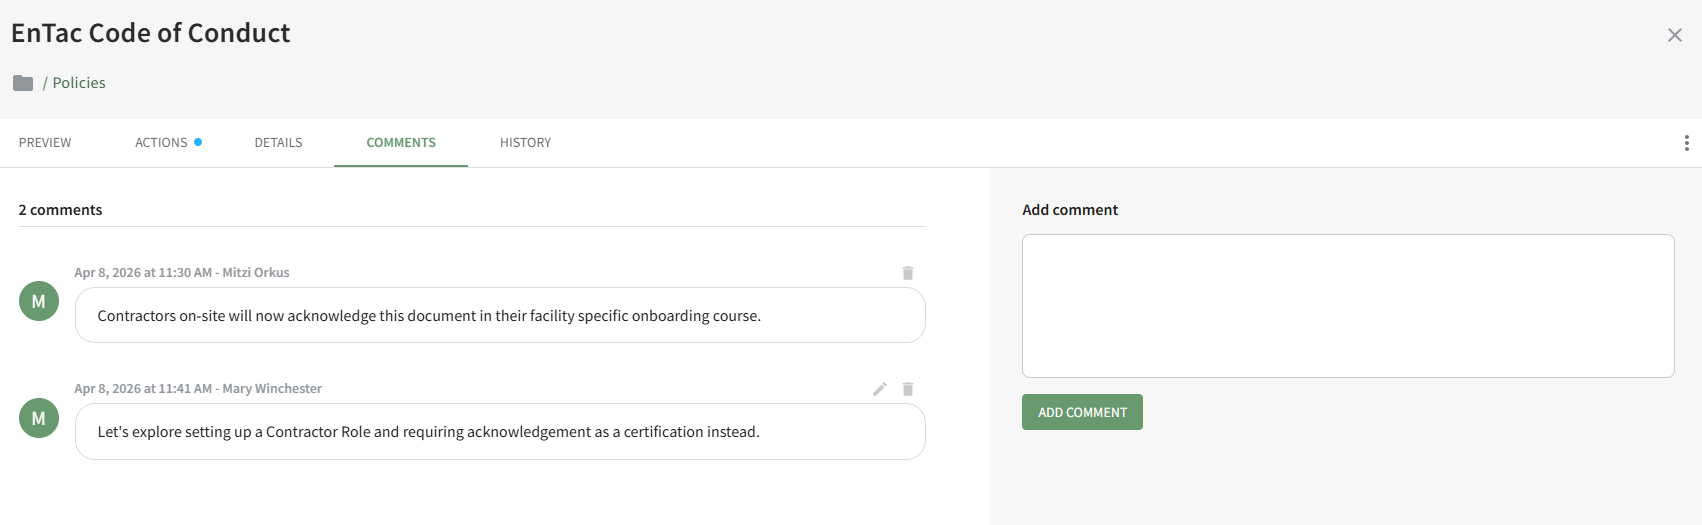
Comments Tab
The Comments Tab on the Details Page allows users with access to the document to add, edit and delete comments relevant to the document revision.
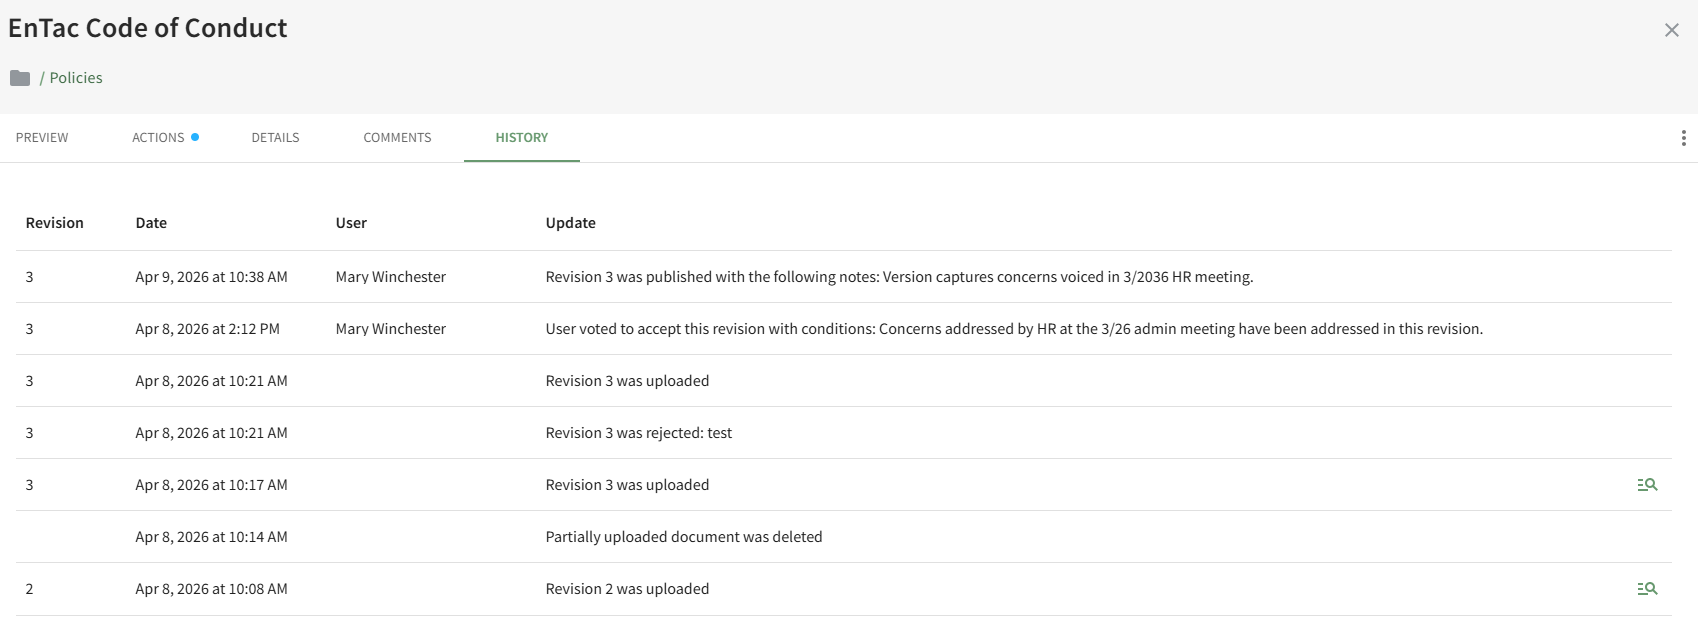
History Tab
The History Tab on the Details Page displays any historical actions pertaining to the current and previous versions of a document.
The file revision number, date and time of action, user, and summary update of the action are included.
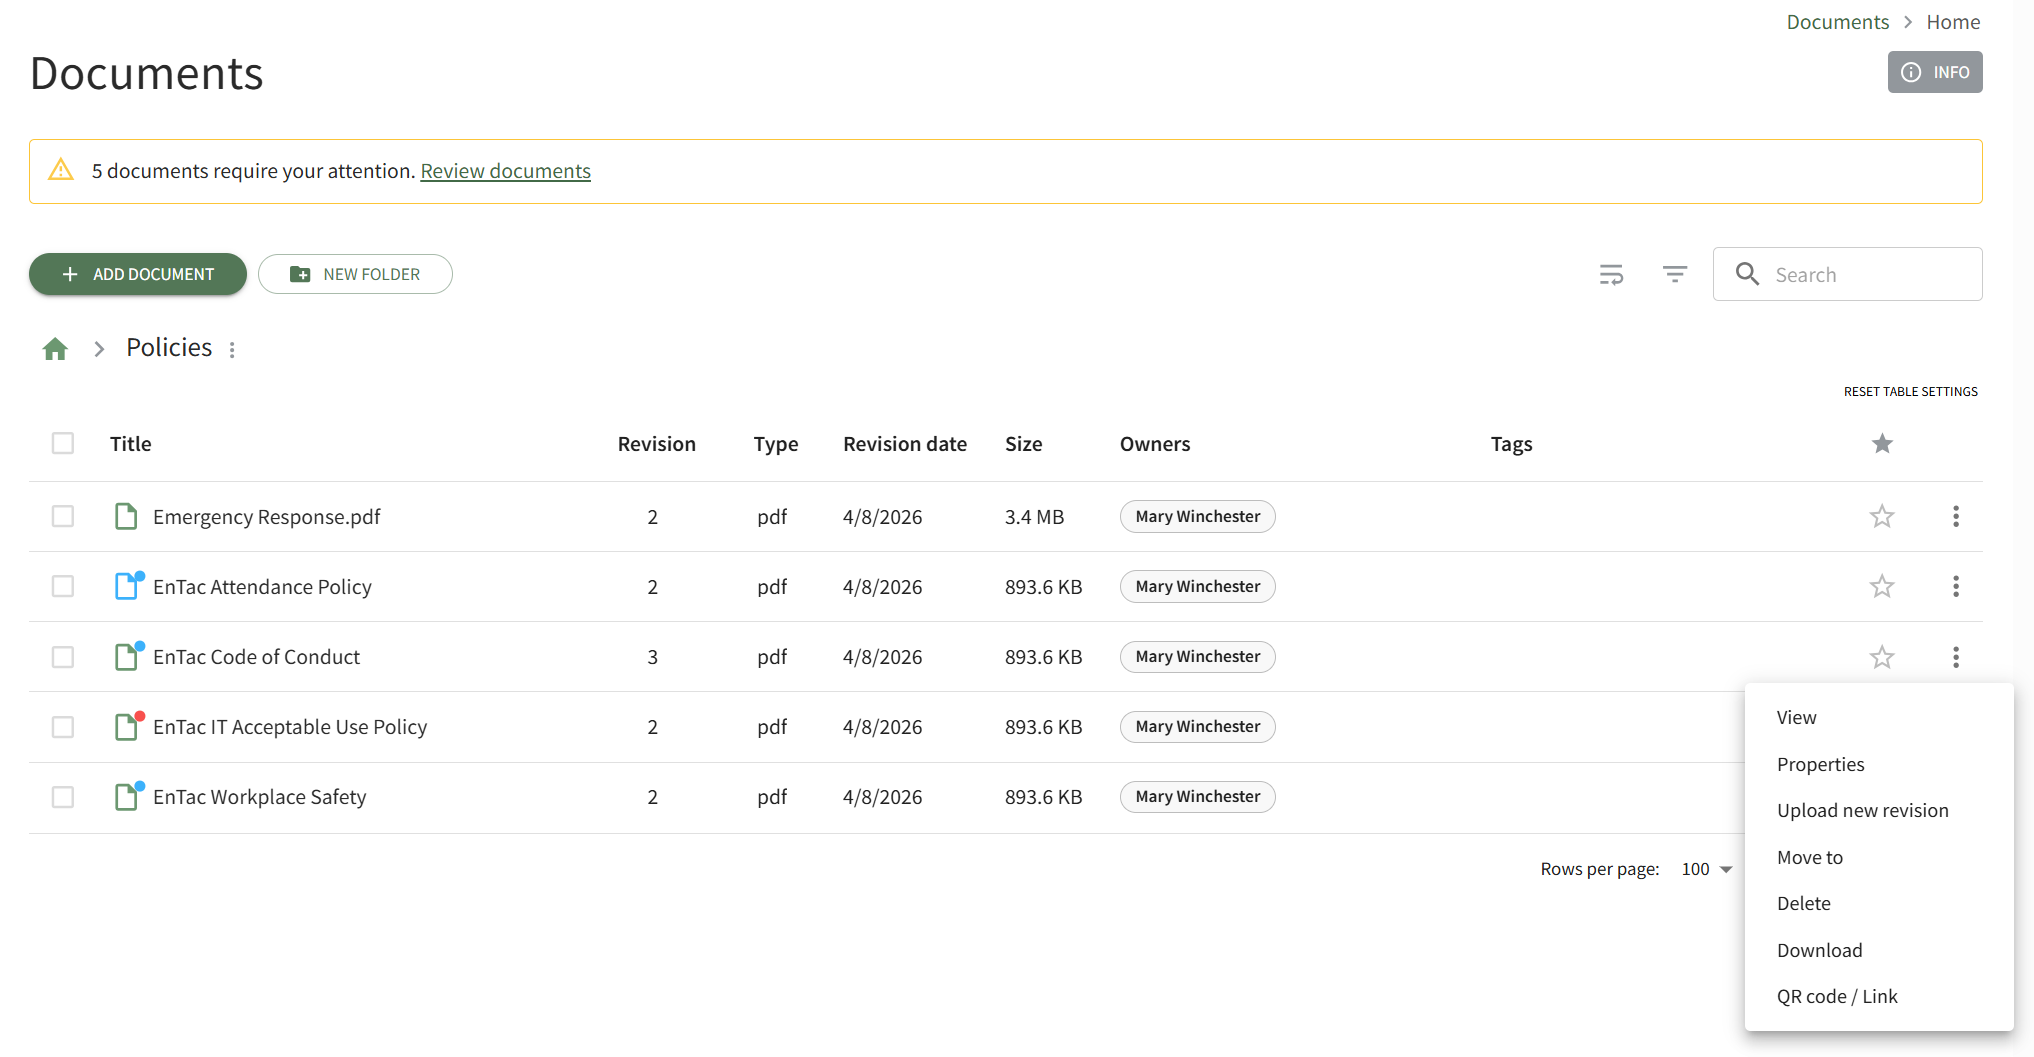
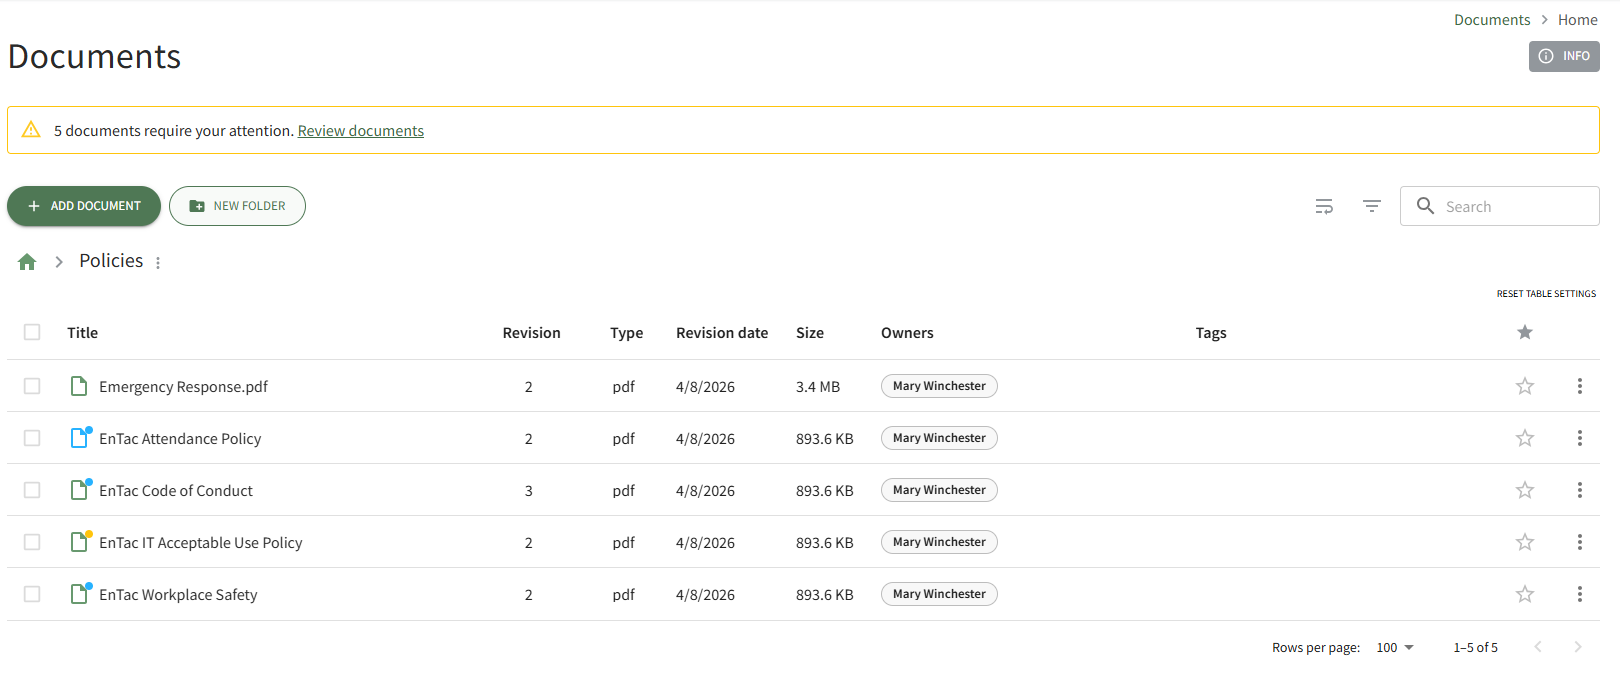
Documents Home Page
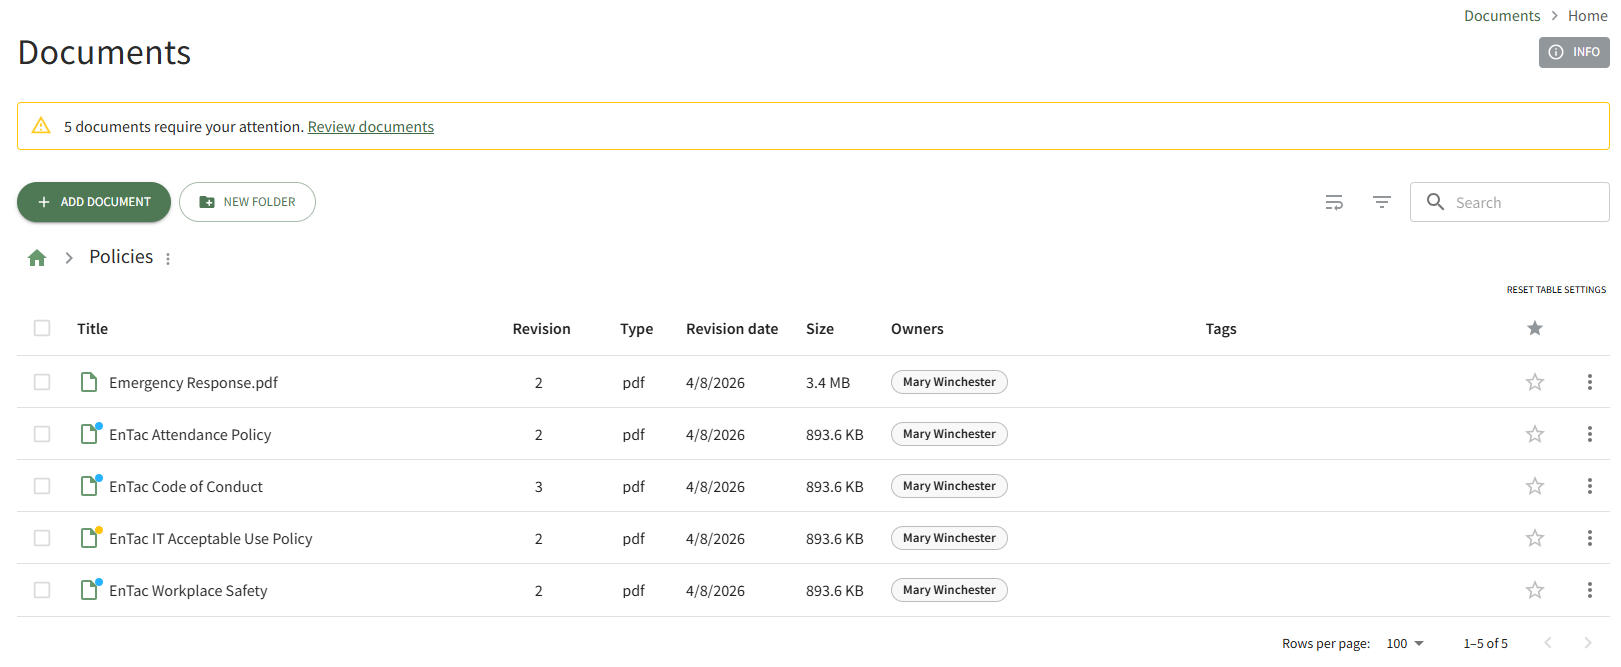
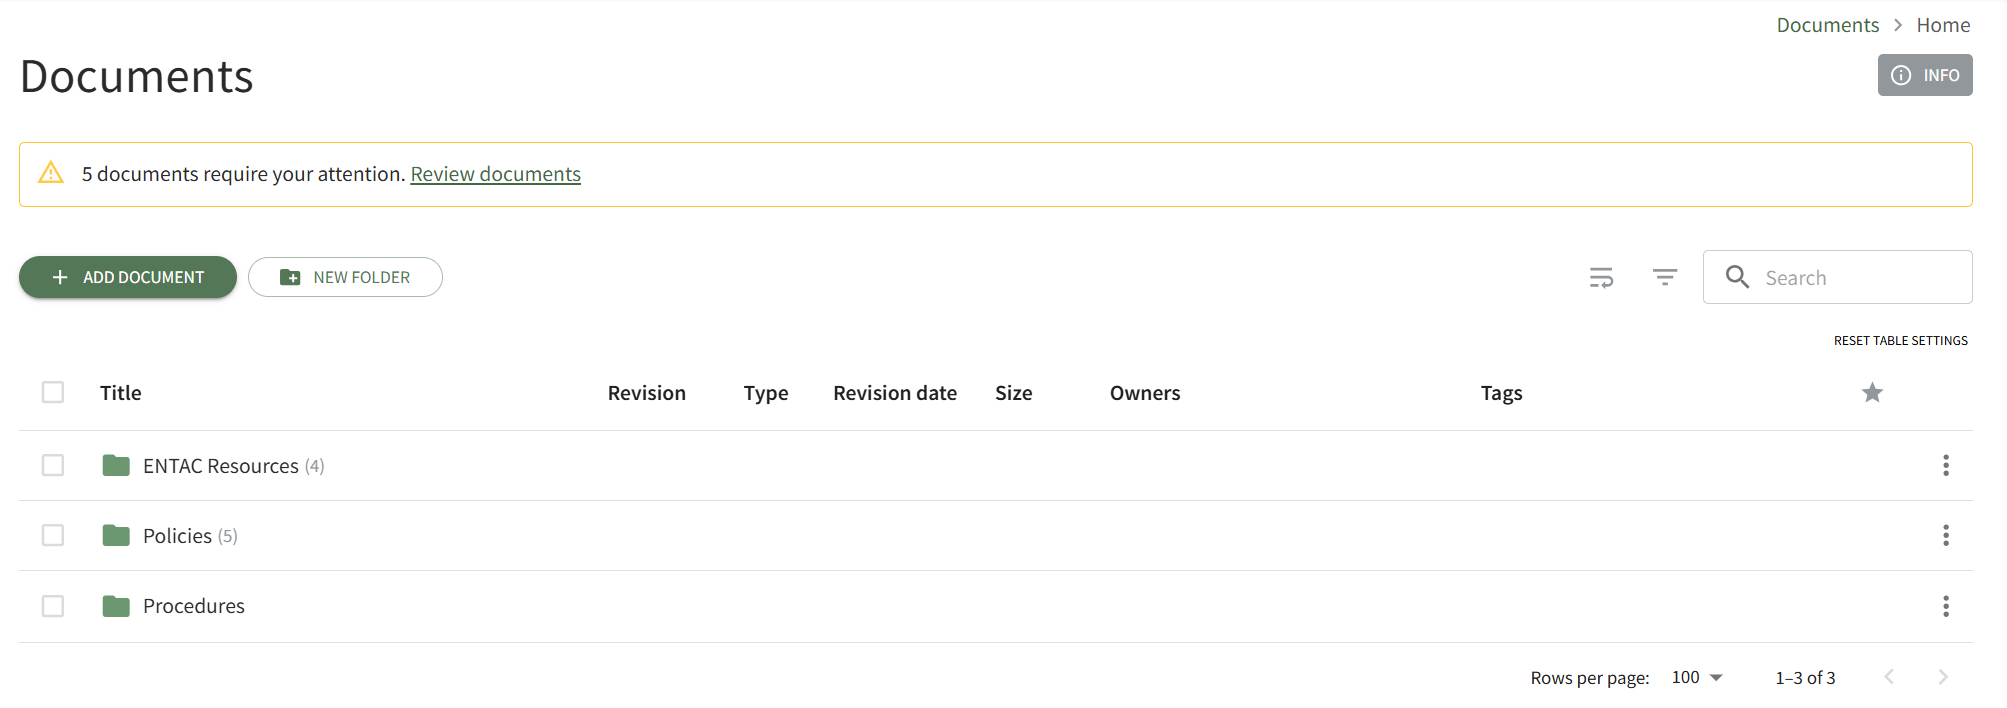
The Documents Module Home Page is an overview page for all the files stored in the Documents Module. 
By default, the Folder/Files List on the home page shows all folders in alphabetical order followed by singular files in alphabetical order.
Icons Used on the Documents Module Home Page | |
Icon | Explanation |
| The vertical three dot icon indicates there are context menu options available. |
| The expand icon will expand all file titles. |
| The filter icon will open the “Filter by Tag” box, showing all available Tags below the Documents header. The user can filter files and folders by Tags or choose to see only favorited files and folders |
| The image icon indicates the file is one of the following image filetypes: .jpg , .jpeg , .webp , .gif , .bmp , .svg , or .png |
| The video icon indicates the file is one of the following filetypes: .mp4 , .webm , .ogg |
| The 3D icon indicates that the file is a 360° photo. |
| The link icon indicates a file is a url file. |
| The page icon is used for PDFs and any other filetypes that are not covered by the icons listed above. |
| The folder icon indicates a folder. The number in parentheses to the right of the folder title indicates the quantity of files and / or folders that are stored within. Click the folder name to display the contents. |
| The folder with gear symbol icon indicates that default values have been set that will be applied to all files that are stored in the folder. Subfolders that are created within folders with default settings have the same defaults as the parent folder. |
| A blue document icon indicates that the file has been designated as a public document. |
| A blue folder icon indicates that the folder has been designated as public. Files/Folders that are not indicated as public can be placed in a public folder. The public folder does not change the permission of files stored in the folder. |
| The star icon indicates that the document is a favorite, which is a default filter in the Documents Module. |
| The home icon returns the user to the Documents Module Home Page. |
The column headings above the Folders/Files List are Title, Revision, Type, Revision Date, Size, and Tags. Hovering the cursor over a column heading title will display a vertical triple dot icon that indicates a context menu is available.
On the Folder/File List, hovering your cursor over the column header displays a vertical three dot icon that when clicked, opens a context menu. The options available vary based on the column header. All are explained in the table below.
Folder/File List Column Header Context Menu Option Explanation | |
Option | Explanation |
Sort by ASC | Selecting “Sort by ASC” lists all folders A-Z and then all files A-Z. |
Sort by DESC | Selecting “Sort by DESC” lists all folder Z-A and then all files Z-A. |
Unsort | Selecting “Unsort” from the context menu removes all filters that have been applied and returns the column heading filter formatting to the default Document List settings. |
Filter | Selecting “Filter” opens a modal that allows the user to customize their Folder/Files List filters.
A dropdown menu under Columns allows the user to select any of the Column Headings (title, revision, type, revision date, size, and favorites). A dropdown menu under operator allows the user to choose the preferred method of filtering and the user can enter the desired filter value in the Value field. |
Show Columns | Selecting “Show Columns” from the context menu opens the Column Header modal. From this modal, the user has the ability to customize which column headers show on the Folders/Files List. The user’s customized selections will remain in place until they are manually changed again from the Column Header Modal.
The “actions” option controls the visibility of the vertical dot icon that opens the context menu. |
Hide | Selecting "Hide" from the context menu is a quick link to remove the column header from the Folder/Files List without having to open the Column Header Modal. |


Below the search bar is a RESET TABLE SETTINGS link.
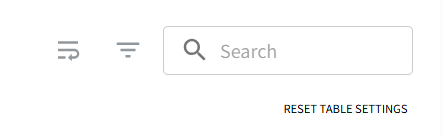
Clicking this link will reset the File/Folder List, making any hidden columns visible and removing any applied filters.
Review Page: Actions Tab
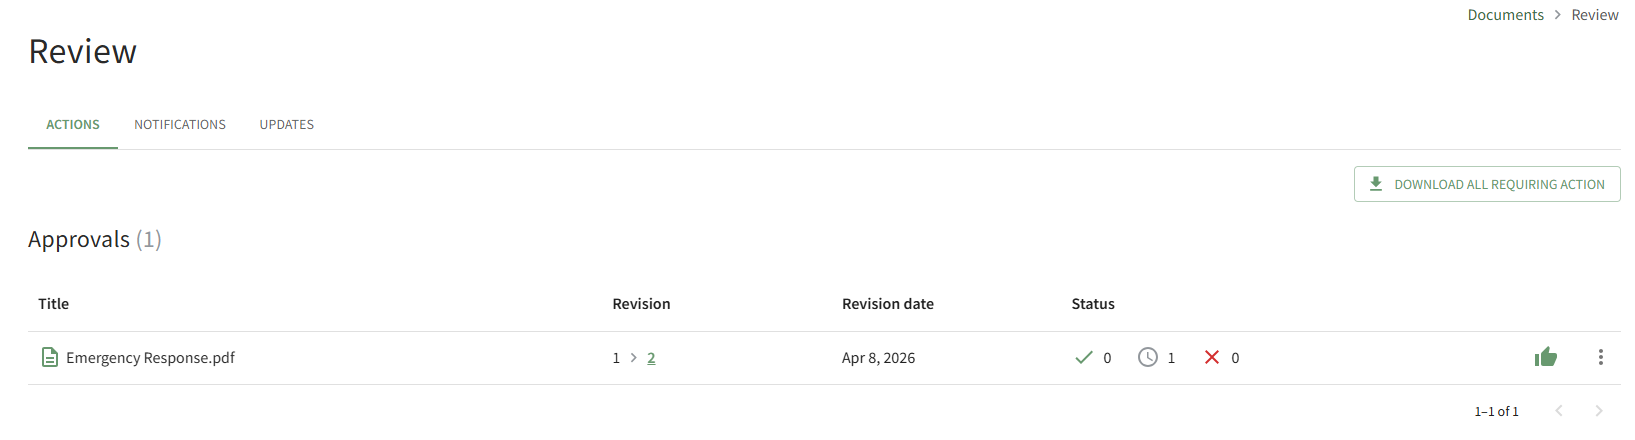
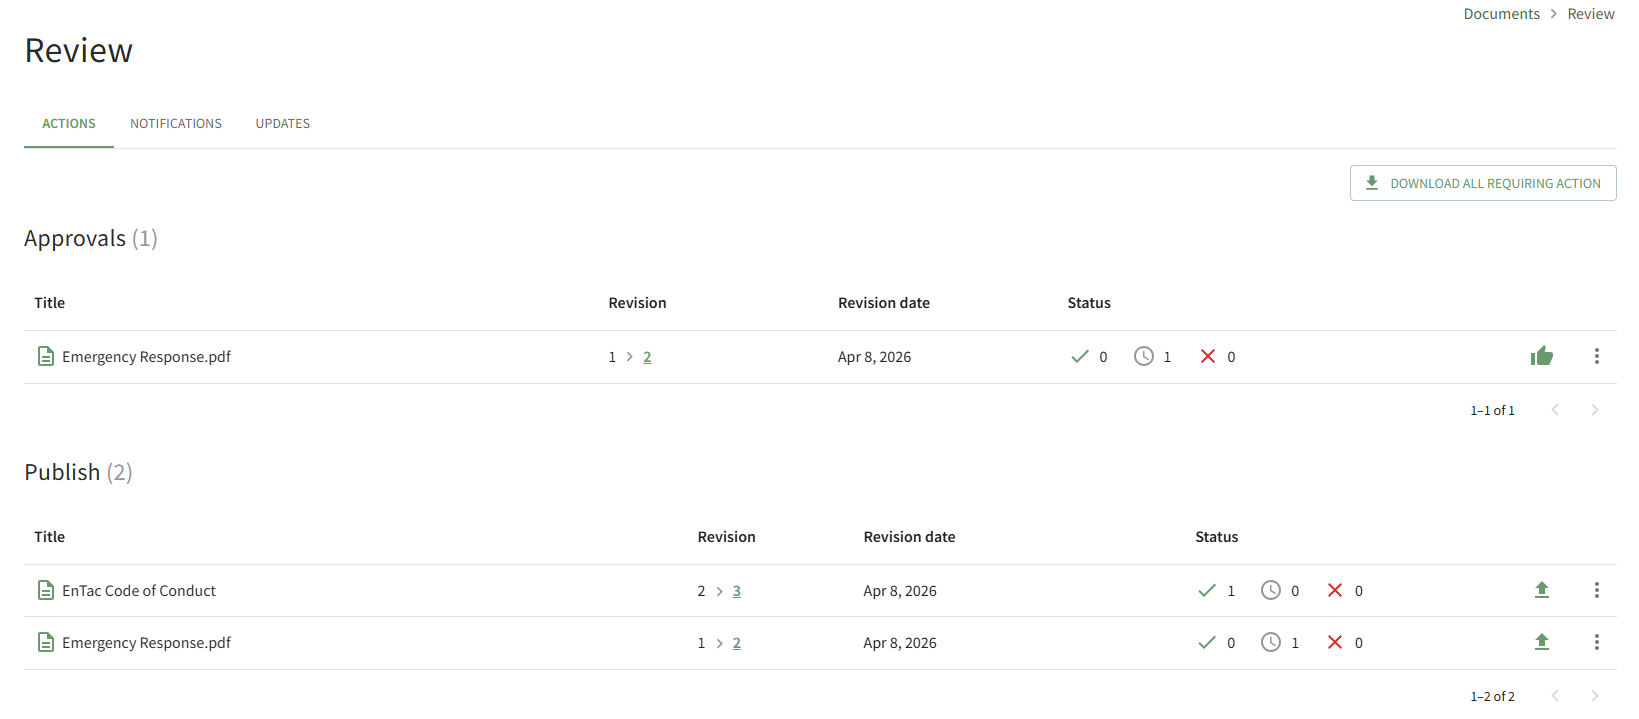
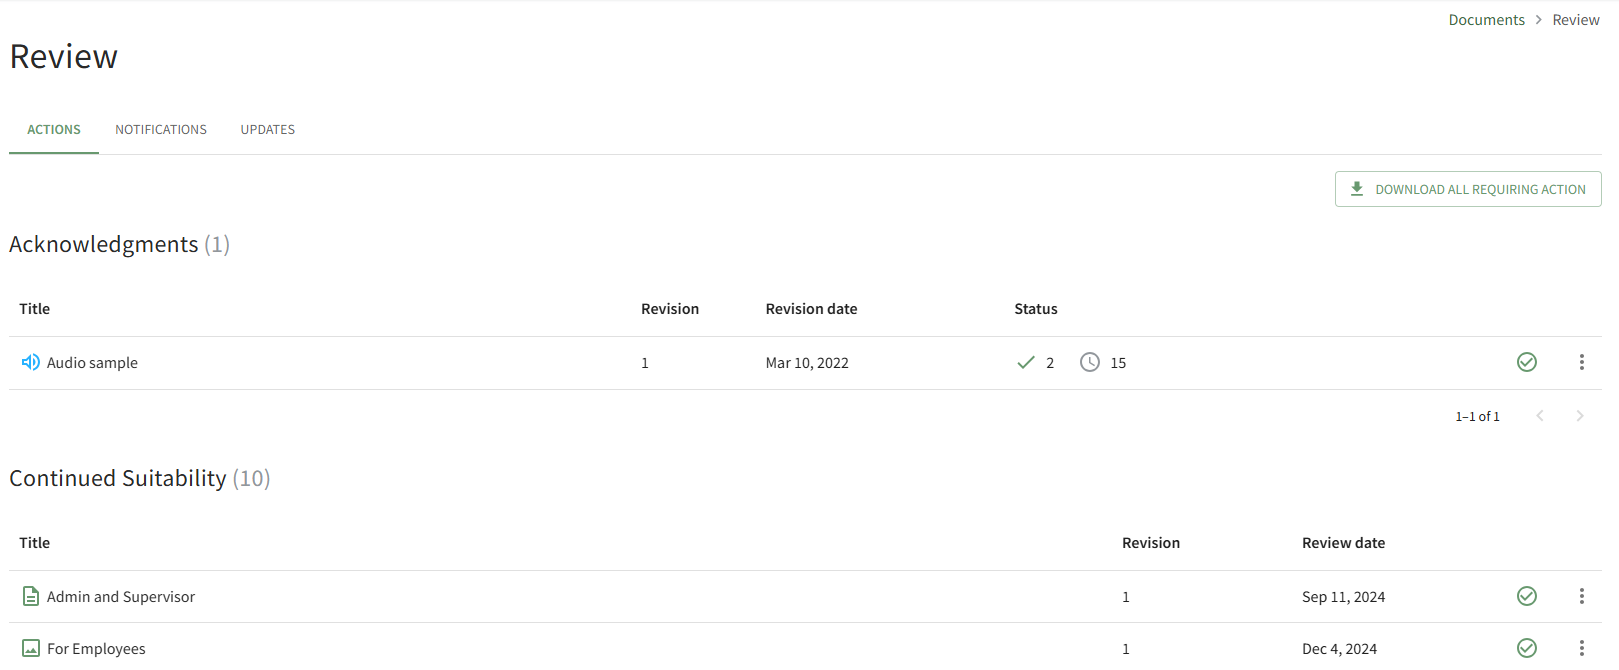
The Review page allows the user to view any files that require action and/or have been flagged for their attention. It is comprised of three tabular subpages: Review, Notifications, and Updates. The Review tab on the Review Page categorizes the documents that need review into four groups: Approvals, Publish, Acknowledgements, and Continued Suitability. Each section of the Review Page: Actions Tab are explained in detail below.
Approvals Section
When new documents or new document revisions are uploaded, the Advanced Settings Tab offers the ability to select the users, roles, and/or access levels that are required to approve new and future revisions of a specified document. Document approvers have the ability to preview the submitted document for content, quality, typos, etc. and approve or decline the document. When this feature is activated for new or revised documents, the requests for document approval will show on the Approvals List on the Actions Tab of the Review Page. The document approval function is, essentially, a voting system enabling individuals to vote to approve or decline the document and make notes of their reasoning.
The Approval List for a specific file is also accessible on the Actions Tab of the file's Details Page.
The user(s) listed as the owner(s) of a document requiring approval will see the file in the Approvals Section of the Review Page as a way to monitor the voting process for that document's revision.
The icons used in the Approvals Section are explained in the table below.
Approval Section Icon Explanations | |
Icon | Explanation |
| The check icon and number to the right identify the number of users that approved the file. |
| The clock icon and number to the right identify the number of users yet to approve to approve the file. |
| The X icon and number to the right identify the number of users that declined approval. |
| The thumbs up icon is used to approve the file. |
| The vertical three dot icon opens a context menu that is used to View Revision, Approve, View, Download, and Decline Approval. |
How To: Approve a File Submitted for Review
To approve a file that was submitted for approval, open the Actions Tab on the Review Page in the Documents Module from the Main Menu and click the vertical three-dot icon to the right of the file submitted for approval opening the Approvals Context Menu.

Select the Approve option, opening the Accept Revision Modal.
Clicking the thumbs up icon will also open the Accept Revision Modal.

You have the option to include a note regarding the revision being approved. Click the Accept button and a pop-up confirms that the revision was successfully approved.
Notes made when the file was approved are visible on the History Tab of the document's Details Page.
How To: Decline Approval of a File Submitted for Review
To decline a file that was submitted for approval, open the Actions Tab on the Review Page in the Documents Module from the Main Menu and click the vertical three-dot icon to the right of the file submitted for approval opening the Approvals Context Menu.
Select the Decline option, opening the Decline Revision Modal.
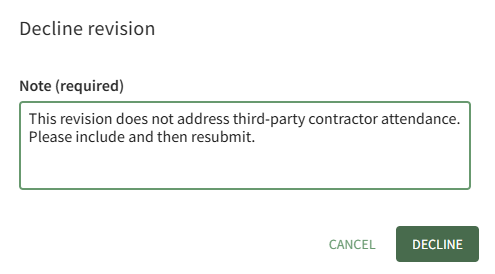
You are required to enter a note in the modal. Click the Decline button.
A pop-up in the footer confirms that the revision was successfully declined.
Publish Section
When a new document/revision is uploaded and requires approval, the users identified as the document owners will also see the file in their Publish Section. Document Owners can choose to publish or reject the revision at any point in time, once all approvers have reviewed the revision or earlier if desired.
Before a document is published, it is not visible to users. When a document is published, it goes live and is accessible to other users.
When a document owner elects to reject publishing, the document upload is cancelled. A document owner can make the required edits and upload the new revision for approval/publishing.

The icons used in the Publish Section are explained in the table below.
Publish Section Icon Explanations | |
Icon | Explanation |
| The check icon and number to the right identify the number of users that have approved publishing the file. |
| The clock icon and number to the right identify the number of users yet to approve publishing the file. |
| The X icon and number to the right identify the number of users that declined publishing the file. |
| The publish icon publishes the document. |
| The vertical three dot icon is used to open a context menu allowing to View Revision, Publish, Reject and Download. |
How To: Publish a Document/File
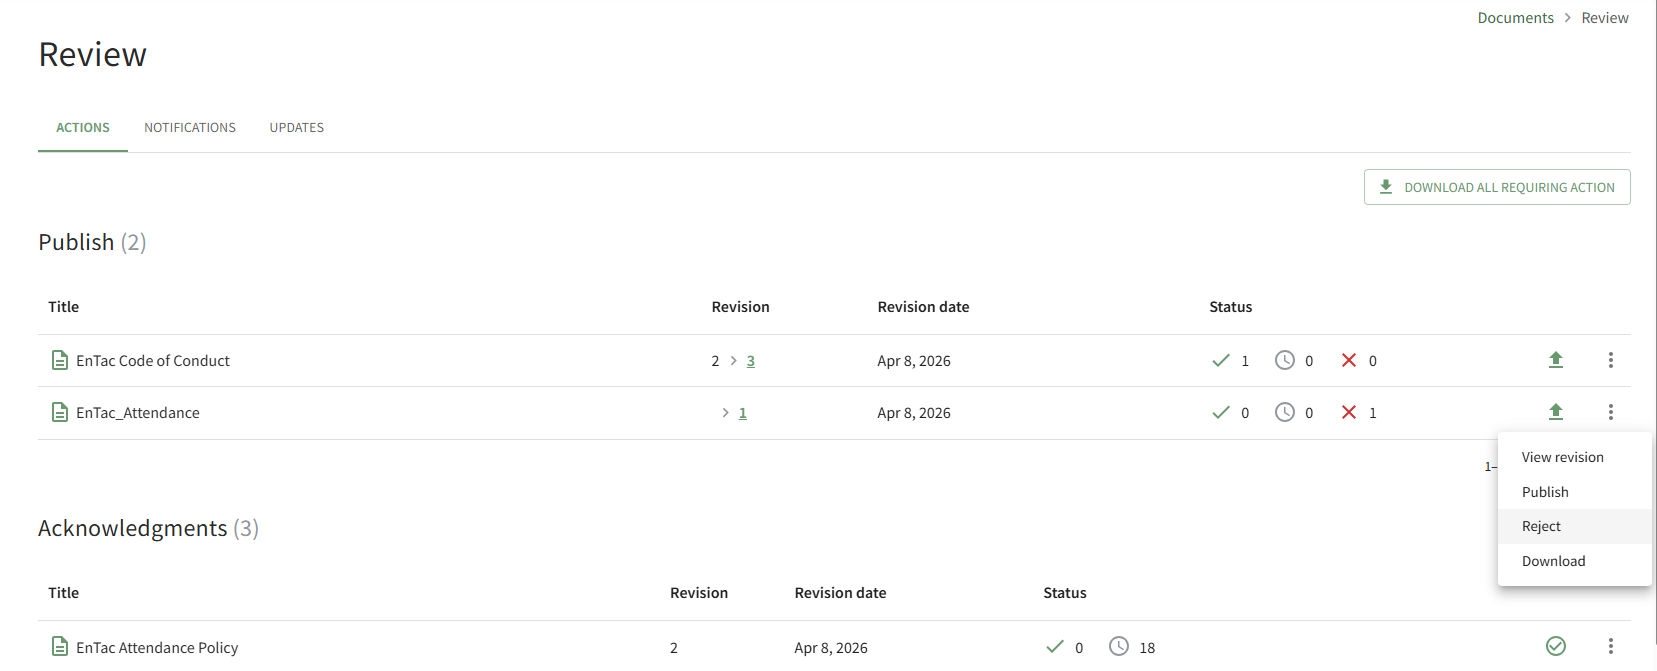
To publish a file submitted for approval and make is visible to others in your organization, go to the Review Page in the Documents Module from the Main Menu. Scroll down (if needed) to the Publish Section on the Actions Tab.
Click the Upload Icon to publish the document or select the Publish option on the context menu made visible by clicking the file's vertical three-dot icon.
This opens the Publish Revision Modal, which allows you to include an optional note that will be visible on the History Tab of a document's Details Page.
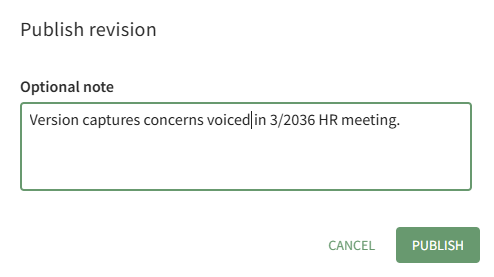
After adding any relevant notes, select the Publish button.
A pop-up confirms that the revision was successfully published.
How To: Reject a Document/File and Prevent Publishing
To reject a document/file that has been submitted for publishing and cancel its upload to KAStrack, open the Actions Tab on the Review Page of the Documents Module from the Main Menu. Click the vertical three-dot icon to the right of the file you want to decline, opening the Publish Context Menu.
Select the Reject option, opening the Reject Revision Modal.
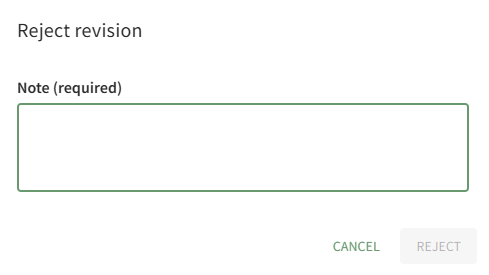
A note regarding the rejection is required. After including your note, select the Reject button.
A pop-up confirms that the revision was successfully rejected.
The notes regarding the rejection are visible on the History Tab of the document's Details Page.
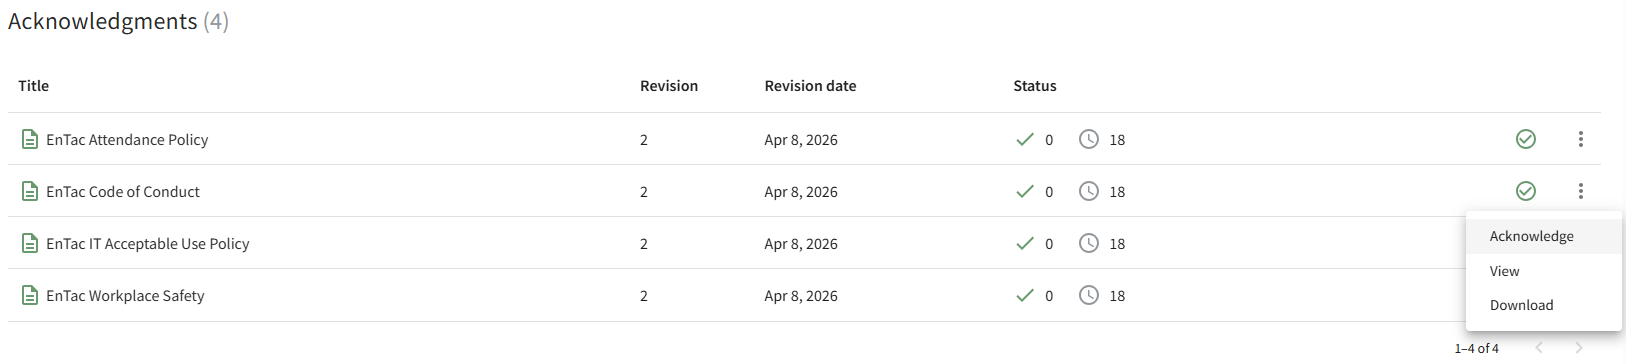
Acknowledgements Section
When new documents or new document revisions are uploaded, the Advanced Settings Tab offers the ability to select the users, roles, and/or access levels that are required to acknowledge the new/revised document. When this feature is activated, the requests for document acknowledgement will show on the Acknowledgements List on the Actions Tab of the Review Page.
The icons used in the Acknowledgements Section are explained in the table below.
Acknowledgement Section Icon Explanations | |
Icon | Explanation |
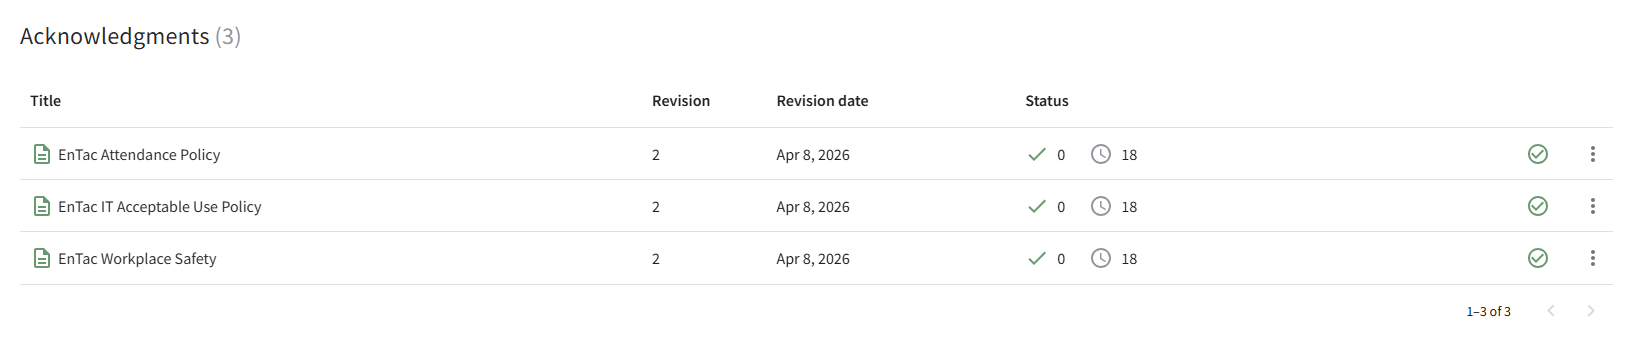
| The check icon and number to the right identify the number of users that have acknowledged viewing the file. |
| The clock icon and number to the right identify the number of users yet to acknowledge they have seen the file. |
| The check within a circle icon allows the user to acknowledge the file. |
| The vertical three dot icon opens a context menu with the options to Acknowledge, View, and Download. |

How To: Send an Acknowledgment Reminder Alert for a Document/File
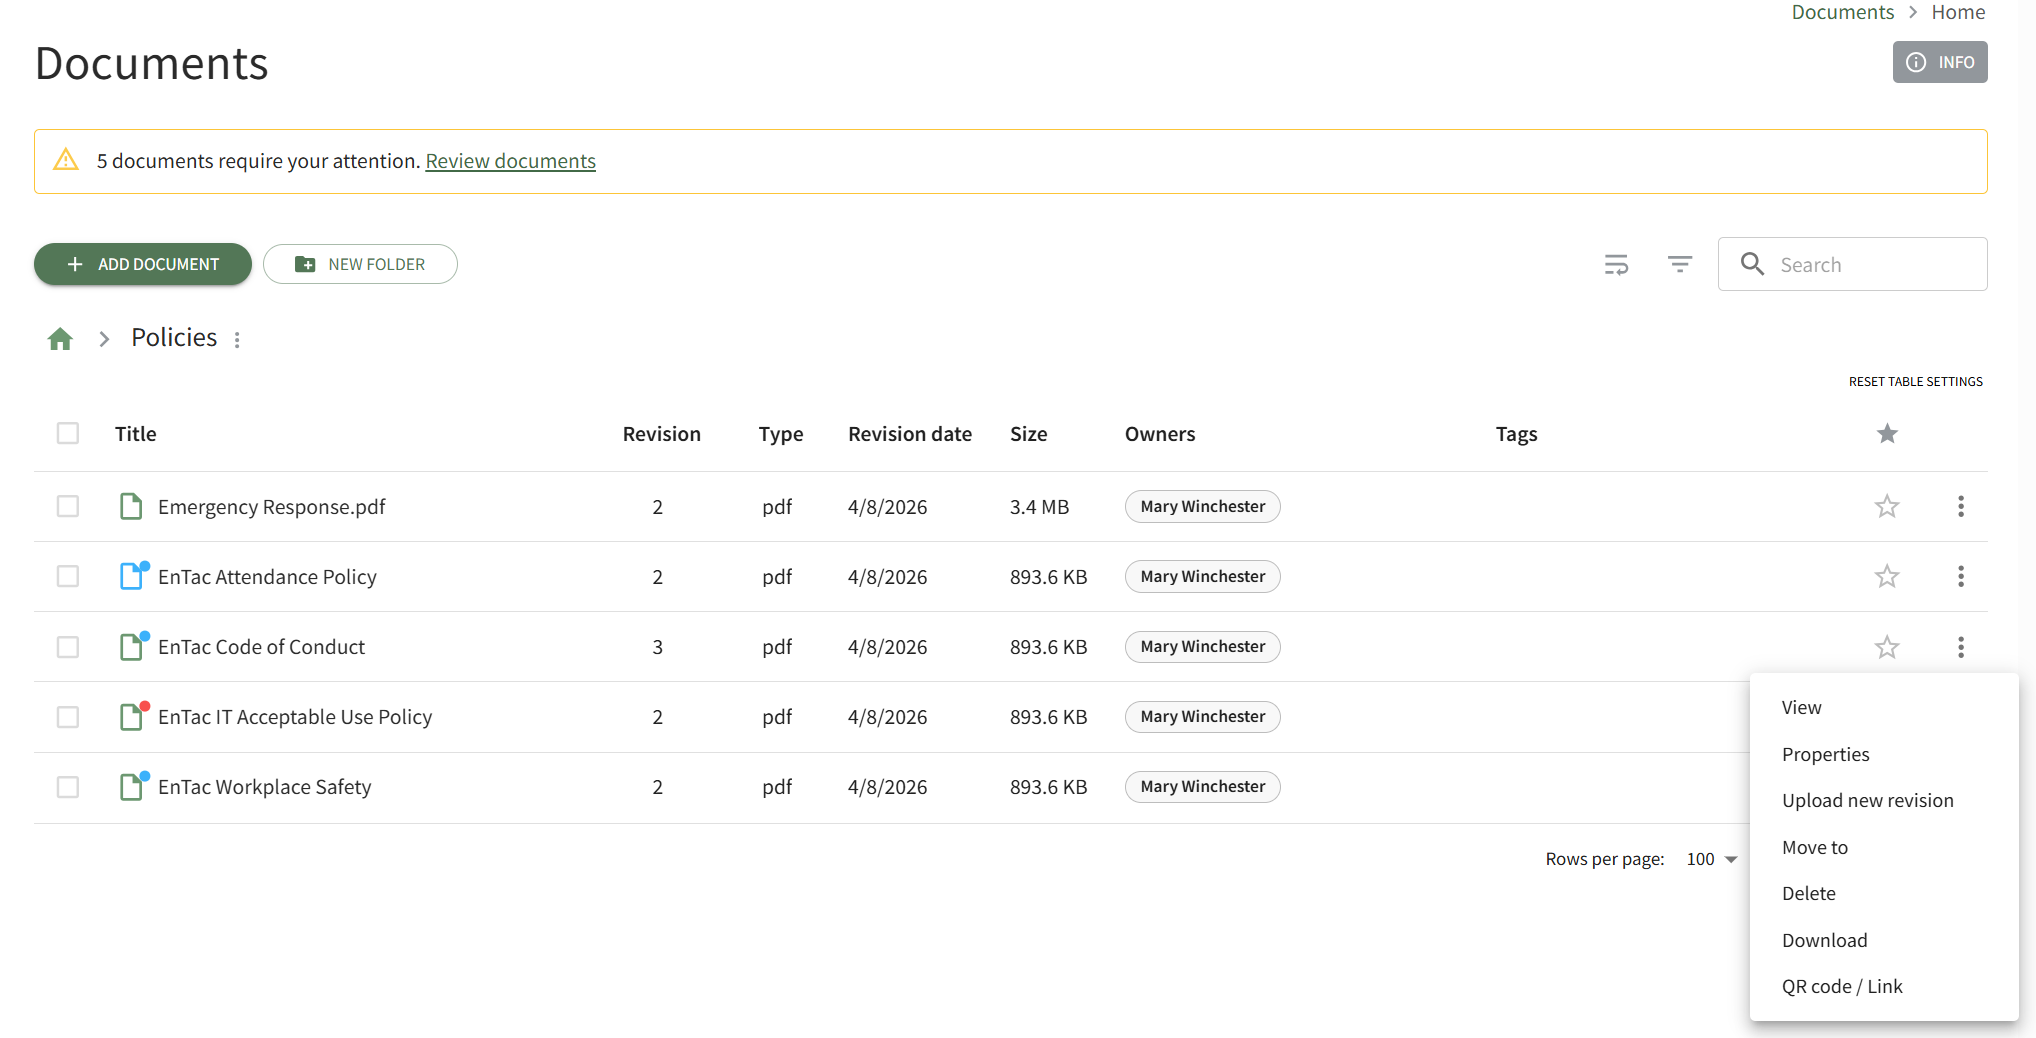
To send an acknowledgement reminder alert for a specific document, open the Home Page in the Documents Module on the Main Menu and navigate the repository to find the document you want to send an acknowledgement reminder for. Click the vertical three-dot icon to the right of the file opening the file's context menu and select View.
This opens the file's Details Page. Open the Details Tab.
Click the Send Acknowledgement Reminder Alert link in the Acknowledgers Section opening the Send Reminder Alert Modal.
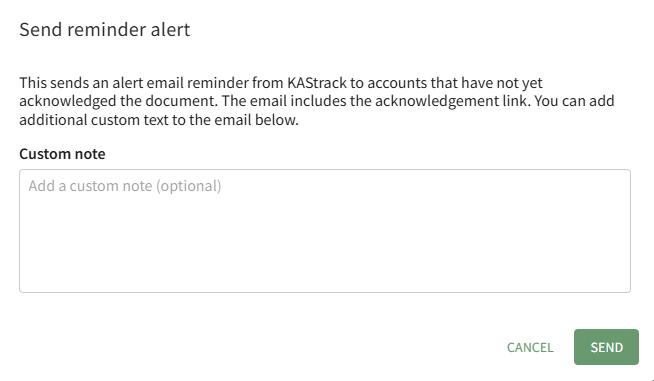
You have the option to add a custom note to the email alert reminder that will be sent to all accounts that have not yet acknowledged the document.
The email alert being sent will include a link that can be utilized to acknowledge the document.
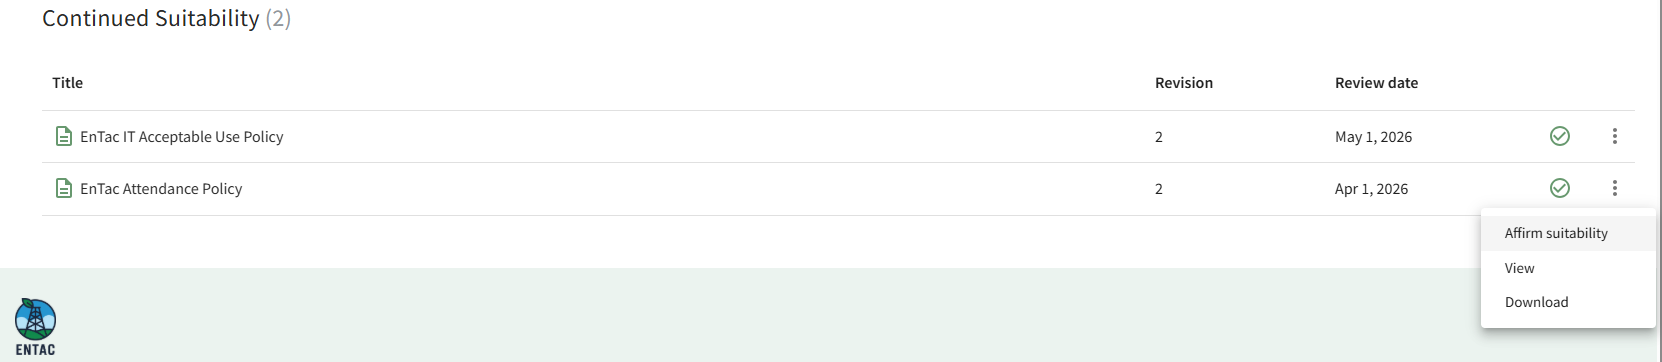
Continued Suitability Section
When new documents or new document revisions are uploaded, the Advanced Settings Tab offers the ability to require future review of the document by a document owner. When this feature is activated, the documents requiring review will show in the Continued Suitability List on the Actions Tab of the Review Page.

The icons used in the Continued Suitability Section are explained in the table below.
Continued Suitability Category Icon Explanations | |
Icon | Explanation |
| The check within the circle icon indicates that user affirms suitability. |
| The vertical three dot icon opens a context menu with the options to Affirm Suitability and Download. |
How To: Affirm a Document/File's Suitability
To affirm a document/file for Continued Suitability, open the Actions Tab on the Review Page in the Documents Module from the Main Menu.

Scroll down to the Continued Suitability of the Actions Tab. Click the vertical three-dot icon to the right of the file to open the Continued Suitability Context Menu and select the Affirm Suitability option.
This opens the Affirm Suitability Modal which asks the user to confirm that the document continues to be suitable purpose.
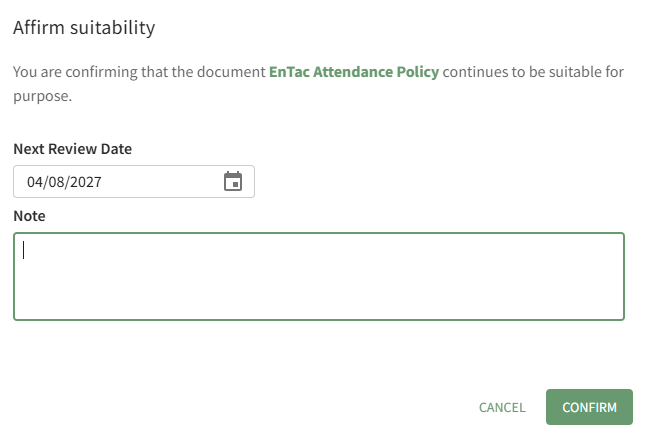
The Next Review Date is stated and can be edited from the modal. Comments can be entered in the Notes textbox.
Select the Confirm button.
The comments made when the document is affirmed can be seen on the History Tab of the file's Details Page.

Review Page: Notifications Tab
The Notifications tab is connected to an advanced feature in the Documents Module. When the new document was added/revised, the Advanced Options Tab enables the ability to "Send Notifications of New Revisions" to the users, certification roles, or access levels indicated. When this feature is activated, the notifications (that do not require user action) are visible on the Notifications Tab of the Review Page.
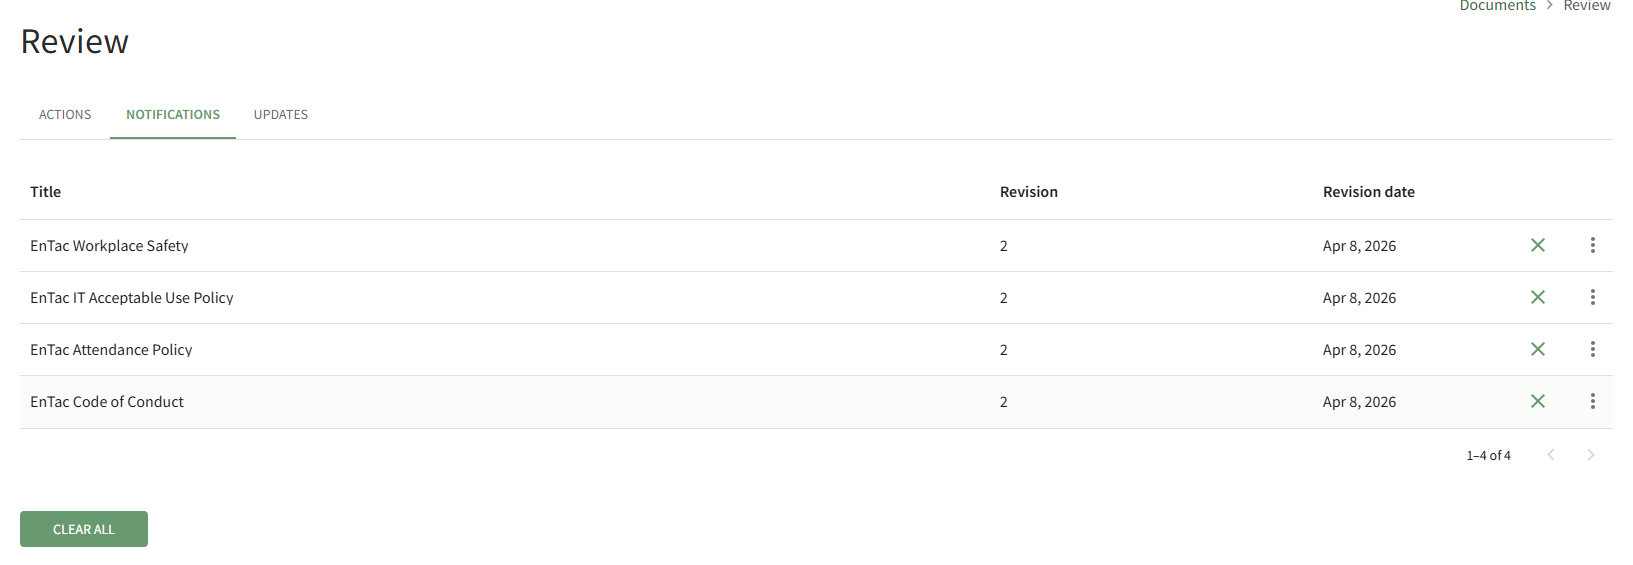
Selecting the X icon to the right of the revision date will clear the file from the page.
Selecting the Clear All button beneath the file list will clear all files on the Notifications Tab.
How To: Specify Who Should Receive Notifications of New File Revisions
Review Page: Updates Tab
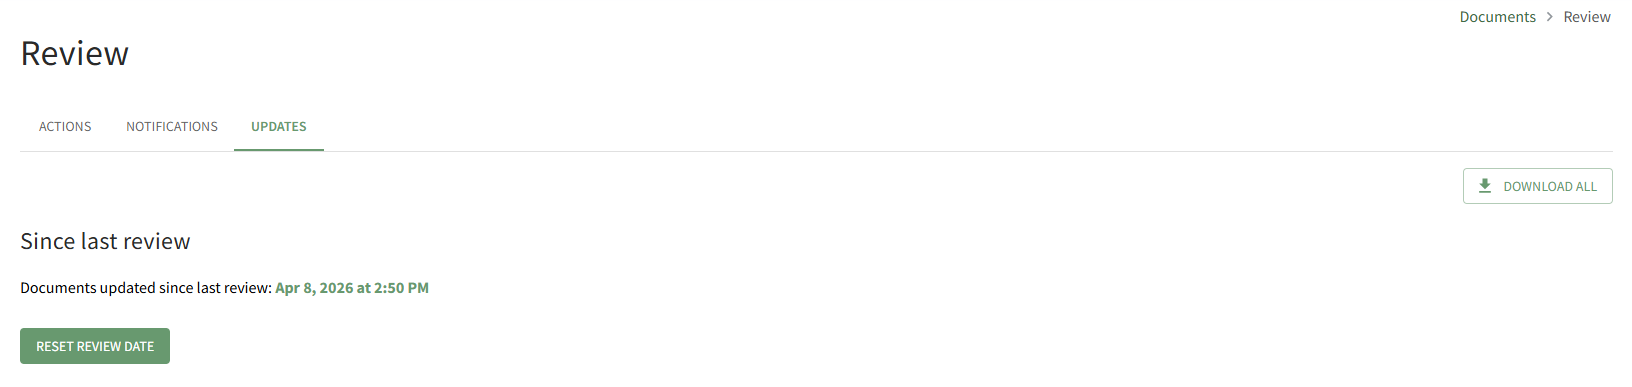
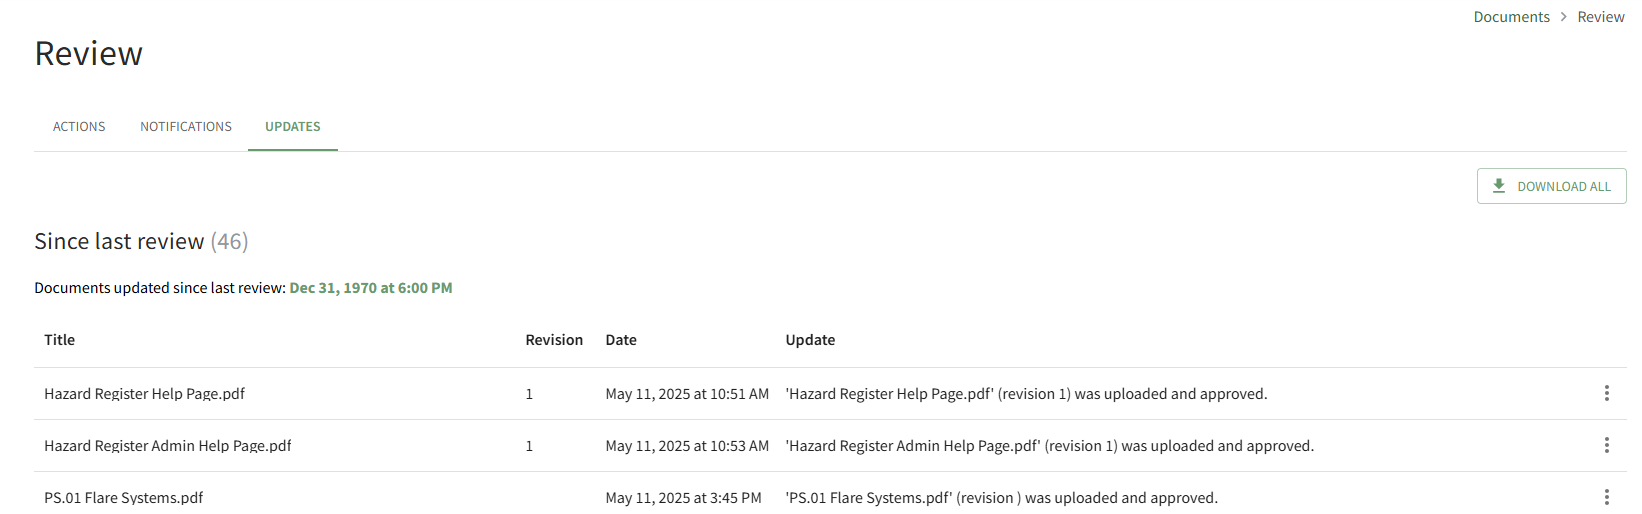
The Updates Tab on the Review Page allows the user to view any files that have been updated since the last review of new files or revisions. Any files that have been updated since the last review date will be shown here.
If the review date has never been reset, the default date will show as Dec 31, 1970 at 6:00 PM.
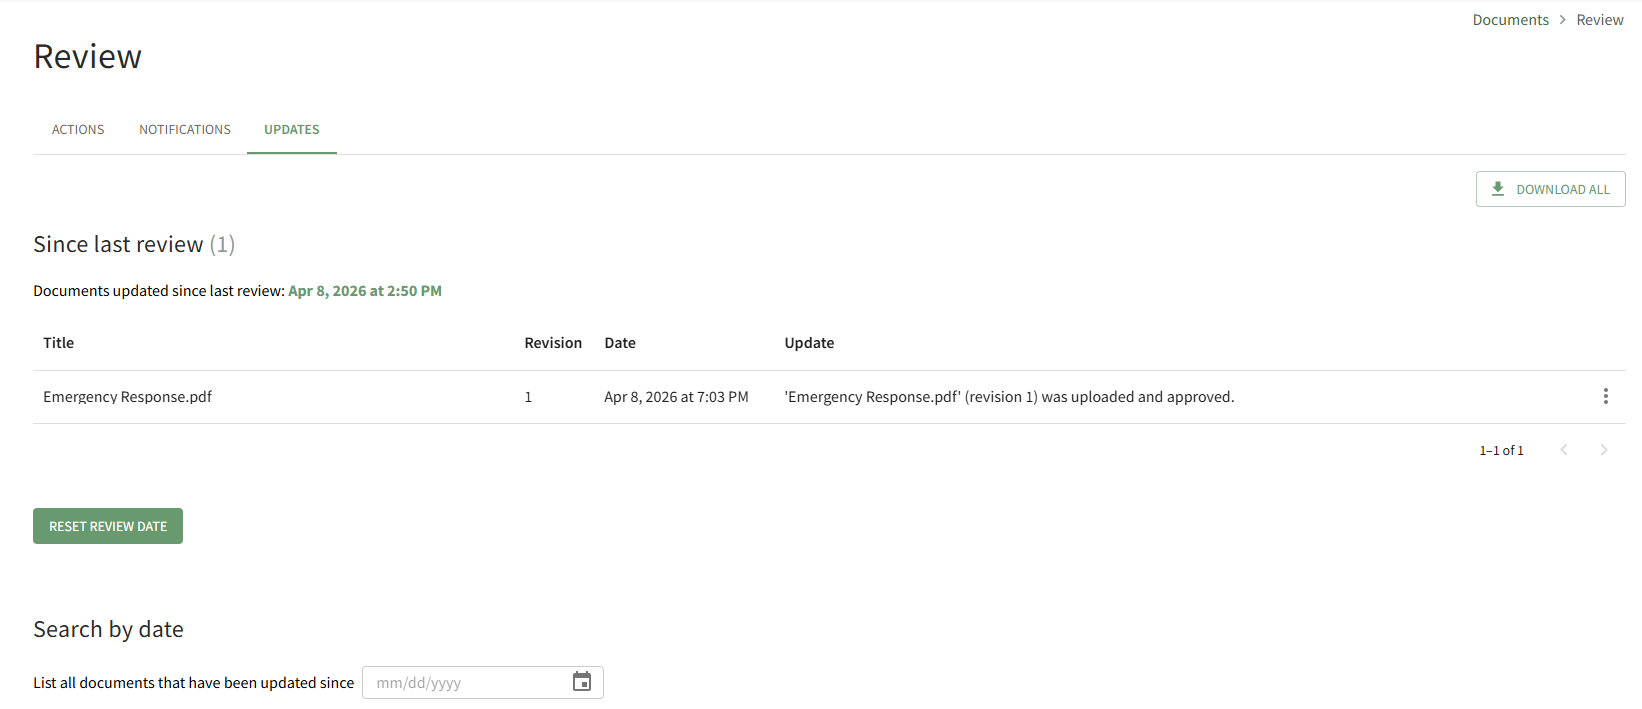
The “Download All” button located at the far right enables downloading of all files that have had revisions made since the user’s last review.
How To: Reset the Since Last Review Document List
To reset the Since Last Review Document List, open the Review Page in the Documents Module from the Main Menu and open the Updates Tab.

All documents that have been uploaded/updated in module since the last review are visible. The number of files is indicated in parenthesis to the right of the section header. Scroll to the bottom of the Since Last Review List.

Click the Reset Review Date button.
The system records the date and time that the list was reviewed.
How To: Search all Documents Updated after a Selected Date
To search all documents uploaded/updated in the Documents Module after a specified date, open the Review Page in Documents Module from the Main Menu and open the Updates Tab.
Scroll to the Search By Date Section at the bottom of the tab.
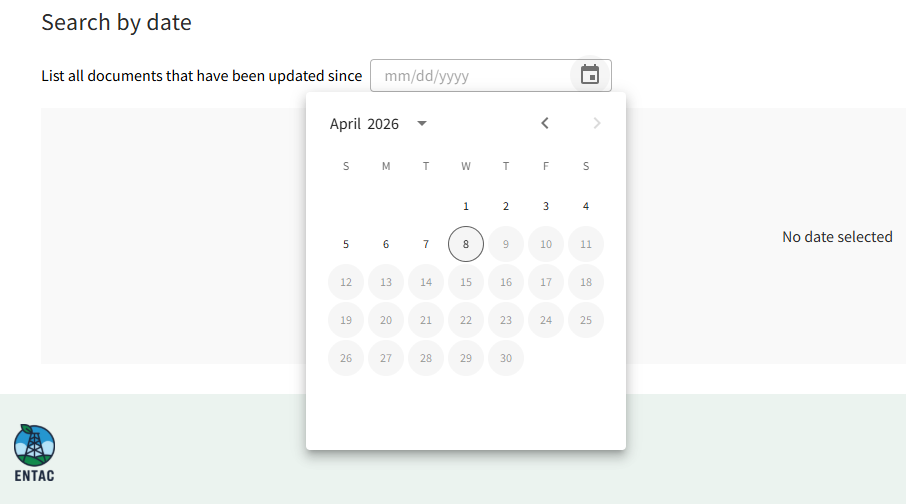
Click in the date field to open the calendar and select the desired date.
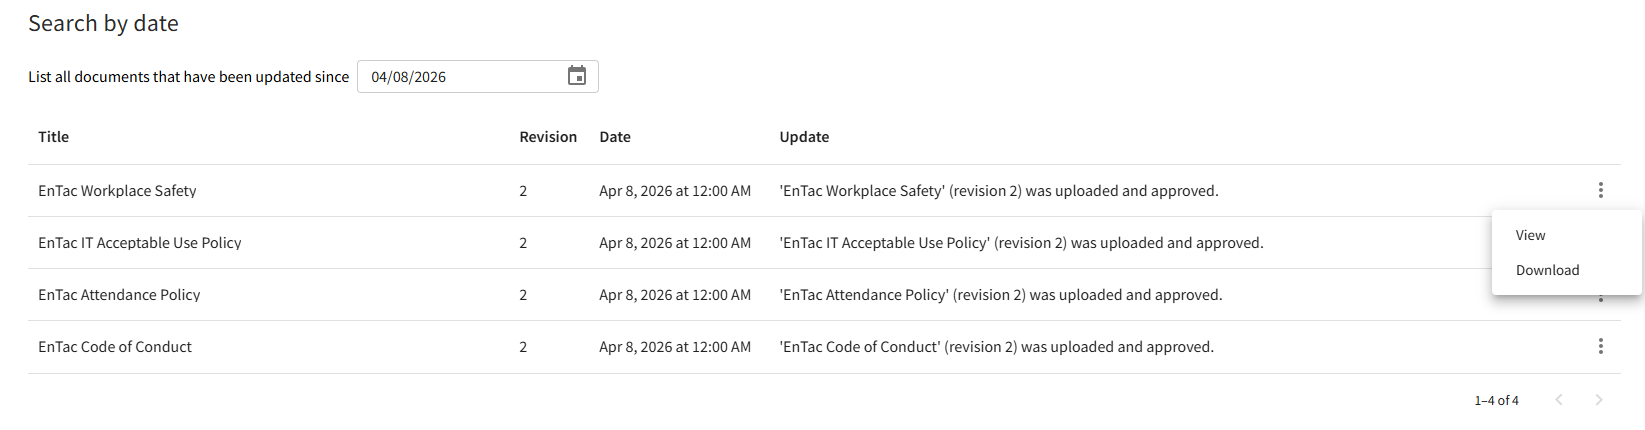
All files updated since the specified date will now show below.
Clicking on the three-icon to the right of the file will allow you to view the file's Details Page or Download the file to your personal device.
Settings Page
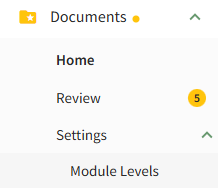
The Module Levels Tab of Settings Page can be accessed from the Main Menu. The system default module levels for the module are visible in the Module Levels Table. New module levels with customizable permissions can be created and managed on this tab.
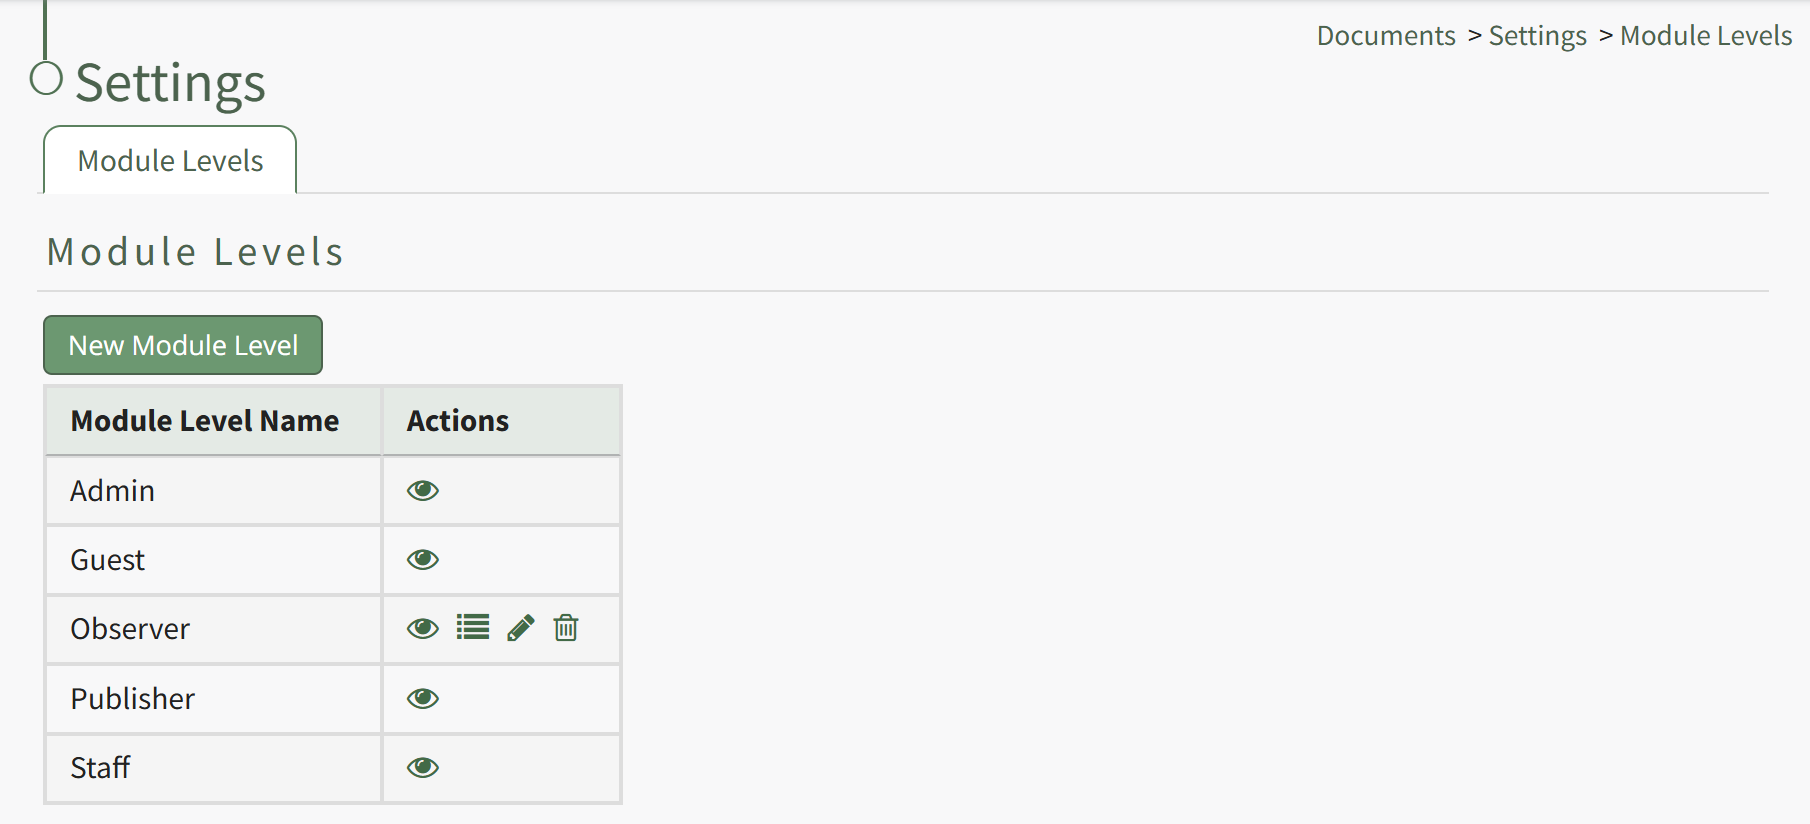
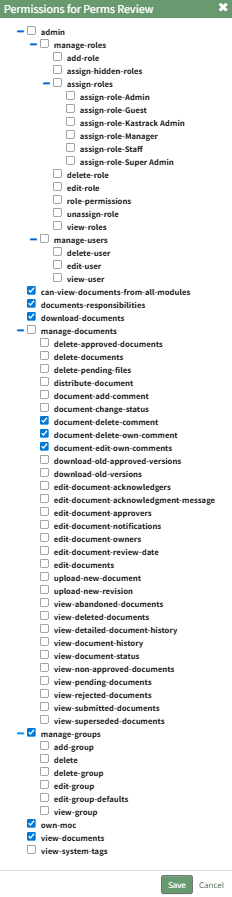
There are four system default module levels associated with the Documents Module. An explanation of the permissions associated with each default module level are shown in the Documents Module Level Permissions Table below.
System default module levels cannot be customized.
Documents Module - Module Level Permissions | |
Module Level | Permissions |
Admin | Manage users (view, edit, delete), Manage groups (add, view, edit, edit group defaults, delete), Manage roles (permissions, add, assign, unassign, view, edit, and delete), Download and view documents, can view documents from all modules, own-moc, Upload (new documents, revisions), View (deleted, rejected, abandoned, superseded, submitted, non-approved, pending documents), view document status and detailed document history, Edit (documents, document status, document approvers, document acknowledgers, document notifications, document review date, document owners, document acknowledgment message), Delete documents and approved documents, Distribute documents, Add/Delete/Edit Comments |
Guest | Download documents, view documents, own-moc |
Publisher | Download documents and old versions, view documents, own-moc, Manage groups (view, edit, edit group deafults, delete), Upload (new revisions, new documents), View (deleted, rejected, abandoned, superseded, submitted, non-approved, pending documents), view document status and detailed document history, Edit (documents, document status, document approvers, document acknowledgers, document notifications, document review date, document owners, document acknowledgment message), Delete documents and approved documents, Distribute documents, Add/Delete/Edit Comments |
Staff | Download documents, view documents, own-moc, Upload (new revisions, new documents), View (deleted, rejected, abandoned, superseded, submitted, non-approved, pending documents), View document status and detailed document history, Edit (documents, document approvers, document acknowledgers, document notifications, document review date, document owners, document acknowledgment message), Delete documents, approved documents, pending files, Add/Delete Comments |
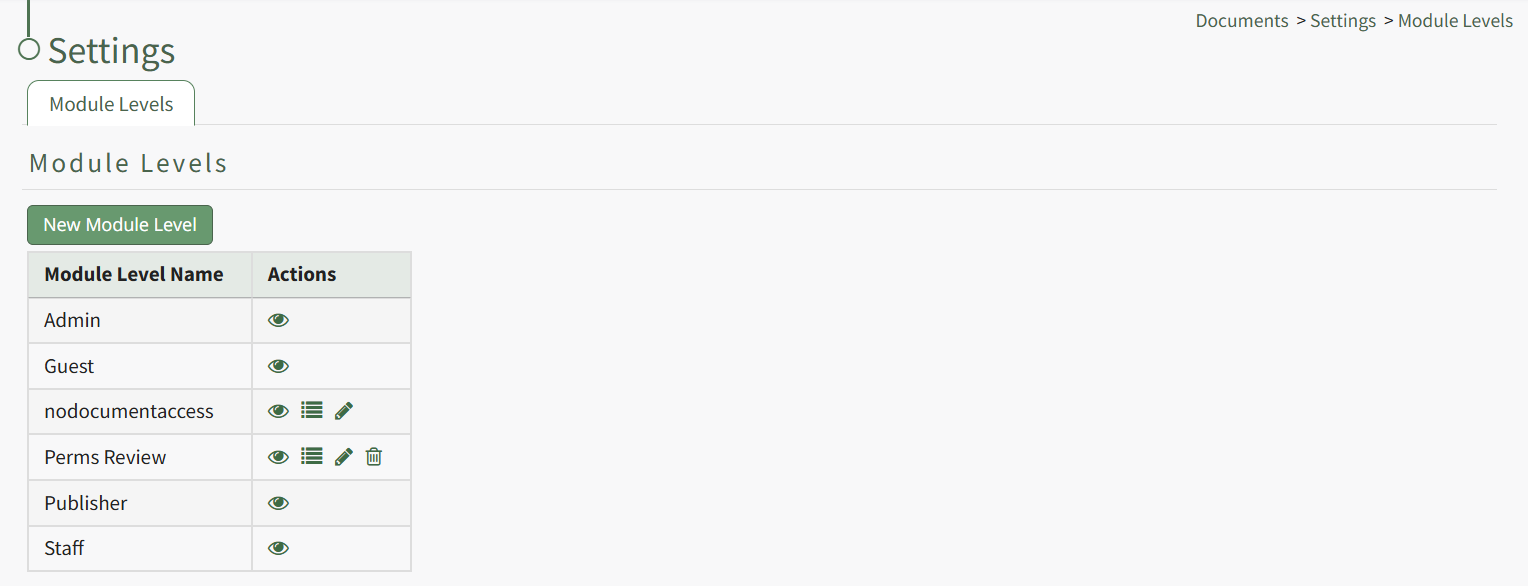
New Module Levels can be created in order to customize module level permissions. An explanation of the icons associated with customized module levels have been provided in the table below.
Module Level Customization Icons | |
Icon | Explanation |
| The eyeball icon allows you to view users assigned to the module level as well as the permissions assigned to them. |
| The bulleted list icon allows you to assign permissions to customized module levels. |
| The pencil icon opens the Edit Module Level Modal. |
| The trashcan icon opens the Delete Module Level Confirmation Modal. |


How To: Create a New Module Level (Documents)
To create a new Module Level with customized permissions in the Documents Module, select Module Levels under Settings in the Documents Module on the Main Menu, opening the Settings Page to the Module Level Tab.
System default module levels cannot be customized. Module levels that are specific to your organization have additional actions to enable customization.
To create a new module level, select the New Module Level button opening the New Module Level Modal.
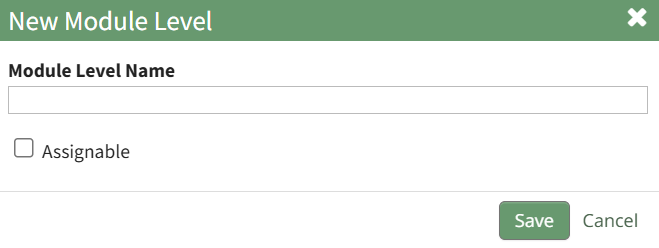
Input the name of the customized module level.
Check the box for Assignable to give permission for the new module level to be assigned to users if desired and click the Save button. Module levels will be listed alphabetically in the Module Level Table.
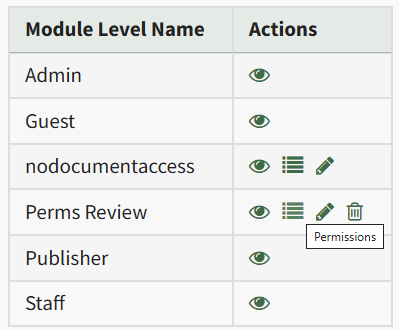
Select the Permissions icon (the bullet point list to the right of the eye) in order to assign the customized permissions to the new Module Level. Click the checkbox to the left of the permissions you want to assign.
Select the Save button.

A pop-up confirms that the permissions were saved.
Access levels for all modules can also be managed in the Site Settings Module on the Access Levels Tab.
A complete list of all permissions associated with the Documents Module have been provided below.

Documents: Supplemental Resources
Documents Module Email Alert Summary
Users can enable and set their own notifications preferences for system emails on the Notifications Tab of the My Accounts Page in the Accounts Module.
How To: Edit Email Report / Alert Notification Settings for Existing Accounts
To edit email report / alert settings for existing accounts, go to the Account Settings Tab on the Settings Page of the Communications Module.

Select the users whose email report/ alerts notification settings you wish to edit.

The Search textbox simplifies the search for specific users. The dropdown menu allows you to select between users’ current statuses for Reports/Alerts receipt. If you wish to edit all user accounts with the same new settings, select the checkbox in the title row of the table to select all users in the table. Selecting a user in one table automatically selects them in the other.
Select the “Edit Selected” button, opening the Update Account Settings Modal.


Make the desired changes for both email reports/alerts that you would like to apply to the pre-selected users.
Select “Save” for the notification preferences to be altered. Click “Cancel” to return to the Account Settings Tab on the Settings Page with any user accounts being impacted.
Documents Module Email Alerts Summary | |
Email Alert | Digestible |
Acknowledgement Reminder | Can be sent via digest |
Acknowledgement Required | Can be sent via digest |
Approval Required | Can be sent via digest |
Comment Added | Can be sent via digest |
Continued Suitability Review | Can be sent via digest |
Continued Suitability Review Warning | Can be sent via digest |
Notification of New Revision | Can be sent via digest |
Administrators can update the system default settings (including whether they are sent in real-time or digestible) for alert emails on the Settings Page of the Communications Module.
Complete List of Documents Module How Tos
How To: Access A File's QR Code / URL Link
To access a QR Code/Link for a file in the Documents Module, open the Document Module Home Page from the Main Menu and navigate your folders to access the desired file.
Access will only be given to users who have permission to view the file unless the document has been indicated as public.
Click the vertical three-dot icon to the far right of the file, opening the file's context menu. Select the QR Code/Link option.
This opens the Direct Access Modal.
From this modal, you can copy the URL Link and/or copy the QR code.
Clicking the Download button will automatically download the file to the user's personal device.
Clicking the Create Shortlink button will generate a shortened URL link for file and display it on the modal.
How To: Access A Folder's QR Code / Link
To access a QR Code/Link for a folder in the Documents Module, open the Document Module Home Page from the Main Menu and navigate your repository to access the desired folder.
Access will only be given to users who have permission to view the folder unless the folder has been indicated as public.
Click the vertical three-dot icon to the far right of the folder, opening the folder's context menu. Select the QR Code/Link option.
This opens the folder's Direct Access Modal.
From this modal, you can copy the URL Link and/or copy the QR code.
Clicking the Create Shortlink button will generate a shortened URL link for file and display it on the modal.
How To: Acknowledge a Document/File
To acknowledge a document/file, open the Actions Tab on the Review Page in the Documents Module from the Main Menu.
Scroll down to the Acknowledgements Section of the Actions Tab. Click the vertical three-dot icon to the right of the file to open the Acknowledgements Context Menu and select the Acknowledge option.
This opens the Acknowledge Revision Modal
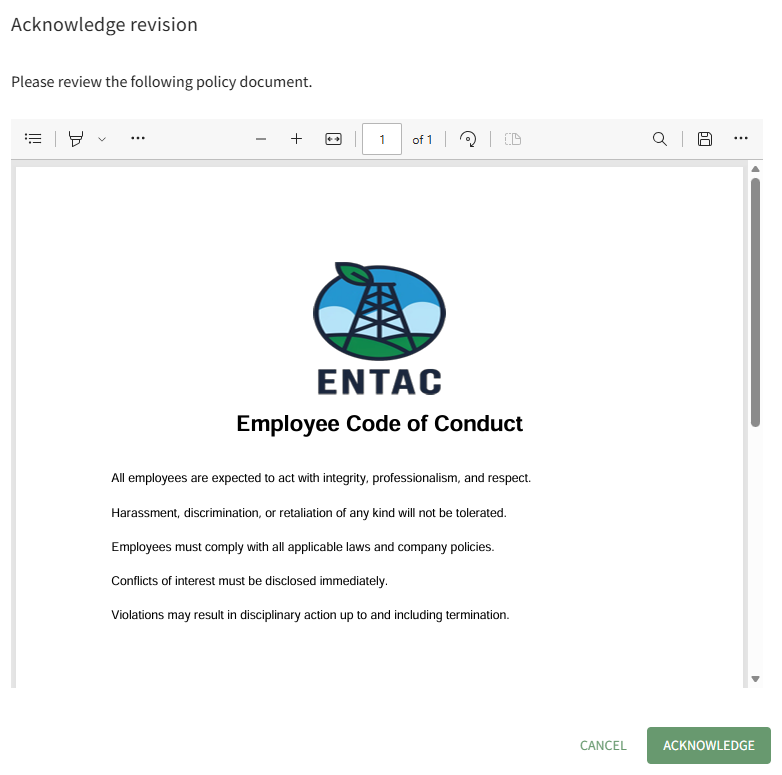
After reviewing the required document, click the Acknowledge button.

A pop-up confirms that the file (revision) was acknowledged.
How To: Add Comments to a File
To add a comment to a file that is housed in the Documents Module, open the Documents Home Page from the Main Menu and navigate to the file you want to leave a comment on. Click the vertical three-dot icon to the right of the file to open the file's context menu and select View.
This opens the document's Detail Page. Open the Comments Tab.
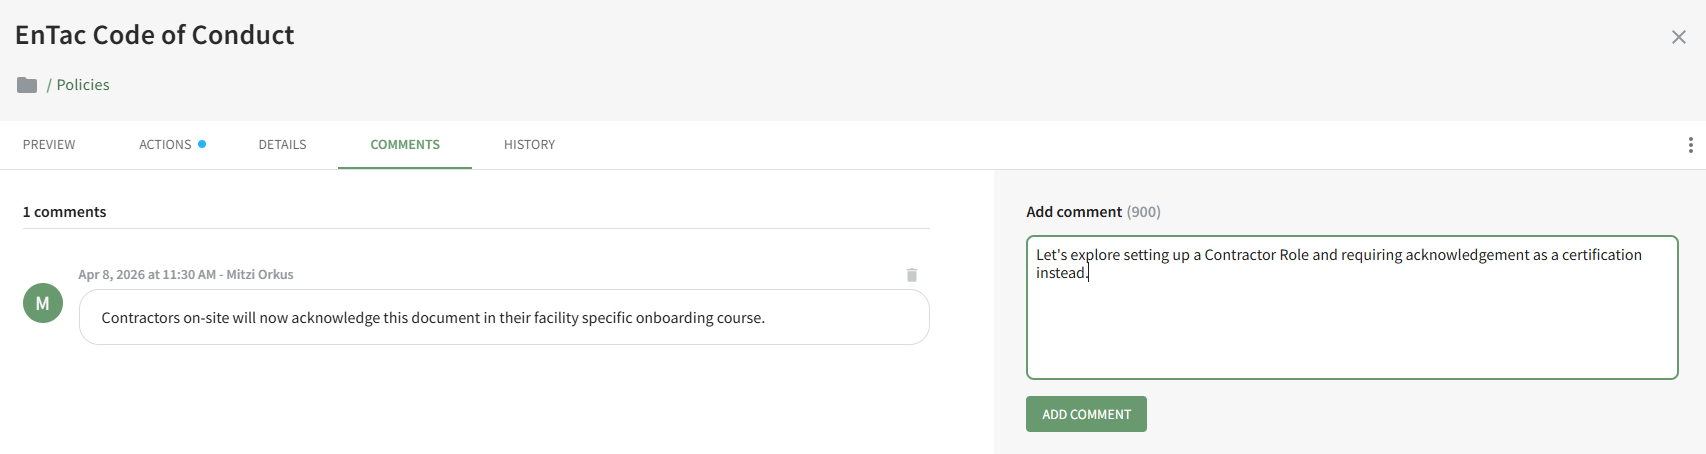
Insert your comments into the Add Comment textbox and click the Add Comment button.
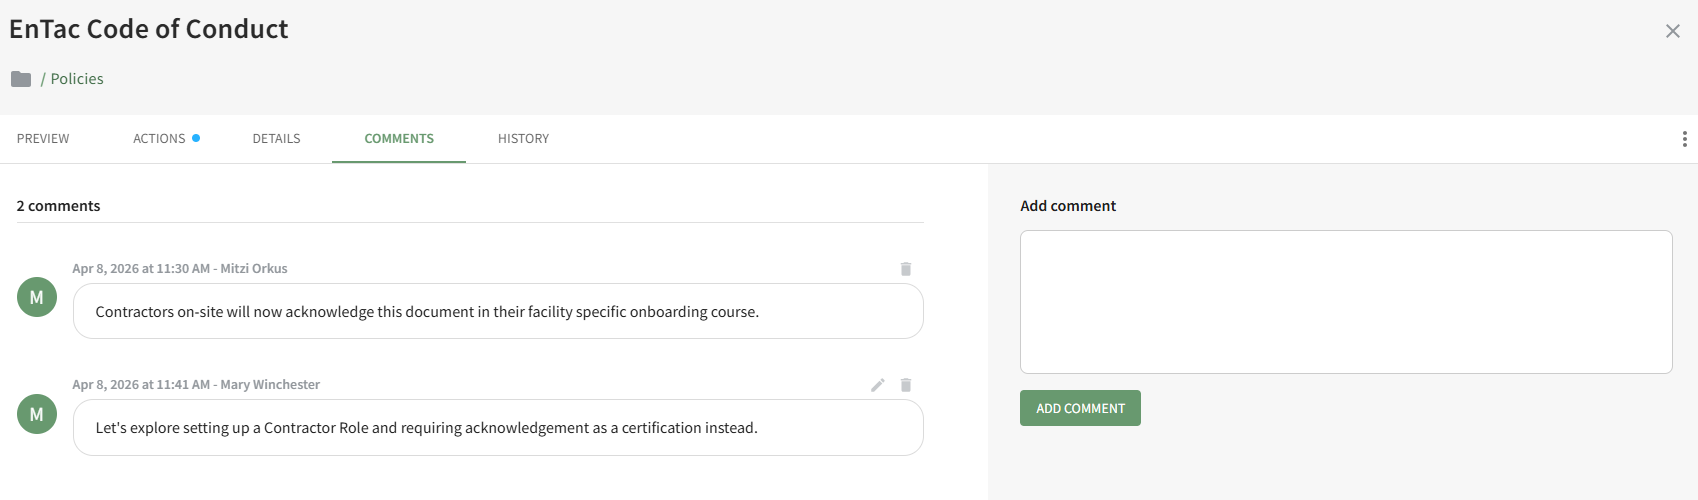
The date and time the comment was recorded as well as the user who made the comment is indicated above the message.
Users have the ability to edit/delete their own comments after they are posted.
How To: Add Tags to a Folder

This opens the Folder Properties Modal.
Select the pre-created desired tags from the dropdown menu and select confirm.
Tags cannot currently be created from within the Documents Module.
How To: Create a New Tag in the Tags Module
To create a new tag in the Tags Module, go to the Manage Page in the Tags Module.

Select the “New Tag” button, visible from both the Tags and Category Tabs, opening the New Tag Modal.
You can also select “Add Tag” from the vertical icon context menu to the far right of a category on the categories tab, which prefills adding a new Tag to the chosen Category.

Input the name of the new tag into the title field.
Emojis may be used in the tag title.
Select the category for the new tag from the dropdown menu. All categories created will show, as well as an “uncategorized” option.
Categories determine the appearance of tags (their color and formatting).
Select the tag behavior (open, permissive, or restrictive) from the dropdown menu.
Select “Add Tag” and the new tag will show on the Tags List on the Tags Tab.
How To: Affirm a Document/File's Suitability
To affirm a document/file for Continued Suitability, open the Actions Tab on the Review Page in the Documents Module from the Main Menu.
Scroll down to the Continued Suitability of the Actions Tab. Click the vertical three-dot icon to the right of the file to open the Continued Suitability Context Menu and select the Affirm Suitability option.
This opens the Affirm Suitability Modal which asks the user to confirm that the document continues to be suitable purpose.
The Next Review Date is stated and can be edited from the modal. Comments can be entered in the Notes textbox.
Select the Confirm button.
The comments made when the document is affirmed can be seen on the History Tab of the file's Details Page.
How To: Approve a File Submitted for Review
To approve a file that was submitted for approval, open the Actions Tab on the Review Page in the Documents Module from the Main Menu and click the vertical three-dot icon to the right of the file submitted for approval opening the Approvals Context Menu.
Select the Approve option, opening the Accept Revision Modal.
Clicking the thumbs up icon will also open the Accept Revision Modal.
You have the option to include a note regarding the revision being approved. Click the Accept button and a pop-up confirms that the revision was successfully approved.
Notes made when the file was approved are visible on the History Tab of the document's Details Page.
How To: Create a New Folder
To create a new folder in the Documents Module, open the Documents Home Page from the Main Menu and navigate the repository to the location where you want to add an additional folder.
To create a nested subfolder within a folder, first open the parent folder. Then follow the steps to add a new folder below.
Select the New Folder button beneath the Home Page header. This opens the New Folder Modal.
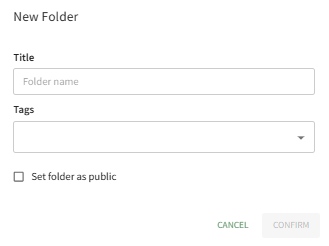
Input the title for the new folder.
If you would like the folder to be accessible to individuals that do not use KAStrack , select the “Set folder as public” checkbox. If the files in the folder are not for public consumption, leave the box blank.
Select Confirm and the new folder will be added to the Folder/File List on the Documents Home Page.
How To: Create a New Module Level (Documents)
To create a new Module Level with customized permissions in the Documents Module, select Module Levels under Settings in the Documents Module on the Main Menu, opening the Settings Page to the Module Level Tab.
System default module levels cannot be customized. Module levels that are specific to your organization have additional actions to enable customization.
To create a new module level, select the New Module Level button opening the New Module Level Modal.
Input the name of the customized module level.
Check the box for Assignable to give permission for the new module level to be assigned to users if desired and click the Save button. Module levels will be listed alphabetically in the Module Level Table.
Select the Permissions icon (the bullet point list to the right of the eye) in order to assign the customized permissions to the new Module Level. Click the checkbox to the left of the permissions you want to assign.
Select the Save button.
A pop-up confirms that the permissions were saved.
Access levels for all modules can also be managed in the Site Settings Module on the Access Levels Tab.
How To: Decline Approval of a File Submitted for Review
To decline a file that was submitted for approval, open the Actions Tab on the Review Page in the Documents Module from the Main Menu and click the vertical three-dot icon to the right of the file submitted for approval opening the Approvals Context Menu.
Select the Decline option, opening the Decline Revision Modal.
You are required to enter a note in the modal. Click the Decline button.
A pop-up in the footer confirms that the revision was successfully declined.
How To: Delete a Folder
To delete a folder in the Documents Module, open the Documents Home Page from the Main Menu and navigate the repository to the folder you wish to delete. Click the vertical three-dot icon to the right of the folder opening the folder's context menu. Select the Delete option.

This opens the Deletion Confirmation Modal.
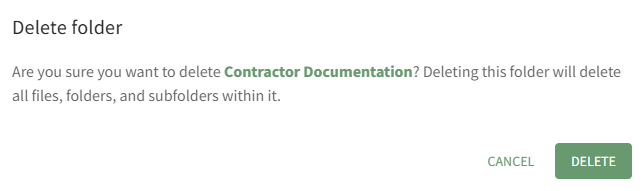
The modal states, "Are you sure you want to delete FOLDER NAME? Deleting this folder will delete all files, folders, and subfolders within it." Click the Delete button.
The folder and its contents have now been deleted from the Documents Module.
How To: Designate a File is Public
To designate a document/file as Public in the Documents Module, open the Documents Home Page from the Main Menu and navigate the repository to the file you want to designate as public.
Click the vertical three-dot icon to the right of the file you wish to make public, opening the file's context menu.
Select Properties opening the Basic Details Tab of the Document Properties modal. Open the Advanced Options Tab.
Select the checkbox to designate the "Document is Public" and click the Update Document button. A pop-up confirms that the document is now public.
The file's icon is now blue, indicating that the document is public.
How To: Designate a Folder is Public
To make an existing folder a public folder in the Documents Module, open the Documents Home Page from the Main Menu and navigate the repository to the folder you want to designate as public.
Click the vertical three-dot icon to the right of the folder you wish to make public, opening the folder's context menu. Select Properties opening the Folder Properties modal.
Click the "Set Folder as Public" checkbox and select the Confirm button.
The folder icon is now blue, indicating that the folder is accessible to individuals that are not logged in to the system as KAStrack users.
How To: Download a Folder
To download the files contained in a folder in the Documents Module, open the Documents Home Page from the Main Menu and navigate your respository to the desired folder. Select the vertical three-dot icon to the far right of the folder opening the context menu and select the Download option.
This opens the Download Modal.
Click the Download button and zip file will be downloaded to your personal device.
How To: Download all Files Requiring Action
To download all files that require action to your personal device, open the Actions Tab on the Review Page in the Documents Module from the Main Menu.
Click the Download All Requiring Action button opening the Download Compressed Package Page.

Click the download link generated for you to download a zip file to your personal device.
The download link generated for you will only be valid for 1 hour. Please start the download now.
How To: Edit the Title of a Folder
To edit the title of a folder in the Documents Module, open the Documents Home Page from the Main Menu and navigate the repository to the folder whose title you wish to edit. Select the vertical three-dot icon to the right of the folder and select the Properties option.

This opens the Folder Properties Modal.
Alter the folder title as desired and select the Confirm button. Your change will now be reflected on the Home Page.
How To: Move a File / Folder
To move a file/folder in the Documents Module, open the Documents Home Page from the Main Menu and navigate the repository to the file/folder you want to move.
Click the vertical three-dot icon to the right of the file you wish to move, opening the file's context menu. Select Move To, opening the Move To Modal.
The right arrow indicates a collapsed folder. Click it to expand and see all the subfolders contained within it. The down arrow indicates an expanded folder. Click it to collapse the parent folder and remove all subfolders from view.
Select the folder you wish to move the file/folder to, then press the Confirm button.
A pop-up confirms that the file was relocated.
How To: Publish a Document/File
To publish a file submitted for approval and make is visible to others in your organization, go to the Review Page in the Documents Module from the Main Menu. Scroll down (if needed) to the Publish Section on the Actions Tab.
Click the Upload Icon to publish the document or select the Publish option on the context menu made visible by clicking the file's vertical three-dot icon.
This opens the Publish Revision Modal, which allows you to include an optional note that will be visible on the History Tab of a document's Details Page.
After adding any relevant notes, select the Publish button.
A pop-up confirms that the revision was successfully published.
How To: Reject a Document/File and Prevent Publishing
To reject a document/file that has been submitted for publishing and cancel its upload to KAStrack, open the Actions Tab on the Review Page of the Documents Module from the Main Menu. Click the vertical three-dot icon to the right of the file you want to decline, opening the Publish Context Menu.
Select the Reject option, opening the Reject Revision Modal.
A note regarding the rejection is required. After including your note, select the Reject button.
A pop-up confirms that the revision was successfully rejected.
The notes regarding the rejection are visible on the History Tab of the document's Details Page.
How To: Reset the Since Last Review Document List
To reset the Since Last Review Document List, open the Review Page in the Documents Module from the Main Menu and open the Updates Tab.
All documents that have been uploaded/updated in module since the last review are visible. The number of files is indicated in parenthesis to the right of the section header. Scroll to the bottom of the Since Last Review List.
Click the Reset Review Date button.
The system records the date and time that the list was reviewed.
How To: Review New File Revisions when Notified
To review new revisions of an existing file in the Documents Module, open the Documents Review Page from the Main Menu and open the Notifications Tab.
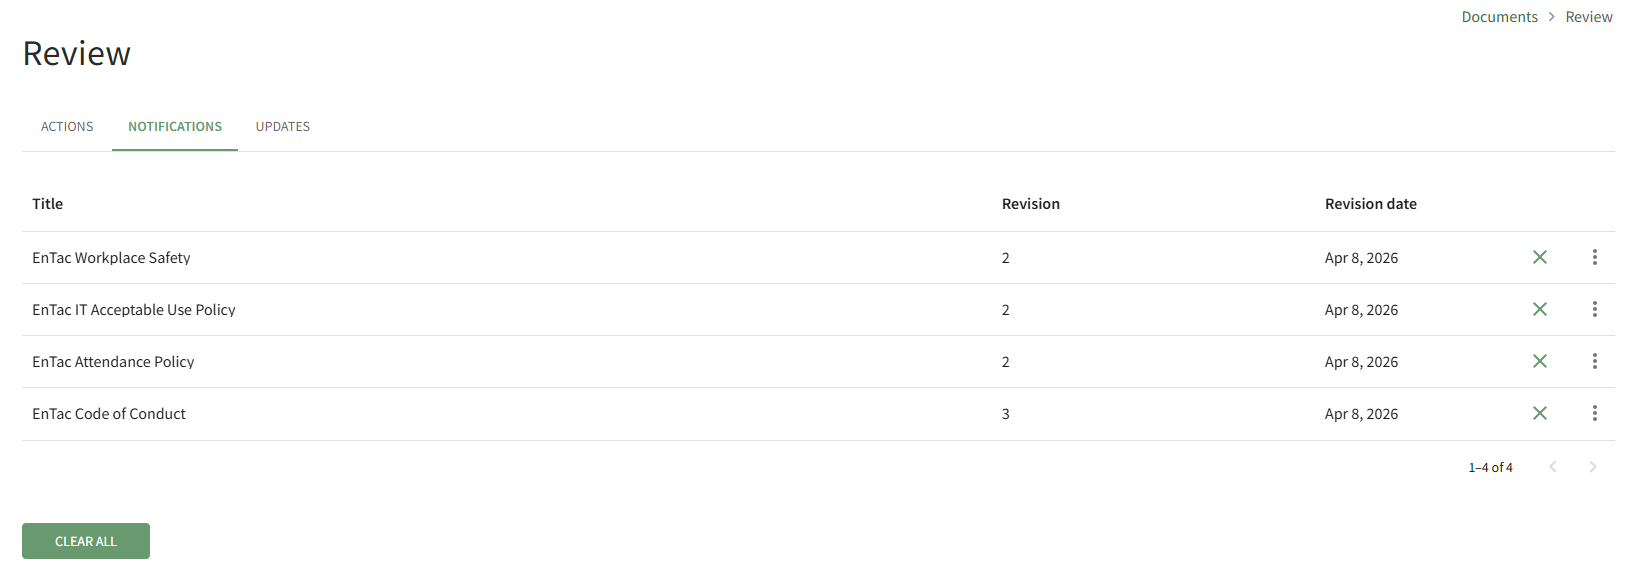
You can click the X icon to the right of the file you received notification of to clear it individually, or you can elect to click the Clear All button and clear all documents from the Notifications Tab at once.
How To: Search all Documents Updated after a Selected Date
To search all documents uploaded/updated in the Documents Module after a specified date, open the Review Page in Documents Module from the Main Menu and open the Updates Tab.
Scroll to the Search By Date Section at the bottom of the tab.
Click in the date field to open the calendar and select the desired date.
All files updated since the specified date will now show below.
Clicking on the three-icon to the right of the file will allow you to view the file's Details Page or Download the file to your personal device.
How To: Send an Acknowledgment Reminder Alert for a Document/File
To send an acknowledgement reminder alert for a specific document, open the Home Page in the Documents Module on the Main Menu and navigate the repository to find the document you want to send an acknowledgement reminder for. Click the vertical three-dot icon to the right of the file opening the file's context menu and select View.
This opens the file's Details Page. Open the Details Tab.
Click the Send Acknowledgement Reminder Alert link in the Acknowledgers Section opening the Send Reminder Alert Modal.
You have the option to add a custom note to the email alert reminder that will be sent to all accounts that have not yet acknowledged the document.
The email alert being sent will include a link that can be utilized to acknowledge the document.
How To: Specify Who Should Receive Notifications of New File Revisions
How To: Upload New Documents/Files
To upload a new or revised version of a file in the Documents Module, open the Documents Home Page from the Main Menu and navigate the repository to the location where you want to add an additional folder.
To create a nested file within a folder, first open the parent folder. This will prevent you from having to move the file after the upload is complete.
Select the Add Document button beneath the Home Page header. This opens the Add a New Document Modal.
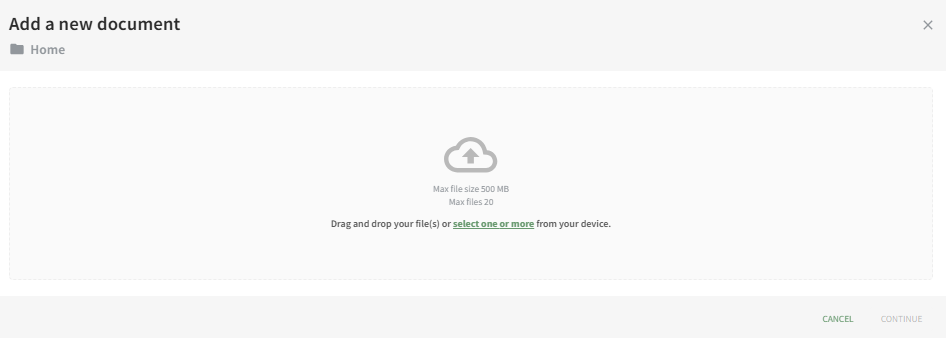
Drag and drop file(s) or select them from your device. Once the desired documents are chosen, select “Continue,” opening the second screen of the Add a New Document Modal.
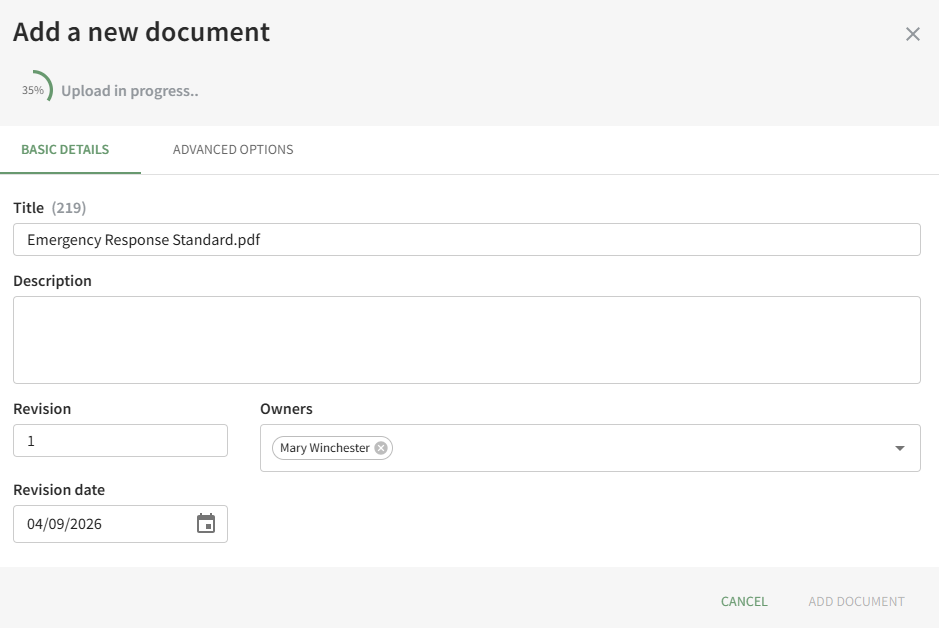
Use both the Basic Details Tab and the Advanced Options Tab to designate the appropriate properties for the document and click the Add Document button. (A detailed explanation of the customizable document properties on both tabs has been included below.)
A pop-up confirms that the new document was successfully added.
Basic Details
Under the Basic Details Tab, the user can input a title, description of the file, revision number and revision date. They can also designate any document owners (the uploader is initially included as an Owner by default) and tags.
If the incorrect file was selected, the user can click “Select a different file” from the top right corner of the modal to exchange it with the correct file.
Document owner(s) can be selected from a dropdown list of users.
Document owners have the ability to approve documents, which is relevant for companies who are required to attest an annual/periodic review for regulatory agencies or other governing bodies. Document owners are also notified any time a new comment is made on a file and are responsible for affirming continued suitability of the file if enabled under Advanced Options.
Advanced Options
Selecting the Advanced Options Tab allows the user to apply enhanced settings to the file. An explanation of each Advanced Options checkbox is included in the table below.
Document Advanced Options Explanations | |
Checkbox | Explanation |
Document is Public | Selecting the “Document is public” checkbox allows individuals who are not users in the KAStrack system to view files. Users in KAStrack will need appropriate permissions to view the file regardless. |
Document is 360° Photo | Selecting the “Document is a 360° photo” checkbox communicates to KAStrack that the file is intended for 360° viewing to ensure it shows correctly. |
New Revisions Require Approval | Selecting the “New revisions require approval” checkbox opens a dropdown menu. Approval requirements for the file can be designed by Access Level, Certification Role, or specific individuals in the system. An additional checkbox can be selected if this revision requires approval.
Users view the files that require approval on the Documents Module Review Page. |
New Revisions Require Acknowledgement | Selecting the “New revisions require acknowledgement” checkbox allows acknowledgement requirement customization.
The “This revision requires acknowledgement” checkbox will notify the Access Levels, Certification Roles, or individuals selected of the new document. If “Acknowledgement is required for login” is selected, a user will not be able to access anything in KAStrack until the user acknowledges the revised document. A textbox allows the user to include a customized acknowledgement message that will be included in the automated message sent out to users by KAStrack. Users view the files that require acknowledgement on the Documents Module Review Page, or just after signing in, when “Acknowledgement is required for login” is enabled. |
Send Notifications of New Revisions | Selecting the “Send notifications of new revisions” checkbox allows a user to customize (by Access Level, Certification Role, or individual) who receives an email notification that a new file revision has been updated in KAStrack. An additional checkbox can be selected if a notification is to be sent for this revision.
Users view the files they have received notification of on the Documents Module Review Page. |
Requires Future Review by Owner | Selecting the “Requires future review by owner” checkbox allows the user to schedule the next review date and set a reminder for the review deadline.
Users review files for continued suitability on the Documents Module Review Page. |
How To: Upload a Revised Version of an Existing File
To upload a revised version of an existing file in the Documents Module, open the Documents Home Page from the Main Menu and navigate the repository until you find the file you want to have an updated revision. Click the vertical three-dot icon to right of the file opening the file's context menu and select Upload New Revision.

This opens the New Revision Upload Modal.
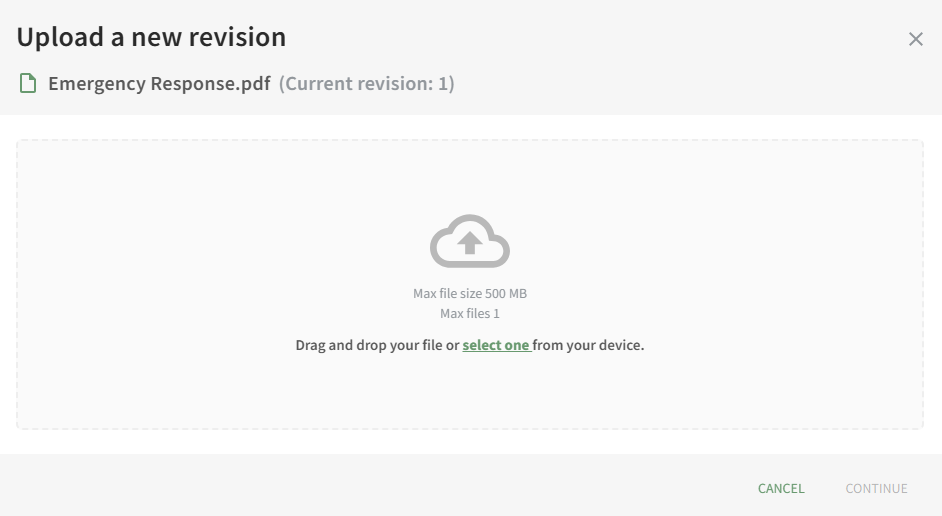
Either drag and drop your file into the modal or select a file from your device and select Continue.
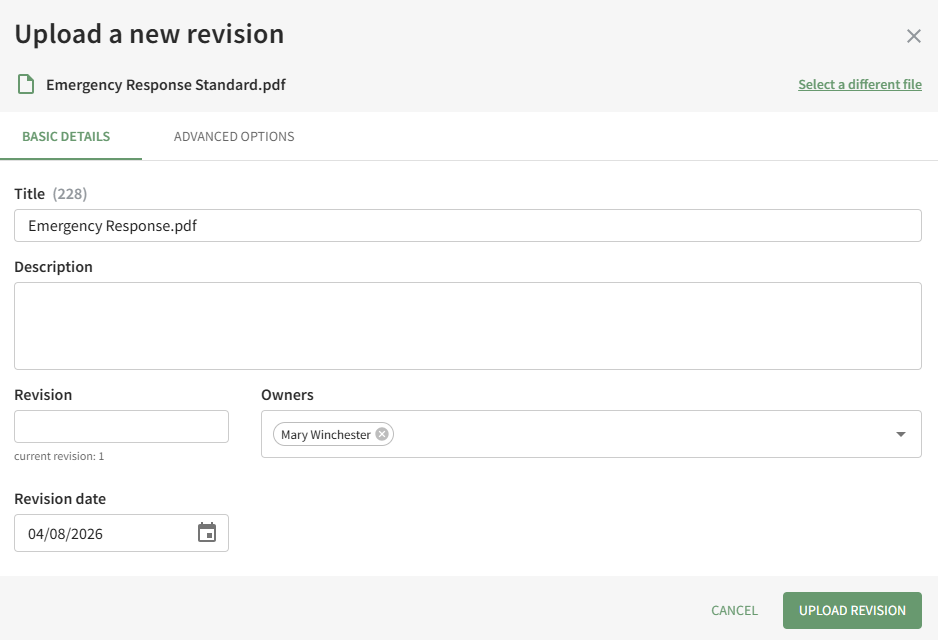
The modal now displays the Basic Details Tab and the Advanced Options Tab.
Change the revision number and edit relevant information as needed. Select the Upload Revision button and a pop-up confirms that the file version was updated.
How To: View a File's History
To view the history of a file in the Documents Module, open the Home Page in Documents from the Main Menu and navigate the repository to access the file whose history you wish to view. Click the vertical three-dot icon to the right of the file opening the file's context menu and select View.
This opens the Preview Tab on the file's Details Page.
Click on the History Tab to access the file's historical information.
Clicking the magnification icon on the History Tab will open the document's detail page for the previous versions of the document.
How To: View Actions Associated with a Document/File
To view any outstanding actions associated with a document/ or file, open the Documents Home Page from the Main Menu and navigate the repository to the specific file you are interested in viewing. Click the vertical three-dot icon to open the file's context menu and select View.

This opens the Preview Tab of the document's Details Page. Open the Actions Tab.

Any outstanding actions related to the document will be visible on this tab.